
How to Sharpen a Kitchen Knife With a Rod Safely

Dulling kitchen knives happen in every home, and fixing that edge with a rod is much simpler and safer than it looks. The easiest method is to rest the rod tip down on a cutting board and gently draw the blade from heel to tip at a steady tilt. Anchoring the rod straight down keeps fingers out of harm's way and stops the knife from slipping off target.
How much sharpness returns depends on the tool and the blade itself. A classic steel rod simply straightens out folded metal along the cutting line, while a ceramic or diamond rod actually shaves away steel to build a fresh edge. Blade shape also changes the angle, since delicate Japanese cutlery calls for a flatter tilt than sturdy Western knives. A quick look at the right setup will help restore that clean slice without any guesswork.
Does your kitchen rod sharpen or just hone blades?
Home cooks often mix up honing and sharpening. Honing means straightening a bent cutting edge without removing metal from the blade. Sharpening means grinding away dull steel to create a fresh, sharp edge.
When you slice onions, carve cooked meat, or chop vegetables on a hard cutting board, the razor-thin edge of your knife flexes. Over time, that thin edge folds over to one side like a bent sheet of paper. The knife is not actually missing metal, but the folded edge can no longer bite into food cleanly.
A standard steel rod pushes that bent edge straight again. The grooved or smooth metal surface gently nudges the microscopic teeth back into line. Because it removes no steel, it preserves the blade life while instantly restoring slicing performance.
Abrasive rods work differently. Ceramic rods and diamond-coated rods actually shave off tiny metal particles as you stroke the blade across them. They work on the bevel, which is the angled slope leading down to the sharp edge. If your rod has diamond grit or a ceramic coating, it acts as a true sharpener rather than a simple straightener.
How do you set up your workstation safely?
You have probably seen television chefs wave a steel rod in midair while whipping a knife back and forth. That showy technique looks fun, but it is dangerous and inaccurate. Waving steel in the air causes the blade to slip toward your fingers, and your angle changes with every single stroke.
Setting up a vertical workstation on your counter gives you complete physical control. It keeps your hands clear of the blade path and provides a stable surface to guide your wrist.
Use this simple checklist before you touch the blade to the steel:
- Secure your cutting board: Place a sturdy wooden or heavy plastic cutting board flat on your kitchen counter. Lay a damp dish towel or a silicone grip mat underneath so the board cannot slide around while you work.
- Position the rod vertically: Hold the handle firmly in your non-dominant hand and plant the tip straight down into the center of the board. The shaft should point straight up like a fence post.
- Protect your fingers: Grip the handle tightly and keep your fingers tucked safely behind the flared guard. Never let your thumb rest on the metal shaft where a slipped blade could catch it.
- Clear your elbow room: Move bowls, prep scraps, and loose pans out of the way. You need an open path for your arm to move down and back smoothly from the shoulder.
How do you draw the knife down the rod?
Once your station is secure, you can bring the knife to the rod. The entire stroke should be smooth, deliberate, and relaxed. Rushing only causes the blade to skip and scratch the metal face.
Follow these steps to draw the knife cleanly across the rod:
- Place the heel at the top: Place the heel of the knife against the top of the rod just below the handle guard. The heel is the wide back part of the blade next to the handle. Point the knife edge slightly downward at your chosen cutting angle.
- Use light, steady pressure: You only need very gentle pressure to guide the steel. Think of the light weight required to slice through a ripe tomato or a block of cheddar cheese. Pressing too hard bends the edge further and can chip brittle kitchen knives.
- Pull down and backward in one stroke: Pull the knife downward toward the cutting board while drawing the blade backward toward your body. Move in a smooth, continuous diagonal curve. By the time you reach the bottom of the rod, the tip of the knife should touch the shaft.
- Switch to the other side: Lift the knife and place the opposite side of the blade against the other side of the rod near the top guard. Repeat the exact same downward and backward pulling motion. Drawing both sides alternately keeps the cutting edge centered.
- Count your passes: Make 4 to 6 light passes on each side of the blade. Avoid overworking the steel. Too many strokes can raise a burr, which is a thin wire of bent metal along the edge that leaves rough, snagging cuts.
What angle should you use for your knife style?
Setting the correct angle determines whether your knife glides through food or scrapes uselessly against the rod. If your angle is too wide, you blunt the edge. If your angle is too narrow, you scratch the blade face without touching the cutting edge at all.
Different kitchen knives require different working angles depending on their build:
- Western chef knives: Most German and American kitchen knives use a sturdy 20-degree angle per side. Makers use slightly softer, forgiving stainless steel designed for rocking cuts and heavy chopping. Many cooks prefer German high-carbon steel premium knife block sets because this thicker 20-degree bevel stands up to hard kitchen boards without chipping.
- Japanese chef knives: Traditional Japanese blades use a steeper, thinner 15-degree angle per side. These knives feature harder, more brittle steel crafted for laser-thin push cuts. Owners of high-carbon Japanese chef knife sets must maintain this slender 15-degree slope to protect the fine factory edge.
Finding these angles without special measuring tools is easy once you practice a simple visual trick. Hold the knife blade flat against the vertical rod so it forms a 90-degree right angle pointing sideways. Tilt the knife halfway down toward the shaft to reach 45 degrees. Tilt it halfway down again, and you land at roughly 22.5 degrees.
Keep the blade right there for a standard 20-degree Western edge. If you are honing a Japanese knife, nudge the spine just a tiny fraction closer to the rod. That 15-degree gap is roughly the thickness of two pennies stacked together. Lock your wrist in that position and maintain that exact spacing from heel to tip.
When should you switch from a rod to stones?
A honing rod is your first line of defense for daily kitchen prep, but it cannot fix every edge problem. Knowing when the rod has done its job prevents wasted effort and unnecessary blade wear.
Use your rod regularly to prevent dullness before it starts. A quick touch-up of 4 passes every two or three cooking sessions keeps a good knife gliding effortlessly. If you cut lots of acidic citrus fruits or slice hard crusty loaves, a weekly pass keeps the edge straight.
However, you should check your blade condition when the rod stops giving results. Try slicing a ripe tomato or a sheet of printer paper without using downward force. If the knife slides over the tomato skin without biting, or tears the paper instead of gliding cleanly through it, the edge is no longer aligned.
Next, look directly down at the cutting edge under a bright kitchen light. A truly sharp edge is microscopically thin and does not reflect light. If you see bright white spots, shiny glints, or small flat lines, those are areas where the steel has chipped away or worn completely flat.
A standard steel rod cannot rebuild missing steel. When your knife fails the paper check and shows flat spots along the edge, put the rod away. The blade needs a full sharpening on whetstones or a visit to a professional sharpener to grind new bevels into the steel.
What features should you check before buying a rod?
If your current rod is too short, slippery, or missing an abrasive surface for your cooking style, finding the right replacement makes edge maintenance much safer. The right tool keeps your knives working properly with minimal effort during regular kitchen prep.
Pay close attention to rod length first. Your rod should always measure at least 2 inches longer than your longest kitchen blade. A standard 8-inch chef knife needs a 10-inch or 12-inch rod so you have plenty of room to sweep from heel to tip without slipping off the end.
Consider the rod material based on how you maintain your cutlery. Smooth or fine-grooved carbon steel is perfect for weekly realignment if your knives are in decent shape. If your blades have gone neglected and feel completely blunt, an abrasive ceramic or diamond-electroplated rod removes small amounts of metal to restore cutting bite.
Look for a handle with a secure, slip-resistant grip made from textured polymer or pakkawood that fits your hand comfortably. A broad safety guard between the handle and the metal shaft is mandatory to stop slips. Many home cooks store their tools alongside magnetic knife block and knife set combos, so verify whether the rod includes a hanging ring or fits neatly into your existing storage block slots.

- TAR Score9.4
TAR Score is a ranking system developed by TopAppliancesReviews.com. TAR score has no relationship or impact from any manufacturers or sales agent websites. Learn more
- BrandCutluxe

- TAR Score9.4
TAR Score is a ranking system developed by TopAppliancesReviews.com. TAR score has no relationship or impact from any manufacturers or sales agent websites. Learn more
- BrandHOSHANHO

- TAR Score9.4
TAR Score is a ranking system developed by TopAppliancesReviews.com. TAR score has no relationship or impact from any manufacturers or sales agent websites. Learn more
- BrandUtopia Kitchen

- TAR Score9.2
TAR Score is a ranking system developed by TopAppliancesReviews.com. TAR score has no relationship or impact from any manufacturers or sales agent websites. Learn more
- Brandwgsajlo
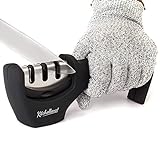
- TAR Score9.0
TAR Score is a ranking system developed by TopAppliancesReviews.com. TAR score has no relationship or impact from any manufacturers or sales agent websites. Learn more
- BrandKITCHELLENCE

- TAR Score8.8
TAR Score is a ranking system developed by TopAppliancesReviews.com. TAR score has no relationship or impact from any manufacturers or sales agent websites. Learn more
- BrandSiyurongg

- TAR Score8.8
TAR Score is a ranking system developed by TopAppliancesReviews.com. TAR score has no relationship or impact from any manufacturers or sales agent websites. Learn more
- BrandLUFFEXX
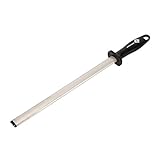
- TAR Score8.8
TAR Score is a ranking system developed by TopAppliancesReviews.com. TAR score has no relationship or impact from any manufacturers or sales agent websites. Learn more
- BrandKota Japan
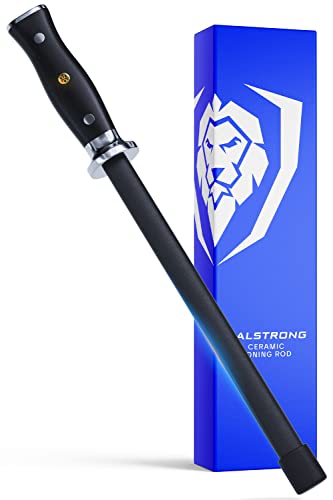
- TAR Score8.6
TAR Score is a ranking system developed by TopAppliancesReviews.com. TAR score has no relationship or impact from any manufacturers or sales agent websites. Learn more
- BrandDalstrong
Last update on 2026-10-02 / Affiliate links / Images, Product Titles, and Product Highlights from Amazon Product Advertising API
FAQs
Can you use a honing rod on serrated bread knives?
Standard kitchen rods cannot sharpen serrated bread knives safely. The wide cylinder of a honing rod bridges across the scalloped teeth, only rubbing the outer points and flattening the blade shape. You need a specialized tapered conical sharpener that fits neatly inside each individual scallop along the blade.
Why does a knife feel dull right after honing?
A knife usually feels duller after using a rod because the stroke angle was inconsistent or tilted too wide. Holding the knife at too wide an angle scrapes the delicate apex away instead of realigning it. Pushing too hard against the rod can also fold the steel completely over to the opposite side, leaving a rough wire burr that snags on food.
Do you need to oil or wet a sharpening rod?
Kitchen honing and sharpening rods must always be used completely dry. Water and honing oils cause the blade to hydroplane across the shaft, reducing the friction needed to straighten or abrade the steel. Simply wipe the rod with a dry cloth after use to brush away loose steel dust.
How long should a standard kitchen steel rod last?
A quality carbon steel honing rod can easily last for decades in a home kitchen. Because smooth or lightly ridged steel realigns metal rather than wearing it away, the rod itself experiences almost zero material loss. Diamond-coated rods may slowly shed their electroplated abrasive grit after several years of heavy use, while ceramic rods last indefinitely unless dropped on a hard tile floor.


Top Rated Best Quality Range Hoods: 2026 Expert Picks
The 12 Best Small Solar Generators 2026

10 Best Quality Semi Automatic Washing Machine of 2026 For Leak-Free Laundry

11 Best Small Washer Machine of 2026 For Everyday Laundry

12 Best Vibration Pads For Washing Machine of 2026 To Stop Walking and Shaking

11 Best Selling Front Load Washing Machine of 2026 For Quiet Odor-Free Laundry

11 Best Washing Machine For King Size Bedding of 2026 To Prevent Cycle Errors

10 Best Small Front Loader Washing Machine of 2026 For Tight Closets






