How to Sharpen a Japanese Chef Knife on a Whetstone

Use a waterstone to restore the edge. Slide the blade across a soaked block at a steady 15-degree angle until you feel a burr, which is a tiny ridge of bent metal along the opposite side. Flip the knife to repeat the strokes, then finish on a fine-grit stone to sweep that ridge away. This gentle grinding shapes the hard steel cleanly without scratching the sides.
A few details change the routine. Most Japanese chef knives have a double bevel, meaning both sides slope evenly, but traditional single-bevel blades are worked mostly on one face. Light dullness only needs a medium stone, while visible chips require a rougher grit first. Avoid metal honing rods and pull-through sharpeners, as brittle Japanese steel easily chips against them. Here is how to set your hands and sharpen with confidence.
The Short Version
- Submerge your 1000-grit whetstone (a sharpening block soaked in water) for about ten minutes until air bubbles stop rising to the surface.
- Place two US pennies under the spine of the blade on the stone to find your 15-degree sharpening angle, then lock your wrist at that height.
- Push the knife across the wet stone in smooth overlapping sections until you feel a burr (a tiny rough ridge of bent steel) along the full length of the opposite side.
- Flip the blade over, repeat the strokes on the other side, and finish on a finer polishing stone (around 3000 to 6000 grit) to wipe away the wire edge.
Essential Gear for Japanese Knives
Japanese kitchen blades differ fundamentally from Western cutlery. Most traditional European knives use softer steel alloys designed to flex under heavy pressure, which you can see in sets like German high carbon steel knife sets. Japanese blades, however, use much harder steel. This hard metal allows the knife maker to grind a very steep, delicate edge that stays sharp through months of prep work. But because that hard steel is rigid, aggressive tools or uneven grinding will chip the edge rather than sharpen it.
A waterstone is the safest and most effective tool for sharpening these fine edges. It grinds away microscopic amounts of metal smoothly while letting you control the exact cutting angle. Before you start, gather these items on your kitchen counter:
- Medium waterstone (around 1000 grit): Grit refers to the coarseness of the sharpening stone particles. A 1000-grit surface is the workhorse stone that reshapes a dull bevel (the slanted slope that forms the cutting edge) without stripping away excess steel.
- Fine polishing stone (3000 to 6000 grit): This stone smooths away coarse scratches, polishes the bevel, and removes the leftover microscopic wire sliver left behind by the medium stone.
- Stable base: Use a fitted silicone holder or a wooden base with rubber feet. If your stone does not come with a stand, place a damp kitchen towel directly underneath it so the block cannot slip on your counter.
- Water container or spray bottle: Keep clean tap water within reach. Water acts as a lubricant and washes away loose metal shavings while creating a lubricating mud across the stone.
- Two standard pennies: These serve as a quick visual gauge to set your blade angle before you take your first stroke.
- Wiping cloth: A clean cotton kitchen towel lets you wipe away stone mud and check the blade clearly between steps.
Setting the Angle: Using Two Pennies to Lock in 15 Degrees
The secret to a crisp slicing edge is maintaining a steady angle on every single stroke. Most Japanese chef knives, such as a gyuto or santoku, perform best with a steep 15-degree slicing edge per side. If your angle is too high, you create a thick edge that wedges into vegetables instead of slicing cleanly. If your angle is too low, the edge becomes paper-thin and easily chips on your cutting board.
You do not need a fancy digital gauge to find 15 degrees. Place your whetstone on the counter with the short end pointing toward your torso. Lay the knife blade completely flat on the stone, facing away from you. Stack two standard copper pennies on the stone, then slide them right under the spine (the thick top edge) of the knife near the bolster. Lower the spine until it rests gently on top of the two pennies while keeping the sharp edge touching the stone surface.
That small gap between the stone and the knife spine is roughly 15 degrees. Lift the blade just enough to slide the pennies out from underneath, keeping your hands in that exact posture. Pay close attention to the space between the knife spine and the stone face. You will use your fingers to hold that exact distance constant throughout the sharpening process.
Lock your dominant wrist solid. Grip the knife handle with your dominant hand, putting your index finger flat against the spine and your thumb against the flat side of the blade. This pinch grip gives you full control over blade tilt. Place two or three fingertips of your off hand flat against the lower half of the blade face, about a quarter inch above the cutting edge. Your non-dominant hand guides the pressure against the stone, while your dominant hand keeps the 15-degree angle locked in place.
Sharpening Strokes: Working from Heel to Tip
Sharpening requires steady, controlled passes rather than rushed scrubbing. Always work in distinct overlapping zones along the blade rather than trying to sweep the entire cutting edge in one wild stroke.
- Soak and prepare the stone: Submerge your 1000-grit whetstone in cool water for roughly 10 to 15 minutes. Watch the surface; once bubbles stop rising, the stone is fully saturated. Mount the stone securely into its non-slip base and place it lengthwise on your counter. Splash a few tablespoons of water across the top.
- Position the heel: Place the heel (the section of the blade closest to your handle) across the bottom portion of the stone at a 45-degree diagonal to the stone length. Set your 15-degree spine clearance using the penny height you practiced earlier.
- Execute smooth push strokes: Apply gentle, even pressure with the fingers of your off hand as you push the blade forward across the stone away from you. Release that downward pressure as you pull the blade back toward you. The cutting action happens on the push stroke; dragging heavy pressure backward can tear the thin edge or gouge your stone. Think of using the pressure of two fingers, about two pounds of force.
- Work in small zones: Complete 15 to 20 smooth push strokes on that heel zone. Keep your wrists firm and let your elbows and shoulders do the movement. Splash extra water on the stone whenever the surface starts to look dry. A muddy paste will start to form; leave this mud on the stone because it helps polish and grind the steel.
- Move to the middle belly: Shift your guide fingers two inches toward the middle of the blade. Repeat the same 15 to 20 forward strokes at the exact same 15-degree angle. Make sure this new section overlaps slightly with the section you just finished so no dull flat spots remain.
- Sharpen the curved tip: Shift your guide fingers toward the tip. Because the tip of a chef knife curves upward toward the spine, keeping the knife flat on the stone will miss the tip entirely. As you stroke forward, lift your dominant elbow slightly upward by about a half inch. This gentle lift keeps the curved edge flush against the stone surface without changing your bevel angle. Work this section with 15 to 20 light strokes.
Finding the Burr: Checking if the Edge Is Ready to Flip
You cannot judge when a knife is sharp by counting strokes alone. You must check for the formation of a burr. A burr is the microscopic wire edge or curved sliver of metal that forms on the opposite side during sharpening. When your stone grinds away enough steel on one side of the bevel, the ultra-thin apex of the metal folds over away from the stone. Finding that folded lip tells you that you have ground completely through the old, dull metal.
Checking for the burr requires a light, careful touch. Never slide your finger along the sharp edge from heel to tip, which can cause a serious cut. Instead, wipe the stone mud off the blade with your towel. Rest the pad of your thumb flat against the unsharpened side of the blade, up near the spine. Gently pull your thumb straight down, sliding off the cutting edge into the air.
If you have sharpened enough, you will feel a distinct rough catch or tiny wire lip right at the border of the edge. It feels somewhat like the rough strike strip on a matchbox or a ragged edge of aluminum foil. Check the full length of the blade, starting at the heel, moving through the middle, and ending at the tip.
If you feel that rough snag from the heel all the way to the tip, that side is complete. If one section feels smooth without any snag, return the knife to the stone and do another 5 to 10 strokes on that specific section until the burr forms completely across the entire blade length.
Once the burr is continuous, flip the knife over to sharpen the opposite side. If you own double-bevel knives like those in Japanese Damascus steel chef knife sets, repeat the exact same procedure with the same 15-degree penny angle and stroke count. As you sharpen the second side, you will feel the wire edge fold back toward the first side. When that happens, your basic sharpening stage is complete.
Polishing: Removing the Burr on Higher Grit
A knife fresh off a 1000-grit stone can cut food, but its edge is jagged and fragile under a microscope. That bent wire burr will quickly break off during food prep, leaving your knife dull again within days. Polishing the edge on a finer finishing stone (3000 to 6000 grit) removes the burr and refines the bevel to a clean, mirror-like finish.
- Rinse your blade and switch stones: Thoroughly wash the knife and your hands under running water to clear away all coarse 1000-grit grit particles. Place your fine-grit stone on your base and wet the surface. Most high-grit finishing stones only need a quick splash of water rather than a long soak; verify your stone instructions to be sure.
- Refine both sides with lighter strokes: Place your knife on the fine stone at the exact same 15-degree angle. Stroke the blade from heel to tip just as you did before, but cut your downward pressure in half. Take about 10 strokes per section on the first side, then flip and take 10 strokes per section on the second side. The fine grit buffs out coarse scratches and weakens the wire burr.
- Take alternating trailing strokes: To cleanly strip the weakened wire burr from the blade apex, you will now stroke backward. Place the heel of the blade on the stone at 15 degrees and pull the knife toward you along the stone, sweeping lightly from heel to tip in one fluid motion. Flip the blade over and pull once on the opposite side. Complete 5 to 6 alternating single strokes, using barely any pressure beyond the weight of the knife itself.
- Confirm the edge on kitchen produce: Wipe the blade dry with a clean cloth. Take a sheet of scrap printer paper and slice downward from the top edge. The knife should glide through the sheet silently with zero tearing or snagging. Alternatively, rest the blade against the skin of a ripe tomato and pull gently backward without pressing down. A properly sharpened and deburred Japanese knife will cut cleanly into the tomato flesh under its own weight alone.
Sharpening Mistakes That Chip Hard Steel
Hard Japanese knife steel is brittle compared to soft Western steel. Avoiding common sharpening errors will save you from expensive blade repairs or permanent edge damage:
- Carbide pull-through sharpeners: Never pull a Japanese knife through handheld V-shaped carbide sharpeners. These devices use extreme force to rip metal off the sides of the blade, which almost always results in deep notches, chips, and ruined blade profiles on hard Japanese knives.
- Standard grooved metal honing steels: Traditional grooved butcher steels work by roughly bending soft steel back into place. When used on hard Japanese steel, those hard metal ridges strike the rigid edge, fracturing microscopic chunks out of the thin bevel.
- Grinding on a dry stone: Never rub a knife across a dry waterstone. Without water to float away metal filings, the steel overheats, friction spikes, and metal particles clog the pores of the stone, scratching the blade face unevenly.
- Wobbling your wrist during strokes: If your wrist rocks up and down as you push the knife, you will create a rounded, convex bevel instead of a flat cutting angle. Keep your wrist rigid and use your arms to move the knife back and forth.
- Pushing down with excessive force: Grinding harder does not sharpen the knife faster; it simply gouges your stone and bends the thin cutting edge out of alignment. Let the abrasive grit of the stone do the cutting while you focus strictly on holding the 15-degree angle.
Choosing the Right Sharpening Stone Setup
If you need gear to maintain your Japanese kitchen knives, look for a double-sided combination waterstone. A dual-grit block gives you everything necessary for routine care in one compact unit. For most home cooks maintaining everyday Japanese cutlery, a stone with a 1000-grit cutting side and a 3000-grit or 6000-grit polishing side provides the ideal balance.
When selecting a sharpening setup, pay close attention to the base. A stone that wobbles or slides across your counter makes it nearly impossible to maintain a steady 15-degree angle and introduces serious safety risks. Look for kits that feature a snug rubber or silicone boot paired with a sturdy bamboo or wooden block with rubberized bottom feet. If you are brand new to holding a steady angle, verify whether the kit includes a clip-on angle guide. An angle guide slips over the spine of your knife and physically rests on the stone, keeping your blade locked at the correct height while you build muscle memory.

- TAR Score9.4
TAR Score is a ranking system developed by TopAppliancesReviews.com. TAR score has no relationship or impact from any manufacturers or sales agent websites. Learn more
- BrandKimura

- TAR Score9.2
TAR Score is a ranking system developed by TopAppliancesReviews.com. TAR score has no relationship or impact from any manufacturers or sales agent websites. Learn more
- BrandHOSHANHO

- TAR Score9.2
TAR Score is a ranking system developed by TopAppliancesReviews.com. TAR score has no relationship or impact from any manufacturers or sales agent websites. Learn more
- BrandSharp Pebble
- TAR Score9.2
TAR Score is a ranking system developed by TopAppliancesReviews.com. TAR score has no relationship or impact from any manufacturers or sales agent websites. Learn more
- BrandMITSUMOTO SAKARI
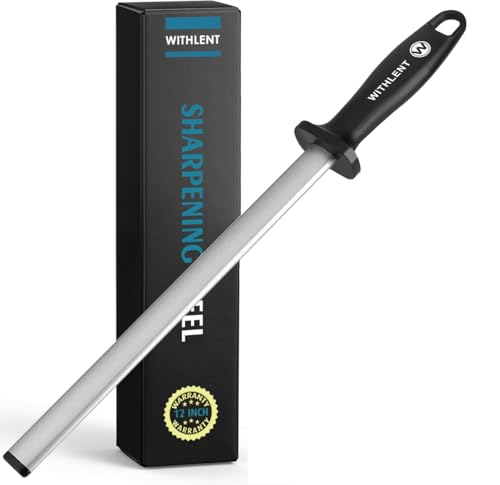
- TAR Score9.2
TAR Score is a ranking system developed by TopAppliancesReviews.com. TAR score has no relationship or impact from any manufacturers or sales agent websites. Learn more
- BrandWITHLENT

- TAR Score9.2
TAR Score is a ranking system developed by TopAppliancesReviews.com. TAR score has no relationship or impact from any manufacturers or sales agent websites. Learn more
- BrandKEENBEST

- TAR Score9.0
TAR Score is a ranking system developed by TopAppliancesReviews.com. TAR score has no relationship or impact from any manufacturers or sales agent websites. Learn more
- BrandSchiffer Publishing

MITSUMOTO SAKARI Japanese Knife Sharpening Stone, Professional Double-Sided Whetstone 1000/3000
View on Amazon- TAR Score9.0
TAR Score is a ranking system developed by TopAppliancesReviews.com. TAR score has no relationship or impact from any manufacturers or sales agent websites. Learn more
- BrandMITSUMOTO SAKARI
- TAR Score8.8
TAR Score is a ranking system developed by TopAppliancesReviews.com. TAR score has no relationship or impact from any manufacturers or sales agent websites. Learn more
- BrandKota Japan

- TAR Score7.6
TAR Score is a ranking system developed by TopAppliancesReviews.com. TAR score has no relationship or impact from any manufacturers or sales agent websites. Learn more
- BrandAudible
Last update on 2026-10-03 / Affiliate links / Images, Product Titles, and Product Highlights from Amazon Product Advertising API
FAQs
How often should I sharpen my Japanese chef knife on a whetstone?
For an average home cook using a knife daily for meal prep, a full whetstone sharpening is typically needed every three to six months. You will know it is time when the blade begins to slide off tomato skins or requires noticeable downward force to chop an onion. Between full stone sharpenings, regular stropping on leather or light alignment on a smooth, ultra-fine ceramic rod will keep the edge functioning smoothly.
Can I use a regular steel rod to hone a Japanese knife between sharpenings?
No, standard grooved metal honing rods should never be used on hard Japanese blades. The metal in those rods is designed for softer European knives and will catch, ding, or chip hard Japanese steel. If you want to maintain the edge between stone sessions, use a smooth, high-grit ceramic rod or a leather strop, holding the knife at the same 15-degree angle with extremely light touch.
What should I do if my knife blade develops a noticeable chip?
Small micro-chips can be ground out at home using a coarse waterstone rated around 240 to 400 grit before moving up to your 1000-grit stone. This coarse stone removes enough metal to reset the bevel past the damage. However, if the chip is larger than two millimeters or runs deep into the blade face, stop and take the knife to a qualified professional sharpener who can regrind the profile without overheating the steel.
Do all Japanese whetstones require soaking in water before use?
No, whetstones fall into two main categories: soaking stones and splash-and-go stones. Traditional soaking stones have open pores that must absorb water for 10 to 15 minutes to prevent drying out mid-stroke. Modern ceramic or resin-bonded stones are non-porous and only require a quick splash of water on the surface before you begin sharpening. Always confirm the stone type from the manufacturer packaging before submerging it.


Top Rated Best Quality Range Hoods: 2026 Expert Picks
The 12 Best Small Solar Generators 2026

10 Best Quality Semi Automatic Washing Machine of 2026 For Leak-Free Laundry

11 Best Small Washer Machine of 2026 For Everyday Laundry

12 Best Vibration Pads For Washing Machine of 2026 To Stop Walking and Shaking

11 Best Selling Front Load Washing Machine of 2026 For Quiet Odor-Free Laundry

11 Best Washing Machine For King Size Bedding of 2026 To Prevent Cycle Errors

10 Best Small Front Loader Washing Machine of 2026 For Tight Closets