
How To Repair Washer Vibrating Excessively Fast

How To Repair Washer Vibrating Excessively starts with spotting the little warning signs most people brush off at first. A loud banging sound during spin cycles, the machine “walking” across the laundry floor, or dishes rattling in nearby cabinets usually point to deeper balance issues hiding underneath the surface. Plenty of washers don’t actually need expensive replacement parts right away. Loose leveling legs, uneven flooring, overloaded drums, or worn suspension rods often create the kind of violent shaking that makes laundry day feel like absolute chaos.
Small laundry spaces tend to make vibration problems even worse. Tight corners amplify noise, while slick tile floors allow machines to shift around more than expected. Oddly enough, many people keep using a shaking washer for months, hoping it’ll somehow settle down on its own. It rarely does. Continued vibration can slowly damage internal components, weaken hoses, loosen drum supports, and wear out bearings faster than most realize.
Balanced loads matter more than people think. Heavy towels clumped on one side of the drum can throw the entire spin cycle off balance in seconds. Front-load and top-load washers behave differently too, so the fix isn’t always identical across every machine. Some washers need recalibrating after being moved, while others simply need tighter footing against the floor. A quick inspection can save a pile of frustration before the problem snowballs into a major repair bill.
Washer vibration repair also depends on understanding what sounds are actually normal. A slight hum during high-speed spinning? Totally expected. Aggressive knocking, floor trembling, or metal clanking? That’s a different story altogether. Worn shock absorbers, damaged dampening straps, or failing tub bearings often create those harsher noises. Ignoring them too long usually leads to stronger shaking and rougher operation over time.
Moisture buildup around unstable washers creates another headache people don’t talk about enough. Constant movement can loosen drain hoses and water connections, leading to sneaky leaks behind the machine. Those damp spots may eventually trigger mold smells or warped flooring. Nobody wants a laundry room turning into a repair project from top to bottom. Stable operation protects both the washer and the surrounding area.
How To Repair Washer Vibrating Excessively becomes much less intimidating once the common causes are broken down step by step. Simple adjustments often solve problems that seem dramatic at first glance. Tightening loose feet, redistributing loads properly, inspecting suspension systems, and checking floor stability can restore smoother performance surprisingly fast. A calmer washer doesn’t just reduce noise either. It helps extend machine lifespan, lowers wear on internal parts, and makes everyday laundry routines far less aggravating.

- TAR Score9.0
TAR Score is a ranking system developed by TopAppliancesReviews.com. TAR score has no relationship or impact from any manufacturers or sales agent websites. Learn more
- BrandRepairwares

- TAR Score8.8
TAR Score is a ranking system developed by TopAppliancesReviews.com. TAR score has no relationship or impact from any manufacturers or sales agent websites. Learn more
- Brandphepetroll

- TAR Score8.8
TAR Score is a ranking system developed by TopAppliancesReviews.com. TAR score has no relationship or impact from any manufacturers or sales agent websites. Learn more
- BrandToLanbbt

- TAR Score8.6
TAR Score is a ranking system developed by TopAppliancesReviews.com. TAR score has no relationship or impact from any manufacturers or sales agent websites. Learn more
- BrandEvelots
- TAR Score8.6
TAR Score is a ranking system developed by TopAppliancesReviews.com. TAR score has no relationship or impact from any manufacturers or sales agent websites. Learn more
- BrandKnivel

- TAR Score8.4
TAR Score is a ranking system developed by TopAppliancesReviews.com. TAR score has no relationship or impact from any manufacturers or sales agent websites. Learn more
- BrandCUISIBOT

- TAR Score8.4
TAR Score is a ranking system developed by TopAppliancesReviews.com. TAR score has no relationship or impact from any manufacturers or sales agent websites. Learn more
- BrandMyLifeUNIT

- TAR Score8.2
TAR Score is a ranking system developed by TopAppliancesReviews.com. TAR score has no relationship or impact from any manufacturers or sales agent websites. Learn more
- BrandOIEKUN

- TAR Score7.6
TAR Score is a ranking system developed by TopAppliancesReviews.com. TAR score has no relationship or impact from any manufacturers or sales agent websites. Learn more
- BrandBIUWING
Last update on 2026-07-26 / Affiliate links / Images, Product Titles, and Product Highlights from Amazon Product Advertising API
How To Repair Washer Vibrating Excessively
A laundry room shouldn’t sound like a bowling alley every time the spin cycle kicks in. A washer that thumps, crawls, or bangs against the wall usually has a balance problem, a floor support issue, or worn parts that can’t control drum movement anymore. How to repair washer vibrating excessively starts with slowing down, checking the simple stuff first, and not assuming the machine is finished. The fix can be surprisingly ordinary, but ignoring it can turn one noisy cycle into damaged hoses, loose panels, and a much bigger repair headache.
Washer Vibration Basics
Excessive washer vibration usually shows up during the spin cycle because that’s when the drum reaches its highest speed. Wet clothes become heavy fast, and one lopsided pile of towels can pull the tub hard to one side. That uneven force makes the cabinet shake, the feet shift, and the machine start “walking” across the floor. Annoying? Absolutely. But it’s also a warning that the washer isn’t sitting or spinning the way it should.
Normal washer movement is mild and steady, not violent or dramatic. A slight hum, a faint vibration through the floor, and a brief wobble as the load settles are usually no big deal. Loud banging, repeated thudding, and movement across the room are different animals altogether. Those signs point toward load imbalance, loose leveling legs, weak suspension, or a floor that flexes too much under the machine’s weight.
Start with the easiest cause before pulling anything apart. Open the washer, look at the load, and check whether bulky items are wrapped into one soggy ball. Bedding, bath mats, jeans, and hoodies often clump together and make the drum spin unevenly. Redistributing the items by hand can calm the machine down right away. That’s not fancy repair work, but it’s often the first real clue.
A washer also needs a solid base to behave. Many full-size machines weigh well over 150 pounds before adding water and wet laundry, so a weak floor can amplify every little shake. Floor stability matters even more in upstairs laundry rooms, older homes, and tight closets with lightweight flooring. If the floor bounces while the washer spins, the machine may not be the only thing causing trouble.
Check The Load First
Load balance is the quickest place to begin because it costs nothing and takes only a careful look. Stuffing the drum to the brim may feel efficient, but the washer needs space for clothes to tumble, rinse, and spread evenly. A packed drum can’t distribute weight properly, especially during high-speed spinning. So the machine fights the load, the cabinet shakes, and the whole laundry room starts putting on a show.
Bulky loads deserve extra attention. A comforter, rug, or pile of towels can soak up water unevenly and slam one side of the tub during spin. Pairing one heavy item with a few smaller items often helps the drum stay more balanced. Still, some bulky pieces simply don’t belong in a home washer if they can’t move freely. Overloading saves one cycle today but can stress suspension parts for months.
Small loads can misbehave too, which catches people off guard. Two sweatshirts or a couple of bath towels may settle on one side and trigger the same rough shaking as an overloaded drum. Add a few similar-weight items so the washer has something to balance against. That little adjustment can reduce spin cycle vibration without touching a tool.
Drainage problems can make vibration worse because soaked clothes stay heavier than they should. Slow draining leaves extra water in the load, and that extra weight makes the spin cycle rougher. To reduce standing water issues before they add strain, clear buildup with best drain cleaner for washing machine drain pipe support when the drain line is part of the problem. Clean drainage helps the washer spin with less resistance and keeps heavy loads from turning into a thumping mess.
Level The Washer Properly
Washer leveling sounds boring until the machine starts inching across the floor like it has somewhere to be. Even a small tilt can cause the drum to pull unevenly during spin. Place both hands on opposite corners and gently rock the washer. Any tapping, shifting, or wobbling means the feet need attention. A stable machine should feel planted, not loose or springy.
Use a bubble level across the top from side to side, then front to back. Adjust the legs until the washer sits evenly in both directions. Most leveling feet twist by hand or with pliers, but don’t rush it. A quarter turn can make a real difference. Once the height is right, tighten the locking nuts against the cabinet so the legs don’t loosen again during vibration.
Front-load washers are especially picky about leveling because their drums spin at high speeds. A small imbalance can feel much louder than expected, especially on tile, laminate, or upstairs floors. Top-load washers can shake aggressively too, but front-load models often reveal leveling problems faster. That’s why checking the feet should happen before assuming the shocks or bearings are bad.
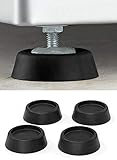
Some homes need more than leg adjustments. A slick floor can let the washer slide even if the feet are technically level. Anti-vibration pads may help, but they won’t fix a broken suspension or a weak floor. Think of them as a support tool, not a cure-all. Solid footing still does the heavy lifting.
Inspect The Floor And Space
Floor movement can trick people into blaming the washer for everything. Stand near the machine during spin and feel whether the floor flexes beneath your feet. If the whole area trembles, the washer may be amplifying a structural issue instead of creating all the noise by itself. Laundry closets on upper floors are notorious for this because the sound travels through walls and framing.
A cramped laundry nook can also make vibration sound worse. If the washer touches a wall, dryer, cabinet, or supply line, every movement turns into tapping or banging. Leave a little breathing room around the cabinet so the machine can run without knocking into nearby surfaces. Proper clearance protects the washer finish, reduces noise, and keeps hoses from rubbing against sharp edges.
Older machines often vibrate more as parts wear down, but a poorly matched replacement can create fresh frustration too. If a machine is constantly overloaded, installed on a weak surface, or too large for the space, upgrading thoughtfully may be smarter than fighting the same issue forever. Compare practical laundry setups through best fully automatic top load washing machine under 15000 if size, budget, and daily load habits all matter. Machine fit matters just as much as features on paper.
Noise can linger even after the washer problem improves, especially in small homes where laundry areas sit near bedrooms or living spaces. Dust, detergent residue, and humidity also collect around machines that shake and shift often. For nearby rooms affected by musty air or lint-heavy smells, improve breathing comfort with best room air purifier for allergies as a separate home-care step. Cleaner air won’t repair the washer, but it can make the space feel less stale while the mechanical issue gets handled.
How To Repair Washer Vibrating Excessively
Rough spinning rarely fixes itself, and that’s the part that makes people groan. A washer may seem fine during filling and washing, then suddenly slam around once the drum ramps up. How to repair washer vibrating excessively means checking the parts that control movement, water weight, and cabinet stability before the shaking turns into leaks or worn bearings. A calm spin cycle depends on balanced loads, secure hoses, and suspension parts that still have enough strength to do their job.
Inspect Hoses And Rear Connections
Washer hoses deserve a close look because vibration can loosen or stress them over time. Pull the washer forward carefully and check the hot water hose, cold water hose, and drain hose for rubbing, kinks, cracks, or damp spots. A hose pressed tightly against the wall may knock during spin and sound like a deeper mechanical problem. That little tap-tap-tap can drive anyone up the wall.
Loose connections can also make vibration feel worse than it is. Tighten the hose fittings by hand, then snug them gently without forcing the threads. Over-tightening can damage washers or fittings, so don’t go full gorilla on it. For safer replacement planning, compare best hoses for washing machine before old rubber lines turn into a surprise puddle behind the appliance.
Drain hose position matters too. A hose shoved too far into the standpipe may cause siphoning, while a loose one may rattle against the wall during spin. Secure it with the proper clip or strap so it stays put without being pinched. The goal is simple: water should leave smoothly, and the hose shouldn’t slap around every time the washer speeds up.
Check the back panel while you’re there. A loose access panel, missing screw, or bent bracket can buzz loudly during high-speed spinning. Those sounds often mimic serious drum trouble, which can lead to unnecessary panic. Small hardware checks save money because not every loud washer needs a new motor, bearing, or control board.
Test The Suspension System
Washer suspension controls how much the tub moves inside the cabinet. Top-load washers often use suspension rods, springs, dampening straps, or snubber rings. Front-load washers usually rely on shock absorbers and springs to control drum movement. Once these parts wear out, the tub can swing too far and slam into the cabinet during spin.
Press down gently on the inner tub and let go. The tub should settle quickly instead of bouncing several times. A loose, jumpy, or uneven bounce points toward weak suspension parts. That’s a strong clue, especially if leveling and load balance have already been checked. Excessive tub movement usually means the machine can’t control wet laundry weight properly.
Shock absorbers on front-load washers can leak fluid, crack, or lose resistance. Suspension rods on top-load machines may stretch, rust, or lose tension after years of heavy loads. These parts don’t always fail overnight. They usually fade slowly, which is why a washer can go from “a little shaky” to “why is it attacking the wall?” over several months.
Replacement difficulty depends on the washer design. Some suspension rods are fairly accessible from the top, while front-load shock absorbers may require removing panels and working in tight spaces. Safety comes first, so unplug the washer and shut off water before opening anything. If the tub feels loose, crooked, or unstable after basic checks, suspension repair moves high on the list.
Check Bearings And Drum Parts
Tub bearings are more serious than leveling feet or uneven laundry. A failing bearing often creates a deep rumbling, grinding, or roaring sound during spin. Vibration may come with that noise because the drum no longer rotates smoothly. Spin the drum by hand while the washer is empty. If it sounds rough, feels gritty, or wobbles strangely, the bearing area needs attention.
A damaged spider arm can also cause violent shaking, especially in front-load washers. This part supports the drum from the back, and corrosion can weaken it over time. The washer may still run, but the drum may sit off-center or scrape slightly. Off-center drum movement is not something to ignore because it can damage the tub, seal, and motor system.
Look for signs around the door boot or tub opening. Rubber dust, gray residue, scraping marks, or a drum that rubs the gasket may suggest deeper mechanical wear. That doesn’t automatically mean the washer is trash, but it does change the repair conversation. Bearing and drum repairs can be labor-heavy, so the machine’s age, condition, and replacement cost matter.
Some vibration problems have nothing to do with the washer’s inner parts. Laundry rooms near kitchens or utility areas may share walls with other noisy equipment, and household airflow issues can make utility spaces feel damp or stale. If cooking odors or moisture linger nearby, compare best non venting range hoods for a separate ventilation upgrade that fits homes without exterior ducting. Better air control won’t fix a bad bearing, but it can make tight home spaces feel less stuffy while appliance repairs are handled.
Run A Smart Test Cycle
Testing after each repair step keeps the process from turning into guesswork. Run the washer empty first and listen during the spin cycle. A smooth empty spin suggests the drum, motor, and basic balance system may be okay. If the washer still bangs with no clothes inside, the issue is likely mechanical, structural, or installation-related.
Try a small balanced load next. Use similar-weight items, such as several towels or a few cotton shirts, rather than one heavy blanket. Watch the washer as it ramps into spin. If vibration appears only with bulky loads, the machine may be overloaded, poorly loaded, or simply not suited for those items. Load behavior tells a lot if you watch instead of walking away.
Listen for the type of sound, not just the volume. A rhythmic thump often points to imbalance. A scraping sound suggests contact between moving parts. A roaring noise hints at bearings. A sharp metal knock may come from suspension or loose cabinet hardware. Sound patterns help narrow the repair path without tearing the whole washer apart.
Keep notes after each change. Level adjusted, hose secured, load reduced, floor checked, suspension inspected. That short checklist helps avoid repeating the same steps and makes a service call more productive if one becomes necessary. A technician can work faster when the basics have already been ruled out. Clear repair notes can save both time and money.
Prevent Shaking From Coming Back
Washer vibration prevention starts with boring habits that actually work. Don’t overload the drum, don’t wash one heavy item by itself, and don’t ignore small changes in sound. Machines often give early hints before a major shake starts. Catching those signs early keeps parts from taking a beating cycle after cycle.
Check the washer’s level every few months, especially after moving it for cleaning or hose replacement. Feet can loosen slowly from repeated vibration. Floors can shift slightly too, especially in older homes. A quick rock test takes seconds and can stop the washer from creeping out of position. Stable footing is one of the cheapest ways to protect the machine.
Clean around and behind the washer so lint, detergent residue, and moisture don’t build up. Dirt can hide leaks, loose hoses, and rubbing marks that would otherwise be easy to spot. Give the drain area some attention as well, since slow water removal leaves clothes heavier during spin. Good maintenance doesn’t need to be fancy. It just needs to happen before the machine starts shouting for help.
Replace worn parts before they drag other components down with them. Weak suspension can strain bearings, loose hoses can leak from repeated movement, and poor leveling can make every spin cycle rougher than necessary. The smartest repair path is usually the one that handles simple causes first, then moves toward deeper parts only when the evidence points there. That keeps the job practical instead of turning it into a parts-swapping guessing game.


10 Best Quality Semi Automatic Washing Machine of 2026 For Leak-Free Laundry

11 Best Small Washer Machine of 2026 For Everyday Laundry

12 Best Vibration Pads For Washing Machine of 2026 To Stop Walking and Shaking

11 Best Selling Front Load Washing Machine of 2026 For Quiet Odor-Free Laundry

11 Best Washing Machine For King Size Bedding of 2026 To Prevent Cycle Errors

10 Best Small Front Loader Washing Machine of 2026 For Tight Closets

12 Best Side Load Washing Machine of 2026 For Low Vibration

11 Best Single Tub Washing Machine of 2026 For Apartments Without Hookups






