
How To Repair Washer That Won’t Fill With Water Fast

How To Repair Washer That Won’t Fill With Water often starts with one annoying moment. You press the cycle button, hear a faint click, then... nothing. No rushing water. No spinning clothes. Just silence and a growing pile of laundry staring back at you like bad luck showed up early. That kind of problem can throw off an entire day, especially when the washer worked perfectly fine a night ago.
Several issues can block water flow, and honestly, some of them are ridiculously easy to overlook. A twisted inlet hose, clogged filter screen, faulty water inlet valve, or even a stubborn lid switch can quietly shut everything down. Water supply problems also tend to hide in plain sight. Plenty of people assume the washer itself failed, while the real culprit sits behind the machine the whole time.
Digging into washer repair doesn't always require a toolbox packed like a mechanic’s garage. A flashlight, adjustable pliers, and a bit of patience usually go a long way. Small warning signs often show up before complete failure happens. Weak water pressure, delayed filling, or strange buzzing sounds can point toward trouble before the washer completely taps out.
Then there’s the frustration of replacing parts blindly. Nobody wants to spend money on a new valve or control board only to realize the shutoff tap wasn’t fully open. That’s why step-by-step troubleshooting matters so much. Careful inspection saves time, reduces unnecessary repairs, and keeps perfectly usable components from ending up in the trash.
How To Repair Washer That Won’t Fill With Water also depends heavily on understanding how modern washers behave. Some newer models pause intentionally while sensing load balance or checking door locks. Others stop filling due to pressure switch issues that confuse the machine into “thinking” the tub is already full. Weird? Absolutely. Common? More than most people realize.
Older washers bring a different headache altogether. Mineral buildup inside valves and sediment-packed screens tend to choke water flow slowly over time. Hard water areas make that issue even worse. A washer may still run, but reduced filling speed creates incomplete wash cycles, soap residue, and clothing that never feels fully clean.
Practical fixes matter because laundry problems never arrive at a convenient time. A washer refusing to fill can quickly snowball into missed work uniforms, damp towels piling up, and unnecessary stress. Spotting the issue early and applying the right repair approach helps restore normal routine without turning the laundry room into a full-blown disaster zone.

- TAR Score9.2
TAR Score is a ranking system developed by TopAppliancesReviews.com. TAR score has no relationship or impact from any manufacturers or sales agent websites. Learn more
- BrandSiLnmLih

- TAR Score9.2
TAR Score is a ranking system developed by TopAppliancesReviews.com. TAR score has no relationship or impact from any manufacturers or sales agent websites. Learn more
- BrandNBRINGO

- TAR Score9.2
TAR Score is a ranking system developed by TopAppliancesReviews.com. TAR score has no relationship or impact from any manufacturers or sales agent websites. Learn more
- BrandXBVV

- TAR Score9.2
TAR Score is a ranking system developed by TopAppliancesReviews.com. TAR score has no relationship or impact from any manufacturers or sales agent websites. Learn more
- BrandZDBB
- TAR Score9.2
TAR Score is a ranking system developed by TopAppliancesReviews.com. TAR score has no relationship or impact from any manufacturers or sales agent websites. Learn more
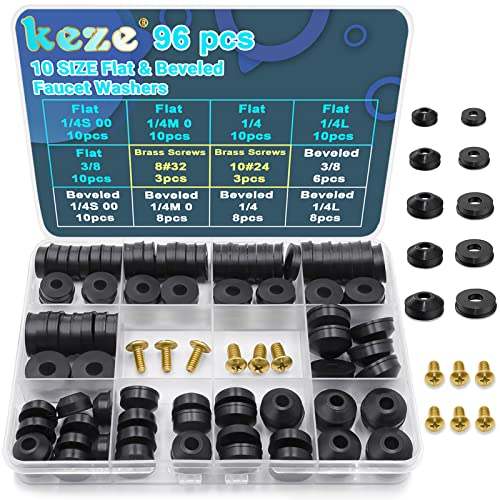
- BrandKeze

- TAR Score9.0
TAR Score is a ranking system developed by TopAppliancesReviews.com. TAR score has no relationship or impact from any manufacturers or sales agent websites. Learn more
- BrandWINSTECK

- TAR Score8.8
TAR Score is a ranking system developed by TopAppliancesReviews.com. TAR score has no relationship or impact from any manufacturers or sales agent websites. Learn more
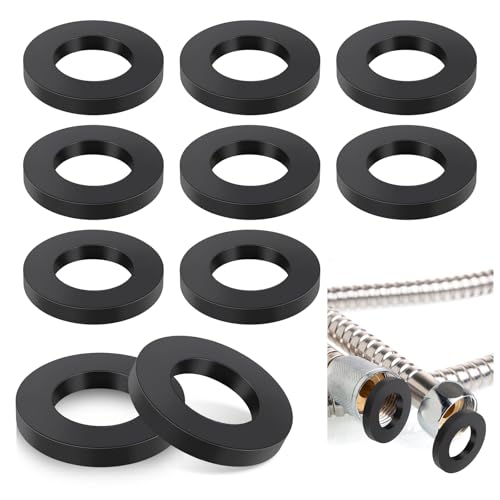
- BrandSliverdew
- TAR Score7.2
TAR Score is a ranking system developed by TopAppliancesReviews.com. TAR score has no relationship or impact from any manufacturers or sales agent websites. Learn more
- BrandFdcLixuvol
Last update on 2026-07-23 / Affiliate links / Images, Product Titles, and Product Highlights from Amazon Product Advertising API
How To Repair Washer That Won’t Fill With Water
A quiet washer can feel oddly loud after the start button is pressed and nothing happens. The tub stays dry, the clothes sit there, and the whole laundry plan hits a wall. That frustrating pause is exactly where how to repair washer that won’t fill with water becomes less about guessing and more about checking the water path, electrical signals, and safety switches in the right order.
Start With The Water Supply
The simplest cause often hides behind the washer, right where nobody wants to squeeze in. A partly closed shutoff valve can reduce flow enough to make the machine act broken, even though the washer itself is fine. Check both hot and cold taps, because many machines need steady pressure from both sides before the cycle behaves normally. A quick turn of the valves can save a lot of head-scratching.
Hoses deserve a real look, not just a quick glance from across the room. A kinked hose can choke the water supply like a bent garden hose, and that restriction may leave the washer buzzing without filling. Pull the machine forward carefully and inspect the hose path for sharp bends, crushed spots, or aging rubber. If the hose feels stiff, swollen, or cracked, replacement makes more sense than trying to nurse it along.
Water pressure matters more than people expect. A washer may start normally, then stall because the incoming water is too weak to satisfy the fill sensor. Open a nearby faucet and compare the flow, then test the washer valves again. Weak household pressure, sediment in plumbing, or a partially blocked shutoff valve can all create slow filling that looks like a washer failure.
Hot and cold supply lines can also get swapped or restricted unevenly. Some wash settings call for one temperature first, so the machine may wait if that side is blocked. That little detail catches plenty of folks off guard. For a better laundry setup after the repair, improve wash results with laundry detergent for front load washing machine that suits low-water cycles and rinses cleaner.
Check Inlet Screens And Hoses
Small mesh screens sit where the hoses connect to the washer, and they’re tiny troublemakers. Sediment, rust flakes, and hard-water grit can clog those screens until water barely trickles through. Turn off the water first, disconnect the hoses, and inspect the inlet ports with a flashlight. Clean screens gently because damaging them can let debris reach the water inlet valve.
A clogged screen usually doesn’t fail overnight. The washer may take longer to fill for weeks before it finally seems dead. That slow decline is a clue worth taking seriously. If fill time keeps stretching out, the issue may be restricted water flow rather than a bad control board.
Use a bucket test to separate hose problems from washer problems. Disconnect each hose from the machine, aim it into a bucket, then briefly open the valve. Strong flow from the hose means the supply side is probably fine. Weak flow points toward blocked hoses, shutoff valve trouble, or plumbing sediment before the washer ever enters the story.
Hose washers inside the fittings can also collapse or shift out of place. That sounds minor, but a warped washer can block water enough to cause filling issues. Replace old rubber washers if they look flattened, brittle, or uneven. Small parts matter here because the washer depends on a clean, open route from wall valve to inlet valve.
Test The Water Inlet Valve
The water inlet valve is the gatekeeper. It opens only when the washer sends power to it, and it closes when the tub reaches the right level. A failed valve may hum without opening, open only on one temperature side, or refuse to respond at all. This part is one of the most common suspects in washer won’t fill problems after the supply lines check out.
Listen closely during the fill stage. A humming sound with no water often points toward a valve that receives power but can’t open properly. No sound at all may suggest the valve isn’t getting the signal, though that can also involve the lid switch, pressure switch, timer, or control board. That’s why careful diagnosis beats random part swapping every single time.
Testing the valve with a multimeter can confirm whether the solenoids still have continuity. Unplug the washer before touching wiring, then follow the service manual for the correct terminals. A valve that fails continuity testing usually needs replacement. A valve that tests fine may still be blocked mechanically, especially in homes with hard water buildup or rusty supply pipes.
Replacement is usually straightforward, but access varies by washer design. Top-load machines often hide the valve behind the rear panel, while front-load machines may require removing the top panel. Keep track of wire positions and hose clamps before removing anything. For a machine that’s aging beyond one repair, compare practical replacement choices with washing machine under 12000 before spending too much on repeated fixes.
Inspect The Lid Or Door Switch
A washer may refuse to fill if it thinks the lid or door is open. That safety feature prevents messy or unsafe operation, but it can be annoying when the switch fails. Listen for a clean click when closing the lid on a top-loader. On front-load washers, check whether the door locks firmly before the cycle begins.
Door lock trouble often feels random at first. One cycle starts fine, the next does nothing, then the machine suddenly behaves again after a hard slam. That pattern is a clue, not a personality flaw. A weak lid switch or door latch assembly can interrupt the fill command before water ever reaches the tub.
Never bypass a safety switch as a permanent fix. It may seem tempting, especially during laundry panic, but that shortcut can create real safety risks and more expensive damage. The better move is to test the switch and replace it if it no longer works consistently. Safety parts exist for a reason, even when they’re being stubborn.
Look for broken plastic tabs, loose screws, bent strike plates, or worn latch hooks. These small mechanical pieces can stop the switch from engaging even if the electrical part still works. A proper alignment can sometimes restore normal filling without replacing the switch. Still, cracked latch parts usually don’t get better with time.
Look At The Pressure Switch
The pressure switch tells the washer how much water is inside the tub. A small air tube connects the tub area to the switch, and pressure changes as water rises. If that tube gets clogged, pinched, or disconnected, the washer may think it’s already full. That false signal can stop filling before the first splash.
Pulling the pressure tube loose and checking it for cracks or blockage can reveal a lot. Soap residue, lint, and moisture can build up inside over time. Blow through the tube gently if the manual allows it, then inspect both ends for a snug fit. A loose tube creates false water level readings that confuse the whole cycle.
The switch itself can also fail electrically. Some machines use a mechanical pressure switch, while newer models may rely on an electronic water level sensor. Either way, the washer needs accurate feedback before it allows filling, washing, draining, or spinning. A bad reading can mimic a bad valve, which is why testing matters.
Overfilling and no-fill problems can both point toward water level sensing issues. That sounds backwards, but it makes sense once the switch is seen as the washer’s measuring tool. If the machine can’t measure water correctly, it can’t make good decisions. Accurate water level control keeps the repair focused instead of turning into a guessing game.
Rule Out Control Board Trouble
The control board sits deeper in the chain, so don’t blame it first. Many washers get accused of having a bad board when the real issue is a blocked screen or failed lid switch. That mistake gets expensive fast. A smart repair starts with basic water flow, then moves toward electrical controls only after simpler causes are ruled out.
Board problems can show up as dead fill commands, inconsistent cycle behavior, or error codes that return after resets. Some machines will flash codes tied to water supply, door lock, or pressure sensing. Record the code before unplugging the washer because it may disappear after power is removed. The manual can turn that code into a useful repair direction.
Loose wiring can impersonate a failed board. Vibration from years of spin cycles can loosen connectors or create corrosion around terminals. Inspect wiring harnesses near the inlet valve, lid switch, pressure switch, and control area. A firm reconnection or cleaned terminal can restore signal flow without replacing an expensive part.
Moisture and laundry-room humidity make electronics less forgiving. A washer placed near poor ventilation, damp walls, or dusty utility corners may develop control issues sooner. Separately, cleaner indoor air around compact laundry spaces can help reduce dust and stale odors, so explore a small air purifier for allergies if the laundry area shares space with living areas. That won’t repair a washer, but it can make the room less irritating while maintenance work is happening.
How To Repair Washer That Won’t Fill With Water Safely
A washer that still refuses to fill after the basic checks is waving a bigger flag. The easy stuff may be cleared, but how to repair washer that won’t fill with water still depends on tracing the fill system without rushing into guesswork. Safety comes first because water, electricity, and cramped laundry rooms make a messy trio. Pull the plug, shut off the valves, and give yourself enough room to work without yanking hoses or stressing wires.
Check Error Codes And Cycle Settings
Modern washers can be picky, and sometimes the machine isn’t broken in the way it first appears. A delayed fill may happen because the washer is checking the door lock, sensing load weight, or waiting for the correct cycle condition. Look at the display for an error code before unplugging the washer. That small code can point toward water supply trouble, pressure sensing issues, or door lock failure.
Cycle settings can also create confusion. Some eco cycles use less water and fill slowly by design, which can look wrong if you’re used to older washers. Still, a tub that stays bone dry is different from a machine that fills lightly. The key is separating normal low-water operation from a real no-fill failure.
Pause the cycle, cancel it, then try a basic rinse or quick wash setting. A simpler cycle removes extra variables and makes the fill behavior easier to read. If the washer fills on one setting but not another, the issue may involve cycle control instead of plumbing. That clue can save you from replacing good parts for no reason.
Keep the manual nearby if possible, even if it’s the digital version on your phone. Washer brands use different code systems, and guessing from memory can send repairs sideways. Match the code to the exact model number, not just the brand name. A similar-looking machine can use different diagnostic steps and different replacement parts.
Inspect Wiring Without Forcing Parts
Loose wiring can stop water from entering even when every hose and valve looks fine. Washers shake, vibrate, and live in humid spaces, so connectors can loosen over time. Check the wiring near the inlet valve, door switch, and pressure sensor with the power disconnected. A connector that looks slightly crooked may be the reason the machine never sends the fill signal.
Corrosion is another sneaky problem. A greenish or chalky residue around terminals can interrupt power flow enough to mimic a failed component. Don’t scrape wildly or soak electrical parts. Clean gently where appropriate, and replace damaged connectors if the metal looks weak or burnt.
Wire harnesses can rub against cabinet edges or moving parts. Over time, that friction can expose copper or break small wires inside the insulation. Follow the harness path by sight and touch, looking for pinched sections, brittle insulation, or heat marks. A washer that fills only sometimes may have a wiring issue that opens and closes with vibration.
A multimeter helps here, but patience helps more. Test continuity only after confirming the machine is unplugged and the correct terminals are identified. Random probing can damage connectors or create more confusion. Careful electrical checks keep the repair practical instead of turning it into a parts lottery.
Clean Sediment Before Replacing Parts
Hard water and old plumbing can pack a washer’s inlet system with grit. Sediment often builds slowly, so the machine may go from normal fills to weak trickles before finally stopping. Cleaning the inlet screens and flushing the hoses can restore water flow without touching the control board. That’s a nice win, especially when money is tight.
Rust flakes from pipes can clog the same screen again after cleaning. If the washer improves for a few days and then slows down, the supply line may still be feeding debris into the machine. Flush each hose into a bucket until the water runs clear. This step is boring, sure, but it protects the new inlet valve if you later replace one.
Mineral buildup can also reduce flow inside the valve body itself. Cleaning external screens won’t always fix an internal restriction. A valve that stays weak after hoses and screens are cleared may need replacement. That repair usually costs less than chasing a false control-board problem.
Large households can expose washer weaknesses faster because the machine runs more often. If constant laundry loads are pushing an older unit past its comfort zone, compare capacity needs before sinking money into repeated repairs; a high capacity washing machine can reduce crowding, repeated cycles, and strain on laundry routines. Still, a repair makes sense if the washer is otherwise solid and the fault is limited to the fill system.
Know When The Timer Is Suspect
Older washers often use a mechanical timer, and that part can wear down after years of turning through cycles. A bad timer may fail to send power to the inlet valve during the fill stage. The washer may advance oddly, stall in one position, or fill only when the knob is jiggled. Those symptoms point toward control timing rather than a simple water blockage.
Timer problems can feel inconsistent, which makes them frustrating. One load starts fine, then the next one sits dry and silent. If moving the timer knob slightly changes the washer’s behavior, pay attention. That little reaction may reveal worn contacts inside the timer.
Don’t replace the timer until the valve, lid switch, pressure switch, and wiring are checked. Timers can cost enough to make blind replacement painful. A careful test for voltage at the inlet valve during the fill stage gives better evidence. No voltage with all safety switches working can push the diagnosis toward the timer or main control.
Front-load and newer top-load machines usually rely on electronic boards instead of mechanical timers. That changes the repair path. Error codes, service mode tests, and sensor readings become more important. The repair still follows the same logic: confirm water supply, confirm valve function, then inspect the control side.
Prevent The Same No-Fill Problem
Once the washer fills again, prevention saves future headaches. Replace old hoses before they split, especially if they feel stiff or show bulges near the fittings. Keep the shutoff valves accessible instead of burying them behind storage bins. Fast access matters if a hose leaks or a fill problem returns.
Cleaning inlet screens once or twice a year can make a real difference in hard-water homes. Sediment doesn’t need much space to restrict water flow. A small clog can stretch fill times, leave detergent behind, and make cycles act weird. Simple maintenance protects the inlet valve and keeps the washer from working harder than it should.
Laundry room conditions also affect washer reliability. Poor ventilation, lint, cooking grease from nearby spaces, and humidity can leave grime on surfaces and controls. If the washer sits near a kitchen or utility area, improve airflow and reduce airborne buildup; for nearby cooking zones, compare under cabinet range hoods to help control steam and residue before it spreads. Cleaner surroundings won’t fix a broken valve, but they can reduce the crud that settles around appliances.
Use the right detergent amount, too. Too much soap can create residue that affects sensors, hoses, and tub pressure readings. High-efficiency washers need less detergent than many people pour by habit. Better dosing supports cleaner rinsing, fewer sensor issues, and fewer odd cycle interruptions.
Decide Between Repair And Replacement
Repair makes sense when the issue is small, clear, and affordable. A clogged screen, bad hose, loose connector, or failed inlet valve is usually worth fixing. These problems don’t always mean the washer is near the end of its life. A focused repair can restore normal filling without draining the budget.
Replacement starts to look smarter when several expensive parts fail close together. A washer with a failing control board, worn bearings, leaking tub seal, and fill issues may be asking for more than one repair. At that point, the no-fill problem is only part of the story. The bigger question is whether the machine still has enough reliable service life left.
Age matters, but usage matters more. A lightly used washer in a small household may deserve repair even after many years. A heavily used washer running daily loads may wear out faster, especially if it has been overloaded or poorly leveled. Look at the whole pattern, not just the latest failure.
Keep repair costs realistic. Spending a small amount on a valve or hose is different from paying for multiple major parts. A good rule is to avoid chasing one expensive repair after another without checking the washer’s overall condition. Practical decisions keep laundry stress, repair bills, and wasted time from piling up.


10 Best Quality Semi Automatic Washing Machine of 2026 For Leak-Free Laundry

11 Best Small Washer Machine of 2026 For Everyday Laundry

12 Best Vibration Pads For Washing Machine of 2026 To Stop Walking and Shaking

11 Best Selling Front Load Washing Machine of 2026 For Quiet Odor-Free Laundry

11 Best Washing Machine For King Size Bedding of 2026 To Prevent Cycle Errors

10 Best Small Front Loader Washing Machine of 2026 For Tight Closets

12 Best Side Load Washing Machine of 2026 For Low Vibration

11 Best Single Tub Washing Machine of 2026 For Apartments Without Hookups






