
How to Repair Washer Showing Error Code E1 or F9 Fast

How to repair washer showing error code e1 or f9 becomes a whole lot easier once the real problem stops hiding behind blinking lights and half-finished cycles. A washer that suddenly refuses to drain or keeps flashing cryptic codes can throw an entire routine off balance. One minute the load is running fine, then bam, water stays trapped inside the drum while the machine starts acting stubborn. That kind of frustration builds quickly, especially when damp clothes sit too long and the smell starts creeping in.
Most E1 or F9 washer errors point toward drainage trouble, pressure sensor confusion, clogged filters, kinked hoses, or even small blockages hiding deep inside the drain pump. Tiny things often create massive headaches. Coins, lint buildup, pet hair, or detergent residue can quietly choke the system until the washer finally waves a white flag. A lot of people assume the control board has failed right away, but honestly, simpler issues usually trigger these codes first.
Drain pump cleaning plays a bigger role than many expect. A partially blocked filter may still let some water escape, though not fast enough for the washer’s timing system. That delay tricks the machine into thinking something serious has failed. Then the error code pops up over and over again. Checking the drain hose behind the appliance also matters because bends, pinches, or improper installation can restrict water flow without looking obvious at first glance.
Pressure switches and water level sensors create another layer of trouble. Moisture buildup or soap residue around these components can cause inaccurate readings, which leads the washer to panic midway through a cycle. Some washers stop spinning entirely while others lock the door and refuse to continue. Frustrating? Absolutely. Still, many of these issues can be handled with patience, basic tools, and a little troubleshooting confidence.
How to repair washer showing error code e1 or f9 also involves paying attention to warning signs before the machine fully shuts down. Slow draining, gurgling sounds, vibration during spin cycles, or leftover water at the bottom of the tub usually appear before the actual error code arrives. Catching those clues early can prevent bigger repair bills later. Ignoring them tends to backfire because small drainage restrictions often become complete blockages.
Electrical resets sometimes help too, oddly enough. Unplugging the washer for several minutes allows the control system to clear temporary glitches that may have triggered the code. That trick will not magically repair broken parts, of course, but it can help separate sensor confusion from mechanical failure. If the code disappears after a reset yet returns later, the machine is practically begging for a closer inspection.
Washer maintenance habits make a surprising difference over time. Excess detergent creates residue buildup inside hoses and filters, while overloaded drums strain the drainage system harder than necessary. Small habits add up. A washer that receives occasional cleaning and airflow around the drain system usually runs smoother and throws fewer error codes down the road.

- TAR Score9.6
TAR Score is a ranking system developed by TopAppliancesReviews.com. TAR score has no relationship or impact from any manufacturers or sales agent websites. Learn more
- BrandTide

- TAR Score9.6
TAR Score is a ranking system developed by TopAppliancesReviews.com. TAR score has no relationship or impact from any manufacturers or sales agent websites. Learn more
- BrandTide

- TAR Score9.6
TAR Score is a ranking system developed by TopAppliancesReviews.com. TAR score has no relationship or impact from any manufacturers or sales agent websites. Learn more
- BrandTide

- TAR Score9.6
TAR Score is a ranking system developed by TopAppliancesReviews.com. TAR score has no relationship or impact from any manufacturers or sales agent websites. Learn more
- BrandTide

- TAR Score9.6
TAR Score is a ranking system developed by TopAppliancesReviews.com. TAR score has no relationship or impact from any manufacturers or sales agent websites. Learn more
- BrandGain

- TAR Score9.6
TAR Score is a ranking system developed by TopAppliancesReviews.com. TAR score has no relationship or impact from any manufacturers or sales agent websites. Learn more
- BrandTide

- TAR Score9.6
TAR Score is a ranking system developed by TopAppliancesReviews.com. TAR score has no relationship or impact from any manufacturers or sales agent websites. Learn more
- BrandTYLER CANDLE COMPANY

- TAR Score9.4
TAR Score is a ranking system developed by TopAppliancesReviews.com. TAR score has no relationship or impact from any manufacturers or sales agent websites. Learn more
- BrandArm & Hammer
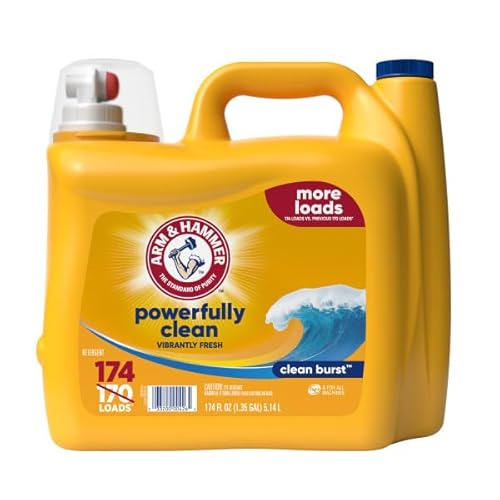
- TAR Score9.4
TAR Score is a ranking system developed by TopAppliancesReviews.com. TAR score has no relationship or impact from any manufacturers or sales agent websites. Learn more
- BrandArm & Hammer
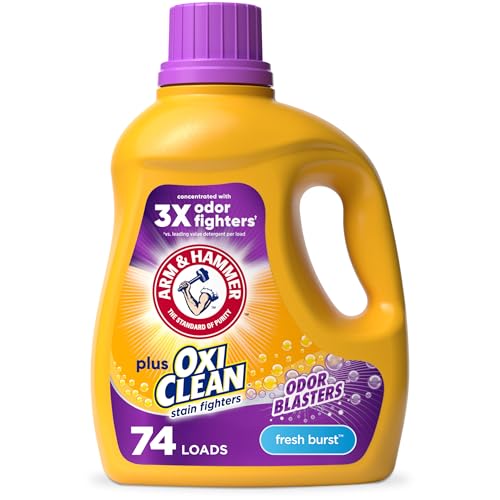
- TAR Score9.4
TAR Score is a ranking system developed by TopAppliancesReviews.com. TAR score has no relationship or impact from any manufacturers or sales agent websites. Learn more
- BrandArm & Hammer
Last update on 2026-07-24 / Affiliate links / Images, Product Titles, and Product Highlights from Amazon Product Advertising API
How To Repair Washer Showing Error Code E1 Or F9
A washer that stops with wet clothes trapped inside feels like a small household ambush. The cycle starts normally, the drum tumbles, then the machine quits and flashes a code like it’s speaking in riddles. That’s where how to repair washer showing error code e1 or f9 becomes more than a search phrase because the real issue usually sits inside the drain path, pump filter, or water level sensing system. Slow water removal can fool the control board into thinking the washer failed, even when the fix is simpler than a full part replacement.
Start With The Drain Problem
E1 and F9 washer codes usually point toward a drain failure, a long drain delay, or a control system that can’t confirm the water has left the tub. The washer expects water to move out within a certain window, and if that doesn’t happen, the machine stops to protect itself. That pause feels dramatic, but it’s often a sign of restricted water flow rather than a dead washer. The trick is to follow the water path before blaming the electronics.
Standing water in the drum gives the first clue. If clothes come out soaked, the pump hums without draining, or the door stays locked after the cycle, the washer may be struggling to clear water fast enough. A small clog can slow drainage just enough to trigger the error code. Coins, hair pins, lint clumps, broken zipper pulls, and even soft detergent sludge can turn into a nasty little traffic jam.
Start with the obvious stuff because simple checks save time and keep repair costs from snowballing. Make sure the drain hose isn’t crushed behind the washer, pushed too far into the standpipe, or bent sharply against the wall. A hose that looks fine from the front can still be pinched where nobody sees it. Pull the washer forward carefully and inspect the full length of the hose before opening panels.
Drain height also matters more than most people expect. If the hose sits too low, water may siphon out at the wrong time, and if it sits too high, the pump has to work harder than it should. The washer needs a clean path and the right drain setup to finish cycles without throwing codes. A quick hose adjustment can sometimes clear repeated E1 or F9 errors without replacing a single part.
Check The Pump Filter Without Guessing
The drain pump filter is the usual suspect, and honestly, it earns that reputation. Many front-load washers have a small access panel near the lower front corner, while some top-load machines hide the filter deeper inside. Before opening anything, unplug the washer and place towels nearby because trapped water can rush out fast. A shallow pan helps catch the mess before it spreads across the floor.
Turn the filter slowly and let water drain in stages. Rushing this step can turn a manageable repair into a soggy headache. Once the filter comes out, look for lint buildup, coins, buttons, and rubbery detergent residue packed around the screen. Even a small blockage can reduce pump flow enough to make the washer think the drain system has failed.
Clean the filter with warm water and wipe the filter housing before reinstalling it. Avoid forcing the cap back into place because cross-threading can create leaks later. The seal should sit flat, and the cap should tighten firmly without feeling crooked. This small part is boring, sure, but a clean pump filter can bring a stubborn washer back to life.
Some washers don’t have an easy front filter, which makes the job less friendly. In that case, the pump may need to be reached from the rear or bottom panel. If the machine is heavy, stacked, or wedged into a tight laundry closet, don’t muscle it alone. Safety beats pride, especially with water, electricity, and a bulky appliance all in the same cramped corner.
Read The Sounds Before Replacing Parts
Washer sounds tell a story before tools even come out. A steady hum with no draining often means the pump is trying to run but something blocks the impeller. A clicking sound may point to debris hitting the pump blades. Silence during the drain portion can suggest a wiring issue, failed pump motor, or control signal problem.
Listen during the drain stage after cleaning the filter. If the pump sounds smoother and water moves quickly, the blockage was probably the main problem. If the error returns, the washer may still have debris deeper in the hose or pump body. That’s where step-by-step troubleshooting matters because guessing can burn money fast.
A weak pump can still make noise without moving enough water. That’s the sneaky part. The motor may spin, but worn blades or a tired internal mechanism can’t push water through the hose at the right speed. Repeated long-drain errors after filter cleaning often point toward a pump that’s fading rather than fully dead.
Use a flashlight to inspect the pump impeller if the filter opening allows it. The impeller should move with slight resistance, not wobble wildly or feel jammed solid. Remove visible debris carefully and avoid poking hard plastic blades with sharp tools. A damaged impeller can turn a basic clog into a real pump replacement job.
To reduce detergent buildup that can clog washer parts later, switch to measured detergent use and compare a washer-friendly option like liquid detergent for top loading washing machine for cleaner rinsing habits.
Detergent overload creates more trouble than people want to admit. Too much soap leaves residue inside hoses, pressure tubes, and pump chambers. That residue catches lint, pet hair, and fabric fibers until the drain path gets gummy. Using less detergent can feel wrong at first, but modern washers don’t need a heavy pour to clean regular laundry.
Inspect The Hose And Standpipe
The drain hose deserves a close look even after the pump filter is clean. A washer can throw the same code if water leaves the pump but gets trapped before reaching the household drain. Pull the hose loose from the standpipe and check for lint plugs, soft clogs, or a crushed rubber section. Sometimes the blockage sits right at the hose end, hiding in plain sight.
Run water through the hose into a bucket if it’s removable and safe to handle. A strong flow means the hose is probably open. A weak trickle or sudden backup means the hose needs cleaning or replacement. Don’t ignore partial blockages because they can pass a little water while still triggering long-drain errors during full loads.
The standpipe can cause its own drama too. If the home drain is slow, the washer may pump water out, then get splashback, gurgling, or overflow. That’s not always a washer failure. A clogged household drain can mimic a washer error because the machine can’t complete drainage cleanly.
Watch the standpipe during a drain cycle if it’s safe and visible. Bubbling, overflow, or sewer-like odors suggest the plumbing needs attention. The washer may be doing its job while the wall drain fails to keep up. Fixing home drainage restrictions protects the washer pump from unnecessary strain.
Separate Sensor Trouble From Real Drain Failure
Water level sensors can trigger E1 or F9 style problems even after the tub drains. The washer relies on pressure readings to know whether water remains inside. If the pressure hose is blocked with soap scum or moisture, the sensor may report water that isn’t there. That creates a maddening loop where the machine keeps complaining after the obvious clog is gone.
A thin pressure tube usually runs from the tub area to the sensor. If that tube gets pinched, cracked, or clogged, the washer receives bad information. Cleaning or reseating the tube can restore accurate readings. This step matters because replacing the pump won’t help if the real issue is false water level detection.
Unplug the washer before checking any internal sensor tubing. Remove access panels only if the machine design allows it and you’re comfortable working around appliance wiring. Look for loose connections, dampness, residue, or tiny cracks near the tube ends. A careful visual check can reveal sensor-related faults without jumping straight to expensive parts.
After inspection, reset the washer by unplugging it for several minutes. That pause lets the control board clear temporary fault memory. If the washer drains normally afterward and the code stays gone, the system may have been reacting to a temporary pressure or flow delay. If the code returns, the problem likely needs deeper attention.
For bigger cleaning setups outside the laundry room, compare equipment needs separately with commercial car washing machine options instead of forcing a laundry washer to handle jobs it was never built for.
Load habits can also confuse the washer’s drain and spin timing. Heavy blankets, waterlogged towels, and overloaded drums hold more water than the pump can clear comfortably. The washer may pause, rebalance, drain again, then finally throw an error if the timing drags too long. Smaller loads give the machine a fair shot, especially during troubleshooting.
Handle Reset Steps The Smart Way
A washer reset can help, but it shouldn’t become the whole repair plan. Unplugging the machine for five to ten minutes may clear a temporary glitch or stuck control response. That’s useful after cleaning the filter, straightening the drain hose, or fixing a sensor tube. A reset before any inspection, though, can hide the clue without solving the cause.
Run a rinse and drain cycle after each repair step. Don’t stack five changes together and then test, because you won’t know what actually worked. Start with the filter, then the hose, then the pump area, then the sensor path. This order keeps the process grounded in real symptoms instead of repair roulette.
Watch how the washer behaves during the test cycle. Fast draining, smoother pump sound, and no leftover water are good signs. Slow draining, repeated pauses, or a returning code means the restriction remains or the pump is weak. The machine is giving feedback, even if it’s not exactly polite about it.
Keep the laundry area dry during testing because water around the washer can create slipping hazards and electrical risk. Wipe up spills right away and keep towels ready near the access panel. A careful repair setup feels less exciting, but it prevents side problems. Safe troubleshooting beats a rushed fix every single time.
To keep dusty lint, detergent scent, and damp laundry-room air from spreading into a nearby hobby space, improve the room separately with an air purifier for artist studio instead of expecting washer repair to solve air quality issues.
How To Repair Washer Showing Error Code E1 Or F9
After the first round of checks, the washer may still act stubborn, and yep, that’s where deeper troubleshooting earns its keep. How to repair washer showing error code e1 or f9 often comes down to tracing what happens after water leaves the tub, how the pump responds, and whether the control system receives the right signals. A machine can look completely broken while one small restriction, loose wire, or sensor mismatch keeps tripping the cycle. Slow down, keep the floor dry, and follow the clues instead of throwing parts at the problem.
Test The Drain Pump More Carefully
The drain pump needs more than a quick glance because it can fail in sneaky ways. A pump may hum, vibrate, or make a faint buzzing sound and still move very little water. That makes the washer think the tub is still full, which triggers the same E1 or F9 error code again. A working pump should move water with a steady push, not a lazy trickle.
Unplug the washer before touching any pump wiring or opening lower panels. Look around the pump body for leaks, burn marks, loose connectors, or signs that water has reached the electrical plug. A damp connector can cause erratic behavior even if the pump itself hasn’t fully failed. That kind of fault can come and go, which makes it extra annoying during normal laundry days.
Check the pump impeller through the filter opening or after removing the pump, depending on the washer design. The impeller should spin with light resistance and shouldn’t rattle like a loose bottle cap. If it feels jammed, cracked, or wobbly, the pump may not create enough force to clear water. A damaged impeller is a clear weak point, not just a cosmetic problem.
Some washers throw the code only with heavier loads because the pump can’t keep up when water volume rises. That’s a useful clue. Small test loads may pass while towels or blankets bring the error right back. In that situation, pump strength matters more than basic power because the motor must handle real laundry conditions, not just an empty rinse cycle.
Look For Wiring And Control Clues
Electrical connections deserve attention after the drain path checks out. A loose pump connector, corroded terminal, or pinched harness can interrupt power during the drain cycle. The washer may start draining, stop suddenly, then flash the error as if the pump failed. In reality, the pump might be fine while the signal path drops out.
Inspect visible wiring with the washer unplugged and the access panel removed. Look for rubbed insulation, loose plugs, brittle clips, or wire sections pressed against sharp metal edges. Laundry appliances vibrate for years, so small movement can slowly wear a harness down. That’s especially true near the pump, motor, and lower frame where moisture and vibration meet.
Push connectors firmly back into place without yanking the wires. A connector should seat cleanly and shouldn’t wiggle loosely after installation. If corrosion appears green, white, or crusty, the connection may need cleaning or replacement. Bad contact can mimic control board failure, which is why wiring checks come before expensive board decisions.
Control boards can fail, but they shouldn’t be the first suspect. A board replacement costs more and may not fix anything if the pump, hose, pressure system, or wiring caused the code. Follow the cheaper and more common causes first. That practical order keeps the repair grounded and protects the budget from a wild-goose chase.
Check Door Lock And Cycle Behavior
Door lock behavior can reveal whether the washer is stopping because of water level, drain timing, or safety logic. Many washers keep the door locked if water remains inside the drum. That lockout protects the floor from a sudden spill, but it also makes the machine feel trapped. If the door stays locked after an error, assume standing water may still be part of the problem.
Listen for the lock click during the failed cycle. A normal click followed by no drain action may point toward the pump circuit or control signal. Repeated clicking can suggest the washer is trying to move forward but can’t confirm safe conditions. These sounds help separate a drain fault from a latch issue.
Don’t force the door open. Pulling hard on the handle can break the latch, bend the striker, or create a second repair that didn’t need to exist. Use the emergency drain tube or manual release only if the washer manual allows it. A calm approach saves the door lock assembly from unnecessary damage.
For homes where bending, kneeling, or pulling heavy wet laundry creates extra strain, choosing a more accessible setup can matter long term. Compare practical laundry features through a washing machine for older person guide before replacing a washer that keeps creating hard-to-handle repair moments.
Cycle selection can also affect how often the code appears. Bulky, delicate, and quick wash cycles may drain differently depending on the model. If one cycle fails repeatedly while another drains fine, the washer may be reacting to load balance, water volume, or programmed timing. That clue helps narrow the issue instead of treating every failure like the same fault.
Clean The Pressure Tube And Sensor Path
The pressure tube acts like the washer’s water-level messenger. If that little tube gets clogged with suds, lint sludge, or trapped moisture, the control board may receive the wrong reading. The washer may already be empty while the sensor still says water remains. That mismatch can trigger an E1 or F9 warning even after the drain system looks clear.
Find the pressure tube by checking the service diagram or tracing the small hose from the tub area to the water level sensor. Unplug the washer before removing any panel or touching internal parts. The tube should sit snugly on both ends, without cracks, kinks, or soft swollen spots. A loose tube can cause false readings that interrupt the cycle.
Remove the tube only if the design allows easy access and you can reinstall it correctly. Blow gently through it to check for restriction, but don’t blast it with heavy pressure that might damage the sensor. Warm water can help clear residue if the tube is removed from the machine completely. Let it dry before reconnecting because trapped water can create another bad reading.
The sensor itself may fail, though clogged tubing is usually easier to fix first. A faulty sensor can report the wrong water level even with a clean tube. If the washer drains fully, the tube is clear, and the code still returns, the water level sensor becomes a stronger suspect. At that point, model-specific testing matters because resistance values and diagnostic modes vary by brand.
Prevent The Code From Coming Back
Prevention starts with load size. Overstuffed drums hold water unevenly, strain the pump, and leave clothes too heavy during spin. A washer needs space for water to move through fabric and exit the tub cleanly. Packing it tight may save one trip today, but it can punish the drain system later.
Use detergent with a lighter hand, especially in high-efficiency washers. Too much soap creates foam, residue, and sticky buildup inside hoses and sensor tubes. The washer may drain water but still struggle with suds, which confuses timing and level readings. Less detergent often means cleaner rinsing, fewer odors, and fewer long-drain problems.
Clean the pump filter on a routine schedule if the machine has an accessible one. Households with pets, long hair, kids’ pockets, or frequent towel loads may need filter checks more often. Keep a small container near the laundry area for coins and pocket junk before clothes go into the drum. That tiny habit protects the pump impeller from the usual suspects.
Laundry rooms also need airflow because damp corners, lint, and detergent scent can make the space feel stale. If the washer sits near a kitchen or utility area with cooking moisture, compare ventilation ideas with 42 inch under cabinet range hoods instead of letting heat and humidity linger around nearby rooms. Better air movement won’t fix a drain code, but it helps reduce the damp conditions that make appliance areas unpleasant.
Know When Repair Stops Making Sense
Repeated error codes after filter cleaning, hose checks, pump inspection, and sensor tube cleaning deserve a more serious look. A washer that fails every few loads may have a weak pump, damaged wiring, faulty pressure sensor, or control board issue. Replacing random parts without testing gets expensive fast. A measured repair plan keeps the decision practical instead of emotional.
Age matters too. An older washer with rust around the base, recurring leaks, loud bearings, and repeated drain faults may not justify several separate repairs. A single pump replacement can make sense, but stacking pump, sensor, latch, and board costs can cross the line. The smartest choice depends on repair cost, machine condition, and how often the problem interrupts normal use.
Call a technician if the washer trips breakers, smells burnt, leaks near wiring, or shows corrosion around electrical connectors. Those symptoms move beyond basic maintenance. Water and electricity don’t leave much room for bravado. Professional testing can confirm whether the control board, pump circuit, or pressure sensor has failed before money goes into parts.
Keep notes while troubleshooting because details help. Write down when the code appears, what cycle was running, whether water remained inside, and what sounds the pump made. Those observations give a repair tech useful evidence and can shorten the diagnostic process. Clear symptoms beat vague guesses, especially with how to repair washer showing error code e1 or f9 problems that can come from several connected parts.


10 Best Quality Semi Automatic Washing Machine of 2026 For Leak-Free Laundry

11 Best Small Washer Machine of 2026 For Everyday Laundry

12 Best Vibration Pads For Washing Machine of 2026 To Stop Walking and Shaking

11 Best Selling Front Load Washing Machine of 2026 For Quiet Odor-Free Laundry

11 Best Washing Machine For King Size Bedding of 2026 To Prevent Cycle Errors

10 Best Small Front Loader Washing Machine of 2026 For Tight Closets

12 Best Side Load Washing Machine of 2026 For Low Vibration

11 Best Single Tub Washing Machine of 2026 For Apartments Without Hookups






