
How to Repair Washer Lid Lock Mechanism Fast

How to repair washer lid lock mechanism keeps popping up for one simple reason: few things feel more irritating than a washer that refuses to start right when laundry piles up. One minute the machine seems fine, then suddenly the lid lock clicks endlessly, flashes an error, or freezes mid-cycle like it’s got a mind of its own. Frustration builds fast, especially after restarting the washer three times and hearing the same stubborn clicking noise again. Small mechanical issues inside the lock assembly often trigger these headaches, and ignoring them usually turns a minor repair into a much bigger mess.
Loose wiring, detergent buildup, damaged switches, or worn plastic components can quietly create problems long before the washer fully stops working. That’s why understanding washer lid lock mechanism problems matters more than many people realize. A faulty lock doesn’t just interrupt spin cycles. It can also leave clothes soaking wet, trap laundry inside the drum, or trigger draining issues that spiral into extra repairs. Plenty of homeowners assume the entire appliance is failing, but honestly, the lock system itself is frequently the real culprit.
Repairing the issue doesn’t always require expensive tools or complicated electrical experience either. Many washer models use fairly accessible lid lock assemblies that can be inspected with basic household tools and a little patience. A worn latch, misaligned strike plate, or disconnected harness can sometimes be corrected in less time than a trip to the appliance store. Still, rushing through the process usually backfires. Careful inspection helps avoid snapping plastic clips, damaging control boards, or replacing parts that weren’t causing the problem in the first place.
Noise patterns also reveal a lot. Repeated clicking without locking often points toward electrical failure, while a lid that locks but won’t release may signal a stuck actuator or control issue. These details matter because every symptom changes the repair path. Paying attention to how the machine behaves before tearing it apart saves time, money, and a fair amount of aggravation. Also, some washer brands hide screws beneath trim pieces or under hinge covers, so slowing down during disassembly prevents unnecessary damage.
How to repair washer lid lock mechanism solutions become much easier once the underlying problem is identified clearly. A simple cleaning may solve intermittent locking problems caused by grime or moisture buildup around the switch area. Other cases may require replacing the entire lock assembly if internal contacts have burned out or cracked over time. Either way, understanding the signs before replacing random parts keeps repairs practical instead of turning into a guessing game. Washing machines already create enough stress during breakdowns, so fixing the actual issue the first time makes a huge difference.

- TAR Score10.0
TAR Score is a ranking system developed by TopAppliancesReviews.com. TAR score has no relationship or impact from any manufacturers or sales agent websites. Learn more
- BrandEarthtec

- TAR Score9.6
TAR Score is a ranking system developed by TopAppliancesReviews.com. TAR score has no relationship or impact from any manufacturers or sales agent websites. Learn more
- BrandGREALTH

- TAR Score9.4
TAR Score is a ranking system developed by TopAppliancesReviews.com. TAR score has no relationship or impact from any manufacturers or sales agent websites. Learn more
- BrandKscjdg
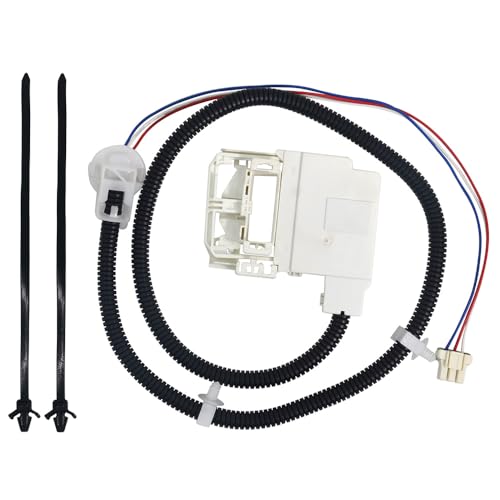
- TAR Score8.8
TAR Score is a ranking system developed by TopAppliancesReviews.com. TAR score has no relationship or impact from any manufacturers or sales agent websites. Learn more
- BrandGYOFFULL

- TAR Score8.8
TAR Score is a ranking system developed by TopAppliancesReviews.com. TAR score has no relationship or impact from any manufacturers or sales agent websites. Learn more
- BrandIdelen

- TAR Score8.8
TAR Score is a ranking system developed by TopAppliancesReviews.com. TAR score has no relationship or impact from any manufacturers or sales agent websites. Learn more
- BrandCykemo

- TAR Score8.6
TAR Score is a ranking system developed by TopAppliancesReviews.com. TAR score has no relationship or impact from any manufacturers or sales agent websites. Learn more
- BrandHPUY

- TAR Score8.2
TAR Score is a ranking system developed by TopAppliancesReviews.com. TAR score has no relationship or impact from any manufacturers or sales agent websites. Learn more
- BrandAibinhe
Last update on 2026-07-22 / Affiliate links / Images, Product Titles, and Product Highlights from Amazon Product Advertising API
How To Repair Washer Lid Lock Mechanism
A washer that clicks, flashes, and refuses to start can turn a normal laundry day into a real pain in the neck. The lid looks closed, the load is ready, and yet the machine sits there like it’s waiting for a secret handshake. That’s where how to repair washer lid lock mechanism becomes more than a handy phrase because the lock affects filling, spinning, draining, and safe cycle movement. A careful repair can save unnecessary part swaps, prevent wet clothes trapped in the tub, and keep the washer from quitting halfway through the job.
Lid Lock Repair Basics
A washer lid lock is not just a plastic latch that keeps the top shut. It’s a safety switch, a cycle signal, and a small gatekeeper that tells the control board whether the machine can spin. If the lock fails, the washer may hum, pause, click, flash an error code, or drain without moving into the spin cycle. That makes the problem feel bigger than it really is, especially after the same load has been restarted three or four times.
The first smart move is cutting power before touching anything inside the washer. Pull the plug, wait a few minutes, and let the control board reset before opening panels or testing wires. This protects both the machine and your hands because the lid lock area can include live wiring, sharp cabinet edges, and tight plastic clips. Rushing here is where many people break trim pieces that were never broken in the first place.
Most lid lock problems fall into a few buckets: mechanical misalignment, dirty switch contacts, loose wiring, or a worn internal actuator. A lid strike that no longer lines up can fool the washer into thinking the lid is open. Detergent residue, lint, and moisture can also collect near the latch opening and block smooth movement. Little things, oddly enough, can create big washer drama.
A basic inspection should start with the lid strike, the lock opening, and the wiring harness connection beneath the top panel. Look for cracked plastic, bent metal, loose screws, pinched wires, and signs of heat near the connector. A small flashlight helps because washer lid lock mechanism parts often sit in shadow near the underside of the top frame. If something looks burned, melted, or brittle, cleaning alone probably won’t cut it.
Spot The Real Lock Problem
Symptoms tell a story, and the washer usually drops clues before it gives up completely. Repeated clicking without engagement often points to a weak lock actuator or a latch that can’t seat correctly. A lid that locks but won’t release may suggest a stuck switch, a paused control board, or a cycle interruption. A washer that fills but won’t spin often points back to the lock signal because the machine won’t allow high-speed movement unless the lid is confirmed shut.
Error codes can help, but they don’t always tell the whole truth. Different brands use different code language, and one lid lock code may also appear during wiring faults or control board confusion. That’s why visual inspection matters before ordering parts. A loose harness can mimic a failed lock, and replacing the assembly without checking the connector can feel like throwing money into the wind.
Try opening and closing the lid slowly while watching the strike enter the latch slot. The movement should feel clean, centered, and firm. If the strike rubs the side, misses the opening, or feels wobbly, the issue may be alignment instead of electrical failure. Tightening loose hinge screws or replacing a damaged strike can sometimes restore normal locking without touching the internal switch.
Cleaning also deserves a fair shot, especially on washers that live in humid laundry rooms or garages. Use a dry cloth, cotton swab, and a small amount of mild cleaner on the latch area, then let it dry fully before reconnecting power. Avoid flooding the switch with liquid because moisture can make the problem worse. For broader washer care, reduce residue buildup with a practical routine and compare best descaler washing machine options that help keep mineral deposits from sneaking into other trouble spots.
Open The Washer Without Breaking Clips
Many top-load washers hide lid lock screws under the top panel, control trim, or rear hinge area. The exact access point depends on the model, but the repair usually starts by removing screws at the back or releasing spring clips near the front seam. Keep every screw in a cup or small tray because lost screws have a funny way of turning a simple repair into a half-day scavenger hunt. Slow hands beat brute force here.
Plastic clips are the part most people underestimate. They may look sturdy, but older clips can become brittle from heat, vibration, and detergent exposure. Use a putty knife or flat tool gently, and avoid twisting too hard against painted surfaces. A scratched top panel won’t stop the washer from running, but it still stings after fixing the actual problem.
Once the top panel lifts, support it instead of letting it hang from wires or hinges. The lid lock wiring harness usually plugs into a connector near the lock body or routes toward the control board. Check for loose plugs, corrosion, and wires that look pinched between metal panels. A connector that feels half-seated may be the whole reason the washer keeps refusing to lock.
Take a photo before unplugging anything. That one habit saves headaches during reassembly because similar connectors can look confusing from a bad angle. Marking the wire route with tape also helps keep the harness away from moving parts. Neat wiring matters because a harness rubbing against the cabinet can fail again later, even after a fresh lock assembly goes in.
Test Before Replacing Parts
Testing prevents guesswork, and guesswork gets expensive fast. A multimeter can check continuity on some lid lock switches, though the exact test points vary by washer design. The goal is simple: confirm whether the switch changes state when the latch engages. If the reading never changes, the lock switch may be dead, stuck, or mechanically blocked.
Not every lid lock can be tested the same way because some modern locks include multiple circuits. One part may detect lid position while another controls the locking actuator. That setup means a lock can partly work and still fail during spin. A washer might click, lock briefly, then unlock again because the control board never receives the right confirmation signal.
Inspect the old lock assembly before tossing it aside. Burn marks near terminals, cracked housings, broken tabs, or a latch that sticks by hand all point toward replacement. A lock that moves freely and looks clean may deserve a wiring check before buying a new part. This keeps the repair grounded instead of turning into a parts cannon situation.
Front-load machines work differently because the door lock carries extra responsibility during high-speed spins and water sealing. Still, the same logic applies: check the latch, harness, and lock signal before blaming the control board. For homes comparing machines after repeated repair headaches, review capacity, layout, and maintenance tradeoffs through best 5 front load washing machine before jumping into a replacement. A new washer costs real money, so repair confidence matters first.
Replace The Lid Lock Safely
A replacement lid lock should match the washer model number, not just the brand name. Similar-looking parts can have different connectors, mounting holes, or switch logic. Check the model tag under the lid, behind the control panel, or along the back edge before ordering. The right part prevents fit problems, signal errors, and wasted repair time.
Remove the old lock by unplugging the harness and backing out the mounting screws. Some locks also include a cover plate or wire retainer that needs to be transferred to the new assembly. Set the parts side by side before installation and compare latch shape, screw spacing, and plug style. A tiny difference in the plug can stop the washer from recognizing the lock at all.
Install the new assembly without overtightening the screws. Tight is good, but crushing plastic mounting ears can create alignment problems right away. Seat the harness firmly until it clicks, then route the wires along the original path. Good wire routing protects against vibration damage during spin cycles, which is where sloppy repairs often show their weak spots.
Before fully closing the washer, test the lid movement by hand. The strike should enter the lock cleanly without scraping, bending, or forcing the lid downward. Restore power, start a short cycle, and listen for a single firm lock sound rather than repeated clicking. If the washer locks, fills, and moves into the next cycle normally, the washer lid lock repair is likely on the right track.
Prevent Repeat Lock Failures
Prevention starts with gentler lid habits. Slamming the lid may feel harmless, but over time it can loosen hinges, bend the strike, and stress the lock body. Close the lid firmly but without dropping it from the top position. That small habit protects alignment, plastic latch parts, and the washer’s safety circuit.
Keep the lid lock area dry and clean. Detergent splashes, softener residue, pet hair, and lint can build around the latch opening, especially in busy laundry spaces. Wipe the rim weekly and leave the lid open after heavy loads so moisture can escape. A dry lock area is less likely to develop sticky movement or contact problems.
Washer location can also affect lock life. A machine sitting off-level shakes harder, and that vibration can loosen screws or stress wiring near the lid switch. Adjust the feet until the washer sits stable on all corners. If the laundry room feels dusty, damp, or carries musty air, improve airflow and consider broader air control with best large area air purifier for spaces where lint, odors, and humidity tend to hang around.
Watch for early warning signs instead of waiting for total failure. A delayed lock, random clicking, flashing lid light, or occasional spin refusal deserves attention before laundry gets trapped inside. Early repairs are usually cleaner, cheaper, and less annoying. A washer that locks smoothly is boring in the best possible way, and boring is exactly what laundry equipment should be.
How To Repair Washer Lid Lock Mechanism
A stubborn washer can make the second half of the repair feel like a guessing game, especially after the lid lock has already been cleaned, checked, or replaced. The trick is to move from obvious fixes into deeper troubleshooting without jumping straight to the control board. A clear process keeps how to repair washer lid lock mechanism practical, calm, and less expensive than random part swapping.
Check Wiring And Control Signals
Wiring problems can hide in plain sight, especially near a washer lid that gets opened, closed, and bumped every week. A lid lock harness may look fine from the outside while one small wire sits loose inside the connector. Push each plug firmly into place and check for burn marks, green corrosion, or brittle insulation. A weak connection can act exactly like a failed lid lock.
Control signals matter because the washer needs confirmation before it allows spin speed. The lock may click, but the board still might not receive the right signal from the switch. That mismatch can leave the cycle stuck between sensing and spinning. Careful testing helps separate a bad lock assembly from a communication problem.
A multimeter can help, but patience matters more than fancy tools. Test only with the washer unplugged unless the service manual clearly calls for live voltage checks. Many home repairs go sideways because someone probes wires without knowing which circuit is active. Safety wins every time, especially around electrical components and damp laundry spaces.
Heavy loads can also shake wiring loose over time. Large blankets, work clothes, and bulky towels create more vibration than small everyday loads. For households that regularly wash dense laundry, Compare practical capacity choices through best washing machine 300 pounds before blaming every future failure on the lid lock alone. A machine that fits the workload puts less stress on hinges, latches, and suspension parts.
Reset The Washer The Right Way
A reset won’t fix broken plastic or burned contacts, but it can clear a confused control board. Unplug the washer for several minutes, then plug it back in and run a short cycle. Some models also require a lid-open and lid-close sequence after power returns. This simple step can restore normal behavior after a power interruption or failed cycle attempt.
Don’t keep resetting the machine over and over if the lock keeps clicking. Repeated resets can hide the real issue and waste time. One or two attempts are enough to tell whether the board simply needed to clear an error. After that, the repair should move back toward inspection, testing, and part condition.
Error lights often return quickly after a reset if the lock cannot engage. That fast return is useful because it confirms the washer still sees a lid safety fault. Write down any blinking pattern or displayed code before unplugging the machine again. Those details can point toward lid switch failure, actuator trouble, or wiring issues.
Some washers store old fault codes even after the obvious problem is fixed. Running a diagnostic cycle may clear the code and confirm the new lock is working. The steps vary by brand, so the model number matters. Guessing button sequences from a different washer can create more confusion than clarity.
Fix Alignment Before Buying More Parts
Alignment issues are sneaky because the washer may look completely normal from the outside. The lid closes, the latch touches the slot, and nothing seems cracked at first glance. Still, a slightly bent strike can prevent the lock from fully engaging. That tiny mismatch can trigger constant clicking, cycle pauses, or a lid lock error.
Check the lid hinges before adjusting the latch. Loose hinge screws allow the lid to sit unevenly, especially on older top-load washers. Tighten the screws gently and test the lid movement again. A lid that sits squarely gives the lock mechanism a fair chance to work.
The strike should enter the latch opening without rubbing the sides. If it scrapes, bends, or needs pressure to lock, the washer may think the lid is unsafe. Replace cracked strikes instead of trying to glue them. Glue rarely holds up against vibration, heat, and repeated lid movement.
Cabinet damage can also throw off alignment. A washer that has been moved, tilted, or squeezed into a tight laundry closet may have a slightly shifted top panel. Loosen the related screws, square the panel carefully, and retighten everything evenly. Small adjustments can bring the lid lock mechanism back into line without replacing another part.
Know What Not To Bypass
Bypassing a lid lock may sound tempting after a long day, but it’s a bad road to walk down. The lock exists because a spinning washer can cause real injury if the lid opens at speed. Defeating the switch also creates unpredictable behavior in the control system. A proper repair protects safety, cycle timing, and the machine’s normal operation.
A washer that runs only with a bypass is still broken. The underlying issue may be a damaged latch, failed switch, loose harness, or weak board signal. Ignoring that problem can lead to more faults later. Fixing the actual cause keeps the repair clean instead of turning the washer into a risky workaround.
Moisture and lint can make these problems worse in cramped laundry rooms. Poor airflow around the washer lets humidity linger near switches, connectors, and painted metal edges. To pull odors and steam away from nearby work areas, Upgrade kitchen and utility ventilation with best range hoods under cabinet if the laundry space shares air with cooking zones. Cleaner airflow supports lower moisture buildup around appliances.
A safe washer repair should leave every factory safety feature working as intended. The lid should lock during spin, unlock after the cycle, and respond normally to pause commands. Anything else means more troubleshooting is needed. A machine that behaves predictably is worth far more than a shortcut that saves a few minutes.
Test The Repair With Real Loads
A quick empty cycle is useful, but it doesn’t prove everything. Run a small load first and listen for a clean lock sound before the wash and spin portions. The lid should lock once, stay locked during spin, and release after the cycle finishes. Smooth behavior confirms the lock signal and mechanical latch are working together.
Move up to a medium load after the first test passes. Watch for shaking, repeated pauses, or clicking during the transition into spin. Vibration can expose weak wiring or a latch that barely lines up. This staged approach avoids trapping a full load of wet towels in the drum.
Pay attention to how the washer unlocks after the cycle. A delayed release can happen briefly on some models, but long delays or buzzing sounds deserve another look. The actuator may be sticking, or the control board may not be ending the lock command properly. A healthy repair should feel consistent, not moody.
Document what changed during the repair. Note the replaced part, cleaned area, tightened screws, and any error codes cleared. Those notes help if the same symptom returns months later. Good repair habits turn washer troubleshooting from guesswork into a repeatable process.
Prevent Future Lid Lock Trouble
Good laundry habits protect the lid lock more than most people think. Close the lid firmly, but don’t slam it like a car door. Repeated impact can loosen hinges and shift the strike little by little. Gentle handling protects plastic tabs, mounting screws, and switch alignment.
Keep detergent use sensible because extra soap creates residue that travels into odd places. Sticky buildup can settle near the latch opening and slow down moving parts. High-efficiency washers especially dislike heavy detergent pours. Less residue means fewer sticky switches and fewer mystery cycle pauses.
Level the washer if it rocks during spin. A machine that shakes across the floor puts extra strain on the lid lock, harness, hinges, and cabinet. Adjust the feet until all corners sit solidly, then test with a normal load. Stability keeps the washer lid lock mechanism from taking a beating every laundry day.
Inspect the latch area every few months, especially in busy homes where the washer runs constantly. Look for cracks, looseness, grime, and delayed locking before the machine quits mid-cycle. Small fixes are cheaper than emergency repairs after wet clothes are stuck inside. A quiet, steady lock is a small detail, but it keeps the whole washer routine moving without drama.


10 Best Quality Semi Automatic Washing Machine of 2026 For Leak-Free Laundry

11 Best Small Washer Machine of 2026 For Everyday Laundry

12 Best Vibration Pads For Washing Machine of 2026 To Stop Walking and Shaking

11 Best Selling Front Load Washing Machine of 2026 For Quiet Odor-Free Laundry

11 Best Washing Machine For King Size Bedding of 2026 To Prevent Cycle Errors

10 Best Small Front Loader Washing Machine of 2026 For Tight Closets

12 Best Side Load Washing Machine of 2026 For Low Vibration

11 Best Single Tub Washing Machine of 2026 For Apartments Without Hookups






