
How To Repair Washer Leaking From Bottom Or Hose Fast

How To Repair Washer Leaking From Bottom Or Hose often sounds worse than it really is. A puddle creeping across the laundry floor can send anyone into panic mode, especially after a long day when the last thing you want is another household mess. Still, plenty of washer leaks come from simple trouble spots like loose hose connections, worn clamps, cracked drain lines, or small seal failures hiding underneath the machine. Catching the issue early can save flooring, reduce mold risks, and prevent a frustrating cycle of repeat leaks that keep showing up out of nowhere.
Water leaks rarely appear without warning signs. Damp corners, musty smells, slow drips, or random splashing during spin cycles usually point toward a specific problem area. Some machines leak only during draining, while others drip constantly because a supply hose has started to split near the connector. That’s where hose inspection, proper tightening, and checking for damaged rubber seals become incredibly useful. A quick look behind the washer can reveal problems that many people overlook for months.
Older washers tend to develop vibration issues over time, and that movement can slowly loosen water line connections. A drain hose pushed too far into the standpipe can also create backflow and overflow headaches that seem confusing at first glance. Then again, overloaded wash cycles don’t help either. Excess shaking places extra strain on fittings and internal parts, causing small leaks to become major puddles before you know it. Tightening connections and replacing brittle hoses often solves more than expected.
Bottom washer leaks can feel tricky because water travels before becoming visible. A worn pump, cracked tub-to-pump hose, or damaged internal seal may drip slowly underneath the cabinet long before water reaches the floor. That hidden moisture can damage surrounding walls and flooring if ignored too long. So, spotting leak timing matters quite a bit. Leaks during filling usually connect to supply lines, while leaks during draining often point toward the drain hose or pump assembly.
Some repairs require nothing more than a screwdriver, adjustable pliers, and a replacement hose picked up from a hardware aisle. Others need careful cleaning around connection points because soap residue and lint buildup can interfere with proper sealing. Small details matter here. A washer hose tightened too aggressively may crack the connector, while one left slightly loose continues dripping despite repeated adjustments. Balancing those fixes takes patience rather than brute force.
How To Repair Washer Leaking From Bottom Or Hose also means understanding prevention instead of constantly reacting to new leaks. Replacing aging hoses every few years, leveling the washer properly, and checking connections after moving the appliance can prevent expensive surprises later. Laundry rooms already deal with moisture, heat, and vibration daily, so regular inspections help avoid turning a small drip into a major cleanup project. Nobody wants soggy towels on the floor every weekend trying to manage the same preventable issue again and again.

- TAR Score10.0
TAR Score is a ranking system developed by TopAppliancesReviews.com. TAR score has no relationship or impact from any manufacturers or sales agent websites. Learn more
- BrandNBRINGO

- TAR Score9.4
TAR Score is a ranking system developed by TopAppliancesReviews.com. TAR score has no relationship or impact from any manufacturers or sales agent websites. Learn more
- BrandVetico

- TAR Score9.4
TAR Score is a ranking system developed by TopAppliancesReviews.com. TAR score has no relationship or impact from any manufacturers or sales agent websites. Learn more
- BrandSmoTecQ

- TAR Score9.4
TAR Score is a ranking system developed by TopAppliancesReviews.com. TAR score has no relationship or impact from any manufacturers or sales agent websites. Learn more
- BrandYejesiy

- TAR Score9.2
TAR Score is a ranking system developed by TopAppliancesReviews.com. TAR score has no relationship or impact from any manufacturers or sales agent websites. Learn more
- BrandXBVV

- TAR Score9.0
TAR Score is a ranking system developed by TopAppliancesReviews.com. TAR score has no relationship or impact from any manufacturers or sales agent websites. Learn more
- BrandWINSTECK

- TAR Score8.8
TAR Score is a ranking system developed by TopAppliancesReviews.com. TAR score has no relationship or impact from any manufacturers or sales agent websites. Learn more
- BrandSliverdew

- TAR Score8.6
TAR Score is a ranking system developed by TopAppliancesReviews.com. TAR score has no relationship or impact from any manufacturers or sales agent websites. Learn more
- BrandJHBKing

- TAR Score8.6
TAR Score is a ranking system developed by TopAppliancesReviews.com. TAR score has no relationship or impact from any manufacturers or sales agent websites. Learn more
- BrandLYMGS
- TAR Score7.2
TAR Score is a ranking system developed by TopAppliancesReviews.com. TAR score has no relationship or impact from any manufacturers or sales agent websites. Learn more
- BrandFdcLixuvol
Last update on 2026-07-21 / Affiliate links / Images, Product Titles, and Product Highlights from Amazon Product Advertising API
How To Repair Washer Leaking From Bottom Or Hose
A wet laundry floor has a funny way of ruining the whole mood. One tiny drip turns into a towel pile, a musty corner, and that sinking feeling that the washer might be on its last legs. Still, how to repair washer leaking from bottom or hose usually starts with simple clues, not panic. Leak timing, hose condition, and where the water first appears can point you toward the real problem before money gets tossed at the wrong fix.
Washer Leak First Checks
Start with the floor pattern before moving the washer or grabbing tools. Water pooling behind the machine often points to supply hose connections, while water spreading from the front or center may suggest a pump hose, door seal, or tub connection. A washer leak can travel along the cabinet base, so the puddle’s edge doesn’t always reveal the exact source. Annoying, right, but that little detail keeps you from blaming the wrong part.
Check the washer while it runs, but keep hands away from moving parts and electrical areas. Watch the fill cycle, wash cycle, drain cycle, and spin cycle separately because each stage stresses a different part of the machine. A leak during filling usually points toward hot and cold inlet hoses or the water inlet valve area. A leak during draining often points toward the drain hose, pump, or internal drain line.
Unplug the washer before touching hoses, clamps, or bottom panels. Shut off the hot and cold water valves, then wipe everything dry so new moisture becomes easier to spot. Dry paper towels placed near hose joints can expose slow drips that hide from plain sight. That small trick sounds almost too simple, but it’s a handy way to catch a tiny connection leak before it becomes a soaked baseboard.
A flashlight helps more than guesswork here. Look for rust marks, soap trails, mineral crust, bulging rubber, cracked plastic, or damp lint stuck around fittings. Those marks often reveal where water has been escaping for a while. Since washer leaks rarely fix themselves, catching these signs early can protect flooring, wall trim, and nearby storage from slow moisture damage.
Hose Leaks Behind The Washer
Supply hoses carry constant pressure, so even a tiny split can drip all day. Pull the washer forward gently and inspect both hot and cold hoses from the wall valves to the machine inlets. Look closely near the metal ends because rubber often cracks where it bends around the fitting. If the hose feels stiff, swollen, or brittle, replacement is safer than trying to squeeze out a few more laundry days.
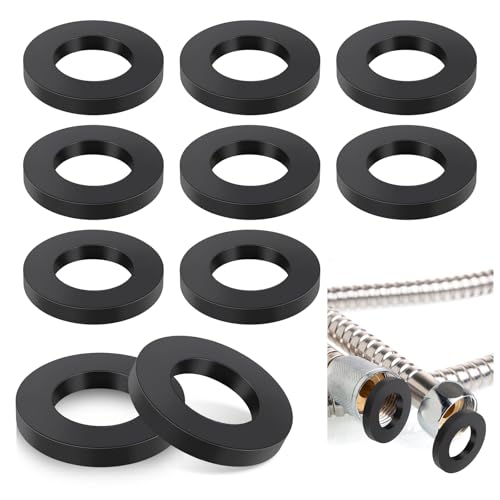
Loose hose nuts can also cause a stubborn leak behind the washer. Tighten them by hand first, then use pliers only for a slight extra turn because over-tightening can damage the threads or crush the washer inside the connector. A missing or flattened rubber washer inside the hose end can make a connection drip no matter how hard it’s tightened. That’s a classic headache, and it fools plenty of people.
Braided stainless steel hoses usually handle pressure better than basic rubber hoses, though they still need inspection. Rubber inside the braid can still age, and the fittings can still loosen from vibration. If the washer shakes during spin, those tiny movements can slowly work connections loose. Keep the hose path relaxed, not kinked, because sharp bends add stress right where leaks love to start.
Detergent residue can make leak tracing messy because sudsy water spreads faster than clean water. Using too much soap can create overflow or seepage that looks like a hose failure. For cleaner rinsing in a top loader, compare options like liquid detergent for top loading washing machine so buildup doesn’t keep feeding the problem. The right amount matters too, because too many suds can push water into places it shouldn’t go.
Drain Hose Problems And Backflow
The drain hose gets blamed less often than it should. A cracked drain hose may leak only during the drain cycle, which makes the washer look fine during filling and washing. Check the hose from the washer outlet to the standpipe or laundry sink, then flex it gently to reveal hidden cracks. If water appears only when the pump kicks on, that hose deserves a hard look.
Drain hose placement can create overflow even when the hose itself isn’t broken. A hose shoved too far into the standpipe can cause siphoning, while a loose hose can jump or splash during draining. The hose should sit securely without being sealed airtight into the pipe. That little air gap helps water drain properly and keeps weird backflow problems from turning laundry day into mop duty.
Clamps matter, especially at the washer drain outlet. A clamp that looks “mostly fine” may still loosen enough to leak under pump pressure. Spring clamps can weaken over time, and screw clamps can strip or bite into old rubber. Replace the clamp if it’s rusty, warped, or no longer grips the hose evenly.
A clogged standpipe can mimic a washer leak because water backs up and spills behind the machine. Listen for gurgling, slow draining, or water rising in the pipe during pump-out. A partial clog may handle small loads but overflow during bulky towels or bedding. That’s why load size and drain behavior both matter during troubleshooting.
Leaks From The Bottom Cabinet
Bottom leaks feel more mysterious because the water may drip from several inches away from the damaged part. Once the washer is unplugged and the water valves are off, tilt or move it carefully if the model allows safe access. Remove the lower front panel only if it’s designed for service access. Inside, common leak points include the drain pump, tub-to-pump hose, internal clamps, and sometimes a worn tub seal.
The drain pump often leaks from its housing, gasket, or hose connections. A small crack may release water only during draining, while a worn seal can drip steadily after a cycle. Look for white residue, rust stains, or damp lint near the pump body. If the pump housing is cracked, patching usually isn’t worth the risk because pump pressure can reopen the leak fast.
Internal hoses take a beating from vibration, heat, detergent, and repeated water movement. A tub-to-pump hose may split along a crease or loosen around the clamp. These hoses are often wider and softer than supply lines, so they can sag or rub against nearby parts. Replace any hose that feels gummy, cracked, or flattened because rubber fatigue rarely stays small.
Mineral buildup can make seals harder and less flexible over time. In areas with hard water, deposits may collect around valves, hose ends, and internal water paths. A maintenance product such as descaler for washing machine can help reduce buildup that contributes to poor drainage, odors, and residue. It won’t repair a torn hose, of course, but cleaner internal surfaces can make future leaks easier to prevent and spot.
Door Seals, Gaskets, And Overflows
Front-load washers often leak from the door gasket, especially when hair, lint, coins, or small fabric scraps get trapped in the fold. Wipe the gasket slowly and check the lower lip where water sits after a cycle. Small tears can leak during wash or spin, and trapped debris can break the seal just enough to drip. A clean gasket can stop a leak that looks much scarier than it is.
Top-load washers can leak from overfilling, splashing, or a worn tub seal near the center shaft. Overloading the drum pushes water over the basket edge during agitation, especially with bulky blankets. Uneven loads also create heavy shaking, which can stress hoses and clamps underneath. Keep loads balanced because washer vibration quietly causes plenty of leak problems.
Too much detergent creates suds that can creep out through vents, dispensers, and seals. That foamy overflow may look like a mechanical leak, but the fix starts with measuring soap more carefully. High-efficiency machines need less detergent than many people assume. Using the wrong formula or pouring by eye can turn suds control into a repeat mess.
Moldy smells often follow hidden moisture, especially around gaskets and damp laundry rooms. Dry the gasket after cycles, leave the door open when practical, and clear lint from folds and dispenser areas. If the room stays humid or musty, reduce background odor and noise distractions with air purifier for white noise in nearby living spaces where laundry hum carries through walls. That won’t fix the washer leak, but cleaner air and steadier background sound can make laundry areas less irritating while repairs are handled.
Safe Tools And Repair Habits
Basic tools handle many washer hose repairs without turning the job into a weekend saga. Keep adjustable pliers, a nut driver, towels, a flashlight, replacement washers, and hose clamps nearby. A shallow pan can catch leftover water when removing hoses. Simple setup prevents that “oops” moment where trapped water spills across the floor right after you thought things were dry.
Take photos before removing parts, especially hose routing and clamp positions. Washers can look simple from the outside, but the internal hose layout gets confusing fast once panels are off. A quick phone photo helps you put everything back the same way. That matters because a hose routed against a sharp bracket can rub through later and create another leak.
Replace parts in pairs when age is the real problem. If one supply hose is cracked or brittle, the other one is probably close behind. Swapping only the failed hose may save a few dollars today but leave another weak point waiting. Fresh hoses, fresh rubber washers, and snug clamps create a more reliable fix than patching one tired piece at a time.
Stop before electrical risk enters the picture. Water near outlets, control boards, motors, or wiring changes the situation from annoying to unsafe. A washer that leaks heavily from the bottom, trips a breaker, smells burnt, or shows water near electrical parts needs professional attention. Practical repairs are great, but safety beats stubborn DIY every single time.
Repair Choices That Save The Floor
Water damage gets expensive fast, especially when a washer sits near baseboards, drywall, or laminate flooring. A small leak from the bottom can soak into seams before anyone notices the smell. That’s why the smartest move is to dry the area completely, run a short test cycle, and watch for the first fresh drip. Early leak tracking keeps the repair focused instead of turning the laundry room into a guessing game.
Hose replacement is usually the cleanest fix when rubber looks cracked, swollen, or stiff. Trying to tape a pressurized washer hose is asking for trouble because the pressure returns every time the valve opens. New washers inside the hose ends also matter because flattened rubber rings can leak even when the metal fitting feels tight. A fresh hose with a snug seal gives the machine a much better shot at staying dry.
Rental homes add another layer because leaks can damage property that someone else owns. Keep repair notes, photos, and receipts so there’s a clear record of what was checked and replaced. For laundry spaces that take daily use from different routines, compare practical appliance setups like washing machine rental house before choosing a replacement. Durable controls, balanced spin, and easy hose access can make future leaks easier to manage.
Floor protection also deserves attention after the leak is fixed. Dry the area with fans, inspect trim for swelling, and check nearby walls for damp spots. A washer pan can help catch future drips, but it shouldn’t become an excuse to ignore a leak. Prevention works best when the washer is level, hoses are routed cleanly, and connections are checked after every move or repair.
Pressure, Valves, And Washer Movement
High water pressure can punish supply hoses and inlet valves over time. If a hose keeps leaking at the same connector, the issue may not be the hose alone. A worn water inlet valve can seep behind the machine or drip into the tub between cycles. That slow leak may look harmless at first, but it can waste water and leave the washer smelling stale.
Washer movement is another sneaky leak trigger. A machine that walks during spin can tug on hoses, loosen clamps, and stress fittings behind the cabinet. Level the feet, tighten the locking nuts, and avoid stuffing the drum until it groans. Balanced loads reduce vibration, which helps protect both hoses and internal seals.
Old shutoff valves can leak after being turned for the first time in years. Turn them slowly, watch the stem area, and keep towels nearby. If water drips from the valve itself, the washer may not be the real problem. A plumber may be needed if the wall valve is corroded, stuck, or dripping from behind the handle.
Small repairs should feel stable after a test cycle. Run a quick wash or rinse cycle with the washer pulled slightly forward so you can see the connections. Check again after the cycle ends because slow drips sometimes appear only after pressure sits for a while. No fresh moisture means the repair is heading in the right direction.
Leaks Caused By Soap And Buildup
Too much detergent can create a leak that doesn’t come from a broken part. Extra suds can creep through vents, dispensers, and seals, then run down the cabinet like a mechanical failure. High-efficiency washers are especially picky about soap amounts. A smaller dose often cleans better than a heavy pour because the machine can rinse properly.
Residue buildup can also block small water paths inside the dispenser drawer or drain area. Soap scum, lint, and hard-water deposits may redirect water toward the front or bottom of the washer. Remove the dispenser drawer if the model allows it, rinse away buildup, and wipe the cavity with a damp cloth. Clean water flow helps prevent mystery leaks that show up only during certain cycles.
Musty laundry rooms often connect to trapped moisture, poor airflow, and slow leaks that went unnoticed. Keep the washer door or lid open after use when possible, and wipe rubber seals so water doesn’t sit in folds. Nearby kitchens can have their own airflow headaches too, so for separate home upgrades, compare range hoods white shaker cabinets when cooking moisture and odors need better control. Good ventilation won’t repair a washer hose, but it helps keep moisture problems from piling up around the home.
Cleaning cycles help, but they don’t replace inspection. A washer cleaner may remove odor and residue, yet a cracked hose or bad clamp still needs a physical fix. Treat cleaning as maintenance, not magic. Real leak repair means matching the symptom to the part that’s actually failing.
Testing The Repair Without Making A Mess
Test slowly after every repair, even if the fix seems obvious. Turn the water valves back on a little at first, then check the hose ends before opening them fully. A dry paper towel around each connection will show tiny drips quickly. That quick check saves a whole lot of mopping if a washer isn’t seated correctly.
Run one short cycle before doing a full load. Watch the fill, agitation, drain, and spin stages because leaks often appear during only one part of the cycle. Keep the washer pulled out just enough to inspect the rear connections safely. If the machine shakes hard, stop and rebalance the load before vibration creates a new problem.
Check underneath after the cycle finishes. A leak from the pump or internal hose may leave drops on the frame, even if the floor still looks dry. Use a flashlight and look for fresh shine, damp lint, or new streaks. Hidden moisture is the clue that tells you the repair isn’t finished yet.
Wait a few minutes before pushing the washer back into place. Some leaks happen only after pressure settles or leftover water drains through a loose joint. Dry connections, dry floor, and no fresh drips after sitting are all good signs. Then slide the machine back carefully so hoses don’t kink behind it.
Repair Limits And Replacement Clues
Some washer leaks are worth fixing, and some are a warning that the machine is aging out. A simple hose, clamp, or gasket repair usually makes sense. A cracked outer tub, repeated pump failures, or major rust around the base can change the math quickly. Spending money on one repair after another gets old fast.
Age matters, but condition matters more. A newer washer with one damaged hose is usually an easy save. An older washer with corrosion, loud bearings, poor draining, and bottom leaks may be stacking problems. At that point, repair cost, part availability, and future reliability should guide the decision.
Professional help makes sense when the leak source sits deep inside the machine. Tub seals, internal valves, cracked tubs, and electrical exposure aren’t great places for trial and error. Water and wiring don’t forgive sloppy work. A technician can pressure-test, inspect internal parts, and confirm whether the machine is safe to keep using.
Smart maintenance keeps the next leak from sneaking up. Inspect hoses a few times a year, replace old rubber before it fails, avoid overloads, and keep the washer level. Wipe seals, clean dispensers, and pay attention to new sounds during spin. How to repair washer leaking from bottom or hose often starts with a fix, but it stays solved through steady habits that keep water where it belongs.


10 Best Quality Semi Automatic Washing Machine of 2026 For Leak-Free Laundry

11 Best Small Washer Machine of 2026 For Everyday Laundry

12 Best Vibration Pads For Washing Machine of 2026 To Stop Walking and Shaking

11 Best Selling Front Load Washing Machine of 2026 For Quiet Odor-Free Laundry

11 Best Washing Machine For King Size Bedding of 2026 To Prevent Cycle Errors

10 Best Small Front Loader Washing Machine of 2026 For Tight Closets

12 Best Side Load Washing Machine of 2026 For Low Vibration

11 Best Single Tub Washing Machine of 2026 For Apartments Without Hookups






