
How to Repair Pressure Washer Unloader Valve Fast

How to repair pressure washer unloader valve issues can feel downright aggravating after your machine suddenly loses pressure, surges nonstop, or refuses to spray consistently. One minute the washer runs fine, then bam, water pressure starts acting up like it’s got a mind of its own. That tiny valve hidden inside the system often causes the headache, especially after heavy use, dirty water buildup, or long periods sitting idle in the garage. Pressure spikes, overheating pumps, and erratic spray patterns usually point straight toward this overlooked component.
Most people assume the pump itself has failed, but that’s not always the case. A worn spring, clogged bypass passage, or stuck piston inside the unloader valve can throw the entire machine off balance. Small debris and mineral deposits tend to build quietly over time, especially in areas with hard water. Then suddenly the pressure washer starts pulsing, whining loudly, or shutting off under load. That’s where practical repair steps make a huge difference instead of rushing toward expensive replacement parts.
Repairing the valve usually starts with careful inspection and cleaning rather than swapping everything immediately. A little grit trapped inside can prevent the bypass system from regulating pressure properly. Tight seals, smooth piston movement, and proper spring tension all matter more than people realize. Skipping maintenance often turns a minor pressure problem into pump damage that costs far more to fix later on.
Pressure consistency also depends heavily on proper adjustment after repairs. Cranking the valve too tight may create stronger spray for a short while, but it can strain internal pump components and overheat the machine. On the flip side, loose adjustments lead to weak cleaning performance that wastes both water and time. Dialing in the correct balance keeps the washer running smoother while extending pump life.
Plenty of pressure washer owners get frustrated because symptoms mimic several different mechanical issues. A sputtering spray wand could stem from clogged nozzles, air leaks, or faulty valves all at once. That confusion sends many people replacing random parts without solving the root problem. Understanding how the unloader valve controls water flow makes troubleshooting far less stressful and far more accurate.
Regular upkeep matters too, honestly. Dirt, soap residue, and moisture inside unused machines create ideal conditions for sticking valves and corrosion. Even reliable pressure washers struggle after months of neglect sitting through seasonal weather changes. Cleaning the system after use and checking valve movement occasionally can help prevent those annoying pressure swings before they start ruining cleaning jobs.

- TAR Score9.4
TAR Score is a ranking system developed by TopAppliancesReviews.com. TAR score has no relationship or impact from any manufacturers or sales agent websites. Learn more
- BrandGeneral Pump
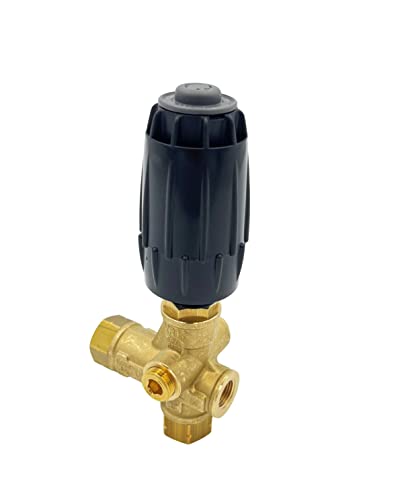
- TAR Score9.2
TAR Score is a ranking system developed by TopAppliancesReviews.com. TAR score has no relationship or impact from any manufacturers or sales agent websites. Learn more
- BrandAR ANNOVI REVERBERI

- TAR Score9.2
TAR Score is a ranking system developed by TopAppliancesReviews.com. TAR score has no relationship or impact from any manufacturers or sales agent websites. Learn more
- BrandThrelaco

- TAR Score9.0
TAR Score is a ranking system developed by TopAppliancesReviews.com. TAR score has no relationship or impact from any manufacturers or sales agent websites. Learn more
- BrandComet

- TAR Score8.6
TAR Score is a ranking system developed by TopAppliancesReviews.com. TAR score has no relationship or impact from any manufacturers or sales agent websites. Learn more
- BrandCarbman

- TAR Score7.6
TAR Score is a ranking system developed by TopAppliancesReviews.com. TAR score has no relationship or impact from any manufacturers or sales agent websites. Learn more
- BrandLesurey

- TAR Score7.0
TAR Score is a ranking system developed by TopAppliancesReviews.com. TAR score has no relationship or impact from any manufacturers or sales agent websites. Learn more
- BrandKodrily

- TAR Score4.0
TAR Score is a ranking system developed by TopAppliancesReviews.com. TAR score has no relationship or impact from any manufacturers or sales agent websites. Learn more
- BrandKH866
Last update on 2026-07-18 / Affiliate links / Images, Product Titles, and Product Highlights from Amazon Product Advertising API
How To Repair Pressure Washer Unloader Valve
A pressure washer that surges, stalls, or drops pressure right as the job gets dirty can make a simple cleanup feel like a wrestling match. The pump sounds busy, the wand feels jumpy, and the spray keeps changing its mind. That headache often leads back to how to repair pressure washer unloader valve problems, especially when the machine has sat through a season with old water, soap residue, or grit trapped inside. Fixing the issue starts with slowing down, reading the symptoms, and treating the unloader valve like the pressure-control part it really is.
Pressure Trouble Starts Small
A bad spray pattern doesn’t always mean the pump is cooked. Many pressure washers lose steady pressure because the unloader valve piston sticks, the spring weakens, or debris blocks the bypass passage. That little valve tells water where to go after the trigger closes, so a small jam can make the whole machine act dramatic. The old shop saying fits here: “Pressure finds the weakest path.”
Surging usually shows up before total failure. The spray may hit hard, fade, then hit hard again while the motor or engine keeps hunting. That pattern points toward poor pressure regulation, not just a clogged nozzle. A clogged nozzle can create similar stress, though, so the repair path needs to start with simple checks before tearing into parts.
Electric pressure washers often run around 1,500 to 2,300 PSI, while many gas models push higher pressure for driveways, siding, and equipment washing. That much force has to be controlled smoothly, or the pump gets hammered every time the trigger opens and closes. The unloader valve helps redirect water back through the bypass route instead of letting pressure spike. Without that control, pump heat, hose vibration, and trigger kickback can all get worse.
Weak pressure after storage is another big clue. A machine that ran fine last summer may sputter this spring because mineral deposits, dried detergent, or tiny flakes of corrosion settled inside the valve. Hard water makes that problem more likely, especially if the washer was stored without flushing clean water through the system. Small buildup creates big annoyance, and yeah, it can feel like the machine is picking a fight.
Spot The Valve Symptoms
A failing unloader valve usually speaks through pressure behavior. Watch for pulsing spray, quick pressure drops, engine bogging, or a pump that gets hot during short use. The trigger may feel rough, and the hose may twitch more than usual. These signs don’t prove the valve is bad by themselves, but they put it near the top of the suspect list.
Start with the nozzle because it’s the easiest troublemaker to rule out. A partially blocked spray tip can create too much back pressure and make the unloader valve react badly. Remove the nozzle, rinse it, and clear it with a nozzle-cleaning tool rather than wire that can widen the opening. A damaged nozzle changes spray behavior, and no valve adjustment can fix a worn-out tip.
Then check the water supply. Low inlet flow starves the pump and makes the washer pulse, even if the unloader valve is healthy. A kinked hose, clogged inlet screen, or weak faucet can cause pressure cycling that looks like a valve problem. Give the machine enough clean water first, because pumps hate guessing games.
Soap residue deserves a look too. Thick detergent left inside the system can gum up moving parts and slow the valve piston. Flush the washer with clean water for a few minutes before testing again. Separately, laundry gear has its own maintenance headaches, so to reduce buildup in household machines, compare detergent for washing machine philippines options built around cleaner rinsing and routine care.
Prepare The Repair Area
Safety comes first, even for a small valve repair. Shut the machine off, disconnect power or the spark plug, turn off the water, and squeeze the trigger to release trapped system pressure. Pressurized water can bite hard, and a loosened fitting can spray suddenly if pressure remains inside. Gloves help, but patience helps more.
Set parts on a clean towel as they come off. The unloader valve often includes a spring, piston, seals, washer, and adjustment hardware, depending on the model. Losing a tiny O-ring turns a simple repair into a scavenger hunt. Take a quick phone photo before disassembly so the order of parts doesn’t become a guessing contest later.
Use the right tools instead of forcing stubborn pieces. Adjustable wrenches can round fittings if they slip, so properly sized wrenches are better for tight valve bodies. Some unloaders thread into the pump head, while others sit under a cap or adjustment knob. A gentle approach protects the brass fittings and keeps the repair from snowballing.
Model differences matter. Some pressure washers use integrated unloaders that are harder to service, while others make the valve easier to remove and rebuild. A repair manual or parts diagram helps identify the exact layout before parts go flying. The goal is controlled disassembly, not brute force with a wrench and a prayer.
Clean The Stuck Components
Once the valve is out, inspect the piston first. A healthy unloader piston should move smoothly without gritty drag, deep scoring, or corrosion around the sliding surface. If it sticks halfway, pressure regulation becomes sloppy. Clean it with a mild parts cleaner or clean water and a soft brush, then dry it completely.
Look closely at the bypass passage. Tiny sand grains, bits of old seal material, and calcium buildup can block water movement. That restriction forces the pump to fight itself, which causes surging pressure and extra heat. Never jam sharp tools into the passage because scratches can damage sealing surfaces.
O-rings and seals tell their own story. Flattened, cracked, swollen, or torn seals allow water to leak past areas that should stay tight. Replacing worn seals is usually smarter than reusing them and hoping for the best. A fresh seal kit can restore pressure control without replacing the entire pump assembly.
Lubrication helps only if it suits the material. Use a pump-safe lubricant or silicone grease on O-rings when the manual allows it. Petroleum-based grease can damage some rubber parts, so don’t smear random garage grease on the valve and call it good. The right lubricant gives the moving parts a smooth start without creating a sticky mess.
Adjust Pressure Without Overdoing It
After cleaning and reassembly, pressure adjustment needs a light hand. Turning the adjustment knob too far can raise pressure beyond what the pump, hose, or spray gun should handle. More pressure sounds tempting, but over-adjustment can shorten pump life and make the washer harder to control. Stable pressure beats bragging rights every time.
Use a pressure gauge if possible. Guessing by spray feel alone can lead to uneven results, especially on gas models with stronger pumps. A gauge shows whether the system returns to a safe working range after the trigger closes and opens. That measurement protects the pump seals, hose fittings, and spray gun from unnecessary stress.
Test in short bursts. Pull the trigger, release it, listen to the pump, and watch for pulsing or engine strain. A properly adjusted unloader valve should let the washer respond cleanly without wild pressure swings. If the engine bogs or the pump chatters, stop and recheck the valve parts before pushing harder.
Some machines simply won’t behave well with a damaged spring or deeply scored piston. Cleaning helps many stuck valves, but it can’t bring worn metal back to shape. Replacing the unloader assembly may be the smarter move if the same symptoms return after careful cleaning and adjustment. For laundry spaces with tight budgets and smarter appliance planning, compare front loader washing machine under 1000 choices before buying bulky equipment that doesn’t fit the room.
Prevent Repeat Valve Problems
Good repair work loses value if the same crud returns two weeks later. Flush the washer with clean water after using detergent, especially after driveway degreasers or thick soaps. Soap left inside the pump can dry into sticky residue and slow the unloader piston. A few minutes of flushing can save a long afternoon of troubleshooting.
Water quality matters more than people expect. Hard water leaves mineral scale in small passages, and those passages are exactly where the valve needs clean movement. An inlet filter helps catch grit before it reaches the pump. That simple habit supports steady pressure and reduces wear on seals.
Storage is another sneaky problem. Leaving water inside the pump during cold weather can crack parts, while long storage in humid spaces encourages corrosion. Pump saver fluid can protect internal components during off-season storage. It’s not fancy, but seasonal maintenance keeps valves from sticking when the first big cleaning day rolls around.
Airborne dust can also settle on stored equipment, especially in garages with sawdust, pollen, or pet dander floating around. Keep the washer covered, store hoses clean, and avoid leaving fittings open. Separately, cleaner indoor air helps reduce household dust on stored tools and appliances, so upgrade room filtration with a rated hepa air purifier if dust keeps coating shelves and gear. Less grime around stored equipment means fewer gritty surprises later.
How To Repair Pressure Washer Unloader Valve Part Two
Repairs get easier once the obvious pressure problems are already ruled out. A washer that still surges after nozzle cleaning, fresh water flow, and valve inspection needs a closer look at wear patterns, heat buildup, and adjustment mistakes. This is where how to repair pressure washer unloader valve work becomes less about guessing and more about reading what the machine is telling you. Small details matter, and yep, skipping them can send you right back to the same frustrating pressure swing.
Check Wear Before Buying Parts
A worn unloader valve rarely fails with fireworks. It usually acts tired first, with lazy pressure recovery, rough bypass cycling, or spray that feels strong for a second and then falls flat. Look for scratches on the piston, crushed O-rings, weak spring tension, or a valve stem that doesn’t slide cleanly. These clues help separate a dirty valve from a valve that’s simply past its best days.
Seal condition matters more than the part size suggests. A small nick on an O-ring can let water sneak past the sealing point, and that leak changes how pressure builds inside the pump. The result may feel like a weak pump, but the real issue is poor sealing inside the pressure-control path. Replacing seals first often makes more sense than replacing the whole assembly.
Spring fatigue can be sneaky too. The spring controls how the valve responds under pressure, so a weak spring may cause early bypassing or uneven spray. If the spring looks rusty, compressed, or bent, don’t stretch it back by hand and hope for magic. A proper replacement keeps the pressure response predictable and safer for the pump.
Clean parts before judging them. Grease, mineral scale, and detergent film can hide scoring or make a good part look worse than it is. A soft brush, clean water, and careful drying usually reveal the real condition. For household cleaning routines where residue builds up in hidden passages, maintain appliance interiors with clothes washing machine cleaner so buildup doesn’t quietly turn into a bigger maintenance headache.
Test The Pump After Reassembly
Reassembly should feel smooth, not forced. Tighten fittings evenly, seat the seals correctly, and avoid over-cranking threaded brass parts. A crooked seal can create pressure leaks that mimic the original problem. That’s a rotten deal after doing the dirty work, so slow hands win here.
Run the pressure washer briefly with water flowing before pushing it hard. Listen for pump chatter, engine strain, or sudden pressure drops as the trigger opens and closes. A steady sound usually means the valve is moving correctly through its cycle. A rattling or pulsing sound means something still isn’t seating or adjusting right.
Use short trigger pulls during the first test. Holding the trigger for too long before confirming stable pressure can mask smaller problems. Release, pull again, and watch how quickly the spray returns. A repaired unloader valve should respond without a long delay or a violent kick through the hose.
Heat is a red flag. If the pump body gets hot quickly during light testing, the bypass may be cycling too much or water may not be moving correctly. That extra heat can damage seals and shorten pump life. Shut the machine down, let it cool, and recheck bypass flow before continuing.
Fix Adjustment Mistakes
Pressure adjustment can make or break the repair. Turning the unloader knob too tight may create a harder spray, but it also raises stress on pump seals, fittings, and the hose. That shortcut can turn a small repair into a costly pump problem. The better move is gradual adjustment with careful testing after each small turn.
A pressure gauge removes guesswork. Spray feel can fool anyone, especially with wider nozzles that spread water differently. A gauge shows whether the system stays within a safe operating range and returns properly after trigger release. That one tool can protect the pump from overpressure damage.
Loose adjustment causes its own mess. The washer may run, but the spray feels weak, cleaning takes longer, and detergent rinsing becomes uneven. That kind of low output wastes water and patience. Proper valve balance keeps pressure strong enough for cleaning without beating up the pump.
Kitchen and laundry exhaust issues can create another kind of maintenance headache, especially in tight indoor spaces where heat, steam, and residue hang around longer than they should. Improve ventilation planning with pull out range hoods when compact spaces need better air movement without bulky fixtures. Cleaner surrounding air and less sticky residue make tool storage areas easier to keep in decent shape.
Know When Replacement Wins
Cleaning doesn’t fix every valve. Deep scoring, cracked parts, stripped threads, or heavy corrosion usually mean replacement is the smarter call. A damaged unloader assembly may work for a few minutes and then fall right back into pulsing or pressure loss. At that point, repeated tinkering wastes time and risks pump damage.
Replacement also makes sense if the washer has been adjusted too aggressively in the past. Over-tightened valves can stress springs, seals, and pressure surfaces until they no longer respond smoothly. The machine may still run, but the pressure control feels touchy and unreliable. A fresh valve restores consistent regulation without chasing one symptom after another.
Match the replacement part carefully. Pressure washers can look similar from the outside while using different pump heads, valve threads, and pressure ratings. A part that almost fits is still the wrong part if it leaks or changes the pressure range. Use the model number, pump label, and parts diagram to protect the repair accuracy.
Cost matters, sure, but so does risk. A cheap mismatched valve can cause bypass trouble, leaks, or unstable pressure. Spending a bit more on the correct valve often beats replacing hoses, spray guns, or pump seals later. The best repair is the one that keeps the washer predictable after the tools are put away.
Keep The Valve From Sticking Again
Prevention starts after every cleaning session. Flush clean water through the pump after using soap, degreaser, or surface cleaner attachments. Detergent film dries into sticky residue, and that residue can slow the valve piston the next time the machine starts. A quick rinse routine saves a lot of head-scratching later.
Store the washer with care. Drain leftover water, protect the pump during cold weather, and keep hose ends capped if the garage gets dusty. Dirt inside fittings can travel straight into the pump during the next setup. Keeping the system cleaner helps preserve smooth pressure control.
Inspect the inlet screen regularly. A clogged screen starves the pump, and a starved pump can pulse like the unloader valve is failing. Clean water flow gives the valve a fair chance to do its job. That simple screen check is one of the easiest ways to avoid false repairs.
Use the right nozzle for the job. Too narrow of a spray tip can create extra back pressure, while a worn nozzle can make pressure feel weaker than it really is. Match the nozzle to the surface, keep tips clean, and replace damaged ones instead of compensating with valve adjustment. The unloader valve works best when the rest of the system isn’t fighting it.
Read The Machine During Real Use
A repaired pressure washer should feel steady during normal cleaning, not just during a quick driveway test. Watch how it behaves after ten or fifteen minutes of use, especially while switching between spraying and releasing the trigger. Stable response means the bypass system is handling pressure changes correctly. A return of pulsing means the repair needs another look.
Listen closely while working. A smooth pump sound usually points to balanced flow, while chattering, whining, or repeated engine hunting signals pressure instability. The sound of the machine often changes before the spray becomes obviously weak. Catching that early protects pump life and keeps the repair from getting more expensive.
Surface results tell a story too. Uneven cleaning stripes, random weak spray, or detergent that doesn’t rinse cleanly may indicate pressure inconsistency. The wand should feel controlled, not jumpy or unpredictable. A properly repaired pressure washer unloader valve makes cleaning feel boring again, and boring is exactly what you want from pressure regulation.
Keep notes after the repair if the washer sees heavy seasonal use. Write down the nozzle size, pressure setting, replacement seal size, and any symptoms that appeared before repair. That small record helps later if pressure trouble returns. Practical notes beat memory every time, especially after the machine has been sitting in the corner for months.


10 Best Quality Semi Automatic Washing Machine of 2026 For Leak-Free Laundry

11 Best Small Washer Machine of 2026 For Everyday Laundry

12 Best Vibration Pads For Washing Machine of 2026 To Stop Walking and Shaking

11 Best Selling Front Load Washing Machine of 2026 For Quiet Odor-Free Laundry

11 Best Washing Machine For King Size Bedding of 2026 To Prevent Cycle Errors

10 Best Small Front Loader Washing Machine of 2026 For Tight Closets

12 Best Side Load Washing Machine of 2026 For Low Vibration

11 Best Single Tub Washing Machine of 2026 For Apartments Without Hookups






