
How To Repair Pressure Washer Pump And Hose Fast

How To Repair Pressure Washer Pump And Hose becomes a whole lot easier once the real problem stops hiding in plain sight. Weak spray pressure, sputtering water flow, strange noises, or a hose that suddenly starts leaking halfway through a cleanup session can drive anybody up the wall. One minute the driveway looks promising, then bam, the machine starts acting like it’s ready for retirement. Most of the time, though, the issue comes down to worn seals, trapped air, cracked fittings, clogged valves, or pressure buildup that’s been ignored for too long.
Pressure washer owners often replace expensive parts too quickly because the symptoms look worse than they really are. A damaged pressure washer hose may seem ruined beyond repair, yet small punctures, loose couplers, and split connectors can usually be fixed with the right repair kit and proper tightening methods. Pumps tell a similar story. Water dripping from the manifold or inconsistent pressure doesn’t always mean total pump failure. Sometimes mineral buildup, dirty inlet filters, or dried-out O-rings are the actual culprits quietly wrecking performance behind the scenes.
Frustration usually kicks in after repeated pressure loss during demanding cleaning jobs. Concrete grime won’t budge, siding stays streaky, and patio furniture ends up looking half-cleaned. That’s where understanding pump maintenance and hose inspection changes everything. Small maintenance habits like flushing leftover detergent, checking for air leaks, and avoiding kinked hoses can stretch equipment life much longer than most people expect. Ignoring those little details, meanwhile, tends to snowball into larger repairs nobody wants to pay for.
Repair work also feels less intimidating once the machine gets broken down into manageable parts. Pumps rely heavily on seals, pistons, valves, and water flow consistency. Hoses depend on stable pressure, tight fittings, and crack-free connections. Each component plays its own role, and once one weak spot appears, the entire system starts behaving unpredictably. That annoying pulsing spray pattern or sudden pressure drop usually points toward a specific mechanical issue rather than random bad luck.
Good repair habits save both money and headaches. A properly repaired pressure washer pump restores cleaning strength without forcing a full replacement purchase, while a patched or reconnected hose keeps water flowing safely and efficiently. Also, knowing which problems are repairable versus completely worn out helps avoid wasting time on temporary fixes that won’t hold under heavy pressure. Realistically, not every damaged hose deserves saving, especially if internal reinforcement layers have already started separating.
People often underestimate how much water quality affects long-term performance. Hard water deposits slowly clog internal pump passages and create extra strain during operation. Left unchecked, that buildup shortens seal life and reduces pressure consistency. Cleaning out those internal passages and using fresh water after detergent applications can dramatically improve reliability. Little maintenance routines may seem boring, sure, but they prevent plenty of expensive surprises later on.
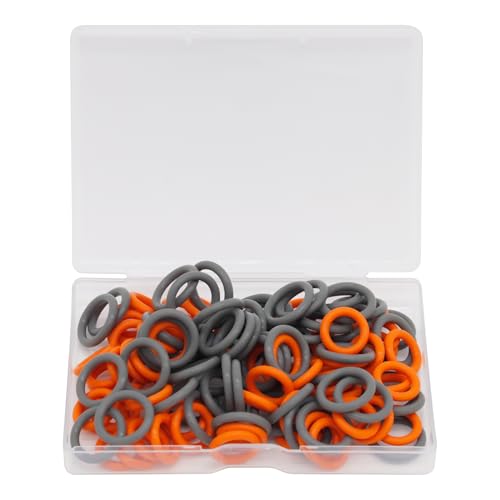
- TAR Score10.0
TAR Score is a ranking system developed by TopAppliancesReviews.com. TAR score has no relationship or impact from any manufacturers or sales agent websites. Learn more
- BrandPWBBDSC

- TAR Score9.4
TAR Score is a ranking system developed by TopAppliancesReviews.com. TAR score has no relationship or impact from any manufacturers or sales agent websites. Learn more
- BrandPLG

- TAR Score9.4
TAR Score is a ranking system developed by TopAppliancesReviews.com. TAR score has no relationship or impact from any manufacturers or sales agent websites. Learn more
- BrandPLG

- TAR Score9.2
TAR Score is a ranking system developed by TopAppliancesReviews.com. TAR score has no relationship or impact from any manufacturers or sales agent websites. Learn more
- BrandFetechmate

- TAR Score9.0
TAR Score is a ranking system developed by TopAppliancesReviews.com. TAR score has no relationship or impact from any manufacturers or sales agent websites. Learn more
- BrandTool Daily

- TAR Score9.0
TAR Score is a ranking system developed by TopAppliancesReviews.com. TAR score has no relationship or impact from any manufacturers or sales agent websites. Learn more
- BrandCamoo

- TAR Score9.0
TAR Score is a ranking system developed by TopAppliancesReviews.com. TAR score has no relationship or impact from any manufacturers or sales agent websites. Learn more
- Branduxcell
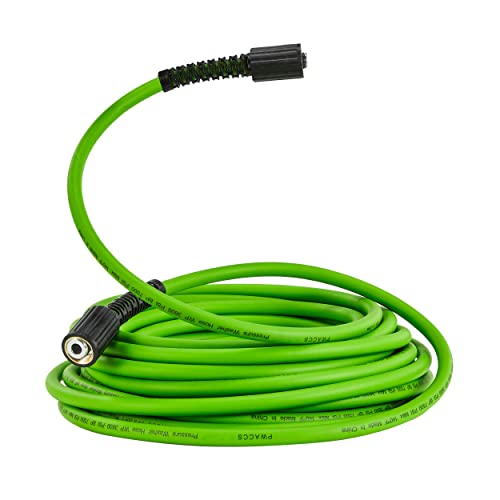
- TAR Score8.8
TAR Score is a ranking system developed by TopAppliancesReviews.com. TAR score has no relationship or impact from any manufacturers or sales agent websites. Learn more
- BrandPWACCS

- TAR Score8.6
TAR Score is a ranking system developed by TopAppliancesReviews.com. TAR score has no relationship or impact from any manufacturers or sales agent websites. Learn more
- BrandOTUAYAUTO

- TAR Score7.8
TAR Score is a ranking system developed by TopAppliancesReviews.com. TAR score has no relationship or impact from any manufacturers or sales agent websites. Learn more
- BrandWAXUEKIN
Last update on 2026-07-11 / Affiliate links / Images, Product Titles, and Product Highlights from Amazon Product Advertising API
How To Repair Pressure Washer Pump And Hose
A weak spray pattern can turn a simple cleaning job into a whole afternoon of muttering at the machine. The driveway stays streaky, the siding still looks dingy, and the trigger gun starts pulsing like it has a mind of its own. That is where how to repair pressure washer pump and hose becomes more than a repair topic, because steady pressure, safe water flow, and leak control decide whether the washer cleans or just wastes water.
Pump And Hose Warning Signs
A pressure washer usually gives clues before it quits completely. Pulsing pressure, water dripping near the pump head, and spray that fades after a few seconds often point to flow trouble rather than instant pump death. Many people blame the motor first, but the pump and hose take most of the beating during regular cleaning. Start there, because those parts handle pressure, heat, vibration, and every bit of grit that sneaks past the inlet screen.
Hose damage can be sneaky. A tiny pinhole leak may look harmless until it drops pressure at the nozzle and forces the pump to work harder. A swollen section means the inner layers may be separating, and that is a safety issue, not just an annoying drip. A hose with exposed braid, soft bubbles, or deep cracks should not be patched for heavy use because high-pressure water can cut skin faster than most folks expect.
Pump trouble often shows up as water leaking from the bottom, noisy operation, or pressure that rises and falls for no obvious reason. A stuck unloader valve can create the same stop-and-go feel, while worn seals may allow water to escape before it ever reaches full pressure. The smart move is to check water supply, inlet filter condition, and hose restrictions before tearing into the pump. Simple checks save time and keep a repair from turning into a parts-swapping mess.
Pressure washers also hate starvation. A garden hose with poor flow, a kink near the spigot, or a clogged inlet screen can make a healthy pump act worn out. Most residential pressure washers need a steady water feed, and the supply hose must deliver enough volume before the machine starts building pressure. So, before blaming seals or valves, confirm that water flow is clean, steady, and unrestricted from the spigot to the pump inlet.
Start With Safe Pressure Release
Repair work should begin with the machine fully off, unplugged or cooled down, and disconnected from pressure. Pull the trigger after shutdown to release trapped water pressure, because stored pressure can surprise you even after the engine stops. Wear gloves and eye protection if the hose has been leaking near fittings. That small habit helps prevent ugly mistakes around pressurized connections.
Disconnect the spray gun, high-pressure hose, and water supply before inspecting anything closely. A hose coupler may look fine while attached, but the threads, O-rings, and quick-connect seats often reveal the real problem once separated. Look for flattened O-rings, cracked washers, and gritty buildup inside the connector. Those small pieces cost little, yet they can make or break pressure stability.
Cleaning the area before opening the pump matters more than it sounds. Dirt around the manifold can fall into valves or seal pockets once bolts come loose. Wipe the pump body with a damp rag, then use a soft brush around screw heads and fittings. Keeping debris out protects internal valves, ceramic pistons, and seal surfaces from scratches that cause leaks later.
A rushed repair usually creates a second problem. Take photos before removing parts, especially if the unloader valve, inlet fitting, or manifold bolts are unfamiliar. Lay parts in order on a towel so washers and springs do not roll away. This low-tech habit keeps reassembly cleaner, faster, and far less frustrating.
Fix Low Pressure Before Replacing Parts
Low pressure does not always mean the pump is finished. A clogged nozzle, loose hose fitting, or dirty inlet screen can mimic a failing pump almost perfectly. Start with the spray tip, because a partly blocked nozzle changes the whole pressure pattern. A quick rinse or nozzle-cleaning needle can restore spray force without touching the pump at all.
Check the garden hose next. A long, narrow, or kinked supply hose can starve the pump, especially during heavy cleaning on concrete or fencing. The washer may run, but the pump keeps gulping air and water unevenly. That creates surging pressure, vibration, and extra wear on seals.
Hard water can leave scale inside fittings and screens, especially after repeated detergent use. White crust near the inlet filter or pump threads is a clue that minerals are slowing water flow. Rinse removable screens, clear grit from quick-connects, and avoid harsh scraping on plastic parts. Clean flow is the foundation of pump life, hose performance, and consistent cleaning pressure.
Separate home cleaning tasks can also reveal useful maintenance habits. For example, machines that move a lot of water need clean filters and clear drainage paths, just like laundry equipment does. To compare water-use habits across household machines, review energy saving washing machine for a practical look at efficiency and routine maintenance. The same mindset helps here: protect the system from restriction, waste, and avoidable strain.
Repair Leaking Hose Connections
Most hose leaks happen near fittings because that area bends, twists, and gets dragged across rough ground. A leak at the quick-connect may only need a new O-ring, while a leak at the crimped end usually calls for a replacement fitting or hose. Tightening harder is not always the answer. Over-tightening can crush rubber seals, strip threads, and make the leak worse.
Inspect both male and female fittings before blaming the hose itself. A nicked plug, dirty coupler, or flattened washer can spray water sideways even when the hose body is still healthy. Replace worn O-rings with pressure-rated pieces, not random leftovers from a drawer. Proper seal fit keeps water pressure stable and prevents annoying drips at the trigger gun.
Pinhole leaks in the middle of a high-pressure hose are trickier. Some repair couplers can work on specific hose types, but the hose must be cut cleanly and matched to the correct diameter and pressure rating. A patched hose should be watched closely during the first run. If it swells, seeps, or feels soft near the repair, stop using it because hose failure under pressure is not worth gambling on.
Detergent residue and grit can also shorten hose life. After using soap, run clean water through the washer for a minute or two so residue does not dry inside the line. Coil the hose in wide loops instead of tight bends, because sharp bends weaken inner reinforcement. Better storage protects hose flexibility, fitting alignment, and long-term pressure control.
Open The Pump Without Guesswork
Pump repair starts with knowing what type of pump sits on the machine. Many residential pressure washers use axial cam pumps, while heavier units may use triplex pumps with serviceable valves and seals. The repair approach changes depending on the design. Still, common trouble spots include check valves, oil condition, water seals, and the unloader system.
Remove the pump manifold carefully if seals or valves need inspection. Bolts should be loosened evenly so the manifold does not bind or crack. Once open, look for broken valve cages, worn springs, cracked seals, and mineral buildup around water passages. Damaged valves often cause pressure cycling, while worn seals usually show up as water leaking from the pump head.
Do not scrape ceramic plungers or polished surfaces with metal tools. A tiny scratch can chew up new seals quickly once the pump runs again. Use a soft cloth, clean water, and manufacturer-safe cleaner for mineral deposits. Smooth contact surfaces matter because seal life depends on clean movement and even pressure.
Some small pumps are not worth rebuilding if the housing is cracked or internal parts cost close to replacement. That is not defeat, that is just practical math. A seal kit makes sense for leaking seals or worn valves, but a pump with heat damage, stripped threads, or split castings may keep failing. Smart repair means knowing where replacement beats another temporary patch.
Replace Seals And Valves Cleanly
Seal replacement rewards patience. Pull old seals gently, clean the pockets, and check that no rubber fragments stay behind. New seals should sit squarely, because a crooked seal can leak as soon as pressure builds. A light coat of approved lubricant helps protect new pump seals during the first startup.
Valves should be replaced as a set if several look worn or cracked. Mixing one new valve with several weak ones can leave the pressure uneven and make diagnosis harder. Springs should move freely, and valve cages should not show cracks or heavy scoring. Balanced valve action helps restore smooth pressure, better spray response, and cleaner water movement.
Reinstall the manifold evenly and avoid forcing bolts into place. Cross-threaded bolts can ruin a repair faster than the original leak did. Tighten in a balanced pattern, then reconnect water before starting the engine or motor. Let water flow through the pump briefly to purge air and protect fresh seals from dry startup damage.
Household maintenance often follows this same pattern: clean the flow path, replace worn seals, then test gently before full use. For a separate cleaning setup where water handling and residue control matter, compare mini washing machine for bubble hash and notice how filtration, water movement, and cleanup routine affect performance. Pressure washer repair works the same way at its core, since flow control beats brute force every time.
Test Pressure Without Overworking The Pump
After repair, start with a gentle test instead of jumping straight into blasting concrete. Connect the water supply, open the spigot fully, and squeeze the trigger before starting the machine. This purges air from the pump and hose. Air pockets can cause chattering, pressure spikes, and rough operation during the first few seconds.
Watch every connection while the machine runs at low demand. A tiny drip near the pump head, hose coupler, or spray gun can reveal a seal that is not seated right. Shut down and release pressure before making adjustments. Never tighten fittings while the system is pressurized because high-pressure leaks can be dangerous at close range.
Listen to the pump while testing. A healthy pump should sound steady, not strained, rattly, or uneven. If pressure pulses after a seal and valve repair, recheck the inlet screen, nozzle, unloader valve, and water feed. The pump may be fixed, but restricted flow somewhere else can still make it behave badly.
Outdoor cleanup sometimes stirs up dust, mold, and damp debris, especially around patios, garages, and storage areas. For indoor air concerns after heavy cleaning or dusty garage work, compare hepa air purifier for large rooms as a separate support tool for cleaner indoor air. It will not repair a washer, of course, but dust control and cleaner airflow can matter after messy maintenance days.
Pressure Washer Pump And Hose Repair Steps
Repairs get a lot less messy once the machine has already been checked for the obvious troublemakers. A pressure washer can act stubborn even after new seals, clean fittings, and a fresh hose repair, so the second half of the job is about fine-tuning pressure, protecting repaired parts, and stopping repeat failures. A steady machine should pull clean water, hold pressure without pulsing, and shut off without leaving puddles under the pump. If any of those pieces still feel off, the washer is telling you exactly where to look next.
Adjust The Unloader Valve Carefully
The unloader valve controls where water goes when the trigger is released, and a sticky one can make the whole washer feel unpredictable. A stuck or poorly adjusted unloader may cause pressure spikes, pump chatter, or sudden drops in spray force. Before turning adjustment nuts, clean the valve area and check for mineral grit around the spring and piston. Small debris can hold the valve partly open, which wastes pressure and makes the pump work harder than it should.
Go slow with adjustments because too much tension can create unsafe pressure. The goal is not to force the highest number possible, but to restore a stable spray pattern that matches the washer’s rated output. If the machine surges after the trigger is released, back off and inspect the valve parts again. A smooth unloader keeps water moving safely and protects pump seals from unnecessary shock.
A tired unloader valve can mimic several other problems. It may look like a bad pump, a clogged nozzle, or even a weak engine because the symptoms overlap. That is why clean testing matters after every change. Run the washer briefly, squeeze the trigger a few times, then watch whether pressure recovery feels quick and even.
Some unloaders are not designed for much adjustment on small residential washers. Forcing them can crack plastic parts or damage threads, which turns a minor repair into a bigger headache. If the valve body is cracked, corroded, or worn smooth inside, replacement usually beats tinkering. A fresh valve often restores pressure control faster than chasing tiny adjustments all afternoon.
Prevent Heat Damage During Repair Testing
Heat sneaks up fast on pressure washer pumps. Letting the machine run too long without spraying can cause water inside the pump to heat up, which weakens rubber seals and shortens pump life. During testing, squeeze the trigger often so fresh water moves through the system. A cool pump is a happier pump, especially after new seals have just been installed.
Hot water buildup can also warp small plastic parts in some residential pumps. That creates leaks around fittings and makes valves stick at the worst possible time. If the washer has been idling without spray, shut it down and let it cool before troubleshooting further. Heat-damaged seals often look flattened, hardened, or slightly shiny compared with healthy rubber.
Storage habits matter too. A pump left with detergent, hard water, or dirty runoff inside can develop residue that traps heat and restricts water flow later. Flushing with clean water after use helps protect internal passages, valve seats, and seal edges. It is the same practical habit used with laundry appliances, where better rinsing and temperature control can reduce strain, so compare washing machine for cold water if water efficiency and cleaner rinse habits are part of your home setup.
Cold weather brings a different kind of damage. Water left inside the pump can freeze, expand, and crack the housing or fittings. Use pump saver before winter storage and drain hoses fully before putting them away. Those few minutes protect pump chambers, hose lining, and quick-connect fittings from splitting while the washer sits unused.
Choose Repair Or Replacement Wisely
Repairing a pressure washer feels satisfying, but not every part deserves another chance. A hose with one cleanly cut damaged section may be repairable with the correct coupler, while a hose with bulges, exposed reinforcement, or multiple soft spots should be replaced. The weakness matters because high-pressure water turns a bad hose into a safety hazard. Saving a few dollars is not worth risking a burst near your hand or leg.
Pump replacement makes sense when the housing is cracked, bolt threads are stripped, or internal parts cost nearly as much as a new pump. Seal kits are useful for leaks and mild wear, but they cannot fix warped metal, deep scoring, or broken castings. A practical repair plan compares parts cost, labor effort, and the age of the machine. Sometimes the smartest fix is replacing the pump and keeping the washer out of the scrap pile.
Nozzle and wand condition should factor into the decision too. A damaged nozzle can overwork a repaired pump by creating strange pressure behavior, while a leaking spray gun can make pressure drop even after the hose and pump are fixed. Inspect the full pressure path from inlet to nozzle before calling the repair finished. The washer only performs as well as its weakest connection point.
Airflow around nearby work areas can matter during dirty repair jobs, especially in garages where engines, dust, and cleaning chemicals mix. Separately, kitchen ventilation has its own airflow issues, and homeowners comparing ventilation upgrades can review performing range hoods for better grease and odor control. For pressure washer repair, the bigger point stays simple: keep work areas ventilated, avoid fumes, and protect breathing comfort while handling grimy parts.
Stop Repeat Hose Leaks
Repeat hose leaks usually come from stress, not bad luck. Dragging the hose around sharp concrete corners, pulling it tight against tires, or storing it in tight coils can weaken the inner layers. A repaired hose needs wider loops and less twisting if it is going to last. Protecting hose reinforcement keeps pressure stable and reduces sudden failures.
Quick-connect fittings need regular inspection because they take constant movement. A gritty coupler can chew up an O-ring, and a loose fitting can leak even when the hose itself is fine. Rinse couplers after dusty jobs and replace worn seals before the next cleaning session. Small upkeep keeps hose connections, trigger gun fittings, and spray wands from dripping during use.
Never use tape as the main fix for a high-pressure hose split. Tape may slow a drip for a moment, but it cannot safely hold washer pressure. Use rated fittings, proper repair couplers, or a replacement hose matched to the machine’s pressure rating. The right fix protects operator safety and prevents pressure loss that makes cleaning jobs drag on forever.
Hose routing during use makes a huge difference. Lay the hose where it can move freely instead of wrapping around chair legs, garden edging, or porch posts. A clear path prevents sudden jerks that strain fittings and damage pump outlets. Better routing keeps water flow steadier and makes the whole washer feel easier to control.
Maintain Pump Oil And Water Flow
Some pressure washer pumps use oil, and that oil deserves attention. Milky oil means water may have entered the crankcase, which points toward seal trouble or internal wear. Dark, gritty oil can reduce lubrication and make moving parts run hotter. Clean oil supports pump durability, smoother operation, and fewer surprise failures.
Not every residential pump is oil-serviceable, so check the pump design before draining anything. Sealed pumps are often replaced rather than rebuilt deeply, while triplex pumps usually allow more service. For serviceable models, use the oil type recommended for the pump, not whatever happens to be on the shelf. Correct oil protects bearings, plungers, and internal drive parts from avoidable wear.
Water flow is just as important as lubrication. A clean inlet filter prevents sand, rust flakes, and grit from scratching valves or lodging under seals. After every few heavy jobs, remove the filter and rinse it gently. That tiny screen works like a guard dog for the pump, blocking debris before it damages valve seats and seal surfaces.
Detergent should be flushed after use because dried soap can gum up injectors and fittings. A clogged detergent system can create odd pressure behavior and make the washer feel weaker than it is. Run clear water through the washer until the line is clean and the spray looks normal. Clean flushing protects chemical injectors, pump passages, and hose interiors from sticky buildup.
Store The Washer So Repairs Last
A repaired pressure washer can fail again quickly if storage is careless. Leaving the hose kinked, the pump full of water, or the fittings exposed to dirt invites the same problems back. Coil the hose loosely, drain water from the pump, and keep quick-connects capped if possible. Good storage protects fresh repairs, rubber seals, and metal threads.
Sunlight also wears on hoses. Long exposure can dry the outer jacket, making it stiffer and more likely to crack during the next cleaning session. Store hoses out of direct sun and away from sharp tools or chemicals. A flexible hose handles pressure changes better and reduces stress on couplers and spray gun fittings.
Winter storage deserves extra care because freezing damage can destroy a pump that worked perfectly weeks earlier. Drain the machine, disconnect the hose, and use pump saver if freezing temperatures are possible. A cracked pump head often costs more to fix than basic winter prep. Protecting against freeze damage keeps pump housing, valves, and seals intact.
Before the next season starts, do a quick dry inspection before adding water. Look for cracked hoses, missing O-rings, loose bolts, and signs of oil leakage. Then run water through the system before starting the engine or motor. That simple restart routine protects pressure stability and gives the repaired washer a cleaner start.
Troubleshoot After The Repair
A repair is not finished until the washer behaves well during a real cleaning pass. Test it on a small section of concrete, fencing, or outdoor furniture and watch for pressure changes. A steady spray, quiet pump rhythm, and dry fittings are good signs. Any pulsing, dripping, or squealing means one weak point still needs attention.
If pressure drops after a few minutes, check the inlet filter and water supply again. Debris can move after the first test and clog the screen even if it looked clean earlier. A collapsing garden hose can also starve the pump during longer jobs. Steady supply flow supports consistent spray power and prevents the pump from running rough.
If the washer leaks only after shutdown, inspect the unloader, spray gun, and hose connections. Some leaks appear only when trapped pressure settles in the system. Release pressure after each test and recheck O-rings for pinching or flattening. Post-run checks catch slow leaks that might not show while water is spraying.
If repairs keep failing, step back and look at the whole setup. A worn pump paired with an old hose, dirty nozzle, and weak supply line will keep causing headaches one part at a time. Replacing the worst component may help, but matching the full pressure path matters more. Reliable cleaning comes from balanced water flow, safe hose condition, and a pump that no longer has to fight preventable strain.


10 Best Quality Semi Automatic Washing Machine of 2026 For Leak-Free Laundry

11 Best Small Washer Machine of 2026 For Everyday Laundry

12 Best Vibration Pads For Washing Machine of 2026 To Stop Walking and Shaking

11 Best Selling Front Load Washing Machine of 2026 For Quiet Odor-Free Laundry

11 Best Washing Machine For King Size Bedding of 2026 To Prevent Cycle Errors

10 Best Small Front Loader Washing Machine of 2026 For Tight Closets

12 Best Side Load Washing Machine of 2026 For Low Vibration

11 Best Single Tub Washing Machine of 2026 For Apartments Without Hookups






