
How To Repair Pressure Washer Hose Leak Fast

How to repair pressure washer hose leak problems can feel like pure bad luck at first. One minute the machine blasts grime off concrete like a champ, then suddenly water starts spraying sideways, pressure drops, and the whole cleanup job turns into a soggy headache. Tiny cracks, worn fittings, loose couplers, or damaged O-rings usually sneak up after repeated use, especially if the hose gets dragged across rough driveways or baked in the sun for too long. Ignoring the issue only makes things worse because small leaks tend to spread fast once high pressure keeps hammering weak spots.
Most people don't realize how much strain a pressure washer hose handles during normal cleaning sessions. Sharp bends, kinks near the connector, and improper storage slowly weaken the inner lining even if the outside still looks decent. That's why pressure consistency matters so much during inspection. A weak spray pattern, sputtering water flow, or unexpected bursts around the fittings often point straight to hidden hose damage. Catching those warning signs early can save both time and replacement costs.
Repair methods depend heavily on where the leak appears. Small pinhole leaks in the middle of the hose sometimes respond well to repair kits designed for high-pressure applications, while cracked connectors usually need replacement fittings instead of temporary wraps. Duct tape might look tempting in the garage drawer, but honestly, it rarely survives under strong PSI levels. Proper hose clamps, threaded couplers, and reinforced repair sleeves hold up far better under repeated pressure cycles. A quick fix that fails halfway through cleaning can end up soaking nearby walls, vehicles, or landscaping.
Storage habits also play a surprisingly big role in preventing repeat leaks. Leaving the hose tightly coiled after use traps moisture and stresses the outer layer, especially during temperature swings. Rolling the hose loosely and draining leftover water before storage helps preserve hose flexibility and prevents brittle spots from forming. Even little habits, like avoiding hard tugs around corners or keeping the hose away from hot engine parts, can stretch its lifespan quite a bit.
How to repair pressure washer hose leak issues properly isn't just about stopping water spray. It's about restoring steady cleaning power without risking sudden hose bursts or uneven pressure during heavy-duty tasks. A well-maintained hose keeps the machine running smoother, reduces strain on the pump, and makes outdoor cleaning less frustrating overall. Nobody wants to stop halfway through washing siding or blasting mud off a driveway because a weak hose suddenly gives up. Solid repairs and smarter maintenance keep those messy interruptions from ruining the job.
- TAR Score9.0
TAR Score is a ranking system developed by TopAppliancesReviews.com. TAR score has no relationship or impact from any manufacturers or sales agent websites. Learn more
- BrandTatuo

- TAR Score9.0
TAR Score is a ranking system developed by TopAppliancesReviews.com. TAR score has no relationship or impact from any manufacturers or sales agent websites. Learn more
- BrandBURIUS

- TAR Score9.0
TAR Score is a ranking system developed by TopAppliancesReviews.com. TAR score has no relationship or impact from any manufacturers or sales agent websites. Learn more
- BrandCIATBYYJ
- TAR Score8.6
TAR Score is a ranking system developed by TopAppliancesReviews.com. TAR score has no relationship or impact from any manufacturers or sales agent websites. Learn more
- BrandVIPRUSH

- TAR Score8.0
TAR Score is a ranking system developed by TopAppliancesReviews.com. TAR score has no relationship or impact from any manufacturers or sales agent websites. Learn more
- BrandStyquenzer

- TAR Score5.2
TAR Score is a ranking system developed by TopAppliancesReviews.com. TAR score has no relationship or impact from any manufacturers or sales agent websites. Learn more
- BrandYimluofa
Last update on 2026-07-18 / Affiliate links / Images, Product Titles, and Product Highlights from Amazon Product Advertising API
How To Repair Pressure Washer Hose Leak
A driveway cleanup can go sideways fast once water starts spitting from the hose instead of blasting dirt off the concrete. The machine may still sound strong, but the spray gets weak, the hose jumps around, and the job suddenly feels twice as messy. That is where how to repair pressure washer hose leak becomes more than a quick garage fix because a damaged hose can waste water, reduce cleaning power, and put extra strain on the pump. Fixing the leak the right way keeps pressure steady, protects nearby surfaces, and helps avoid the kind of mid-job failure that turns a Saturday chore into a wet circus.
Leak Trouble Starts Small
A pressure washer hose rarely fails out of nowhere. Most leaks begin as tiny weak spots caused by dragging, sharp bends, heat exposure, or fittings that have been tightened one too many times. The outside jacket might show a small scuff while the inner layer is already struggling against high-pressure water. That mismatch is why a little drip can turn into a sharp spray once the trigger is pulled.
The first clue is often a drop in cleaning force. A hose leak steals pressure before water reaches the nozzle, so the spray may look uneven or feel softer against concrete, siding, or patio furniture. That weak output is not just annoying. It can make people move the wand closer, which raises the chance of damaging wood, paint, or softer outdoor surfaces.
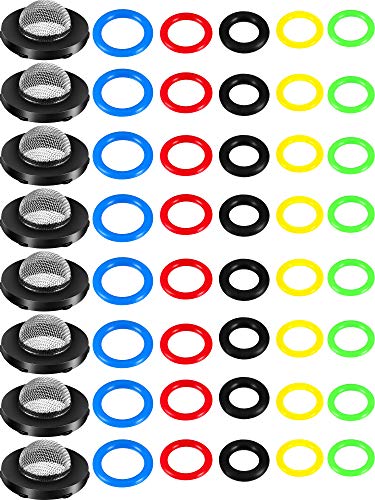
Fittings deserve special attention because they take a beating during setup and storage. A loose coupler, cracked washer, or flattened O-ring can cause water to spray from the connection point even when the hose itself is still usable. Replacing a worn O-ring costs very little compared with buying a whole new hose. Still, the trick is knowing whether the leak comes from the seal, the fitting threads, or the hose wall.
Middle-of-the-hose leaks are more serious. A pinhole or split along the hose body means the reinforced layer has been compromised, and high PSI will keep forcing water through that weak area. Tape may quiet the spray for a minute, but it is not a real fix for high-pressure hose damage. A proper repair needs rated connectors, clean cuts, and a tight seal that can handle repeated pressure cycles.
Check The Leak Before Cutting
Start by shutting the pressure washer off and releasing pressure through the spray gun. Skipping that step is asking for trouble because trapped pressure can shoot water from the leak or make fittings harder to remove. A safe inspection starts with a dry hose, a clean work area, and a little patience. Marking the leak with tape or a marker helps keep the damaged spot easy to find once the hose is drained.
Run your hand near the hose, not directly over the suspected leak, while checking for cracks or bubbles. High-pressure pinholes can act like needles, so direct contact with an active spray is a bad idea. Look for abrasion marks, flattened sections, bulges, and stiff areas that no longer flex normally. Those signs tell you whether the hose has surface wear or deeper internal damage.
Connection leaks need a different test. Unscrew the hose from the pump, gun, or extension, then inspect the rubber washer or O-ring inside the coupling. A brittle, missing, or crushed seal can create a messy spray even if the threads look fine. Swapping in the right replacement seal often restores clean water flow without cutting the hose at all.
Thread damage can fool people because it sometimes looks like a seal problem. Cross-threaded fittings, cracked brass, or worn quick-connect couplers can leak even with a fresh washer installed. Tightening harder usually makes the problem worse by warping the seal or damaging the threads further. A snug fit beats brute force every time.
Repair Kits Need The Right Fit
Pressure washer hose repair kits are not one-size-fits-all, and that catches plenty of people off guard. Hose diameter, fitting style, thread type, and pressure rating all matter. A kit that fits a garden hose will not survive a pressure washer hose, even if it looks close on the shelf. The repair parts need to match the hose’s PSI rating and inner diameter.
Most residential pressure washers run far above normal household water pressure, so the connector must be built for that load. A weak clamp or mismatched barb can slip loose once pressure builds, turning a small repair into a sudden spray burst. The safer approach is using a rated hose mender or replacement coupler made specifically for pressure washer lines. That small detail changes the whole reliability of the repair.
Clean cuts matter too. A jagged hose end can prevent the fitting from seating evenly, which leads to leaks around the repair point. Use a sharp utility knife or hose cutter and remove only the damaged section. Keeping the cut square helps the clamp or threaded coupler grab the hose evenly without pinching one side.
Some hoses use steel braiding or heavy reinforcement, so cutting them can take more effort than expected. Frayed reinforcement should be trimmed carefully because loose strands may interfere with the fitting. Gloves help here, especially on older hoses with rough wire edges. A neat repair starts with clean preparation, not with rushing the connector into place.
Household maintenance often overlaps in weird ways, and laundry rooms are a good example. To reduce appliance strain in another corner of the house, compare detergent for old washing machine choices that are easier on aging parts and everyday wash routines.
Fix Fitting Leaks First
Fitting leaks are usually the best place to start because they are common, cheap to fix, and easy to misread. A spray near the gun handle or pump outlet often points to a worn seal rather than a ruined hose. Remove the hose, wipe the fitting dry, and check the rubber washer for cracks, flattening, or missing chunks. A fresh O-ring seal can stop a leak that looked much worse than it really was.
Use the correct seal size instead of forcing in whatever happens to be in the toolbox. A seal that is too thin will not compress enough, while one that is too thick may keep the threads from seating properly. Either mistake creates another leak. The right washer should sit neatly in the fitting and compress slightly once tightened.
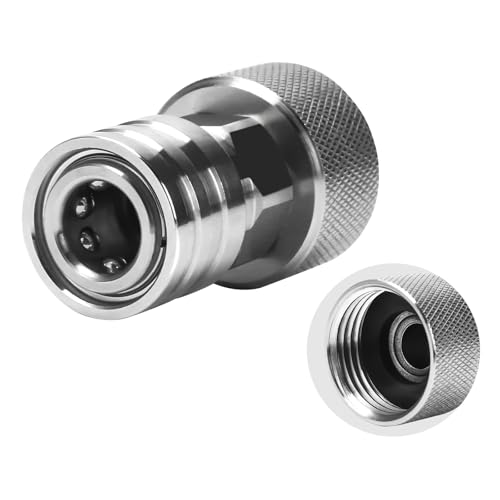
Quick-connect fittings can leak from grit, corrosion, or worn locking balls. Rinse the coupler, check the plug end, and make sure the connection clicks firmly into place. A loose quick-connect can sputter under pressure and create that annoying side spray near the handle. Keeping these parts clean helps maintain consistent pressure without replacing the full hose.
Thread tape can help on some threaded metal connections, but it should not be treated like magic. It will not fix cracked fittings, stripped threads, or damaged internal seals. Use only a small amount where appropriate and avoid blocking water passages. Too much tape can bunch up and create a worse seal than before.
Cut Out Damaged Hose Sections
A leak in the hose body calls for a firmer repair. Mark the damaged area, then cut out the weak section instead of trying to patch over it. Leaving cracked material near the repair point can cause a second leak right beside the new fitting. Removing the full damaged zone gives the repair a better shot at holding under working pressure.
After cutting, inspect both hose ends. The inner tube should look round, clean, and free of splits. If the hose feels brittle for several inches beyond the leak, cut farther back until the material feels flexible again. Repairing into brittle hose is like tying a knot in wet paper, it might hold for a moment, then fail at the worst time.
Insert the hose mender or coupler according to the kit design. Some kits use barbed fittings with clamps, while others use threaded compression-style pieces. Push the fitting in evenly and make sure it seats fully before tightening. A half-seated connector often leaks once the pump builds pressure.
Tighten clamps evenly, not aggressively. Over-tightening can crush the hose wall, especially if the hose has already lost some flexibility from age or heat. A firm, even clamp creates a better seal than a clamp cranked down until the hose deforms. The goal is secure compression, not brute-force squeezing.
After the repair, test at low pressure first if your setup allows it. Connect the hose, run water through it without pulling the trigger, then check for drips around the repair. Once the connection looks dry, start the washer and test in short bursts. Standing to the side of the repair point gives you a safer view if the fitting slips.
Avoid Tape Fixes That Fail
Tape feels tempting because it is fast, cheap, and probably sitting nearby. The problem is pressure washer hoses operate under forces that ordinary tape was never built to handle. Even thick waterproof tape can stretch, lift, or split once water pushes through the damaged spot. A taped hose may look fixed until the pump loads up and pressure spikes.
Rubber repair wraps have limits too. They may reduce misting on a low-pressure line, but pressure washer hose damage is a different animal. The water does not just drip from a hole. It forces its way out with enough energy to widen weak spots and peel back soft repairs.
Epoxy can also disappoint if the hose flexes during use. A rigid patch on a flexible hose creates stress along the patch edges, which often leads to cracking or separation. Pressure washer hoses bend, twist, and vibrate during normal cleaning, so repairs need to move with the hose. Rated mechanical fittings handle that movement better than hard patch materials.
A temporary wrap may help you identify the leak location during inspection, but it should not be treated as a finished repair. If the hose is leaking from the body, use a proper repair kit or replace the hose if the damage is too widespread. That choice protects the pump, keeps spray patterns steady, and reduces the risk of a sudden hose burst.
Know When Replacement Makes Sense
Not every hose deserves repair. A single clean puncture on a fairly new hose is one thing, but multiple cracks, bulges, or stiff sections tell a different story. Old hoses can weaken along their full length, especially after sun exposure, winter storage, or repeated kinking. Repairing one leak may simply reveal the next weak spot.
A bulging hose is a red flag. That swelling usually means the inner reinforcement has failed, and the hose wall is no longer holding pressure evenly. Cutting out one bulge might not solve the broader problem if the rest of the hose feels soft or lumpy. In that case, replacement is the safer move.
Repair can also shorten the usable hose length. Cutting out damaged sections may be fine once, but repeated cuts leave less room to move around vehicles, fences, or patio edges. A shorter hose often forces awkward angles, which creates more strain on the fittings. That tradeoff matters if the washer gets used for larger cleaning jobs.
Price matters, sure, but so does downtime. A leaky, patched-up hose can waste half a cleaning session through repeated stops and checks. A new hose with the correct PSI rating, length, and connector type can save frustration if the old one has reached the end of its rope. The best call depends on damage location, hose age, and how often the pressure washer gets used.
Appliance purchases come with similar tradeoffs around cost, capacity, and long-term convenience. For laundry upgrades on a tighter budget, compare top loader washing machine under 700 picks before replacing an older unit that still limps along.
Prevent Leaks After Repair
A repaired hose needs better habits if it is going to stay fixed. Start with storage because tight coils and hard bends create stress points. Roll the hose loosely, drain leftover water, and avoid hanging it from one sharp hook. A wide hose reel or smooth storage loop helps protect hose flexibility.
Keep the hose away from hot engine parts. Heat can soften the outer jacket and weaken the inner layers, especially near the pump where people often leave extra hose piled up. A few inches of clearance can prevent heat damage that looks minor at first and ugly later. That simple habit protects both the hose and the repair fittings.
Dragging the hose across concrete, gravel, or metal edges wears the jacket down over time. Pull from the hose body gently instead of yanking from the spray gun. Walk the hose around corners when possible, especially near brick steps, trailer edges, or rough driveway seams. Small changes in handling can reduce abrasion damage more than fancy accessories ever will.
Flush the system before storage if the washer has been used with detergents. Residue can dry inside fittings and make connectors stick, which leads to harder twisting and more seal wear the next time around. Clean connections also make it easier to spot new leaks early. A dry fitting with a fresh drip tells the truth right away.
Outdoor work often sends dust, pollen, and damp odors into nearby garages or utility rooms. For another practical comfort upgrade, explore cooling air purifier options that help keep indoor air fresher during hot, dusty chore days.
Match Pressure And Nozzle Habits
Nozzle choice affects hose stress more than people think. A clogged or overly restrictive nozzle can create pressure problems that make weak hose sections fail faster. Clean the nozzle tip and use the right spray angle for the job. Better water flow reduces unnecessary strain on hose connections and pump components.
Using a zero-degree nozzle on delicate jobs can also create bad habits. People tend to fight the wand, tug the hose harder, and work closer to surfaces than needed. A wider spray tip often cleans safely with less drama, especially on siding, patio furniture, and painted surfaces. Less wrestling with the hose means less bending near the fittings.
Pressure spikes can happen when the trigger is released repeatedly during short bursts. Normal machines are built for this, but an old hose with weak spots may not appreciate constant cycling. Give the hose room to move and avoid sharp loops while working. A hose trapped under a tire, ladder foot, or patio chair can kink and weaken quickly.
Water supply matters too. Starved water flow can make the machine pulse, which sends vibration through the hose and fittings. Make sure the garden hose feeding the unit is not kinked and that the inlet screen stays clean. Steady supply supports smooth pressure washer performance and helps repairs last longer.
Test The Repair Before A Full Cleaning Job
A repaired hose should never go straight into a long driveway wash without a careful test first. Start with the pressure washer off, connect everything snugly, and let normal water flow through the hose before firing up the pump. This low-pressure check helps reveal small drips, crooked fittings, or seals that did not seat correctly. A dry repair area during this first check is a good sign, but it is not the whole story.
Once the low-pressure test looks clean, start the machine and use short trigger pulls. Watch the repair area from the side rather than standing over it because a failed fitting can spray hard and fast. A repair that holds through several short bursts has a better chance of handling normal use. Still, keep an eye on pressure changes, hose swelling, and any new mist around the connector.
Pressure washer hoses flex while the wand moves, so test the hose in a few normal working positions. Lay it straight, curve it gently, and move the spray gun the way you would during a real cleaning job. A repair that only holds while the hose sits perfectly straight may fail once it bends around a tire, porch step, or patio chair. The goal is real-world reliability, not just a leak-free moment on the garage floor.
After the first use, shut everything down and inspect the repair again. Feel for soft spots nearby, check the clamp position, and make sure the fitting has not crept outward. A small shift means the connection may not be gripping the hose well enough. Catching that early saves the pump from strain and keeps the next cleaning session from turning into a sloppy stop-and-start chore.
Protect The Pump While Fixing Hose Leaks
A leaking hose does more than waste water. It can make the pressure washer work harder because the pump struggles to maintain steady output through a compromised line. That extra strain may show up as pulsing, weaker spray, or rougher operation. Fixing hose leaks quickly helps protect the pump from unnecessary wear.
Never run the machine for long with a known leak. The spray may still clean a little, but the system is no longer working as designed. Water escaping before it reaches the nozzle lowers cleaning force and may tempt you to overwork the machine. That habit can turn a cheap hose repair into a much more expensive pressure washer problem.
Use the right nozzle after the repair to keep pressure behavior predictable. A clogged nozzle or wrong spray tip can create sudden pressure changes that stress the repaired section. Rinse the nozzle, check the inlet screen, and confirm the water supply is steady before pushing the machine hard. Clean water flow supports stable pressure and helps the repaired hose last longer.
Heavy outdoor cleanup often runs alongside other messy home chores. For laundry that regularly handles mud, grease, or yard-work clothes, upgrade wash results with washing machine for really dirty clothes options that fit tougher cleaning routines.
Store The Hose Without Creating New Leaks
Storage habits can undo a solid repair faster than people expect. A tight coil puts pressure on the hose wall, especially near fittings and repaired sections. Leaving sharp bends in the same place week after week creates weak points that eventually crack. Loose loops and wide curves protect hose flexibility far better than a cramped hook on the wall.
Drain the hose before putting it away. Water left inside can freeze in cold weather, encourage corrosion around metal fittings, or leave mineral buildup that makes connectors stiff. A quick drain takes almost no time and helps prevent avoidable damage. That small step supports longer hose life and cleaner starts next time.
Sun exposure is another quiet hose killer. Heat and UV can dry out the outer jacket until it feels stiff, chalky, or brittle. Store the hose in shade, a garage, or a covered storage bin instead of leaving it stretched across a driveway. Keeping it out of harsh weather protects the outer layer and reduces cracking around repaired areas.
A hose reel can help, but only if it does not force tight bends. Cheap reels with narrow centers may kink thicker pressure washer hoses, especially near the coupling. Choose a storage method that lets the hose sit naturally without crushing the repaired section. Practical storage is not fancy, but it keeps the hose ready instead of fragile.
Spot Damage That A Repair Cannot Save
Some pressure washer hose damage crosses the line from repairable to risky. A clean pinhole in one section can often be fixed, but several leaks along the same hose usually point to aging material. Bulges, long cracks, and stiff sections mean the hose has lost strength beyond one small area. At that point, replacement is often safer than stacking repairs.
A hose that leaks near both ends can be especially frustrating. You may replace one fitting, then notice another spray pattern near the gun or pump connection. That usually means the hose has been twisted, dragged, or stored poorly for too long. Replacing it saves time if the original material no longer has reliable reinforcement.
Watch for hose swelling during use. Swelling means internal layers are separating, and that is not something clamps or tape can truly fix. A swollen pressure hose can burst without much warning once the pump builds force. Safety beats squeezing one more job out of a tired hose.
Old fittings can also make a good hose act bad. Corroded quick-connects, cracked brass, or stripped threads may keep leaking even after new seals are installed. Replacing the fitting is smart if the hose body still feels strong. But if both fittings and hose walls look tired, a new hose gives you cleaner pressure and fewer interruptions.
Use Better Habits During Every Cleaning Job
Most hose leaks come from repeated stress, not one dramatic mistake. Pulling the hose around sharp porch edges, parking tires on it, and yanking the spray gun all create damage over time. Slow down before moving around corners and guide the hose by hand when it catches. That simple habit protects fittings, repaired sections, and the hose jacket.
Keep the hose laid out before starting the machine. Twists and tight loops can restrict water flow and make the hose jump once pressure builds. A straight hose gives the washer a smoother path to the nozzle and reduces stress near the couplers. Better setup means fewer leaks and more steady cleaning power.
Give the hose room away from hot surfaces. Mufflers, engines, sun-baked metal, and hot pavement can soften or weaken the outer layer. Heat damage often looks harmless at first, then shows up later as cracks or leaks near the softened spot. A little space protects the hose from heat-related wear.
Big cleaning days can kick dust, steam, and greasy air into nearby work areas, especially around patios, garages, and outdoor kitchens. Improve indoor cleanup comfort with professional range hoods if cooking fumes and lingering odors are also part of the household mess.
Choose A Hose That Matches Real Use
A replacement hose should match the pressure washer, not just the connector. Check the PSI rating, hose diameter, length, and fitting type before buying anything. A hose rated too low can fail quickly, while the wrong fitting creates leaks before the first job even starts. Matching the specs keeps pressure washer performance predictable.
Longer hoses are convenient, but they are not always better. Extra length can add weight, increase drag, and make storage harder in small garages or sheds. A hose that is long enough to move around vehicles and siding without constant repositioning usually feels best. Too much hose can become a tangled nuisance that invites kinks and abrasion.
Material matters too. Rubber hoses tend to flex better and handle cold conditions more comfortably, but they can cost more and feel heavier. PVC hoses are often lighter and cheaper, though they may stay stiff and fight back during cooler weather. Pick the tradeoff that fits your cleaning routine instead of grabbing the first hose that looks close.
Reinforced hoses are helpful for regular concrete, deck, and equipment cleaning. They resist pressure better and usually tolerate more movement than thinner hoses. Still, no hose lasts long if it is dragged over sharp edges or stored in tight knots. Good materials plus careful handling make the biggest difference.
Keep Repairs Safe Around People And Surfaces
A leaking pressure washer hose is not just a cleanup annoyance. High-pressure water can cut skin, damage paint, and force water into places it should not go. Keep hands away from active leaks and never test a pinhole by touching it. Safety starts with respecting high-pressure spray, even from a small damaged spot.
Move pets, kids, and bystanders away before testing a repaired hose. A fitting that pops loose can whip or spray suddenly, especially during the first pressure test. Use short trigger pulls and stand to the side while watching the repair. Controlled testing keeps a simple hose fix from becoming a scary surprise.
Protect delicate surfaces during testing too. A sudden spray from the repair area can hit windows, painted trim, outdoor outlets, or garden beds. Aim the wand safely and keep the repaired section away from anything that could be damaged by a burst of water. Careful positioning gives you better control while the hose proves itself.
After each repair, make a habit of checking the same spot before every major job. It only takes a few seconds to look for drips, swelling, clamp movement, or cracks near the connector. That quick check helps catch failure before full pressure turns it ugly. A repaired hose can keep working well, but only if routine inspection becomes part of the setup.


10 Best Quality Semi Automatic Washing Machine of 2026 For Leak-Free Laundry

11 Best Small Washer Machine of 2026 For Everyday Laundry

12 Best Vibration Pads For Washing Machine of 2026 To Stop Walking and Shaking

11 Best Selling Front Load Washing Machine of 2026 For Quiet Odor-Free Laundry

11 Best Washing Machine For King Size Bedding of 2026 To Prevent Cycle Errors

10 Best Small Front Loader Washing Machine of 2026 For Tight Closets

12 Best Side Load Washing Machine of 2026 For Low Vibration

11 Best Single Tub Washing Machine of 2026 For Apartments Without Hookups






