
How To Repair Or Reset Washer Control Board Fast

How To Repair Or Reset Washer Control Board issues can feel like chasing ghosts around the laundry room. One minute the washer powers on, then suddenly it freezes mid-cycle, flashes odd error codes, or refuses to spin at all. Frustration builds fast because modern washers rely heavily on electronic controls, and even a tiny interruption can throw the whole machine into chaos. Strange clicking sounds, delayed starts, or buttons that stop responding often point toward deeper control board trouble hiding behind the panel.
Power surges, moisture buildup, loose wiring, and worn capacitors quietly create problems long before the washer fully stops working. Plenty of homeowners end up replacing an entire appliance when a careful reset or targeted repair could've solved the issue. That's where washer control board troubleshooting becomes incredibly valuable. Understanding how these systems behave helps narrow down whether the issue stems from corrupted settings, damaged relays, burnt components, or simple communication glitches between parts.
Resetting the control board sounds simple on paper, yet many washers react differently depending on the manufacturer and internal software. Some models need a hard power drain, while others require button combinations or diagnostic modes hidden inside the control panel. Missing one step can leave the washer stuck in the same malfunction loop. Careful handling matters too because static electricity and rushed disassembly can create even bigger electrical headaches.
Repair work also comes with tradeoffs that most people don't expect. Replacing a damaged relay or soldering a cracked connection may revive the washer, but badly scorched boards often signal broader electrical damage elsewhere in the machine. That's why checking wiring harnesses, drain systems, lid switches, and power supply stability matters before blaming the board alone. Washer electronics tend to work together like dominoes, so one failure can trigger several confusing symptoms at once.
Noise, moisture, and heat exposure gradually wear electronic boards down over time. Laundry rooms with poor ventilation or frequent humidity swings create especially rough conditions for sensitive components. Also, overloaded wash cycles and unstable outlets can slowly stress the control system without obvious warning signs. Spotting these patterns early may help prevent repeat failures and unnecessary replacement costs later on.
Anyone tackling How To Repair Or Reset Washer Control Board concerns usually wants practical answers instead of vague technical jargon. Straightforward diagnostics, safe reset methods, and realistic repair expectations help reduce wasted time and expensive guesswork. Small clues often reveal the real culprit, and honestly, that's what makes the difference between a quick fix and a washer that keeps acting up every other week.

GSPUSA W11607637 CKD607637X compatible with Admiral, Amana, Inglis, Maytag, Whirlpool,
View on Amazon- TAR Score10.0
TAR Score is a ranking system developed by TopAppliancesReviews.com. TAR score has no relationship or impact from any manufacturers or sales agent websites. Learn more
- BrandGSPUSA

- TAR Score10.0
TAR Score is a ranking system developed by TopAppliancesReviews.com. TAR score has no relationship or impact from any manufacturers or sales agent websites. Learn more
- BrandNorth America HVAC
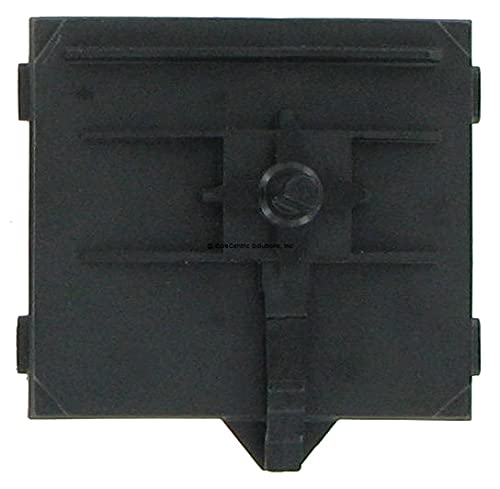
CoreCentric Remanufactured Laundry Washer Control Board Replacement for Whirlpool W10248240
View on Amazon- TAR Score9.4
TAR Score is a ranking system developed by TopAppliancesReviews.com. TAR score has no relationship or impact from any manufacturers or sales agent websites. Learn more
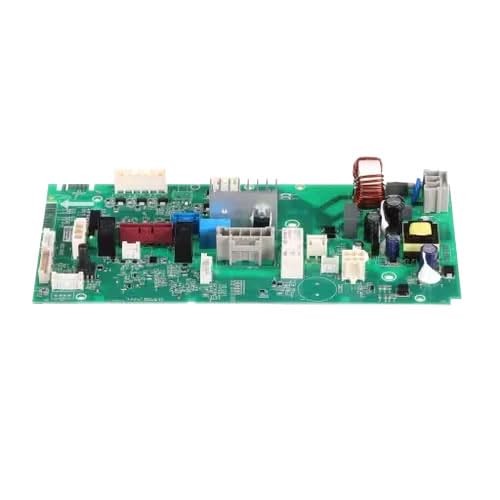
- BrandCORECENTRIC SOLUTIONS
- TAR Score9.2
TAR Score is a ranking system developed by TopAppliancesReviews.com. TAR score has no relationship or impact from any manufacturers or sales agent websites. Learn more
- BrandGE

- TAR Score9.2
TAR Score is a ranking system developed by TopAppliancesReviews.com. TAR score has no relationship or impact from any manufacturers or sales agent websites. Learn more
- BrandGE
- TAR Score9.0
TAR Score is a ranking system developed by TopAppliancesReviews.com. TAR score has no relationship or impact from any manufacturers or sales agent websites. Learn more
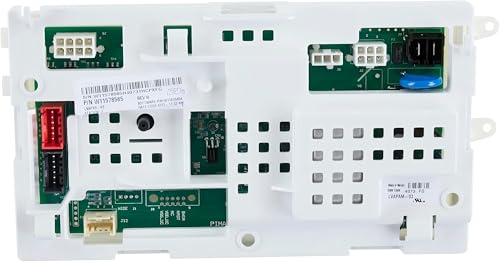
- BrandUJGFCZX

CoreCentric Remanufactured Laundry Washer Control Board Replacement for Whirlpool W10384846
View on Amazon- TAR Score9.0
TAR Score is a ranking system developed by TopAppliancesReviews.com. TAR score has no relationship or impact from any manufacturers or sales agent websites. Learn more
- BrandCORECENTRIC SOLUTIONS

- TAR Score8.8
TAR Score is a ranking system developed by TopAppliancesReviews.com. TAR score has no relationship or impact from any manufacturers or sales agent websites. Learn more
- BrandBudora

- TAR Score7.6
TAR Score is a ranking system developed by TopAppliancesReviews.com. TAR score has no relationship or impact from any manufacturers or sales agent websites. Learn more
- BrandFast Craft

- TAR Score6.4
TAR Score is a ranking system developed by TopAppliancesReviews.com. TAR score has no relationship or impact from any manufacturers or sales agent websites. Learn more
- BrandHMHAMA
Last update on 2026-07-23 / Affiliate links / Images, Product Titles, and Product Highlights from Amazon Product Advertising API
How To Repair Or Reset Washer Control Board
A washer that freezes mid-cycle can turn one small laundry load into a full-blown headache. The lights blink, the buttons ignore you, and the drum just sits there like it has clocked out early. That is usually the moment how to repair or reset washer control board stops sounding technical and starts sounding urgent, especially when wet clothes are trapped inside and the machine refuses to cooperate.
Washer Control Board Basics
The washer control board acts like the command center for the whole machine. It tells the water valve when to open, the motor when to spin, the drain pump when to clear water, and the door lock when to stay shut. Once that board glitches, the washer may look alive but behave like it has no clue what job comes next. That mismatch is why electrical troubleshooting matters before replacing random parts.
A failed board does not always mean the board is burned beyond repair. Sometimes the washer has stored a bad cycle command after a power flicker, outlet issue, or interrupted load. A proper reset can clear that confusion and let the machine start fresh. Still, resetting the washer should never replace basic safety checks, because a loose wire or damaged outlet can bring the same fault right back.
Symptoms usually tell a story if you slow down and read them. A washer that fills but will not agitate may point toward motor control signals, while a machine that will not unlock could involve the lid switch, door lock, or board relay. Random beeping, frozen displays, and dead buttons often sit closer to the control panel circuit. The trick is not guessing too fast, because washer problems love wearing disguises.
Many repair techs use a simple rule: Start with power, then wiring, then the board. That advice saves money because the most expensive part is not always the guilty one. A weak outlet, corroded connector, or kinked harness can make a good board look bad. So before calling the control board finished, check the power supply, harness plugs, and visible board condition with a calm eye.
Common Signs Of Board Trouble
The first clue is often inconsistency. One load runs fine, the next stops at rinse, then the next refuses to start at all. That uneven behavior usually feels more frustrating than a clean failure because it wastes time and patience. A shaky washer control board can send mixed signals, especially after heat, vibration, or moisture has stressed the electronics.
Error codes help, but they are not magic. A code may say motor fault, drain fault, lid fault, or communication fault, yet the real issue can still be a board that is not sending steady voltage. Think of the code as a breadcrumb, not the whole loaf. The smartest move is to pair the code with real symptoms, like whether the washer fills, locks, drains, spins, or powers down.
Burn marks are a stronger warning. If the board has dark spots, a sharp electrical smell, cracked solder joints, or swollen capacitors, the problem has probably moved beyond a basic reset. At that point, control board repair may involve component-level work or full board replacement. That is also the moment to check why the damage happened, because moisture or voltage spikes can destroy a new board too.
A dead display can be tricky. The board may be bad, but the issue could also come from a bad user interface panel, loose ribbon cable, tripped breaker, or failed noise filter. For delicate laundry routines, steady washer behavior matters, so protect small garments with smarter wash habits and Explore best underwear washing machine options if your current unit keeps roughing up light fabrics. That separate upgrade angle will not repair a circuit board, but it can reduce repeat laundry headaches caused by harsh cycles.
Safe Reset Steps Before Repair
A reset works best after the washer is fully powered down. Unplug the machine from the wall instead of only pressing the power button, then let the stored charge drain from the electronics. Many washers need a quiet pause before the board clears its stuck command. This simple step can help with software lockups, frozen cycle memory, and temporary communication errors.
After the pause, plug the washer back in and avoid smashing buttons right away. Let the display wake up, then choose a basic rinse or drain cycle to see whether the board responds normally. If the machine starts, listens, and finishes, the issue may have been a temporary glitch. If the same fault returns, deeper diagnosis is the safer path.
Some models use a button sequence to enter diagnostic mode. The exact sequence varies by brand, so guessing can cause confusion or change settings you did not mean to touch. Use the tech sheet tucked behind the lower panel or inside the console if your washer has one. That sheet often lists error code meanings, test modes, and reset steps specific to the machine.
A reset cannot fix burned electronics, broken relays, or a board damaged by water. It also will not repair a failed door latch, bad drain pump, or worn motor sensor that only looks like a board problem. That is why one successful reset should not be treated like a permanent cure if the same issue keeps showing up. Repeated failures usually point toward a root cause that still needs attention.
Checking Power And Wiring First
Power problems can mimic board failure so well that plenty of people get fooled. A washer may light up but still lack stable voltage during heavy parts of the cycle. The motor, drain pump, and water valves all demand steady current at different moments. A weak connection can make the main control board crash right when the machine needs it most.
Start with the outlet, plug, and breaker. Burned plug blades, loose wall sockets, and shared circuits with heavy appliances can create weird interruptions. A washer should not be fighting for power with space heaters, large dryers, or overloaded extension cords. Stable electricity gives the control system a fair chance to work without random resets.
Wiring harnesses deserve a careful look too. Vibration can loosen connectors over time, especially around the control board, motor, lid lock, and drain pump. Moisture can also leave corrosion on pins, which blocks clean communication between parts. Reseating a loose connector can sometimes bring back normal operation without touching the board itself.
Repair costs can climb quickly once the board, motor, or interface panel enters the conversation. If the washer is older and the repair estimate feels too close to replacement cost, Compare front loader washing machine under 1000 choices before spending heavily on electronics. That does not mean tossing a repairable washer, but it gives the decision some financial backbone.
Opening The Console Without Making It Worse
Opening the control area calls for patience, not muscle. Screws may hide behind trim, dispenser drawers, or rear console covers, and forcing plastic tabs can snap them in seconds. Take photos before removing wires so everything goes back where it belongs. Those quick snapshots protect the wiring layout better than memory ever will.
Static electricity is another quiet troublemaker. Electronic boards can be sensitive, especially if you touch contacts without grounding yourself first. Keep the washer unplugged, avoid working on carpet if possible, and handle the board by its edges. A careful approach helps protect the circuit board from damage that was not there before.
Look for obvious signs before reaching for tools. Burned spots, melted connectors, cracked solder, swollen capacitors, and moisture marks all tell you the board has suffered stress. A light layer of dust is normal, but sticky residue or water trails are not. Moisture near electronics is a big red flag because humidity damage can return even after cleaning.
Noise and air quality around laundry spaces can matter more than people think. Dust, lint, and trapped humidity can collect near appliances, especially in tight utility rooms with poor airflow. For a quieter laundry corner and cleaner surrounding air, Upgrade to best silent air purifier support if linty air and musty smells keep hanging around nearby. That will not replace board repair, but it can make the space less rough on people and electronics.
Repair Or Replace The Board
Control board repair starts with one blunt question: is the board actually repairable, or is it already cooked? A washer that shows light corrosion, a loose connector, or one cracked solder joint may still have a fighting chance. A board with heavy burn marks, melted plastic, or repeated fuse failures usually points toward serious electrical damage. Fixing the visible spot without solving the cause can send the washer right back into the same mess.
Component-level repair can save money, but it is not always the easy road. Replacing a capacitor, relay, or solder joint takes the right tools and a steady hand. A sloppy solder bridge can damage nearby circuits and turn a repairable board into scrap. That is why board-level repair fits best when the damaged area is small, visible, and clearly isolated.
Full board replacement makes more sense when the washer has several odd symptoms at once. Random resets, non-responsive buttons, failed cycle commands, and repeated communication errors may mean the board is failing across multiple circuits. Before buying a board, match the part number from the original unit instead of relying only on the washer model. Small revisions can matter, and the wrong replacement control board may not communicate correctly with the machine.
Cost should stay part of the decision. If the washer is older, noisy, rusty, or already showing drum and pump wear, a control board may only buy a little more time. For a tighter replacement budget, compare washing machine for 500 pounds choices before sinking too much cash into a tired appliance. A repair makes sense only when the rest of the washer still has enough life left to justify the board.
Using Diagnostic Mode Wisely
Diagnostic mode can cut through the guessing, but it is not a magic button. It checks parts in a controlled order and helps reveal whether the washer can fill, drain, lock, agitate, and spin on command. A board that enters diagnostics and controls every part correctly may not be the villain. The problem could be a sensor, load imbalance, drain restriction, or another cycle interruption outside the board itself.
Error codes need context because they can be blunt instruments. A drain code might appear because the pump failed, the hose is blocked, or the board stopped sending power to the pump. A lid lock code might mean the lock is bad, the wiring is loose, or the control board is misreading feedback. Pair each code with hands-on checks before ordering parts.
Run only the tests you can safely observe. Keep hands clear of the drum, belt area, and electrical connections while the washer is plugged in. Listen for clicking relays, pump hum, water valve buzz, and motor response. Those small clues often reveal whether the control signal is reaching the part or dying at the board.
Some diagnostic cycles store the last few faults, and that history can be useful. A single old code after a power outage may not matter much. Repeated versions of the same fault carry more weight, especially if they appear after every wash. Patterns beat panic every time, and repeat faults deserve more attention than one random blink.
Moisture And Heat Damage
Moisture damage is sneaky because it may not shut the washer down right away. Steam, splashes, and damp laundry rooms can slowly corrode terminals and leave cloudy marks on the board. The washer may start acting weird only after enough residue builds up to interrupt signals. That is why a board can look mostly fine at first glance but still behave badly.
Heat creates a different kind of trouble. Relays, resistors, and power components can run warm during normal use, but poor ventilation makes the stress worse. A washer squeezed into a tight closet with lint buildup and little airflow may cook its electronics over time. Better airflow supports electronic reliability, especially in laundry corners that already feel warm and stuffy.
Nearby appliances can add to the heat problem too. A dryer, water heater, or ducted range hood setup nearby may affect how air moves through the utility area. If the space needs better kitchen or utility ventilation, explore range ducted hoods as a separate airflow upgrade for rooms where trapped heat and cooking odors pile up. It will not repair the washer board, but better ventilation can reduce the kind of stale, humid environment electronics hate.
Cleaning a board takes restraint. Do not soak it, scrape it hard, or blast it with household cleaners. Light corrosion around connectors may be cleaned with proper electrical contact cleaner after the washer is unplugged and fully safe to handle. Heavy corrosion, blackened tracks, or green buildup under components usually signals deeper board damage.
Preventing Repeat Board Failure
Washer control board failure often returns because the original trigger never got fixed. A new board can fail fast if the outlet has unstable voltage, the wiring harness is damaged, or moisture keeps dripping into the console. Replacing parts without checking the environment is like patching a roof while ignoring the storm. The repair needs both the board and the failure source handled.
A surge protector rated for appliances can help in homes with frequent power flickers. It will not save a board from every electrical event, but it can reduce stress from smaller voltage spikes. Avoid cheap power strips because washers draw serious current during certain cycle stages. A steady, grounded outlet gives the main control system a safer place to work.
Load habits matter more than they seem. Overloading the drum forces the motor to work harder, increases vibration, and can trigger off-balance shutdowns that confuse cycle control. Wet rugs, bulky blankets, and packed towels are common troublemakers. Better loading protects the motor circuit, suspension, drain system, and board commands all at once.
Keep the console area dry and clean. Wipe spills quickly, avoid spraying cleaners directly on the panel, and leave the door open after loads if the washer design allows it. A damp machine invites odors, corrosion, and sensor glitches. Small habits can protect electronic parts far better than a repair done after everything has already failed.
Knowing When To Call A Technician
DIY washer repair has limits, and electrical work is where those limits matter. If the board has burned areas, melted connectors, or live voltage checks are required, a trained technician is the safer call. Guessing around energized circuits can damage the washer or hurt someone. A good repair is not worth turning a laundry problem into an electrical hazard.
A technician can test voltage at the board, verify relay output, inspect communication lines, and confirm whether the user interface is also failing. That matters because some washers split control duties between multiple boards. Replacing only one board may not solve the problem if the display panel or motor control board is also faulty. Proper diagnosis protects the budget and the repair outcome.
Ask for the old part back if a board is replaced. That keeps the repair transparent and helps confirm what was actually changed. Also ask whether the technician found moisture, burned wiring, or power-related damage. Those details help prevent a new control board replacement from failing for the same reason.
Repair makes the most sense when the washer is otherwise solid. A clean drum, quiet bearings, strong drain pump, and stable motor all support the case for board replacement. A machine with leaks, grinding sounds, rust, and repeated drainage issues may be throwing good money after bad. The better choice depends on the whole washer, not just the electronic control board.
Testing The Washer After The Fix
Post-repair testing should be slow and boring, which is exactly what you want. Start with a short drain or rinse cycle before trusting the washer with a full load. Watch the display, listen for odd relay clicks, and confirm the door locks and unlocks normally. A calm first test helps catch problems before soaked laundry gets involved.
Run a small load next, not a bulky one. A few towels or everyday clothes give the washer enough weight to prove fill, wash, drain, and spin behavior. Check whether the machine finishes without codes or random pauses. Smooth cycle flow tells you the control board communication is likely back on track.
Look around the machine after the test. Water under the washer, a hot electrical smell, or a flickering display means the job is not finished. Also check that the console buttons respond consistently instead of lagging or double-registering. Small signs like these reveal whether the repair stability is real or just temporary.
Keep notes for the next few loads. Write down any error codes, cycle names, noises, or times when the washer stops. Patterns make future troubleshooting faster and cheaper. A repaired washer should settle into predictable behavior, and repeated glitches after a board reset usually mean another electrical or mechanical fault is still hiding in the system.


10 Best Quality Semi Automatic Washing Machine of 2026 For Leak-Free Laundry

11 Best Small Washer Machine of 2026 For Everyday Laundry

12 Best Vibration Pads For Washing Machine of 2026 To Stop Walking and Shaking

11 Best Selling Front Load Washing Machine of 2026 For Quiet Odor-Free Laundry

11 Best Washing Machine For King Size Bedding of 2026 To Prevent Cycle Errors

10 Best Small Front Loader Washing Machine of 2026 For Tight Closets

12 Best Side Load Washing Machine of 2026 For Low Vibration

11 Best Single Tub Washing Machine of 2026 For Apartments Without Hookups






