
How To Repair Maytag Washer Agitator or Drain Issues Fast

How To Repair Maytag Washer Agitator or Drain Issues starts with understanding the little warning signs most people brush off until laundry day turns into a headache. A washer that refuses to drain, leaves clothes soaking wet, or makes awful grinding sounds can throw the whole house into chaos. One minute everything seems fine, then bam, dirty water sits in the drum like a swamp nobody wants to deal with. Small symptoms often point to worn agitator dogs, clogged drain pumps, kinked hoses, or debris trapped deep inside the machine.
Funny thing is, many Maytag washer problems don’t begin with catastrophic damage. They usually creep in slowly. Agitation weakens over time, cycles take longer, and strange rattling noises start popping up during spin mode. That’s why washer maintenance and early troubleshooting matter more than most folks realize. Catching the issue early can prevent expensive parts replacement and help the washer keep running smoothly instead of turning into a costly garage ornament.
Drain issues especially tend to snowball fast. Lint buildup, coins, hairpins, detergent sludge, and even tiny socks can clog drain pathways before anyone notices. Then suddenly the washer stops mid-cycle or throws standing water back into the tub. Nobody wants to wrestle with gallons of murky water after a long day. Cleaning the drain pump filter, checking the hose connection, and inspecting the impeller can often restore proper flow without needing a full replacement.
Agitator problems create a different kind of frustration. Clothes come out twisted, half-clean, or still smelling funky because the agitator can’t move properly anymore. Worn internal splines or damaged directional cogs are common troublemakers in older Maytag units. Replacing those small components is usually more manageable than people expect, especially with basic hand tools and a little patience. Also, uneven loads and overloaded drums can quietly wear the agitator system down over time.
Noise complaints deserve attention too. Clicking, humming, or grinding sounds often hint at deeper drain pump strain or agitator wear. Ignoring those noises usually backfires. Mechanical parts rarely “fix themselves,” and delayed repairs can push a simple maintenance job into full motor or transmission trouble. That’s why drain system inspection and agitator troubleshooting should happen before the washer completely stops working.
Separately, if appliance maintenance has become part of a bigger laundry room upgrade, exploring organized storage systems and durable utility shelving can help reduce clutter around hoses, detergents, and repair tools. A cleaner workspace makes troubleshooting far less irritating, especially during messy drain repairs or part replacements.
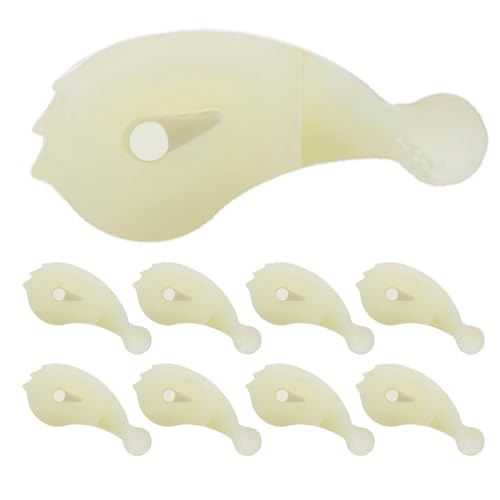
- TAR Score9.6
TAR Score is a ranking system developed by TopAppliancesReviews.com. TAR score has no relationship or impact from any manufacturers or sales agent websites. Learn more
- BrandWokHok
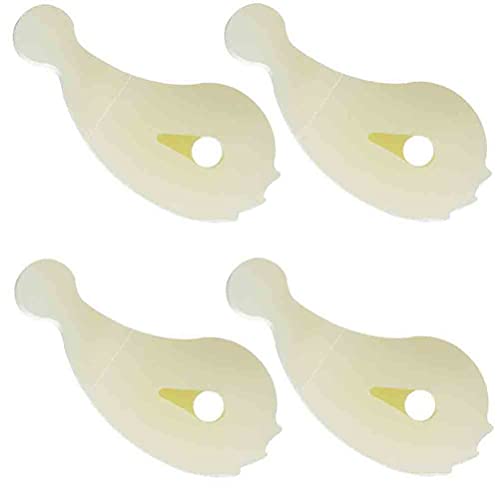
- TAR Score9.6
TAR Score is a ranking system developed by TopAppliancesReviews.com. TAR score has no relationship or impact from any manufacturers or sales agent websites. Learn more
- BrandSeentech

- TAR Score9.4
TAR Score is a ranking system developed by TopAppliancesReviews.com. TAR score has no relationship or impact from any manufacturers or sales agent websites. Learn more
- BrandXFYBZN

- TAR Score9.2
TAR Score is a ranking system developed by TopAppliancesReviews.com. TAR score has no relationship or impact from any manufacturers or sales agent websites. Learn more
- BrandAKEYSRC

- TAR Score9.0
TAR Score is a ranking system developed by TopAppliancesReviews.com. TAR score has no relationship or impact from any manufacturers or sales agent websites. Learn more
- BrandSeentech

- TAR Score8.6
TAR Score is a ranking system developed by TopAppliancesReviews.com. TAR score has no relationship or impact from any manufacturers or sales agent websites. Learn more
- BrandAfter Market Parts
Last update on 2026-07-16 / Affiliate links / Images, Product Titles, and Product Highlights from Amazon Product Advertising API
How To Repair Maytag Washer Agitator Or Drain Issues
Laundry trouble has a rude way of showing up right when the hamper is packed and patience is thin. A tub full of dirty water, a weak agitator, or a humming drain pump can make a simple chore feel like a plumbing mystery. The smart path for how to repair maytag washer agitator or drain issues starts with calm checks, not guesswork. Small clues like slow draining, poor wash movement, and odd noises usually point toward the real problem before parts get expensive.
Maytag Washer Repair Basics
A Maytag washer usually gives warnings before it fully quits, and those warnings deserve attention. Clothes coming out soaked can point to a drain blockage, a tired pump, or a hose sitting at the wrong angle. Weak agitation may come from worn agitator dogs, stripped splines, or an overloaded basket. Start with the simplest checks first, because plenty of “big” washer problems come from coins, lint, buttons, or detergent sludge sitting where they don’t belong.
Power and water safety come first, no shortcuts. Unplug the washer before opening panels, tilting the machine, or reaching near the drain pump. Shut off the water valves if hoses need to move, and keep towels close because standing water has a sneaky way of spreading across the floor. This step feels basic, but it protects the machine, the floor, and your hands.
The repair mindset matters just as much as the tool kit. A rushed repair often leads to cracked clips, lost screws, or a hose pushed back on halfway. Take photos before removing parts, lay screws in order, and keep the workspace clear. For laundry setups that depend on sink connections, prevent hose stress by checking the faucet area too, and upgrade the connection with a faucet for portable washing machine if the current setup keeps leaking or pulling loose.
Good troubleshooting follows the path of the symptom. A washer that fills but won’t wash points toward the agitator drive system. A washer that washes but leaves water behind points toward the drain system. A washer that shakes, thumps, and walks across the room may need leveling, load balancing, or vibration control before deeper parts get blamed.
Drain Problems That Stop The Cycle
Drain trouble usually starts with water refusing to leave the tub. The washer may stop mid-cycle, hum without draining, or finish with clothes still heavy and dripping. The most common suspects are a clogged drain hose, a blocked pump inlet, or debris wrapped around the impeller. A small sock, hair tie, or pocket coin can jam things up like a cork in a bottle.
Check the drain hose before replacing anything. Pull the hose gently from the standpipe or laundry sink, then look for kinks, crushed bends, or lint buildup near the end. A hose pushed too far down the standpipe can also create draining headaches, especially if it causes siphoning or poor airflow. Keep the hose secure, but don’t jam it so tightly that water can’t move freely.
The pump area needs a patient inspection. Some Maytag models have easier access than others, but the goal stays the same: find anything blocking the water path. Listen for a low hum, clicking, or grinding while the washer tries to drain, because those sounds often mean the pump is powered but struggling. If the impeller is cracked, jammed, or loose, the washer may need a replacement pump rather than another cleaning session.
Detergent habits can make drain problems worse. Too much soap creates residue that traps lint and slows water flow, especially in colder wash cycles. High-efficiency washers need HE detergent in smaller amounts, not a “more is better” pour. Foam may look harmless, but it can confuse sensors, stretch cycle times, and leave the drain system messy.
Agitator Issues And Weak Wash Action
A failing agitator makes laundry look washed without truly getting clean. Shirts may stay bunched together, towels may come out with dry patches, and detergent can cling to fabric like chalk dust. The agitator should move with firm, controlled action, not flop around or spin freely without grabbing the load. Weak movement often points to worn agitator dogs, damaged cams, or stripped internal grooves.
Agitator dogs are small parts, but they do a big job. They help the upper agitator grip in one direction and release in the other, creating that familiar ratcheting motion. Once those plastic pieces wear down, the washer may still make noise, but the clothes won’t roll through the water properly. Replacing them is usually cheaper than replacing the whole agitator, which is why this check belongs early in the repair process.
Remove the agitator carefully and avoid forcing old plastic. Many units have a cap, bolt, or fabric softener dispenser covering the center fastener. Once opened, inspect the drive block, splines, bolt, and lower agitator base for cracks or rounded edges. A part that looks slightly chewed up may be the reason the washer sounds busy while the load barely moves.
Load size can quietly punish the agitator system. Heavy blankets, packed towels, and uneven jeans loads put extra stress on the moving parts. The washer may handle it once or twice, but repeated overloads grind down agitator components faster than normal use. Split bulky loads, spread fabric evenly, and let the machine move water through clothes instead of forcing the agitator to wrestle a stuffed drum.
Noises, Shaking, And Hidden Clues
Noise tells a story if you don’t tune it out. A grinding sound during drain may point toward debris in the pump, while a clicking sound during wash may point toward worn agitator parts. Loud banging during spin often comes from an uneven load, weak suspension, or a machine sitting out of level. The tricky part is that washer noise can echo through the cabinet, making one problem sound like another.
Start with the floor and balance before blaming major parts. A washer that rocks on uneven flooring can shake hard enough to loosen hoses, stress the drain connection, and wear internal parts. Adjust the leveling feet until the machine sits firm, then run a small test load. For laundry rooms where vibration keeps coming back, reduce the racket and floor movement with an anti vibration washing machine setup that helps the washer stay planted during spin.
A humming pump without water movement deserves quick attention. That sound can mean the motor is trying, but the impeller can’t turn freely. Shut the washer down before the pump overheats or burns out. Clearing the blockage may save the part, but a pump that keeps humming after cleaning may be too worn to trust.
Smell is another clue people overlook. Sour odors can come from trapped water, detergent residue, or fabric debris sitting in the drain path. A stale laundry room can also make the repair area feel worse than it is, especially in small utility spaces with poor airflow. For lingering odors beyond the washer itself, improve room freshness with a medify air purifier while still fixing the drain issue at the source.
Tools And Checks Before Buying Parts
Basic tools can handle many Maytag washer checks. Keep a nut driver, pliers, towels, a shallow pan, a flashlight, and work gloves nearby. A phone camera helps more than people expect, especially when remembering hose placement or screw order. The goal is clean diagnosis, not tearing everything apart like a weekend demolition project.
Check the model number before ordering parts. Maytag washers can look similar from the outside while using different agitator kits, pumps, belts, lids, or sensors inside. The model tag is usually under the lid, around the door frame, or near the rear panel. Matching parts by exact model prevents the classic headache of waiting for a package that doesn’t fit.
Test one repair at a time. Cleaning a hose, replacing agitator dogs, and changing the pump all at once might hide the original cause. Fix the most likely problem, run a short cycle, then watch what changes. This slower approach makes the repair more reliable and helps avoid wasting money on parts that were never broken.
Some symptoms call for stopping before damage spreads. Burning smells, visible wiring damage, water leaking near electrical areas, or repeated breaker trips need a more cautious approach. A confident homeowner can handle many agitator and drain repairs, but electrical faults and major leaks raise the stakes. Knowing where the DIY line sits can save money without turning a washer repair into a bigger mess.
How To Repair Maytag Washer Agitator Or Drain Problems
A washer that drains poorly or scrubs weakly can turn a normal laundry routine into a stop-and-start mess. The bigger frustration is that the machine may still power on, fill, and make noise, so the problem feels half-hidden. That’s where how to repair maytag washer agitator or drain issues becomes less about guessing and more about reading the symptoms in the right order. A steady repair plan helps protect washer performance, reduce repeat clogs, and keep simple wear from turning into a bigger bill.
Clean The Drain Path First
A slow drain often begins in the easiest place to reach. Pull the washer away from the wall carefully and inspect the drain hose for sharp bends, crushed spots, or lint packed near the outlet. A hose that looks fine from above may still be pinched behind the machine. Straightening that line can improve water flow before a single part gets replaced.
Standing water needs patience, not panic. Use towels, a shallow pan, and a slow drain method so the laundry room doesn’t turn into a puddle party. Once the water level drops, check the hose end and pump area for coins, fabric scraps, hair ties, or detergent sludge. Tiny debris can block the impeller just enough to make the washer hum without moving much water.
Soap residue can act like glue inside the drain system. Too much detergent leaves film that traps lint, especially in cold-water cycles or heavily soiled loads. To reduce buildup, use the right amount of HE detergent and avoid filling the cap out of habit. For smaller laundry setups, reduce residue and suds trouble by switching to a detergent for portable washing machine that fits compact wash habits better.
A drain pump that keeps clogging may be telling a bigger story. Check pockets before every load, use mesh bags for tiny garments, and avoid washing loose pet blankets without shaking them outside first. The pump can handle normal lint, but it isn’t built to chew through socks, gravel, or metal bits. Keeping debris out protects drain speed and helps the washer finish cycles without random stops.
Inspect Agitator Parts Closely
Weak agitation usually shows up in the laundry before it shows up as a clear mechanical failure. Clothes may sit in one clump, detergent may streak across fabric, and towels may smell like they only took a bath in plain water. The agitator should create steady movement that rolls fabric through the wash, not just twitch at the center. A worn agitator cam or damaged dog assembly can make the machine sound active while the load barely moves.
Remove the agitator cap gently and look for the center bolt or fastener. Older plastic parts can crack if they’re pried too aggressively, so slow hands beat brute force here. Once the agitator comes loose, inspect the splines, dogs, and inner grooves for rounded edges. Smooth or chewed-up teeth usually mean the part can no longer grip properly.
Replacement kits are often small, but they need to match the exact model number. Maytag has used different designs across top-load washers, and “close enough” parts can waste time fast. Check the model tag before ordering anything, then compare the old part shape to the replacement. That one habit prevents a lot of muttering, returns, and half-finished repairs.
Agitator trouble can also come from laundry habits. Oversized comforters, packed towel loads, and heavy wet jeans stress the drive system more than regular mixed loads. The washer may survive those loads for a while, but repeated overloading wears plastic contact points and drive parts faster. Split bulky items into smaller loads so the agitator can move water through fabric instead of fighting a packed basket.
Reset Bad Laundry Habits
Plenty of washer problems come from patterns that feel harmless. A little extra soap, one more towel, or a hose shoved a bit too far into the standpipe may not seem like a big deal. Over time, those small choices create slow draining, musty smells, weak rinsing, and extra strain on moving parts. Repairing the washer helps, but changing the habit keeps the same issue from marching right back.
Load balance matters more than people think. A washer that bangs during spin may loosen hose connections, stress suspension parts, and leave the drain system working harder than needed. Mix heavy and light items carefully, and pause the cycle if the basket starts thumping like a drumline. A steady load protects spin speed, drain efficiency, and the agitator’s grip.
Moisture and odor around the laundry area can make every washer issue feel worse. Keep the lid open after cycles, wipe the detergent area, and clear lint from nearby surfaces. If the laundry room shares air with a kitchen or utility corner, better ventilation can help reduce lingering smells, and a kobe range hoods upgrade fits homes where cooking steam and laundry humidity keep piling up in the same zone. Cleaner airflow won’t repair a pump, but it does make the space easier to live with while maintenance stays on track.
Monthly checks are boring, sure, but they save headaches. Look behind the washer for hose wear, wipe around the lid seal, and run a cleaning cycle if the tub smells sour. Check that the standpipe drains quickly and doesn’t gurgle or back up during heavy discharge. These simple checks help catch clog risks before they become standing water at the worst possible moment.
Know What The Sounds Mean
A washer’s sound can narrow the search if you listen closely. A humming noise during drain often points toward a powered pump that can’t move freely. Grinding may mean debris is stuck near the impeller, while clicking during wash can come from worn agitator dogs. Each sound gives a clue, and noise timing matters just as much as noise type.
Run a short cycle with a small load after any repair. Watch the fill, agitation, drain, and spin stages instead of walking away. If the washer agitates strongly but still leaves water behind, the drain path needs more attention. If the washer drains fine but clothes barely move, the agitator assembly remains the main suspect.
Vibration can confuse the diagnosis. A machine that shakes hard may sound like it has a failing pump or loose internal part, even if the real problem is uneven flooring. Level the washer, tighten the feet, and make sure all four corners sit firmly. Once the cabinet stops rocking, the real mechanical noises become easier to separate from plain old movement.
Bad smells deserve a check too. Sour water odors often mean trapped moisture, blocked drainage, or residue inside the tub. A burnt smell is different and should be treated more seriously because it may point toward electrical strain, motor trouble, or a failing pump. Stop using the washer if burning odor, smoke, or breaker trips appear.
Decide Between DIY And Service
Some repairs fit a careful DIY approach. Cleaning the drain hose, clearing pump debris, replacing agitator dogs, and checking load balance are realistic jobs for many households. These tasks usually require basic tools and a little patience. The best candidates are problems with clear symptoms, visible blockages, or small wear parts.
Other problems deserve a technician. Water leaking near wiring, repeated electrical faults, cracked tubs, seized motors, or transmission trouble can move beyond a simple Saturday repair. Pushing through those jobs without the right tools can turn one issue into several. A service call makes more sense when safety, electrical parts, or major internal components are involved.
Cost also shapes the decision. A small agitator kit or hose cleaning may be worth the effort on an otherwise solid washer. A major repair on an older machine with rust, frequent leaks, and repeated failures may not be the smartest spend. Compare the repair cost against age, condition, and how often the washer has acted up lately.
Documentation helps if service becomes necessary. Write down the symptoms, cycle stage, sounds, leaks, and any parts already checked. A clear repair history saves time because the technician won’t have to start from zero. It also helps avoid replacing parts based on vague guesses instead of real washer behavior.
Prevent Repeat Agitator And Drain Issues
Prevention starts before clothes hit the tub. Empty pockets, shake out muddy workwear, and use mesh bags for tiny socks or delicate items. Loose objects are the enemy of drain pumps, and heavy grit can wear parts faster than normal laundry. A cleaner load protects pump life and helps the washer drain without surprise clogs.
Use detergent like a measured tool, not a lucky charm. More soap doesn’t mean cleaner clothes, especially in high-efficiency machines. Extra suds can leave residue, slow rinsing, and add grime to the drain path. Keeping detergent modest supports clean rinsing, better agitation, and fewer stale smells inside the washer.
Give the agitator room to work. Clothes need space to roll, sink, lift, and move through the water. A packed basket turns the agitator into a stressed plastic post instead of a cleaning mechanism. Smaller loads may feel less convenient, but they reduce wear and give fabrics a better shot at coming out actually clean.
Keep a simple repair rhythm. Check hoses every few months, clean the washer tub, listen for new sounds, and fix small changes before they become loud problems. A Maytag washer can be sturdy, but sturdy doesn’t mean maintenance-free. Consistent care keeps drain flow, agitator movement, and cycle reliability in better shape.


10 Best Quality Semi Automatic Washing Machine of 2026 For Leak-Free Laundry

11 Best Small Washer Machine of 2026 For Everyday Laundry

12 Best Vibration Pads For Washing Machine of 2026 To Stop Walking and Shaking

11 Best Selling Front Load Washing Machine of 2026 For Quiet Odor-Free Laundry

11 Best Washing Machine For King Size Bedding of 2026 To Prevent Cycle Errors

10 Best Small Front Loader Washing Machine of 2026 For Tight Closets

12 Best Side Load Washing Machine of 2026 For Low Vibration

11 Best Single Tub Washing Machine of 2026 For Apartments Without Hookups






