
How to Remove Washer Drain Hose Without a Mess

How to remove washer drain hose safely sounds simple until dirty water splashes across the laundry room floor, stubborn clamps refuse to budge, or that old hose suddenly cracks in your hands. Plenty of people start the job thinking it’ll take a quick tug and a bucket, then end up wrestling with trapped water and slippery connections. A little patience changes everything. Proper preparation keeps the process cleaner, safer, and far less stressful.
Old washer hoses often collect grime, detergent buildup, and hidden moisture over time. That funky smell creeping around the laundry area usually traces back to residue sitting inside the drain line. Removing the hose carefully helps prevent spills and keeps debris from spreading around the room. A steady approach also lowers the risk of damaging nearby plumbing connections, especially in tight laundry spaces where every inch feels cramped.
How to remove washer drain hose safely also matters because modern washers can hold more leftover water than most expect. Even after a drain cycle finishes, trapped liquid often lingers deep inside the hose. Tilt the hose the wrong way and, whew, the mess arrives fast. Towels, shallow pans, and slow movements make the entire process much easier to manage without soaking the floor or nearby walls.
Clamp styles can throw people off too. Some hoses use spring clamps that require pliers, while others rely on screw-style fasteners that tighten like miniature metal rings. Rushing through the removal usually leads to stripped clamps or cracked hose ends. Gentle pressure works better than brute force, especially with older rubber hoses that have become stiff from years of heat and detergent exposure.
Another headache pops up once the hose is disconnected. The drain opening itself may release unpleasant odors or leftover sludge sitting near the standpipe. Cleaning the surrounding area before reconnecting a new hose helps reduce future drainage issues. That extra effort pays off later because clogged washer drains rarely start overnight. They build slowly, little by little, until water backs up during a cycle.
Safety plays a bigger role than many realize. Washing machines combine water, electricity, and heavy equipment in one tight spot. Unplugging the appliance and shutting off nearby water sources helps prevent accidental shocks or slippery accidents. Tight corners behind stacked laundry units can also strain your back and shoulders, so careful positioning matters more than people think.
Small details shape the entire experience. A flashlight makes hidden hose clamps easier to spot. Rubber gloves improve grip when hoses feel slimy or wet. Even placing a plastic sheet under the machine can save cleanup time afterward. Those practical little steps often separate a smooth repair from an aggravating afternoon filled with soaked socks and repeated mopping.
How to remove washer drain hose safely becomes much less intimidating once the process is broken down calmly and logically. Slow handling protects the hose connection, prevents surprise leaks, and keeps the laundry room from turning into a puddle-filled disaster. A careful approach also makes reinstalling or replacing the hose far easier later on, which saves both time and frustration in the long run.

- TAR Score10.0
TAR Score is a ranking system developed by TopAppliancesReviews.com. TAR score has no relationship or impact from any manufacturers or sales agent websites. Learn more
- BrandZeikiwe

- TAR Score9.4
TAR Score is a ranking system developed by TopAppliancesReviews.com. TAR score has no relationship or impact from any manufacturers or sales agent websites. Learn more
- BrandSupplying Demand

- TAR Score9.4
TAR Score is a ranking system developed by TopAppliancesReviews.com. TAR score has no relationship or impact from any manufacturers or sales agent websites. Learn more
- BrandRecDec

- TAR Score9.2
TAR Score is a ranking system developed by TopAppliancesReviews.com. TAR score has no relationship or impact from any manufacturers or sales agent websites. Learn more
- BrandBudora

- TAR Score9.2
TAR Score is a ranking system developed by TopAppliancesReviews.com. TAR score has no relationship or impact from any manufacturers or sales agent websites. Learn more
- BrandEnRand

- TAR Score9.0
TAR Score is a ranking system developed by TopAppliancesReviews.com. TAR score has no relationship or impact from any manufacturers or sales agent websites. Learn more
- BrandDLHMBOQ
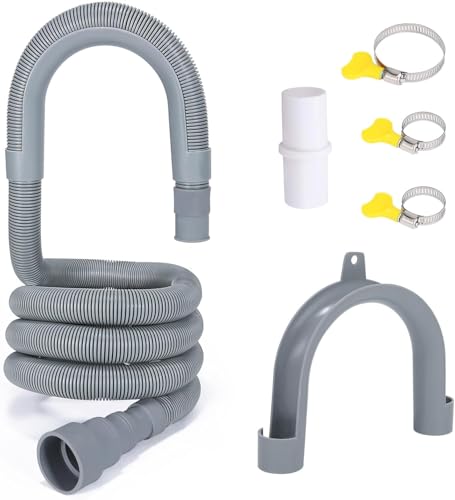
- TAR Score8.6
TAR Score is a ranking system developed by TopAppliancesReviews.com. TAR score has no relationship or impact from any manufacturers or sales agent websites. Learn more
- BrandPink Cross

- TAR Score8.4
TAR Score is a ranking system developed by TopAppliancesReviews.com. TAR score has no relationship or impact from any manufacturers or sales agent websites. Learn more
- BrandCOLDDD
Last update on 2026-06-09 / Affiliate links / Images, Product Titles, and Product Highlights from Amazon Product Advertising API
How To Remove Washer Drain Hose Safely
A quiet laundry room can turn chaotic fast once trapped water starts spilling behind the washer. The job looks small from the front, but the space behind the machine often hides dirty water, tight clamps, stiff rubber, and awkward plumbing angles. That is why how to remove washer drain hose safely needs a calm, step-by-step approach instead of a hard pull and a hopeful shrug. Done carefully, the process protects your floor, your washer connection, and your patience.
Safe Washer Drain Hose Removal
Washer drain hose removal starts before anyone touches the hose. Clear the laundry area first, because baskets, detergent bottles, and floor mats get in the way once water starts moving. Keep old towels, a shallow tray, and a bucket nearby so you are not scrambling with wet hands. That little setup saves a surprising amount of cleanup later.
Unplug the washing machine before moving it or reaching behind it. Water and electricity make a bad pair, and a damp laundry floor only makes the risk worse. Turn off the washer controls, then disconnect power fully so the machine cannot start by accident. This simple step gives the whole job a safer starting point.
Pull the washer forward slowly, not with one hard yank. Many laundry rooms have short hoses, tight water lines, or flooring that scratches easily. Shift the machine a few inches at a time and watch the back connections as they move. Protecting the floor matters, especially if the washer sits on vinyl plank, tile edges, or older laminate.
The drain hose usually runs from the washer into a standpipe, sink, or wall drain. Look at the route before removing anything, because hose position tells you where trapped water may flow. A hose that dips low can hold more water than expected. Keep the open end raised until the bucket is ready.
Prepare The Laundry Area First
Preparation keeps the job from turning into a soggy mess. Place towels around the washer base and near the drain connection before loosening the hose. A shallow pan works well in tight spots where a bucket will not fit. Small steps like these make the job feel controlled instead of chaotic.
Lighting matters more than people expect. Washer hoses often sit in dim corners where clamps and drain openings are hard to see. Use a flashlight or phone light to inspect the hose end, clamp style, and nearby fittings. A clear view helps prevent damaged clamps and rushed mistakes.
Wear gloves if the hose looks slimy or old. Drain hoses can collect detergent residue, lint, mildew, and gritty buildup over time. That residue is unpleasant, but it can also make the hose slippery. Better grip means better control, especially while twisting a stuck hose free.
Keep the hose end pointed upward until you can lower it into a bucket. Trapped water often sits in the bend of the hose even after the washer has finished draining. Lower it too soon and dirty water can splash onto the floor or wall. Slow movement is the quiet hero here.
For bulky laundry loads, drainage issues often show up after washing heavy bedding or stuffed items. To reduce future strain on the washer, compare better laundry setups through best washing machine for pillows before dealing with repeated hose clogs from oversized loads.
Disconnect The Hose Without Forcing It
The safest way to remove the hose is to start at the drain end, not by attacking every connection at once. Lift the hose carefully from the standpipe or sink drain and aim it into a bucket. Let the leftover water drain slowly. This protects the floor and gives you a cleaner workspace before touching the washer-side connection.
Some hoses slide out easily, while others feel stuck from years of grime and heat exposure. Twist gently instead of pulling straight back. A small side-to-side motion can break the seal without tearing the hose or stressing the washer outlet. Gentle pressure beats brute force almost every time.
Clamp style changes the removal process. Spring clamps need pliers to squeeze the tabs together, while screw clamps need a screwdriver to loosen the band. Keep one hand on the hose while loosening the clamp so it does not drop suddenly. That steady hold prevents surprise spills and protects the connection point.
Older rubber hoses can crack near the end, especially where the clamp has squeezed the material for years. Check for brittleness before twisting too hard. A cracked hose should be replaced rather than reused, because a weak end may leak during the next drain cycle. Hose condition tells you whether cleaning is enough or replacement makes more sense.
Control Trapped Water And Odors
Trapped water is the part that catches most people off guard. Even a washer that looks empty can leave water sitting inside the hose. Keep the hose low over a bucket until the flow stops completely. Then tilt it slowly from one end to the other to clear hidden pockets.
Drain water may smell sour because detergent residue, lint, and moisture sit together inside the hose. That odor does not always mean the washer is ruined. It usually means the hose or drain path needs cleaning. Wipe the hose exterior and drain opening with a disposable cloth before reconnecting or replacing anything.
A clogged standpipe can send water back toward the washer during future cycles. Look inside the drain opening with a flashlight if water drained slowly before removal. Lint clumps, soap film, and small debris can collect near the top. Removing visible buildup helps prevent another messy laundry day.
Some laundry rooms also trap odors because airflow is poor. Damp walls, nearby hampers, and closed doors can make smells linger longer after hose work. Improve the room environment with ventilation and regular cleaning around the washer base. For homes where smoke or stale air makes laundry smells worse, improve the room feel with best air purifier for smoke and allergies as a separate air-quality upgrade.
Inspect The Hose Before Reusing It
Inspection is not busywork. A drain hose that looks fine from a distance may have soft spots, cracks, flattened bends, or worn ends. Squeeze along the hose gently and feel for weak areas. Any section that feels mushy, brittle, or deeply kinked deserves attention.
Check the hose opening for lint mats or hardened detergent buildup. A narrow passage slows drainage and can trigger leaks during fast spin cycles. Rinse the hose outdoors or in a utility sink if it is still reusable. Avoid blasting debris into a small bathroom sink, because that only moves the clog somewhere else.
Measure the hose if replacement looks necessary. A hose that is too short can pull loose during vibration, while one that is too long can sag and hold dirty water. The right length keeps a smooth path from washer to drain without sharp bends. Proper fit matters as much as the hose material.
Families running frequent loads need a washer setup that handles steady use without constant drainage headaches. For a broader machine upgrade path, compare practical capacity and household needs through best washing machine for middle class family before replacing parts over and over on an overloaded unit.
Avoid Common Drain Hose Mistakes
Rushing is the biggest mistake during how to remove washer drain hose safely. People tug the hose, spill water, then blame the washer. The real problem is usually poor prep and impatience. A slow removal keeps the mess small and the connection intact.
Do not shove tools into the hose connection to pry it loose. Metal screwdrivers can damage plastic outlets or tear old rubber. Use gentle twisting, clamp adjustment, and patience instead. If the hose refuses to move, loosen the clamp more and work the end gradually.
Do not ignore hose height after removal. The replacement or reinstalled hose must sit securely in the standpipe without being jammed too far down. A hose pushed too deep can create drainage problems, while a loose hose can jump out during a drain cycle. Secure placement prevents repeat spills.
Do not reuse a hose just because it technically still fits. Cracks, stiff ends, and stubborn odors are warning signs. A cheap reused hose can cost more later if it leaks behind the washer unnoticed. Water damage behind appliances has a sneaky way of staying hidden until flooring or drywall shows trouble.
Set Up For Reconnection Later
Once the hose is off, clean the washer outlet and nearby area before putting anything back. A damp rag can remove old residue around the connection. Dry the area afterward so new leaks are easier to spot. Clean contact surfaces help the hose seal better.
Keep clamps in good shape if they will be reused. Bent spring clamps or rusty screw clamps may not hold the hose evenly. Replace questionable clamps instead of trusting them for another round of draining and vibration. A strong clamp keeps the hose seated during heavy spin cycles.
Route the hose without sharp bends. A smooth curve drains better and puts less stress on the connection. Avoid pinching the hose behind the washer after pushing the machine back. That final check matters because crushed hoses can cause slow draining or backup problems.
Run a short rinse or drain cycle after reconnection and watch the hose closely. Look for drips around the clamp, movement at the standpipe, and water backing up from the drain. Stay nearby during the first test instead of walking away. Leak checks are boring until they save your floor.
How To Remove Washer Drain Hose Safely In Tight Spaces
Cramped laundry corners make this job feel more annoying than it should. A washer tucked beside shelves, utility sinks, or a narrow hallway leaves barely enough room for both hands, let alone a bucket and flashlight. That is where how to remove washer drain hose safely becomes less about strength and more about smart positioning, slow movements, and keeping the hose controlled from start to finish.
Work Carefully Behind The Washer
Move the washer only as far as the hoses and cords allow. Pulling too hard can strain the water supply lines, bend the drain hose, or scrape the flooring. Rock the machine gently from side to side instead of dragging it in one rough motion. A small furniture slider or folded towel under the front feet can help protect softer flooring.
Keep your body position stable before reaching behind the machine. Awkward twisting can lead to sore shoulders or scraped knuckles, especially in narrow laundry closets. Place one hand on the washer for balance and use the other hand to guide the hose. Steady movement matters more than speed here.
Check the drain hose route before loosening anything. Some hoses run through a retaining clip on the back of the washer, while others sit loose behind the machine. Removing the hose from a clip too aggressively can crack brittle plastic or pull the hose sideways. A quick look saves a lot of irritation.
Keep a towel pressed beneath the hose connection while working. Even a few ounces of trapped water can run down the wall or behind the baseboard. That hidden moisture is the kind that creates smells later. Immediate spill control keeps the repair cleaner and protects the laundry area.
Clean Around The Drain Connection
The drain area often looks worse once the hose is out. Lint, soap film, dust, and old water can collect around the standpipe or sink drain opening. Wipe the area before reconnecting anything so fresh buildup does not get pushed deeper into the drain. Clean surroundings make leaks easier to spot during the test cycle.
Do not pour harsh chemicals into the washer drain just because it smells bad. Strong cleaners can damage certain pipes, splash back, or create fumes in a small laundry room. A safer first step is wiping visible residue, clearing lint near the opening, and flushing with warm water if the drain setup allows it. For routine washer freshness, compare maintenance choices like washing machine cleaner before buildup turns into a bigger odor problem.
Look for signs of slow drainage around the standpipe. Water stains, dried soap residue, or a musty smell can suggest that water has backed up before. A hose removal job is a good time to notice these clues. Drain behavior tells you whether the hose was the only issue or part of a wider problem.
Keep the hose opening covered while moving it across the room. A plastic bag or old towel wrapped around the end prevents drips from trailing across the floor. That sounds fussy until one dirty streak runs under the washer. Little cleanup tricks make the whole job less aggravating.
Replace Or Reinstall The Hose Correctly
A clean hose can go back on only if it still feels flexible and holds its shape. Cracked rubber, flattened bends, or loose ends are warning signs. Reusing a weak hose may save a few dollars today but risk a leak tomorrow. Replacement makes sense once the hose looks worn or smells sour after cleaning.
Slide the hose fully onto the washer outlet before tightening the clamp. A hose sitting halfway on the fitting can leak during the drain cycle. Position the clamp over the reinforced area, not at the very edge of the hose. Clamp placement helps the connection seal evenly.
Do not overtighten screw clamps. Too much pressure can cut into older rubber or deform a plastic outlet. Tighten until the hose feels secure, then stop. A firm seal should not require crushing the hose.
Set the drain end back into the standpipe at the proper depth. Too shallow and it may pop out during draining. Too deep and it may create siphoning or drainage trouble. Proper hose height keeps water moving the way the washer was designed to handle it.
Test The Washer Before Pushing It Back
Run a short drain or rinse cycle while the washer is still pulled forward. Watch the hose connection, standpipe, and floor underneath the machine. A slow drip is easier to fix before the washer is shoved back into place. Leak testing is the step that saves floors from quiet damage.
Keep a dry paper towel near the hose clamp during the test. Touch it around the connection after water drains. Even tiny moisture marks can reveal a weak seal. That simple check works better than guessing by sight alone in a dark corner.
Listen for unusual sounds during draining. Gurgling, slow flow, or water backing up at the standpipe can point to a partial clog. A hose replacement will not solve a blocked wall drain. Drain performance should look smooth before the washer goes back into regular use.
Push the washer back slowly after the test cycle ends. Watch the hose so it does not kink, pinch, or slip from the drain. Tight laundry setups sometimes need small storage adjustments, and a separate appliance like a compact refrigerator should never crowd the washer hose path or block access to plumbing. Leave enough room for airflow, inspection, and future maintenance.
Prevent Future Drain Hose Problems
Routine checks keep small hose problems from turning into wet-floor surprises. Look behind the washer every few months for drips, kinks, dust buildup, or hose movement. Heavy spin cycles can slowly shift the machine and tug on the hose. Regular inspection catches those changes early.
Avoid overloading the washer with bulky items that hold lots of water. Heavy loads can create more vibration and put extra stress on the drain system. Spread laundry evenly and use the right cycle for bedding, towels, or dense fabrics. Balanced loads help protect both the machine and the hose connection.
Keep the laundry room dry between washes. Leave the washer door or lid open when possible, wipe damp areas, and let air circulate. Moisture trapped behind appliances can make odors worse and encourage grime around hoses. Dry airflow helps the whole space stay fresher.
Replace the drain hose if it keeps smelling, leaking, or clogging after cleaning. Some parts simply age out, especially in busy homes where the washer runs often. A fresh hose and secure clamp can restore confidence without turning the job into a major repair. Safe removal makes that replacement cleaner, calmer, and far less messy.


10 Best Quality Semi Automatic Washing Machine of 2026 For Leak-Free Laundry

11 Best Small Washer Machine of 2026 For Everyday Laundry

12 Best Vibration Pads For Washing Machine of 2026 To Stop Walking and Shaking

11 Best Selling Front Load Washing Machine of 2026 For Quiet Odor-Free Laundry

11 Best Washing Machine For King Size Bedding of 2026 To Prevent Cycle Errors

10 Best Small Front Loader Washing Machine of 2026 For Tight Closets

12 Best Side Load Washing Machine of 2026 For Low Vibration

11 Best Single Tub Washing Machine of 2026 For Apartments Without Hookups






