
How to Remove Stuck Washer Pump Filter Without Damage

How to remove stuck washer pump filter safely becomes a real headache once that filter refuses to budge and dirty water starts creeping across the floor. Plenty of people twist too hard, grab the wrong tool, or yank the cap out too fast, only to end up with cracked plastic, stripped threads, or a washer that suddenly leaks during the next cycle. A jammed filter usually signals trapped lint, hardened detergent residue, hair buildup, or tiny debris wedged deep inside the housing. That stubborn resistance can feel nerve-racking, especially after hearing that awful creaking sound while turning the cap.
Most washer pump filters aren't actually “broken.” They're just packed tight after months of ignored buildup and moisture exposure. Old detergent sludge can dry into a sticky ring around the filter seal, making removal surprisingly difficult. Then there’s the hidden water pressure issue. Twist too quickly and boom, dirty water gushes everywhere before towels even hit the floor. Slow handling matters more than brute force, and honestly, patience saves far more money than replacing cracked plastic parts later.
Safe removal techniques matter because washer pump housings aren't built like metal plumbing fittings. They're lightweight plastic components designed for controlled movement, not aggressive force. People often make the mistake of using oversized pliers or wrench grips that crush the cap edges. That’s where trouble snowballs fast. One damaged filter cap can turn a simple cleaning task into a frustrating parts search that drags on for days.
Temperature also plays a sneaky role here. Cold plastic tightens slightly, while sticky debris hardens around the threading. A little warmth around the filter area can loosen grime enough to reduce resistance without damaging seals. Small details like this make a huge difference. Instead of wrestling the filter like a rusted bolt, controlled movement and gradual pressure help protect the washer’s internal components.
Drain preparation gets overlooked all the time, yet it’s usually the messiest part of the job. Even partially clogged filters can trap a surprising amount of stagnant water behind the housing. That funky smell many people notice? Yeah, trapped lint and moisture usually sit there longer than expected. Towels, shallow trays, and slow draining techniques help prevent panic once the cap finally starts turning loose.
Some filters loosen easily after a gentle rocking motion, while others need gradual back-and-forth turns to break buildup apart. Rushing the process almost always backfires. Soft cloth grips, rubber gloves, or controlled strap tools usually work better than hard metal tools that chew into the cap surface. Also, older washers may have brittle plastic that cracks under uneven pressure, so careful handling isn't just recommended, it's necessary.
How to remove stuck washer pump filter safely isn't only about getting the cap off. It's about avoiding leaks, protecting internal seals, and preventing future drainage problems before they snowball into expensive repairs. A clean pump filter improves draining performance, reduces unpleasant odors, and helps the washer cycle more smoothly. Small maintenance habits now can spare a mountain of frustration later, and frankly, nobody wants standing water sitting inside their laundry room at midnight.

- TAR Score10.0
TAR Score is a ranking system developed by TopAppliancesReviews.com. TAR score has no relationship or impact from any manufacturers or sales agent websites. Learn more
- Brandlasenersm

- TAR Score9.2
TAR Score is a ranking system developed by TopAppliancesReviews.com. TAR score has no relationship or impact from any manufacturers or sales agent websites. Learn more
- BrandREEPLAR

- TAR Score9.0
TAR Score is a ranking system developed by TopAppliancesReviews.com. TAR score has no relationship or impact from any manufacturers or sales agent websites. Learn more
- BrandTOKCKYBL
- TAR Score8.8
TAR Score is a ranking system developed by TopAppliancesReviews.com. TAR score has no relationship or impact from any manufacturers or sales agent websites. Learn more
- BrandValueMax
- TAR Score8.6
TAR Score is a ranking system developed by TopAppliancesReviews.com. TAR score has no relationship or impact from any manufacturers or sales agent websites. Learn more
- BrandDanti

- TAR Score8.2
TAR Score is a ranking system developed by TopAppliancesReviews.com. TAR score has no relationship or impact from any manufacturers or sales agent websites. Learn more
- BrandYIHANGYE
- TAR Score8.2
TAR Score is a ranking system developed by TopAppliancesReviews.com. TAR score has no relationship or impact from any manufacturers or sales agent websites. Learn more
- BrandWatts

- TAR Score7.8
TAR Score is a ranking system developed by TopAppliancesReviews.com. TAR score has no relationship or impact from any manufacturers or sales agent websites. Learn more
- Brandupuuup
Last update on 2026-06-25 / Affiliate links / Images, Product Titles, and Product Highlights from Amazon Product Advertising API
How To Remove Stuck Washer Pump Filter Safely
A washer that won’t drain can turn a normal laundry day into a soggy little disaster, especially once the pump filter refuses to move. The cap feels welded in place, the floor is already damp, and every extra twist sounds like it might snap something expensive. That’s exactly why how to remove stuck washer pump filter safely matters more than forcing the part loose with a pair of angry pliers. A calm setup, slow pressure, and the right grip can protect the pump housing, reduce mess, and keep the repair from snowballing.
Stuck Filter Basics
A stuck washer pump filter usually starts with lint, hair, detergent sludge, and tiny debris packed around the threads. Coins, hairpins, collar stays, and broken zipper pulls can also wedge inside the filter chamber. The cap may still move a little, then lock up as soon as the debris hits the housing wall. That small stop is the washer’s way of saying, “Easy now.”
Force creates the biggest risk here because most filter caps and housings use plastic threads, not metal plumbing parts. One hard twist with locking pliers can chew the cap, crack the outer rim, or distort the seal. Once the seal warps, the washer may drain again but drip later during rinse or spin cycles. That tradeoff stings because the original problem was probably just a clog.
Water pressure can also make the filter feel more stuck than it really is. If water remains behind the filter, the cap may resist turning because the seal is still pressed tight. Slowly draining from the emergency hose, if your washer has one, can reduce that pressure before you touch the cap. This step protects both the floor and the filter gasket.
Some washers hide the filter behind a small lower access panel, while others place it behind the kick plate. The layout changes, but the principle stays the same: reduce pressure, loosen debris, protect the threads, and move slowly. If your washer handles sensitive home drainage setups, compare maintenance habits with a washing machine for septic system so the machine doesn’t overload plumbing with lint-heavy discharge. The cleaner the drain path stays, the less drama the pump filter gives you later.
Prep The Area First
Good prep keeps this job from turning into a slippery mess. Place thick towels under the filter access area before you open anything. A shallow tray, baking sheet, or low plastic container helps catch the first dirty gush. Keep one extra towel nearby because washer water loves traveling farther than expected.
Unplug the washer before working near the pump area. That sounds basic, but it’s a real safety step, not a fussy warning. A washer can still have electrical components close to damp spots around the lower front panel. Dry hands, a dry floor, and no power make the task much safer.
Check whether your washer has a small drain hose beside the pump filter. Many front-load machines include one for controlled draining. Pull the hose out gently, remove the plug, and let water run into the tray a little at a time. This controlled drain lowers the chance of a sudden flood once the filter cap starts to loosen.
Wear rubber gloves if the filter has been ignored for months. The water can smell sour because lint, detergent residue, and warm moisture sit together inside the pump chamber. Gloves also improve grip without biting into the plastic cap. That softer grip matters because controlled traction beats brute force here.
Loosen Without Cracking Plastic
Start with hand pressure before grabbing tools. Press inward slightly, then turn the cap counterclockwise with steady force. That inward pressure can help the threads line up instead of grinding sideways. If the cap shifts even a little, stop, reverse slightly, then turn again.
A back-and-forth motion works better than one long, stubborn twist. Move the filter cap a small amount counterclockwise, then clockwise, then counterclockwise again. This rocking motion can break loose detergent buildup around the threads. It feels slow, but slow is exactly what saves the housing.
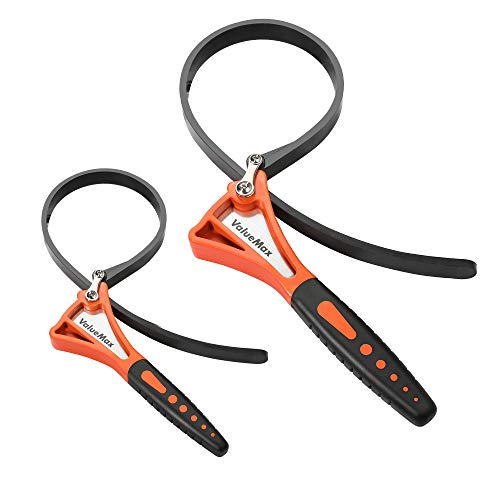
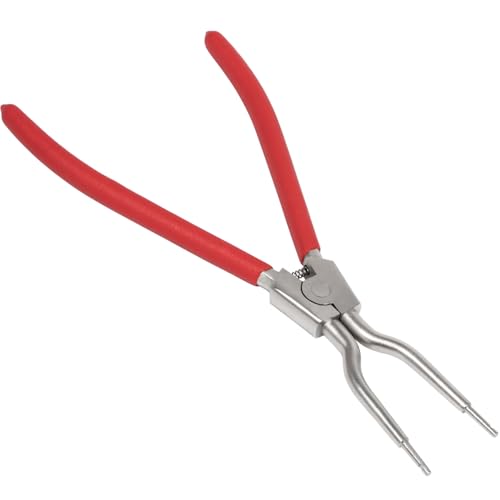
A rubber jar opener, strap wrench, or thick cloth can add grip without crushing the cap. Metal pliers should be a last resort, and even then, use light pressure only. Clamp too hard and the cap edges deform before the clog even loosens. A damaged cap may look minor, but it can ruin the watertight seal.
Warmth can help if the washer sits in a cold laundry room or garage. Hold a warm damp cloth against the filter cap area for several minutes to soften residue around the seal. Avoid boiling water, heat guns, or open flame because plastic pump housings can warp. Gentle warmth plus patient rocking often works better than muscle.
Drain Water Slowly
Water behind the filter can be dirtier than expected, so let it out in stages. Turn the cap just enough to release a small trickle, then tighten it slightly if the tray fills too fast. Empty the tray, reset the towels, and repeat. This step keeps the job controlled instead of turning it into a mop-and-pray situation.
Watch the water flow as it drains. A slow trickle may point to a packed filter or blocked pump chamber. A sudden gush usually means the filter seal finally released. Either way, slow draining protects flooring, cabinets, and nearby baseboards from moisture damage.
Borewell or mineral-heavy water can leave residue inside appliances over time. Hard deposits may make a pump filter feel gritty or tight, especially around the cap threads. To reduce appliance strain in homes with mineral-heavy supply, explore a washing machine for borewell water that fits tougher water conditions. Cleaner water habits can help reduce residue that clings to internal washer parts.
Odor tells a story too. A sour or swampy smell often means damp lint has been sitting behind the filter for too long. That buildup can slow draining and make clothes smell less fresh after washing. Clearing the pump filter helps restore better drainage and cuts down on that stale laundry-room funk.
Remove Debris Carefully
Once the cap loosens, pull the filter out slowly. Debris may cling to the filter basket, or it may sit just behind it inside the pump chamber. Don’t jab blindly with a screwdriver because the pump impeller can sit nearby. Use fingers with gloves, tweezers, or a soft cloth to remove visible debris.
Lint clumps often hide small objects. Coins, buttons, hair ties, bra wires, and broken plastic bits can wedge deep enough to block the filter from turning smoothly. Remove each piece gently and check the filter grooves. Clean threads help the cap go back in without cross-threading.
Spin the pump impeller gently if you can reach it, but don’t force it. A small amount of magnetic resistance or uneven movement can be normal depending on the pump design. What you don’t want is a hard jam caused by debris. Clearing that obstruction can improve drain performance right away.
Rinse the filter under warm water after removing the larger debris. A soft toothbrush can clean grime from the mesh, grooves, and gasket area. Avoid harsh scraping because scratched plastic catches residue faster later. A clean filter basket lets water pass through more freely during drain cycles.
Check The Seal Before Reinstalling
The rubber gasket around the filter cap deserves a close look. Cracks, flat spots, grit, or twisted sections can cause leaks after reinstallation. Wipe the gasket with a damp cloth and remove hair or sandy residue from the groove. A clean seal gives the cap a better chance of closing evenly.
Thread the filter back in by hand only. If it doesn’t catch smoothly, back it out and try again. Cross-threading can damage the pump housing, and that repair costs far more than a careful restart. Smooth threading should feel firm, not crunchy or crooked.
Tighten the cap until snug, but don’t overdo it. The gasket creates the seal, not extreme force. Over-tightening can make the next cleaning harder and may flatten the rubber over time. Snug, even pressure is the sweet spot for leak prevention.
Run a short rinse or drain cycle after everything is closed. Keep towels under the access panel and watch for drips. A small bead of water around the cap means the seal may not be seated correctly. Stop, unplug the washer, and reseat the filter before running a full load.
Prevent The Filter From Sticking Again
Regular cleaning keeps the filter from turning into a stubborn plug. A quick check every month or two works well for busy homes, pet hair, small kids’ clothes, and lint-heavy towels. Smaller loads with fewer loose items also reduce debris buildup. That habit protects the pump system without adding much work.
Use mesh laundry bags for tiny items that love escaping into the washer drain path. Baby socks, bra pads, reusable cleaning cloths, and delicate straps can sneak past the drum and end up near the filter. Empty pockets before washing, even if it feels annoying. One coin can make a pump filter feel completely jammed.
Detergent amount matters more than most people think. Too much detergent leaves residue that can mix with lint and harden near the filter. High-efficiency washers especially need measured detergent because extra suds don’t mean cleaner clothes. The cleaner the rinse, the less soap sludge collects around the filter threads.
Laundry rooms can hold moisture, lint dust, and stale smells after repeated drain issues. Cleaner air won’t fix a clogged washer, but it can make the space less musty while you handle appliance maintenance. For nearby odor and dust control, compare a best air purifier for money option that fits laundry rooms, utility corners, or small indoor spaces. Fresh air helps, but the filter still needs hands-on cleaning.
Avoid Costly Removal Mistakes
The fastest way to ruin this job is to treat the filter cap like a stuck lug nut. Washer pump parts need steady pressure, not sudden force. Hard jerks can snap tabs, strip threads, or crack the cap face. Once that happens, the washer may need replacement parts before it can run safely.
Don’t pour drain cleaner into the washer to “free” the filter. Chemical cleaners can damage seals, hoses, and plastic pump parts. They may also leave residue that touches clothes during later cycles. Mechanical removal and proper cleaning are safer than chemical shortcuts.
Don’t ignore repeated sticking after one successful removal. If the filter jams again quickly, debris may be deeper inside the drain hose or pump chamber. A slow-draining washer, repeated error codes, or grinding noises can point to a bigger blockage. That pattern deserves a closer inspection before the pump overheats or fails.
Stop if the cap cracks, spins without loosening, or leaks after reseating. Those signs suggest damaged threads, a warped gasket, or a broken filter body. Continuing to run the washer can push water into places it doesn’t belong. At that point, replacing the filter cap or calling a repair tech may be cheaper than gambling with a leak.
Safe Fixes After The Filter Comes Loose
The filter may finally turn, but the job isn’t over once that stubborn cap gives way. A clean removal still needs careful inspection, proper reseating, and a quick leak check before the washer goes back to normal loads. Tiny bits of grit around the gasket can undo all that patient work and leave a slow drip behind the access panel.
Inspect The Pump Chamber
Shine a small flashlight into the pump opening before putting the filter back. Look for coins, hair ties, broken plastic tabs, lint ropes, or anything wrapped around the impeller. A stuck washer pump filter often means debris moved farther than expected, so don’t assume the basket caught everything.
Move slowly around the impeller area because that small fan-like part can be delicate. A finger with a glove works better than a sharp tool for checking loose objects. If the impeller feels jammed, stop forcing it and remove visible debris first.
Some washers make a faint clicking feel when the impeller turns, and that can be normal. A hard stop, grinding feel, or trapped object is different. That kind of resistance points to a deeper blockage that could keep the washer from draining even after the filter is cleaned.
Wipe the chamber opening with a damp cloth before reinstalling the filter. Dirt around the rim can stop the gasket from sealing flat. That tiny cleaning step helps prevent slow leaks after the next rinse cycle.
Clean The Filter The Right Way
Rinse the filter basket under warm running water until lint and detergent film loosen. A soft toothbrush can clean the mesh, grooves, and cap threads without scratching the plastic. Scratches matter because rough plastic catches more soap residue during future washes.
Skip harsh cleaners and strong chemicals around the gasket. Rubber seals can dry out, swell, or lose flexibility after contact with aggressive products. Warm water, mild dish soap, and patience are usually enough for safe cleaning.
Detergent habits play a big role in how often the filter sticks. Too much soap leaves sticky buildup that mixes with lint and hardens near the drain path. To reduce residue during regular laundry, compare a best liquid soap option that rinses cleaner and suits your washer type.
Let the filter drip dry for a moment before reinstalling it. A dry rim makes it easier to spot cracks, flattened gasket areas, or worn threads. Catching those small defects early can save the washer from leaking after a full load.
Reinstall Without Cross-Threading
Line up the filter cap straight before turning it clockwise. If it tilts, backs up, or feels crunchy, remove it and start again. Cross-threading can damage the pump housing, and that repair gets annoying fast.
Hand-tightening is the safest move here. The gasket makes the seal, not wild force from a wrench. A snug fit with even pressure protects the rubber seal and makes the next cleaning easier.
After the cap is seated, wipe the area dry. Moisture left around the opening can trick you into thinking there’s a fresh leak. A dry surface gives you a clear read during the first test cycle.
Run a short drain or rinse cycle with towels still on the floor. Watch the filter cap, lower panel, and nearby hose area. If you see dripping, stop the washer, unplug it, and reseat the filter before running clothes again.
Handle Repeat Clogs Smartly
A filter that keeps clogging isn’t just being difficult. Repeated blockage often points to pocket debris, excess lint, overused detergent, or small clothing items slipping into the drain path. The filter is catching the mess, but the laundry routine is feeding it.
Empty pockets before every load, especially jeans, jackets, uniforms, and kids’ clothes. Coins, screws, hair clips, and paper scraps can travel farther than you’d think. One forgotten item can turn into a jammed pump filter by the end of the cycle.
Use mesh bags for tiny items that love disappearing. Baby socks, bra pads, reusable makeup cloths, and delicate straps can slip past the drum edge. A cheap laundry bag saves the pump filter from becoming a lost-and-found drawer.
Cut back detergent if loads feel slimy, smell sour, or leave residue around the door gasket. High-efficiency washers need less soap because they use less water. Too much detergent creates sticky sludge, and sludge loves clinging to pump filter threads.
Know When To Stop For Safety
Stop twisting if the cap starts cracking, bending, or spinning without backing out. That usually means the threads are stripped or the filter body has separated from the cap. Pushing harder can damage the pump assembly and turn a simple filter job into a parts replacement.
Burning smells, buzzing during drain cycles, or repeated drain errors after cleaning deserve attention. The pump may be strained or blocked beyond the filter basket. A clean filter won’t fix a failing motor or debris stuck deep inside the hose.
Leaks after careful reseating usually point to a damaged gasket, warped cap, or dirty sealing surface. Replace the filter cap if the rubber seal looks cracked or flattened. A small part replacement beats dealing with water damage under the washer.
Homes with backup power setups should also keep laundry loads realistic during outages. Washers can draw sudden power during drain and spin cycles, which stresses weak power systems. For energy storage planning outside the laundry room, compare a best battery setup that supports steadier household power needs.
Build Better Filter Habits
Set a simple cleaning rhythm instead of waiting for drainage trouble. Busy homes, pet blankets, towels, and muddy clothes may need filter checks more often. Regular cleaning keeps lint buildup from hardening around the cap.
Keep a small washer kit nearby with gloves, a shallow tray, towels, and a soft brush. That way, cleaning the filter doesn’t feel like a whole production. Easy access makes routine maintenance less tempting to skip.
Watch the washer’s behavior after each cleaning. Slower draining, louder pump noise, and leftover water in the drum can signal that debris is still hiding somewhere. Early signs matter because pump strain usually gets worse before it gets better.
A stuck filter feels like a hassle, but it’s also a warning light. The washer is telling you that water, lint, and debris aren’t moving cleanly through the system. Handle the filter gently, clean the chamber well, and keep the drain path clear before the next laundry pile takes over.


10 Best Quality Semi Automatic Washing Machine of 2026 For Leak-Free Laundry

11 Best Small Washer Machine of 2026 For Everyday Laundry

12 Best Vibration Pads For Washing Machine of 2026 To Stop Walking and Shaking

11 Best Selling Front Load Washing Machine of 2026 For Quiet Odor-Free Laundry

11 Best Washing Machine For King Size Bedding of 2026 To Prevent Cycle Errors

10 Best Small Front Loader Washing Machine of 2026 For Tight Closets

12 Best Side Load Washing Machine of 2026 For Low Vibration

11 Best Single Tub Washing Machine of 2026 For Apartments Without Hookups






