
How to Remove Stuck Washer Lid Lock Mechanism Safely

How to remove stuck washer lid lock mechanism becomes a frustrating search the second the washer refuses to open and a pile of damp laundry starts smelling funky. One minute the cycle finishes, then boom, the lid stays locked like it’s guarding state secrets. That little clicking sound, flashing error light, or stubborn latch can push anybody to the edge, especially after trying the same button sequence three times in a row. A jammed lock doesn’t always mean a major repair, though, and that’s where a calmer, more practical approach helps.
Most washer lid lock problems trace back to a handful of common issues. Power interruptions, worn-out switches, detergent buildup, moisture around the latch, or a failed control board can all trigger the same annoying symptom. Some lids stay partially locked because the mechanism never resets after the spin cycle finishes. Others get stuck after repeated slamming, which slowly throws the alignment off until the hook no longer releases smoothly.
Safe removal steps matter more than brute force. Prying the lid open with random tools often cracks plastic hinges, bends the strike piece, or damages the wiring harness underneath. A better method starts with disconnecting power, checking for trapped pressure inside the drum, and locating the manual release tab if the washer model includes one. Small details like these prevent expensive mistakes that turn a simple latch issue into a full replacement job.
Oddly enough, many people overlook moisture and detergent residue around the locking area. Sticky buildup can prevent the mechanism from retracting fully, especially on high-efficiency washers that use automatic locking systems during wash cycles. Cleaning the latch area carefully with a soft cloth and mild cleaner sometimes fixes the issue faster than replacing parts. Then again, if the lock assembly clicks repeatedly without releasing, internal wear may already be creeping in.
Electrical symptoms also tell an important story. Flickering control panels, delayed unlocking, or repeated cycle interruptions usually point toward sensor communication problems instead of a physically jammed lid. Some washers even lock automatically after detecting an imbalance or drainage problem. So yeah, the lid lock may look like the culprit while another component quietly causes the trouble in the background.
Patience saves headaches here. Rushing the process can damage the washer frame or snap fragile plastic clips hidden beneath the top panel. A steady approach, basic tools, and attention to warning signs make the entire repair process far less stressful. Once the lock mechanism is properly removed or reset, the washer usually returns to normal operation without the drama people expect from appliance repairs.

- TAR Score10.0
TAR Score is a ranking system developed by TopAppliancesReviews.com. TAR score has no relationship or impact from any manufacturers or sales agent websites. Learn more
- BrandHRepair

- TAR Score10.0
TAR Score is a ranking system developed by TopAppliancesReviews.com. TAR score has no relationship or impact from any manufacturers or sales agent websites. Learn more
- Brandjjxeqo

- TAR Score9.4
TAR Score is a ranking system developed by TopAppliancesReviews.com. TAR score has no relationship or impact from any manufacturers or sales agent websites. Learn more
- BrandSoobool

WH01X27954 Washer Lid Lock Switch Part 290D1580P004 290D1580P001 290D1580P002 EG-380843M
View on Amazon- TAR Score9.2
TAR Score is a ranking system developed by TopAppliancesReviews.com. TAR score has no relationship or impact from any manufacturers or sales agent websites. Learn more
- BrandSaiyugty
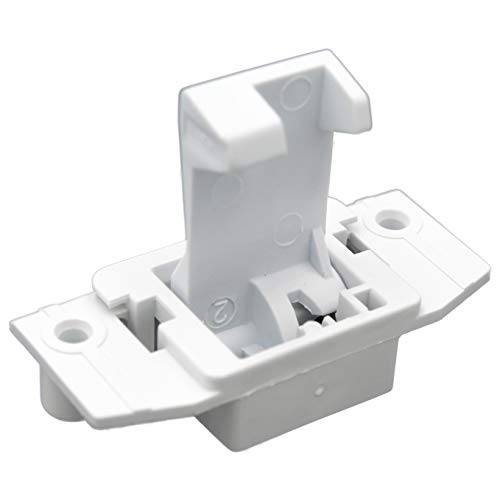
- TAR Score9.0
TAR Score is a ranking system developed by TopAppliancesReviews.com. TAR score has no relationship or impact from any manufacturers or sales agent websites. Learn more
- BrandSupplying Demand

- TAR Score7.2
TAR Score is a ranking system developed by TopAppliancesReviews.com. TAR score has no relationship or impact from any manufacturers or sales agent websites. Learn more
- BrandFuziddn

- TAR Score7.2
TAR Score is a ranking system developed by TopAppliancesReviews.com. TAR score has no relationship or impact from any manufacturers or sales agent websites. Learn more
- BrandNLZQMBC
Last update on 2026-06-25 / Affiliate links / Images, Product Titles, and Product Highlights from Amazon Product Advertising API
How To Remove Stuck Washer Lid Lock Mechanism
A locked washer lid can turn a normal laundry day into a real headache, especially with wet clothes trapped inside and the control panel acting stubborn. The problem often feels bigger than it is, but how to remove stuck washer lid lock mechanism usually starts with patience, power safety, and a closer look at the latch area. A washer lid lock is built to protect hands during spinning, so forcing it open can crack trim, bend the strike, or damage hidden wiring.
Washer Lid Lock Basics
A lid lock works like a small safety gate between the washer’s brain and the lid itself. During wash and spin cycles, the control board tells the lock to engage so the lid can’t pop open while the basket is moving. That’s smart design, but once the lock fails, the washer may sit there with laundry held hostage. The first move should always be unplugging the washer, not grabbing a screwdriver in a panic.
Most stuck locks fall into two camps: mechanical jams and electrical failures. A mechanical jam can happen when the latch strike is bent, detergent residue hardens around the catch, or the lid sits slightly out of alignment. An electrical failure feels sneakier because the lock may click, blink, or refuse to release even though nothing looks broken. Either way, treating the lock like a delicate part saves you from making the repair worse.
The lid lock assembly usually sits under the washer top panel near the front edge. Some top-load washers use screws hidden behind trim, while others use spring clips that release with a putty knife. The exact access point varies, so the safest habit is checking the model layout before pulling panels apart. A calm inspection helps protect plastic tabs, wire connectors, and the lid strike from accidental damage.
Beach homes can be rough on laundry machines because sand, humidity, and salty air creep into small moving parts. To reduce future wear from that kind of environment, compare machines built for coastal laundry spaces with washing machine for beach house options before replacing a washer that keeps locking up. That separate upgrade choice makes sense only if the old machine already has repeated corrosion, drain, or control issues. A single stuck lid lock usually deserves a repair attempt first.
Safety Steps Before Removal
Power safety isn’t just a nice extra here. A washer lid lock connects to wiring, and tugging on it while the machine has power can create shock risk or confuse the control board. Unplug the washer from the wall and wait several minutes so the control system can reset. That pause sometimes releases the lid without tools, which feels almost silly but happens more often than people expect.
Water inside the tub can also keep the lid locked on certain models. The washer may refuse to unlock because it still senses standing water or an unfinished cycle. Check whether the machine drained fully before assuming the lock assembly is dead. A clogged drain hose, blocked pump filter, or overloaded load can make the lid lock look guilty while another issue sits in the background.
Tools should stay simple and controlled. A putty knife, Phillips screwdriver, nut driver, flashlight, and needle-nose pliers usually cover the basics. Avoid knives, pry bars, and heavy force because washer tops use thin metal edges and brittle plastic clips. The goal is careful release, not winning a wrestling match with the lid.
Take a quick phone photo before disconnecting any wiring harness. That small habit saves a ton of confusion later, especially if the connectors look similar. Many lid lock plugs only fit one way, but older or cramped designs can still trip people up. Labeling the wires with tape gives you one more layer of repair confidence.
Manual Release And Reset Tricks
Many stuck washer lids release after a basic power reset. Unplug the machine, leave it alone for several minutes, then plug it back in and wait for the lock to cycle. Some washers click once or twice before releasing, which is normal. If the lock keeps chattering, the issue may involve a weak actuator or a control signal that never completes.
Some models include a manual release tab near the lock assembly or behind the front service area. This tab may be a small plastic pull, cord, or lever depending on the washer design. Pull it gently because snapping that release makes the job more annoying fast. A flashlight helps spot the release point without bending the lid or scratching the top panel.
A stuck lid can also come from a misaligned strike. The strike is the little piece on the lid that drops into the lock, and if it’s bent or loose, the lock may hold it at a weird angle. Tightening screws or nudging the strike back into position can free the mechanism without replacing the whole assembly. Small alignment problems create big drama because the washer needs a clean signal from the lid switch.
Dust, pet hair, and lint floating through a laundry room can build up around washer controls and latch areas. To cut down on airborne mess near laundry appliances, upgrade the room’s filtration with a pet air purifier with washable filter if shedding pets share the space. It won’t repair a broken lock, of course. It can help reduce the fine debris that settles around buttons, vents, and appliance seams.
Opening The Top Panel
Most top-load washers need the top panel lifted before the lid lock can be removed. Screws may sit behind the control console, under rear caps, or along the front seam. Push too hard in the wrong place and the panel can bend, so work slowly with steady pressure. A putty knife slipped into the front clips often releases the top without ugly scratches.
Once the panel lifts, support it safely instead of letting it flop backward. Hinges and wiring harnesses don’t like sudden strain. A helper can hold the panel, or you can prop it carefully with a towel-wrapped support. Keeping the panel stable protects the control wiring and gives your hands room to work.
The lid lock assembly is usually secured by two or more screws from the top or underside. Before removing those screws, look at how the harness routes through clips or channels. Pulling the assembly out without freeing the harness can tear wires or break retainers. A clean removal keeps the replacement process simple if the lock turns out to be bad.
Small laundry rooms collect moisture and detergent scent quickly, especially with poor airflow. For a separate air-quality fix, explore a compact unit like a small HEPA air purifier when the laundry area feels stale after wash days. That won’t unlock the washer, but it can make the space less musty while you deal with repairs. Appliance fixes and room comfort often overlap more than people think.
Removing The Lock Assembly
After the top panel is open, remove the screws holding the lock assembly in place. Keep one hand under the lock so it doesn’t drop or tug on the harness. Then press the connector tab and unplug the wiring gently. The connector tab can be stiff, but forcing it sideways can damage the wire plug.
Inspect the old lock before tossing it aside. Look for broken plastic, burn marks, corrosion, or a latch that won’t move smoothly. A sticky latch may respond to cleaning, but a cracked housing or scorched connector points toward replacement. Visible damage usually tells a clearer story than the error code alone.
Clean the surrounding area while the lock is out. Detergent residue, lint, and rust dust can sit around the opening and interfere with the new part. Use a soft cloth and mild cleaner, then dry everything before plugging parts back in. Moisture trapped near the connector is asking for more electrical trouble.
Install the lock in the same position and route the harness exactly as it was before. Loose wires can rub against moving parts or get pinched when the panel closes. Tighten screws snugly, not aggressively, because overtightening can strip plastic mounts. A secure fit matters, but overdoing it can create a new failure point.
Testing Before Full Reassembly
Test the washer before putting every trim piece back in place. Lower the top panel carefully, plug the washer in, and run a short cycle or lid lock test if the machine has one. Listen for a clean click and watch whether the lock light behaves normally. A steady lock and release pattern means the repair is moving in the right direction.
If the lid still won’t unlock, don’t yank it. The problem may be a failed control board, damaged harness, or drain-related lockout. Check the wires for pinches and confirm the connector is fully seated. A half-connected harness can mimic a bad lid lock and waste money on parts you didn’t need.
Error codes can help, but they shouldn’t be treated like gospel. Some washers throw a lid lock code after repeated failed cycles, even if the root cause sits elsewhere. A blocked drain, uneven load, or weak actuator can confuse the system. Pair the code with real symptoms before deciding on the next move.
Once the lock releases properly, finish reassembly and run a normal load without overfilling the basket. Heavy, unbalanced loads shake the machine hard and can strain the lid strike over time. Keep the lid area clean and avoid slamming it shut. Those small habits help the new or reset lock last longer without more laundry-day drama.
How To Remove Stuck Washer Lid Lock Mechanism Safely
A washer that locks shut after a cycle can make the whole laundry routine feel stuck in mud, especially if the lid won’t open and the clothes are still damp. The second half of how to remove stuck washer lid lock mechanism focuses on deeper checks, replacement clues, and habits that keep the problem from coming back. A careful repair path protects the lid strike, wiring harness, and control board from unnecessary damage. Small moves matter here, because one rushed pry can turn a simple lock issue into a bigger appliance bill.
Check The Lid Strike First
The lid strike is a small part, but it can cause a surprisingly big mess. This plastic or metal tab drops into the lock assembly and tells the washer that the lid is closed. If it bends, cracks, loosens, or sits off-center, the washer may stay locked even after the cycle ends. A close look at the lid strike alignment should happen before replacing the entire lock assembly.
Open the top panel carefully and inspect the strike from both angles if the lid can move at all. A loose screw can let the strike sit crooked, which keeps the lock from releasing cleanly. Tightening the strike may solve the issue if the part still looks solid. If the strike has a crack near the base, replacement is usually smarter than trying to glue it back together.
A washer used by one person still takes plenty of lid-open, lid-close abuse over time, especially in apartments or small laundry closets. For a separate upgrade path, compare space-conscious machines like a washing machine for single person if the old washer keeps having repeated latch, balance, or drain issues. That link fits best as a replacement consideration, not a quick repair fix. A single stuck lock still deserves a proper inspection before tossing the whole machine.
Sometimes the strike looks fine but still misses the lock slot by a hair. Press the lid down gently and watch whether the strike enters smoothly without scraping the lock housing. Scraping, rubbing, or a dull clunk points toward alignment trouble. A washer lid should close firmly, not need a shove like an old screen door.
Trace Wiring And Connector Problems
A lid lock that clicks but won’t release may be dealing with an electrical problem instead of a jam. The wiring harness sends lock and unlock signals between the control board and the latch assembly. If the connector is loose, pinched, corroded, or dirty, the washer may never get a clean signal. That makes the lock mechanism act broken even if the latch itself still moves.
Unplug the washer before touching any connector. Pull the harness plug by the connector body, not by the wires, because those small wires can loosen inside the plug. Look for greenish corrosion, black marks, melted plastic, or moisture near the terminals. Any of those signs suggest electrical stress that needs more than a quick reset.
Re-seat the connector firmly after inspection. A plug that looks attached may still sit slightly loose, especially after vibration from heavy spin cycles. Push it in until the locking tab clicks, then route the harness through its original clips. Loose wiring can rub against the cabinet, and that slow rubbing can create a fresh failure weeks later.
Off-grid laundry setups, cabins, and storm-prone homes can experience power interruptions that confuse washer control boards. For a separate power planning angle, explore a 12v wind turbine if small backup energy projects are already part of the home setup. That doesn’t replace washer diagnostics, but steady power habits can help reduce control glitches. The key is keeping appliance repair and energy planning in their own lanes.
Know When The Lock Needs Replacement
A stuck lock doesn’t always need replacement, but some signs are hard to ignore. A latch that won’t move by hand, a burnt smell, repeated clicking, or a lock light that flashes after every reset usually points toward a failing assembly. The washer may start a cycle, stop suddenly, then refuse to unlock again. Those patterns point to a worn actuator or failing internal switch.
Replacement makes sense if cleaning, resetting, and alignment checks don’t change the behavior. Most lid lock assemblies are model-specific, so matching the part number matters. A similar-looking lock may fit the opening but fail to communicate correctly with the control board. That’s why the model number inside the lid area or rear panel matters more than guessing from photos.
Before installing a new lock, compare it with the old one side by side. Check the connector shape, screw holes, latch opening, and wire length. Tiny differences can create installation problems once the washer top is lowered back into place. A correct match should sit flush without forcing screws or stretching the harness.
After replacement, run a small test cycle before washing a full load. Watch whether the lock engages, holds during spin, and releases after the cycle finishes. A clean lock cycle tells you the washer is reading the new part properly. If the problem remains, the issue may sit in the control board, drain system, or water level sensor.
Avoid Forcing The Washer Lid
Forcing a locked lid feels tempting, especially with wet clothes sitting inside. Bad idea. Washer lids, strikes, hinges, and lock housings are not built for sideways pressure. One hard pull can crack the lid trim or bend the cabinet lip enough to create future alignment problems.
A flat tool should only be used to release clips, not to pry the lid open against the lock. If the latch is still engaged, prying transfers pressure into the weakest plastic parts. That usually means broken tabs, ugly dents, or a lock strike that never lines up right again. Slow troubleshooting beats brute force every time.
Heat, moisture, and detergent residue can make plastic parts more brittle over time. Laundry rooms near bathrooms, basements, or humid utility spaces often speed up that wear. Wipe the latch pocket occasionally and leave the lid open after wash days when possible. Dry air around the lock area helps protect moving parts from sticky buildup.
Heavy loads also punish the locking system. A washer that shakes hard during spin can jar the lid, strike, and lock assembly over and over. Balance bulky towels, avoid stuffing the basket, and stop the cycle if the machine starts banging around. That simple habit reduces strain on the safety lock and the washer frame.
Prevent The Lock From Sticking Again
Prevention starts with keeping the lid area clean. Detergent splatter, lint, pet hair, and dust can settle around the latch opening and slowly gum up the mechanism. A soft cloth and mild cleaner are enough for routine care. Skip harsh sprays near the lock because excess liquid can seep into the electrical connector.
Close the lid firmly but don’t slam it. Slamming may feel satisfying when the washer acts stubborn, but it knocks the strike out of alignment over time. A smooth close helps the lock catch correctly and keeps the lid switch from getting confused. Treat the lid like a moving part, not a countertop.
Pay attention to early warning signs. A delayed unlock, repeated clicking, random pause, or flashing lid light gives you a heads-up before a full lockout happens. Catching those clues early usually means easier cleaning, adjustment, or part replacement. Waiting until the lid traps a full load makes the repair messier and more stressful.
Keep the washer level, too. An uneven machine shakes harder during spin, and that vibration can loosen screws around the lid strike and lock assembly. Adjust the feet until the washer sits steady on the floor. A stable washer protects the lock mechanism, drain parts, and control system from extra wear.
Fix Related Drain And Cycle Issues
A lid lock can stay engaged because the washer believes the cycle isn’t finished. That often happens when water remains in the tub, the drain pump stalls, or the machine senses an unsafe spin condition. The lock may be doing its job while another part causes the delay. Check for standing water before blaming the lock alone.
Listen for the drain pump during the final part of the cycle. A humming sound without water movement may point to a clog or stuck pump. No sound at all may suggest a control or pump power issue. Either way, a lid that won’t open after a failed drain cycle needs a broader check.
Inspect the drain hose for kinks, clogs, or poor placement. A hose pushed too far into the standpipe can cause siphoning problems, while a crushed hose slows drainage. Slow draining can confuse the washer and keep the lock engaged longer than expected. Clean water flow supports proper unlocking after spin.
Run a rinse and spin cycle with a small, balanced load after repairs. This test shows whether the washer drains, spins, locks, and unlocks in the right order. If everything behaves normally, the lid lock issue was likely tied to the latch or reset process. If the machine locks again, the drain system deserves a closer look before replacing more parts.
Decide Between Repair And Service
DIY repair makes sense when the problem is visible, accessible, and limited to the lid strike or lock assembly. A basic replacement can be manageable with patience and the right part. Still, some symptoms deserve a technician’s eyes. Burnt connectors, repeated control errors, or a washer that locks during random moments point toward deeper electrical trouble.
A service call can save money if guessing parts would get expensive. Lid locks, drain pumps, control boards, and harnesses can all trigger similar symptoms. Swapping parts blindly gets old fast. A clear diagnosis matters more than replacing the easiest-looking component.
Age matters, too. A newer washer with one bad lock may be worth repairing without much debate. An older machine with rust, noisy bearings, draining problems, and repeated lid lock faults may not deserve another round of parts. Honest repair math keeps the decision practical instead of emotional.
Keep notes after the repair. Write down the error code, part number, symptom, and date of replacement. Those details help if the issue returns later or if a technician needs the repair history. A simple note can turn a confusing repeat problem into a clear maintenance trail.


10 Best Quality Semi Automatic Washing Machine of 2026 For Leak-Free Laundry

11 Best Small Washer Machine of 2026 For Everyday Laundry

12 Best Vibration Pads For Washing Machine of 2026 To Stop Walking and Shaking

11 Best Selling Front Load Washing Machine of 2026 For Quiet Odor-Free Laundry

11 Best Washing Machine For King Size Bedding of 2026 To Prevent Cycle Errors

10 Best Small Front Loader Washing Machine of 2026 For Tight Closets

12 Best Side Load Washing Machine of 2026 For Low Vibration

11 Best Single Tub Washing Machine of 2026 For Apartments Without Hookups






