
How to Remove Stuck Suspension Rods From Washer Tub

How to remove stuck suspension rods from washer tub becomes a real headache once corrosion, detergent buildup, or years of vibration lock everything in place. Plenty of washer owners start with confidence, grab a wrench, twist a little too hard, and suddenly realize the rods won’t budge an inch. Then comes the frustration. Scraped knuckles, awkward angles, and that stubborn metallic creak can make a simple repair feel way bigger than expected.
Still, there’s a smarter way to handle it. Careful pressure, proper positioning, and understanding how suspension systems actually move inside the washer tub can save both time and unnecessary damage. A lot of people rush into pulling parts apart without checking tension points or supporting the tub correctly. That’s usually where things go sideways. A washer suspension rod system depends heavily on balance, so forcing components loose too aggressively can throw off alignment later.
Stuck suspension rods often happen because moisture sneaks into connection points over time. Rust settles in quietly. Soap residue hardens around brackets. Tiny vibrations during spin cycles slowly tighten components together like they’ve been welded shut. What seems impossible at first usually needs patience more than brute force. Oddly enough, stepping back for a minute and changing the removal angle can make all the difference.
Some washer tubs also create extra resistance because the rods sit under constant spring tension. Pulling one side too quickly may jam the opposite side tighter. That little detail catches many people off guard. Supporting the tub evenly before attempting removal keeps pressure balanced and prevents sudden shifts. It also reduces the risk of bending rod brackets or damaging the washer frame.
How to remove stuck suspension rods from washer tub also depends heavily on washer design. Top-load models from different brands use slightly different locking clips, rod caps, and mounting layouts. One setup may release with a simple twist, while another needs the tub lifted carefully to release tension first. Tiny differences matter here. Ignoring them can turn a manageable repair into a full teardown.
Noise issues, violent shaking, or off-balance spin cycles usually push people toward this repair in the first place. Nobody wants a washer sounding like it’s preparing for takeoff every laundry day. Replacing worn suspension rods restores stability, but getting old rods out safely becomes the hardest part of the job. Slow movements, penetrating lubricant, and controlled leverage usually work better than excessive force.
Then again, patience isn’t exactly easy when you’re kneeling beside a half-disassembled washer. That’s why understanding the hidden sticking points matters so much. Once you know where rods seize, where tension builds, and how the tub shifts during removal, the process feels far less intimidating. A repair that seemed impossible suddenly becomes manageable with the right approach and a little persistence.
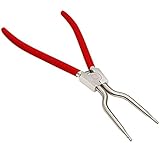
- TAR Score9.0
TAR Score is a ranking system developed by TopAppliancesReviews.com. TAR score has no relationship or impact from any manufacturers or sales agent websites. Learn more
- BrandBeaquicy

- TAR Score8.8
TAR Score is a ranking system developed by TopAppliancesReviews.com. TAR score has no relationship or impact from any manufacturers or sales agent websites. Learn more
- BrandSporthfish

- TAR Score8.8
TAR Score is a ranking system developed by TopAppliancesReviews.com. TAR score has no relationship or impact from any manufacturers or sales agent websites. Learn more
- Brandprime&swift
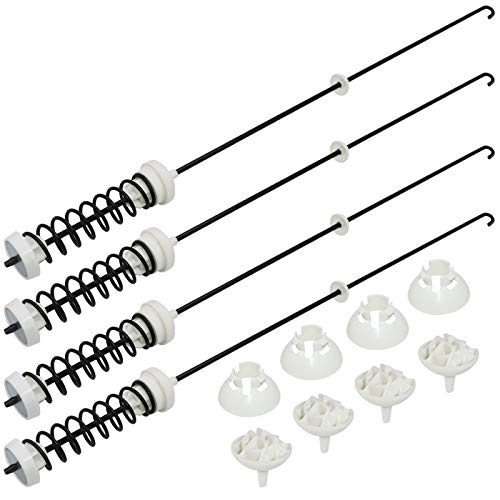
【2025 UPGRADED】W10780048 WTW4800XQ4 WTW4800XQ1 RTW4640YQ1 ATW4675YQ1 Washer Suspension Rod Kit(4
View on Amazon- TAR Score8.8
TAR Score is a ranking system developed by TopAppliancesReviews.com. TAR score has no relationship or impact from any manufacturers or sales agent websites. Learn more
- BrandBeaquicy

W11130362 MVWC565FW2 WTW5000DW2 MVWX655DW1 WTW5000DW3 MVWC565FW1 Washer Suspension Rod Kit(1-year-warranty)
View on Amazon- TAR Score8.8
TAR Score is a ranking system developed by TopAppliancesReviews.com. TAR score has no relationship or impact from any manufacturers or sales agent websites. Learn more
- BrandPulluty

- TAR Score8.6
TAR Score is a ranking system developed by TopAppliancesReviews.com. TAR score has no relationship or impact from any manufacturers or sales agent websites. Learn more
- BrandBNRSZ

- TAR Score8.0
TAR Score is a ranking system developed by TopAppliancesReviews.com. TAR score has no relationship or impact from any manufacturers or sales agent websites. Learn more
- BrandMoker
Last update on 2026-06-25 / Affiliate links / Images, Product Titles, and Product Highlights from Amazon Product Advertising API
How To Remove Stuck Suspension Rods From Washer Tub
A washer that bangs, hops, or leans during spin can turn laundry day into a noisy little circus. The repair usually sounds simple until the old rods refuse to move, the tub drops awkwardly, and every clip seems glued in place. That is where how to remove stuck suspension rods from washer tub becomes more about controlled pressure than muscle. A careful setup keeps the tub steady, protects the cabinet, and saves you from turning one stubborn repair into three new problems.
Start With A Safe Washer Setup
Power comes first, always. Unplug the washer before touching the cabinet, because electrical safety matters even during a mechanical repair. Shut off the water valves too, especially if you need extra room behind the machine. A small mistake around live wiring or a stretched hose can make the job messier than the stuck rods themselves.
Move the washer just far enough to work without yanking the hoses tight. A few inches can give your shoulders better room, but dragging the machine across the floor may damage flooring or loosen connections. Keep a towel nearby for small spills, because leftover water likes to show up at the worst moment. Good footing also matters, since a tilted washer can shift while you are leaning into the tub.
Remove the access panels according to the washer style, then take a slow look before pulling anything. Top-load washers usually hide suspension rods near the outer corners of the tub assembly, with rod hooks, caps, or cups holding everything in place. Snap a quick photo before disassembly so rod placement, spring direction, and bracket positions are easy to match later. That little habit can save a lot of head scratching during reassembly.
Support the tub before releasing a stuck rod. A block of wood, folded towel, or steady hand under the tub can keep the assembly from dropping suddenly. The main goal is to reduce spring tension so the rod is not fighting against the full tub weight. Once the pressure eases, the stuck end often moves with less drama.
Find The Real Reason Rods Are Stuck
Suspension rods rarely seize for one reason only. Detergent residue, humidity, rust, and years of vibration can all work together until the rod end feels frozen in place. The trick is spotting whether the bind is coming from corrosion, a jammed plastic cup, or pressure from the tub sitting at a bad angle. Guessing too fast usually leads to bent brackets or cracked retainers.
Rusty rod ends need a different touch than tight but clean clips. A rusted hook may need penetrating lubricant and time, while a clean clip may only need the tub lifted slightly to release tension. Listen for the difference too. A dry squeak points toward metal friction, while a dull plastic pop often means the cup or cap is binding.
Soap buildup can be sneaky. It dries around suspension pockets and creates a gritty layer that locks parts together, especially on machines that have handled heavy loads for years. Wipe the area before forcing the rod loose, because grime around the bracket can hide the release point. Clean contact points make the next movement easier to judge.
A worn washer may also sag enough to pinch the rod into the mount. That is why lifting the tub slightly before removal often changes everything. The rod is not always truly stuck, it may just be trapped under uneven tub weight. Small shifts beat big yanks here, and patience pays off.
Washer care also starts before parts fail. To reduce repeat shaking problems, compare load balance, drum capacity, and wash action before replacing an old machine with another headache. For cleaner laundry with fewer spin complaints, upgrade your laundry setup with a washing machine for clean clothes that fits your household routine.
Release Tension Before Pulling The Rod
The tub carries more weight than it looks like it should. Once water, basket weight, and springs are involved, a suspension rod can sit under steady pressure even with the washer empty. Lift the tub gently near the stuck corner to remove downward force from the rod seat. The movement should be controlled, not sudden.
A second pair of hands helps, but it is not always necessary. One hand can lift the tub while the other guides the rod end out of its cup or bracket. Keep fingers away from pinch points, because spring-loaded parts can snap back without much warning. Slow pressure gives you better control than a hard pull.
Many rods release with a lift, tilt, and slide motion. Pulling straight up may not work if the hook sits at an angle inside the mount. Try raising the tub slightly, rotating the rod just a little, then easing it out of the pocket. That small change in angle often frees stuck suspension rods without damaging the washer tub.
Penetrating lubricant can help on metal contact points, but keep it away from belts, electronics, and plastic parts that may react poorly. Apply a small amount only where the metal rod meets the stuck bracket, then give it time to creep in. Rushing after spraying wastes the whole point. A few calm minutes can soften rusty contact areas enough for a cleaner release.
Budget also plays into repair decisions. Some older washers need suspension rods, balance checks, and other fixes close together, which can make replacement worth weighing. For a practical price range, compare daily-use features through a top load washing machine under 700 before sinking money into a machine that keeps fighting back.
Use The Right Tools Without Overdoing Force
Basic tools usually handle this job better than aggressive ones. A nut driver, pliers, flashlight, towel, and small block can cover most stuck suspension rod situations. The biggest tool is actually steady leverage, not a giant pry bar. Too much force can bend the rod seat or crack plastic support pieces around the tub.
Needle-nose pliers can guide a stubborn rod, but squeezing too hard may scar the metal or deform the hook. Grip only where control is needed, then let the tub support do the heavy lifting. A flat screwdriver may help nudge a clip, though prying directly against thin plastic is risky. Protecting mounting points matters because those pieces keep the washer balanced later.
Heat is usually a bad idea around washer tubs. Plastic cups, wiring, hoses, and nearby insulation do not appreciate a heat gun or open flame. Stick with safer methods like light lubricant, gentle rocking, and better tub support. The goal is safe release, not proving the rod can be forced out at any cost.
Keep your work area clean while the washer is open. Dust, lint, and detergent crust often collect around the cabinet and suspension pockets. That same stale buildup can hang in the laundry area, especially in tight utility rooms with poor airflow. For a fresher repair space, improve air movement with an air purifier with uv light while you handle dusty appliance work.
Once the first rod comes loose, do not yank the remaining rods in a hurry. The tub will shift differently after one support point releases. Recheck the support block and keep the washer cabinet stable before moving to the next corner. Balanced movement protects tub alignment and keeps the repair from turning sideways.
Work Around Rusted Or Jammed Rod Ends
Rust changes the pace of the repair. A rod that looks orange or crusty near the hook may need gentle cleaning before it moves. Use a rag or small brush to clear loose debris, then apply a tiny amount of penetrating oil to the metal contact point. Clean metal gives penetrating lubricant a better chance to reach the stuck area.
Rock the rod instead of pulling hard in one direction. A tiny forward-back motion can break the bond between rust and metal without bending the mounting bracket. The movement may feel pointless at first, then suddenly the rod gives a little. That small give is your sign to keep using controlled movement, not brute force.
Plastic retainers need even more care. Old plastic can turn brittle from heat, age, and detergent exposure. If the rod cap feels jammed, support the tub and twist the rod gently rather than prying against the cup edge. Saving the retainer shape helps the replacement rod sit correctly later.
Sometimes the washer tub itself needs a slight shift to free the stuck end. Push the tub toward the opposite corner, lift just enough to reduce spring load, then guide the rod out. This feels awkward, sure, but it follows how the suspension system naturally moves. Working with spring tension beats fighting it every time.
Watch for signs that a rod should not be reused. Bent shafts, weak springs, cracked cups, or badly rusted hooks usually mean replacement is the better call. Reinstalling damaged suspension parts can bring the shaking right back after one or two loads. A fresh set of rods gives the washer a better shot at stable spin cycles and quieter operation.
How To Remove Stuck Suspension Rods From Washer Tub
Once the first rod loosens, the job can feel like it should speed up, but that is where plenty of washer repairs go sideways. The tub no longer sits evenly, so every remaining rod may carry pressure in a different way. Keep working slowly, because how to remove stuck suspension rods from washer tub depends on balance, angle control, and a little patience. Rushing the second half can bend mounts, crack plastic cups, or leave the washer shaking again after reassembly.
Remove Each Rod In A Balanced Order
Start with the rod that already has the least tension, not the one that looks easiest to grab. A stuck rod may seem stubborn because the tub weight is leaning into that corner. Lift the tub slightly and feel whether the rod relaxes before pulling. That simple check protects mounting brackets and helps keep the tub from dropping suddenly.
Work across the washer instead of removing rods in a random pattern. After one front rod comes out, move to the opposite rear rod if the layout allows it. This keeps the tub from sagging hard to one side and putting extra strain on the remaining supports. A balanced pattern keeps spring tension more predictable.
Watch the rod cups while the tub shifts. If a cup twists, leans, or tries to pop out with the rod, stop and reset the support under the tub. Old plastic can crack fast once pressure lands on the wrong edge. Keeping the cup square helps preserve rod seating for the replacement parts.
Fast laundry routines can hide suspension wear until the machine starts banging hard during spin. If speed matters in your household, compare washer features that balance cleaning time with load stability through a quick cycle washing machine before putting more money into repeated repairs. A washer with a rushed spin cycle and weak suspension can turn small imbalance issues into loud cabinet movement.
Clean The Mounts Before Installing New Rods
Old suspension pockets often hold more grime than expected. Detergent film, lint, rust dust, and tiny plastic shavings can settle around the rod seats. Wipe each mount before installing the new rods so the parts sit flat and move cleanly. A clean seat supports better alignment and reduces squeaks later.
Use a dry rag first, then a slightly damp cloth if residue feels sticky. Avoid soaking the area because trapped moisture can encourage more corrosion around metal contact points. Let the mounts dry before installing replacement rods. Dry surfaces make it easier to spot cracks, wear marks, or distorted brackets.
Check the cabinet corners while everything is open. Loose screws, bent tabs, or cracked plastic retainers can mimic bad suspension rods even after replacement. Fixing only the rods while ignoring damaged supports may leave the washer walking across the floor again. The repair works best when support points are solid.
Small scratches on the metal frame are usually not a big deal, but deep bending around the rod mount deserves attention. A rod needs a stable anchor point to absorb tub movement evenly. If the mount flexes too much, the new suspension set will wear faster. Strong mounting areas help restore quiet spin performance.
Install Replacement Rods Without Forcing Them
New rods should move into place with firm control, not a wrestling match. Match each rod to the correct position before installation, especially if the set includes different spring lengths or colored markings. Hook the top first if your washer design calls for it, then guide the lower end into the tub cup. Correct placement keeps washer balance from feeling off after the repair.
Lift the tub just enough to reduce pressure while sliding the rod into its seat. Too much lift can make the opposite side shift, while too little lift leaves the spring fighting your hand. The sweet spot feels steady, almost like the rod wants to drop into place. That controlled motion protects plastic retainers from stress.
Do not lubricate every moving point just because one old rod was stuck. Excess oil can attract lint and detergent dust, creating a sticky mess inside the cabinet. Use only what the part instructions allow, and keep slippery products away from belts or electrical areas. Clean contact beats messy over-lubrication in this repair.
After each rod is installed, press down gently on the tub and let it rise. The tub should bounce evenly without clunking or leaning hard to one corner. A rough bounce usually means a rod is seated poorly or a cup is twisted. Rechecking now saves the headache of opening the washer again.
Test The Washer Before Closing The Cabinet
Leave the cabinet open enough to observe movement, but keep hands clear while the washer runs. Start with a light rinse or spin cycle if the machine allows it. The tub should settle into movement without slamming into the sides. This test confirms suspension stability before every panel goes back on.
Listen closely during the first few minutes. A soft spring sound can be normal, but grinding, snapping, or heavy knocking points to a seating issue. Stop the washer if the tub leans sharply or the cabinet shakes harder than before. Early testing helps catch installation mistakes before they damage fresh parts.
Run a small load next, not a heavy blanket or bulky towel load. Heavy items can hide whether the suspension repair is right because they shift unevenly on their own. A moderate load gives a cleaner read on tub balance and spin behavior. Stable movement with a normal load means the new suspension rods are doing their job.
Unrelated home upgrades can still compete for the same repair budget, so keep priorities clear. If your project list also includes outdoor power research, compare a chinese wind turbine separately instead of mixing that decision with washer repair costs. Appliance fixes and energy projects solve different problems, and treating them separately keeps spending decisions cleaner.
Avoid Mistakes That Bring The Shaking Back
Replacing only one rod may seem cheaper, but it often creates uneven tension across the tub. Suspension rods wear as a set because they handle the same years of loads, spin cycles, and vibration. A single fresh rod beside three tired ones can make the tub pull strangely during spin. Full-set replacement usually gives more even support.
Skipping the leveling step is another common mistake. Even new suspension rods cannot fix a washer sitting crooked on the floor. Adjust the feet until the cabinet sits steady without rocking corner to corner. A level machine protects spin balance and reduces stress on the new rods.
Overloading the washer after repair can undo the work quickly. Bulky blankets, packed towels, and uneven loads force the tub to swing harder than normal. Leave enough room for clothes to move freely, and separate heavy items when needed. Better loading habits protect suspension life and keep noise down.
Do not ignore small sounds after the repair. A faint clunk, scrape, or lean can point to a rod that is not fully seated. Catching that early is much easier than waiting until the washer starts banging again. Small corrections preserve washer tub alignment and prevent repeat teardown.
Know When The Repair Is No Longer Worth It
Some washers fight back because more than the rods are worn. A cracked tub ring, damaged balance ring, weak shock points, or bent frame can keep the washer unstable even with fresh suspension parts. If the tub still slams after careful rod replacement, widen the inspection. The real issue may be structural wear, not the rods alone.
Age matters too. A washer with repeated drain, bearing, lid lock, and suspension problems may be stacking repairs faster than it earns them back. That does not mean every older machine belongs on the curb. It means repair cost should be weighed against reliability, parts availability, and how often laundry gets interrupted.
Labor frustration counts, even if you do the work yourself. A repair that steals a whole afternoon, bruises your hands, and still leaves the tub unstable may not be the bargain it first seemed. Be honest about the machine’s condition before buying more parts. Practical judgment beats stubborn spending.
A successful suspension repair should leave the washer steadier, quieter, and less jumpy during spin. The tub should rise and settle evenly when pressed, and the cabinet should stay planted during normal loads. If those basics are not happening, keep inspecting before closing everything up. How to remove stuck suspension rods from washer tub is only half the job, because proper seating, clean mounts, and balanced testing decide whether the repair actually holds.


10 Best Quality Semi Automatic Washing Machine of 2026 For Leak-Free Laundry

11 Best Small Washer Machine of 2026 For Everyday Laundry

12 Best Vibration Pads For Washing Machine of 2026 To Stop Walking and Shaking

11 Best Selling Front Load Washing Machine of 2026 For Quiet Odor-Free Laundry

11 Best Washing Machine For King Size Bedding of 2026 To Prevent Cycle Errors

10 Best Small Front Loader Washing Machine of 2026 For Tight Closets

12 Best Side Load Washing Machine of 2026 For Low Vibration

11 Best Single Tub Washing Machine of 2026 For Apartments Without Hookups






