
How to Remove Stuck or Seized Washer Drain Pump

How to remove stuck or seized washer drain pump becomes a frustrating problem fast once standing water starts pooling inside the washer drum. Wet clothes, sour smells, and that annoying humming sound can turn a simple laundry day into a full-blown headache. Some pumps seize because of lint buildup, hardened detergent residue, rust around mounting screws, or tiny objects jammed deep inside the housing. Others refuse to budge after years of moisture exposure, especially in laundry rooms with poor airflow or high humidity.
Plenty of people grab a screwdriver and force things apart right away, but that usually backfires. Cracked plastic tabs, stripped bolts, and damaged hoses can turn a small repair into an expensive replacement. A smoother approach works better. Gentle pressure, proper drainage prep, and knowing where the pump locks into place often make the difference between a clean removal and a miserable afternoon. Oddly enough, stubborn pumps sometimes loosen faster after a little controlled movement instead of brute force.
Drain pump removal also depends heavily on washer design. Front-load machines tend to hide the pump behind lower access panels, while top-load models may place it underneath the cabinet or beside the motor assembly. Tight spaces make simple tasks feel awkward, especially when hoses are packed with trapped debris or slimy residue. Nobody enjoys getting splashed with stale washer water halfway through a repair, yet it happens all the time when the prep work gets skipped.
Then there’s the issue of corrosion. Rusted clamps, seized mounting screws, and mineral buildup can practically weld the pump into place over time. Hard water creates another layer of trouble by leaving crusty deposits around seals and fittings. Small tricks like loosening hose tension first, twisting the housing gradually, or warming stuck rubber connections can save a ridiculous amount of effort. Those little details matter more than most repair guides admit.
Washer maintenance plays a huge role here too. Pumps rarely seize overnight. Lingering moisture, overloaded laundry cycles, and forgotten pocket items slowly wear things down until the system finally locks up. Coins, hairpins, lint clumps, and even pet fur often collect inside the drain area long before visible symptoms appear. So yeah, removing the pump is only half the battle. Preventing another seizure afterward keeps the washer running smoother and cuts down on repeat repairs that nobody wants to deal with again.
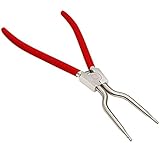
- TAR Score9.2
TAR Score is a ranking system developed by TopAppliancesReviews.com. TAR score has no relationship or impact from any manufacturers or sales agent websites. Learn more
- BrandBeaquicy

- TAR Score9.2
TAR Score is a ranking system developed by TopAppliancesReviews.com. TAR score has no relationship or impact from any manufacturers or sales agent websites. Learn more
- BrandHAUTMEC

- TAR Score9.0
TAR Score is a ranking system developed by TopAppliancesReviews.com. TAR score has no relationship or impact from any manufacturers or sales agent websites. Learn more
- BrandBearHut

- TAR Score9.0
TAR Score is a ranking system developed by TopAppliancesReviews.com. TAR score has no relationship or impact from any manufacturers or sales agent websites. Learn more
- BrandQYQRQF

- TAR Score8.8
TAR Score is a ranking system developed by TopAppliancesReviews.com. TAR score has no relationship or impact from any manufacturers or sales agent websites. Learn more
- BrandSuperior Tool

- TAR Score8.8
TAR Score is a ranking system developed by TopAppliancesReviews.com. TAR score has no relationship or impact from any manufacturers or sales agent websites. Learn more
- BrandCykemo
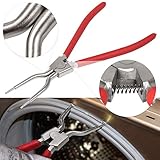
383EER4004A/383EER4001A Washing Machine Inner/Outer Spring Expansion Tool Washer Door Boot
View on Amazon- TAR Score8.6
TAR Score is a ranking system developed by TopAppliancesReviews.com. TAR score has no relationship or impact from any manufacturers or sales agent websites. Learn more
- BrandE-cowlboy
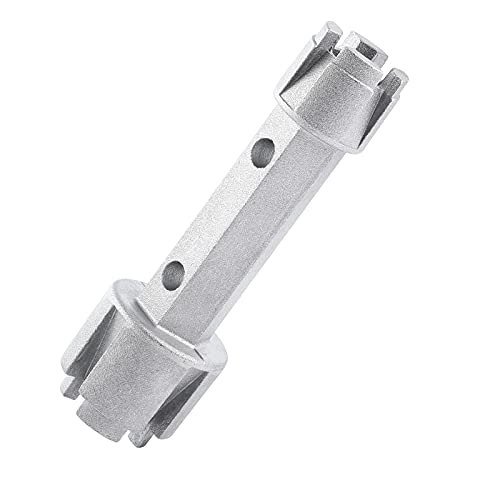
- TAR Score8.6
TAR Score is a ranking system developed by TopAppliancesReviews.com. TAR score has no relationship or impact from any manufacturers or sales agent websites. Learn more
- BrandWMAZtool

- TAR Score8.4
TAR Score is a ranking system developed by TopAppliancesReviews.com. TAR score has no relationship or impact from any manufacturers or sales agent websites. Learn more
- BrandRapid Repair

- TAR Score7.6
TAR Score is a ranking system developed by TopAppliancesReviews.com. TAR score has no relationship or impact from any manufacturers or sales agent websites. Learn more
- BrandFPTPEHPC
Last update on 2026-06-25 / Affiliate links / Images, Product Titles, and Product Highlights from Amazon Product Advertising API
How To Remove Stuck Or Seized Washer Drain Pump
A washer full of dirty water can wreck the whole laundry rhythm, especially after the machine hums, clicks, and then just sits there like a stubborn mule. That’s usually the moment how to remove stuck or seized washer drain pump stops being a casual repair topic and turns into a practical rescue job. The problem often starts with hidden debris, swollen rubber hoses, detergent sludge, or a pump body that has locked itself into place after years of heat, moisture, and vibration. Slow, careful work beats yanking every time because cracked plastic tabs and torn hoses can make the repair uglier than the clog itself.
Stuck Washer Pump Basics
A seized drain pump usually gives a few warnings before it fully refuses to cooperate. The washer may leave standing water in the drum, make a low humming sound, or stop mid-cycle with wet clothes sitting in a sour puddle. Those signs often point to a pump that’s jammed by coins, lint, hairpins, bra wires, grit, or thick detergent residue. It’s not glamorous, but this little part handles a dirty job every time the washer drains.
The pump can also get stuck because the housing has bonded to old rubber hoses. Warm water, soap film, and minerals create a sticky grip around the inlet and outlet ports. Pulling hard at the wrong angle can snap plastic pump fittings before the hose even moves. A better move is to loosen clamps first, twist the hose gently, and break the seal before trying to remove the pump body.
Many homeowners assume the pump motor has died as soon as the washer stops draining. That can happen, sure, but a seized pump often has a more basic cause. A small object lodged in the impeller can lock the blades so tightly that the motor hums without spinning. Checking for mechanical blockage before replacing parts keeps the repair from turning into a guessing game.
Washer layout changes the difficulty level too. Front-load models often tuck the pump behind a lower access panel, while top-load machines may place it underneath or near the motor assembly. Tight spaces make every clamp and screw feel twice as annoying. For bigger laundry setups that push machines harder, compare capacity needs with best washing machine for large family before the next replacement decision turns into another oversized repair headache.
Drain Water Before Touching Parts
Water removal comes first because a stuck pump can release a nasty surprise the second a hose loosens. Place towels, a shallow pan, or a small wet-dry vacuum near the drain area before opening anything. Dirty drain water can smell rough and spread lint sludge across the floor fast. Nobody wants to fix a washer and mop the laundry room at the same time.
Unplugging the washer is non-negotiable. The pump area sits close to electrical connectors, and wet hands around powered parts are a bad mix. Turn off the water supply as well, even if the repair only involves the drain system. A calm setup gives you room to focus on safe disassembly instead of reacting to leaks and loose wires.
Front-load washers may include a small drain tube near the pump filter. That tiny hose drains slowly, but it saves a lot of mess if used before removing the pump. Keep the tube low and let gravity do the boring work. Slow draining can feel tedious, yet it protects the floor and reduces pressure on pump hoses.
Top-load machines may require tilting the washer or accessing the pump from below. Support the machine carefully so it doesn’t rock while your hands are underneath. A wood block or stable support can help, but flimsy props are asking for trouble. Good access matters because awkward angles are where stripped screws and broken fittings usually happen.
Find The Real Seizing Point
A drain pump can feel seized even when the real problem is a stuck hose, rusted screw, or jammed impeller. Before forcing anything, inspect where the resistance comes from. Try moving the hose, clamp, mounting screw, and pump body separately. That simple check helps separate hose adhesion from a truly locked pump.
Old clamps often bite into rubber and leave a compressed groove that grips the pump port. Squeeze spring clamps fully open, slide them back several inches, and rotate the hose before pulling. Screw clamps need even pressure, not a half-loosened twist that chews into the rubber. A patient hand protects rubber drain hoses that may already be brittle.
Mounting screws can seize from corrosion, especially near damp concrete floors or cramped laundry closets. Press the screwdriver firmly into the screw head before turning so it doesn’t cam out. A stripped screw adds another layer of aggravation, and nobody needs that circus. Light tapping around the screw area may help loosen rusted fasteners without cracking nearby plastic.
The impeller itself deserves attention before the pump is removed completely. Shine a flashlight into the inlet if possible and look for string, cloth fibers, broken zipper pulls, or coins. A stuck impeller can make the whole pump seem frozen even though the housing is still removable. Clearing visible debris first may free the pump enough to remove it cleanly.
Loosen Hoses Without Cracking Fittings
Drain hoses love to act welded after years of heat, detergent, and pressure. Pulling straight back usually makes the rubber tighten around the pump nipple like a finger trap. A gentle twist breaks the bond more safely. That small movement protects plastic drain ports, which can snap if the hose is dragged sideways.
A dull plastic trim tool or hose pick can help separate the hose lip from the pump fitting. Metal screwdrivers work, but they can gouge rubber or chip the pump housing if shoved too deep. Slide the tool just under the hose edge and walk it around the circumference. The goal is seal breaking, not prying like you’re opening a paint can.
Warmth can soften a stubborn hose, especially in cold laundry rooms. A warm towel wrapped around the hose end may make the rubber more flexible without overheating nearby parts. Avoid open flames or harsh heat because washer hoses and wiring don’t forgive reckless shortcuts. Gentle warmth supports controlled removal and keeps the repair from getting messy.
Small washers often pack hoses into tighter cabinets, which makes grip and leverage harder. Compact models can be practical in apartments, but cramped service space means repairs require slower hand placement. For tight laundry corners, compare space tradeoffs with best small capacity washing machine before buying a machine that’s painful to service. Easy access can matter just as much as wash capacity once a drain problem shows up.
Remove Screws And Electrical Connectors
Electrical connectors should come off before the pump is fully pulled loose. Take a quick photo of the wiring position so reassembly doesn’t turn into a memory test. Most connectors use locking tabs that need a press, not a yank. Protecting wire terminals keeps the pump circuit from failing after the mechanical repair is done.
Mounting screws may sit in awkward places, especially on machines with bottom access. Use the right screwdriver size and keep firm pressure on the fastener. A wobbly bit rounds the head quickly, and then the repair slows to a crawl. Clean contact with the screw protects mounting hardware and saves your knuckles from a bad day.
Some pumps mount with twist-lock tabs instead of screws. Those designs need rotation in the correct direction before the pump releases. Forcing a twist-lock pump the wrong way can shear tabs from the housing. Look for molded arrows, locking ears, or service marks before applying rotational pressure.
Labeling parts may sound fussy, but it helps when clamps, screws, and hoses look similar after removal. Set small hardware in a cup or tray instead of tossing it on the washer lid. Lost screws can delay a simple repair longer than the actual pump removal. Organized parts keep reassembly clean and prevent leaks caused by rushed guesswork.
Break The Pump Free Gradually
A stuck pump should move in small increments, not one dramatic pull. Rock the body gently side to side while supporting the hose connections and mounting area. That motion breaks crusty residue without loading one plastic corner too hard. Slow movement lowers the risk of cracked pump housing and damaged brackets.
Detergent sludge can dry into a chalky ring around the pump inlet. If the pump shifts slightly but stops, pause and clean the exposed edge with a rag. A little movement followed by cleaning often works better than more force. This approach helps remove mineral buildup without turning the pump body into scrap.
Rust around brackets may need light penetrating oil on metal-only fasteners. Keep oil away from belts, electrical connectors, and rubber seals because it can create new problems. Give the fastener a little time, then try again with steady pressure. The key is controlled force, not muscle-flexing frustration.
Air quality around laundry rooms can suffer when moisture, mildew, and stagnant drain water hang around. A seized pump won’t be fixed by air cleaning, but damp smells often linger after drainage repairs. Separately, to manage indoor air concerns tied to basement or utility-room conditions, compare best air purifier for radon before choosing equipment for that separate issue. Washer repair and home air concerns are different jobs, but both deserve practical attention.
Check The Pump Before Replacing It
Once the pump comes free, inspect the impeller before tossing the part. The blades should spin with light resistance, not grind, wobble, or lock. A jammed coin or hair clump may be the only reason the pump seized. Removing foreign objects can sometimes bring the part back to usable condition.
Look for cracks around hose ports and mounting tabs. Even a small split can leak once the washer drains under pressure. A pump that looks fine on the outside may still have a damaged seal inside. Visible damage around connection points usually means replacement is smarter than reinstalling a risky part.
Burn marks, melted plastic smell, or a swollen motor casing point toward electrical failure. That kind of pump shouldn’t be trusted, even if the impeller turns after cleaning. Motors can hum weakly after overheating and fail again during the next drain cycle. Replacing a compromised pump protects washer reliability and avoids repeat flooding.
Clean the pump cavity before installing the old or new part. Debris left inside the drain path can jam the replacement right away. Wipe the area, inspect the hoses, and confirm clamps still hold firm tension. A clean reinstall supports leak prevention and gives the pump a fair shot at working properly.
Reinstall The Pump Without Leaks
A clean reinstall matters just as much as getting the stuck pump out. Wipe the pump seat, hose ends, and surrounding cabinet area before pushing anything back into place. Old sludge can keep the new or cleaned pump from sitting flush. That tiny gap can create a slow leak that shows up only after the washer starts draining again.
Check the hose ends before reconnecting them. Cracked rubber, stretched clamp marks, or soft swollen sections can fail even if the pump itself is fine. Slide each hose fully over the pump port before tightening the clamp. A hose that sits halfway on the fitting is a classic cause of drain water leaks.
Clamp placement needs a little care. Position the clamp over the raised part of the pump fitting, not barely on the hose edge. Tighten screw clamps evenly and make sure spring clamps return with firm pressure. Proper clamp tension gives the drain connection enough grip without cutting into old rubber.
Basement laundry rooms can make washer repairs trickier because moisture, floor slope, and cooler air all encourage corrosion. For machines kept below grade, compare placement and drainage needs with best washing machine for basement before choosing a setup that’s hard to service later. A dry, accessible location helps protect pump hardware and keeps future repairs from becoming a wrestling match.
Test The Drain Cycle Carefully
Testing should start small, not with a full load of towels. Add a little water, run a short drain cycle, and watch the pump area with a flashlight. Look for drips around the hose ports, mounting surface, and filter cover. Early checking catches small leaks before they spread across the floor.
Listen closely during the first drain. A healthy pump usually makes a steady, smooth sound as water moves out. Grinding, rattling, or a weak hum may mean debris remains inside the pump path. That noise is your clue to stop and recheck the impeller area before running a full cycle.
Watch the drain hose too. A kinked hose can make a good pump look weak because water can’t move freely. The hose should rise and route according to the washer’s setup, then flow without sharp bends. Proper hose position supports steady drainage and reduces strain on the pump motor.
Run one empty rinse and spin cycle after the first quick test. Empty testing helps flush leftover grit from the system without risking clothes. Keep towels nearby, because old hoses sometimes reveal leaks only after pressure builds. This final check protects freshly repaired parts from immediate repeat failure.
Prevent Another Seized Drain Pump
Most seized pumps come from habits that seem harmless at first. Overloading the washer forces more lint, grit, and fabric fibers into the drain path. Heavy loads also stress the pump because water has to move through compacted laundry. Keeping loads reasonable protects drain flow and helps the washer work without strain.
Pocket checks sound boring, but they save pumps. Coins, screws, hairpins, collar stays, and tiny toys are all famous pump killers. A thirty-second check before loading clothes can prevent a jam that takes an afternoon to fix. Small habits protect pump impellers better than any last-minute repair trick.
Detergent amount matters more than people think. Too much detergent creates sticky residue that clings to hoses, filters, and pump chambers. High-efficiency washers need less soap because excess suds can slow draining and leave buildup behind. Using the right amount supports cleaner drainage and reduces sludge around the pump.
Seasonal moisture can also affect laundry spaces, especially garages, basements, and utility rooms near exterior walls. Damp air encourages rust on screws, brackets, and clamps over time. Separate from washer repair, homes looking at backup energy or airflow planning may compare wind turbine for home options for broader household upgrades. The washer still needs direct maintenance, though, because corrosion control starts with keeping the laundry area dry and clean.
Know When Replacement Makes More Sense
A cleaned pump isn’t always a saved pump. If the impeller wobbles, the motor smells burned, or the housing has hairline cracks, replacement is the safer move. Reinstalling a damaged pump may work briefly, then fail during the next heavy drain. A clear-eyed decision protects washer reliability and avoids another soaked floor.
Age matters too. An older pump that seized once may seize again if the bearings or motor shaft are worn. Cleaning debris helps only if the motor still spins smoothly. Rough movement, grinding resistance, or random stopping all point toward internal wear rather than a simple blockage.
Cost can guide the choice, but it shouldn’t be the only factor. A cheap repair becomes expensive if it causes repeated leaks, wasted time, or damaged flooring. Replacing the pump often makes sense when hoses are already off and the cabinet is open. That practical timing can save extra labor later.
Washer condition should influence the final call. A newer machine with one failed pump usually deserves a proper replacement part. An older washer with rusted panels, recurring drain errors, and worn hoses may be closer to retirement. Matching the repair to the machine’s overall health keeps repair decisions grounded instead of emotional.
Avoid Common Repair Mistakes
Forcing the pump loose is the mistake that causes the most damage. Plastic housings can crack quickly, especially on older machines exposed to heat and detergent residue for years. Rocking the part slowly works better than one angry pull. Patience protects mounting tabs and keeps the repair from snowballing.
Skipping photos before disconnecting wires can create confusion during reassembly. Many connectors look obvious until they’re hanging loose in a cramped cabinet. A quick phone picture gives you a simple reference. That tiny step protects electrical connections and prevents crossed wiring.
Reusing weak clamps is another sneaky problem. A clamp may look fine until the washer drains and pressure pushes water past the hose. Replace clamps that feel loose, rusty, or bent out of shape. Strong clamp grip supports leak-free draining and keeps the pump connection stable.
Ignoring the drain filter after pump removal can invite the same clog back. Clean the filter, hose openings, and pump cavity before closing the washer. Leftover lint and debris can travel straight into the repaired pump. A clean drain path gives seized washer pump removal a better long-term payoff.


10 Best Quality Semi Automatic Washing Machine of 2026 For Leak-Free Laundry

11 Best Small Washer Machine of 2026 For Everyday Laundry

12 Best Vibration Pads For Washing Machine of 2026 To Stop Walking and Shaking

11 Best Selling Front Load Washing Machine of 2026 For Quiet Odor-Free Laundry

11 Best Washing Machine For King Size Bedding of 2026 To Prevent Cycle Errors

10 Best Small Front Loader Washing Machine of 2026 For Tight Closets

12 Best Side Load Washing Machine of 2026 For Low Vibration

11 Best Single Tub Washing Machine of 2026 For Apartments Without Hookups






