
How to Remove Stripped or Rusted Screw From Washer Panel

How to remove stripped or rusted screw from washer panel sounds simple until the screwdriver keeps slipping, the screw head turns into a smooth circle, and frustration starts bubbling up fast. Rust loves to lock screws in place, especially around washer panels where moisture hangs around longer than expected. One wrong move can scratch the surface, crack the panel coating, or snap the screw completely inside the machine. That's where careful technique matters more than brute force.
Stubborn screws usually happen after years of detergent residue, humidity, and vibration slowly tightening everything together. A rusty panel screw can feel welded into place, honestly, and forcing it often makes the situation uglier. Small tricks like penetrating oil, controlled pressure, or switching to locking pliers can completely change the outcome. Even something as basic as using the wrong screwdriver size can make the stripping problem ten times worse.
Washer repair jobs become stressful because hidden screws often sit in awkward corners with limited hand movement. Tight spaces leave little room for large tools, so people end up tilting screwdrivers at odd angles without realizing it. That slight angle causes slipping, chewed-up grooves, and scratched paint around the panel. A little patience paired with the right extraction method saves far more trouble than rushing through the process.
Heat can help loosen corrosion, but too much heat near plastic trim or electrical wiring creates another mess entirely. Careful handling matters because washer panels aren't built like heavy automotive parts. Thin metal bends easier than most people expect, especially around mounting points. Gentle pressure combined with steady movement usually works better than aggressive twisting.
Rust removal techniques also depend heavily on how damaged the screw already is. Slightly stripped heads may respond well to rubber band grip tricks or manual impact drivers. Completely rounded screws often need extraction bits or locking pliers for enough bite. Sometimes drilling becomes the last resort, though it should stay exactly that: the last resort.
Old washers tend to hide years of grime behind those panels, which makes screw corrosion even worse over time. Soap residue traps moisture around the metal, slowly eating away at threads until they practically seize together. Cleaning the surrounding area before starting can actually improve tool grip and visibility. Funny enough, many repair headaches start because dirt blocks proper contact between the screwdriver and screw head.
Preventing future rust buildup matters just as much as removing the stuck screw itself. Replacing damaged screws with stainless steel versions helps reduce repeat problems later on. A small dab of anti-seize lubricant can also prevent the same nightmare from happening during future maintenance. Nobody wants to wrestle the same frozen panel screw twice, especially after finally getting the washer open.

- TAR Score9.6
TAR Score is a ranking system developed by TopAppliancesReviews.com. TAR score has no relationship or impact from any manufacturers or sales agent websites. Learn more
- BrandENGINEER

- TAR Score9.6
TAR Score is a ranking system developed by TopAppliancesReviews.com. TAR score has no relationship or impact from any manufacturers or sales agent websites. Learn more
- BrandRoll With Us Depot

- TAR Score9.2
TAR Score is a ranking system developed by TopAppliancesReviews.com. TAR score has no relationship or impact from any manufacturers or sales agent websites. Learn more
- BrandWORKPRO

- TAR Score8.6
TAR Score is a ranking system developed by TopAppliancesReviews.com. TAR score has no relationship or impact from any manufacturers or sales agent websites. Learn more
- BrandDUNDOO

- TAR Score8.2
TAR Score is a ranking system developed by TopAppliancesReviews.com. TAR score has no relationship or impact from any manufacturers or sales agent websites. Learn more
- BrandMAZING

- TAR Score8.2
TAR Score is a ranking system developed by TopAppliancesReviews.com. TAR score has no relationship or impact from any manufacturers or sales agent websites. Learn more
- BrandFJSENR
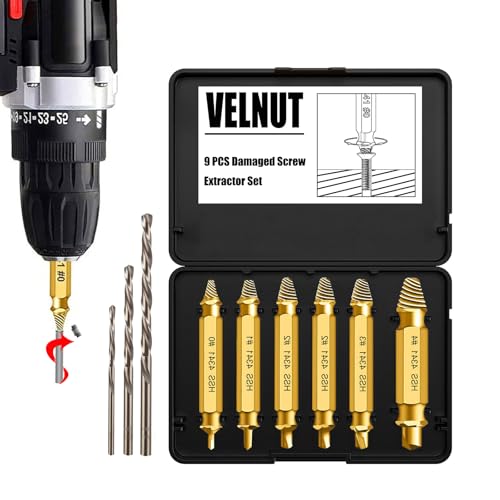
- TAR Score6.8
TAR Score is a ranking system developed by TopAppliancesReviews.com. TAR score has no relationship or impact from any manufacturers or sales agent websites. Learn more
- BrandVELNUT
Last update on 2026-06-25 / Affiliate links / Images, Product Titles, and Product Highlights from Amazon Product Advertising API
How To Remove Stripped Or Rusted Screw From Washer Panel
A tiny panel screw can stall the whole repair, and yep, that feels ridiculous until the screwdriver slips for the fifth time. The job gets even touchier once rust, detergent residue, and tight corners gang up on the screw head, turning how to remove stripped or rusted screw from washer panel into a patience test. The smart move is to slow down, protect the washer finish, and choose the least aggressive removal method before reaching for drills or extractors.
Stripped Washer Panel Screw
A stripped screw usually starts with one small slip, then the groove gets chewed up until the bit can’t bite anymore. Washer panels make that worse because the screws often sit near curved edges, recessed corners, or painted metal where your wrist can’t line up cleanly. Keep the driver straight, press inward, and use a bit that fills the screw head fully because tool fit matters more than arm strength here. Rushing this step can turn a removable screw into a rounded metal dot.
Rust adds another layer of trouble because it can bond the threads to the washer frame. Moisture from laundry rooms, leaks, or damp basements sneaks into screw holes and leaves behind corrosion that grabs like dried glue. A stuck screw may not be stripped yet, but heavy twisting can make it stripped fast. That’s why the first goal is to loosen the rust bond before forcing the screw head.
The old shop saying, “Let the tool do the work,” fits this repair better than most people expect. A manual screwdriver gives more feel than a drill, so you can sense whether the screw is moving or the head is crumbling. That control helps protect thin washer panel metal, which can bend if pressure lands in the wrong spot. If the screw doesn’t budge, stop before the damage snowballs.
Panel screws also vary by washer brand, age, and location. Some use Phillips heads, some use hex heads, and some are soft enough to strip after a few careless turns. Keep a small tray nearby so removed screws don’t vanish under the machine, especially if you’re working in a cramped laundry corner. Small organization saves big irritation, and steady prep keeps the repair from turning into a scavenger hunt.
Start With Safety And Access
Power should be disconnected before touching washer panels because electrical parts can sit behind the cover. Unplug the machine, shut off water if the panel removal exposes hoses, and pull the washer forward only enough to work safely. Good lighting helps more than people admit, since a half-hidden screw head can fool your eyes and ruin your angle. A clear view protects both your hands and the washer finish.
Use a flashlight and inspect the screw before choosing a method. A rusty but intact screw needs a different approach than a screw with a shredded head. Wipe away detergent crust, lint, and grime around the fastener so the bit can seat deeper. That tiny cleanup step often gives the screwdriver enough grip to avoid heavier tools.
Lay a towel over painted surfaces near the work area. Washer panels scratch easily, especially around screw holes where tools tend to slip sideways. A towel also catches loose parts, which is handy if the screw drops behind the panel. Protecting the surface isn’t fussy, it’s just cheap insurance.
Small laundry spaces create awkward body angles, so don’t fight the machine from a bad position. Pull the washer slightly forward, kneel if needed, and line your shoulders with the screw. A straight push into the screw head reduces cam-out, which is the annoying slip that rounds the slots. Better posture gives you controlled torque instead of wild force.
Use Penetrating Oil Before Force
Penetrating oil earns its spot because rust often hides down in the threads where a screwdriver can’t help. Apply a small amount around the screw head and let it creep into the seam. Don’t soak the panel like you’re watering a garden, since excess oil can run into places you don’t want slippery. A modest amount and a little patience can weaken the rust bond.
Give the oil time to work before twisting again. A few minutes may help light corrosion, while tougher rust may need a longer wait and a second application. Tap the screw head gently with the screwdriver handle to help vibration carry the oil into the threads. Keep the taps controlled because washer sheet metal doesn’t enjoy hammer drama.
Try tightening the screw a hair before loosening it. That sounds backward, but a tiny clockwise movement can crack the rust seal and make counterclockwise removal easier. Don’t crank hard, just nudge it with firm pressure. This small trick can save the screw head from further stripping.
Oil can make tools slippery, so wipe the screw head before putting the driver back in. The threads need lubrication, not the top surface where the bit needs friction. Press down firmly, turn slowly, and stop if the driver starts skating. Slow movement gives the screw a chance to move without destroying the remaining contact edges.
Recover Grip On A Damaged Head
A rubber band can help if the screw head is only lightly stripped. Place a wide rubber band over the screw, press the screwdriver through it, and turn slowly with steady pressure. The rubber fills small gaps and adds friction where metal-on-metal grip has failed. It’s not magic, but for a mildly damaged screw, extra bite can be enough.
Steel wool can do a similar job in a tighter screw recess. A small piece between the bit and screw head helps fill worn grooves, though it can be messy around painted panels. Keep the material centered so it doesn’t bunch up and push the bit out. The goal is better contact, not a bulky cushion.
Switching driver sizes can also rescue the job. A slightly larger bit may grab the remaining edges better than the original one, especially if the screw head has widened from slipping. Avoid using a bit that barely fits, since that repeats the same mistake with more damage. A snug driver gives clean pressure and better control.
Use a manual screwdriver before grabbing a drill. Drills spin fast, and fast spinning can polish a stripped head smooth in seconds. A hand tool lets you push inward and turn at the same time, which is exactly what a stubborn washer panel screw needs. Controlled pressure beats speed, especially around painted appliance panels.
For a laundry setup that keeps repairs simpler in tight spaces, compare best washing machine for two persons before replacing an old unit that constantly needs panel access. Smaller households often benefit from machines that leave more room around the appliance, making future maintenance less of a wrestling match. That extra working space can matter when you’re trying to keep tools square on small fasteners.
Grip The Screw With Pliers
Locking pliers help when the screw head sticks above the washer panel. Clamp the jaws tightly around the head, then turn counterclockwise with slow, even pressure. Don’t yank upward because that can bend the panel or tear the screw hole. Side-to-side control gives you mechanical leverage without abusing the washer.
Needle-nose locking pliers fit better in tight panel corners. They don’t always provide as much bite as wider pliers, but they can reach screws hidden near trim or brackets. Adjust the clamp until the jaws leave a firm mark on the screw head. That mark means the pliers have enough grip strength to start turning.
If the screw head is slick with rust or oil, wipe it clean before clamping. Pliers need dry contact, and oil turns a stubborn screw into a slippery little pest. A bit of fine sandpaper can roughen the outer edge enough for the jaws to hold. That tiny surface prep improves traction without damaging the panel.
Protect the surrounding paint with painter’s tape if the pliers might rub against the panel. Scratches around washer panels look worse than the original screw problem, especially on white or stainless finishes. A careful wrap around the work zone gives you a margin for error. Repair work should solve the stuck screw problem, not leave battle scars.
Tap And Shock The Rust Seal
Rust hates vibration, which is why gentle tapping can help loosen a stuck fastener. Place the correct screwdriver in the screw head, hold it straight, and tap the handle with light hammer strikes. The impact can break tiny corrosion bridges inside the threads. Keep it gentle because controlled shock works better than smashing.
A manual impact driver can help on tougher screws, but washer panels require caution. The tool pushes inward and turns slightly when struck, which can improve bite on a damaged head. Still, too much force can dent thin metal or shift nearby brackets. Use this method only when the screw area has enough backing support.
Heat can loosen rusted screws, but appliances add risk. Plastic trim, wire insulation, and painted finishes don’t tolerate careless heat. A hair dryer may warm the area mildly, but open flames or aggressive heat guns can create problems fast. Safe repair choices matter because washer components sit closer together than they appear.
After tapping, try the screwdriver again with fresh downward pressure. Turn slowly, and don’t celebrate too early if the screw moves only a fraction. Work it back and forth, adding tiny amounts of oil if it feels gritty. That patient movement helps preserve the threads so the panel can be reassembled cleanly.
Move To Extractors Carefully
Screw extractors are useful when the head is too damaged for normal grip. Most extractor kits use one end to drill a shallow bite point and the other end to turn the screw out in reverse. The key word is shallow, because washer panels often sit close to brackets, clips, or wiring. Careful drilling protects hidden parts behind the panel.
Use a center punch or small awl to mark the middle of the screw head before drilling. That mark keeps the bit from wandering across the panel and scratching the finish. Start with low speed and light pressure so the drill cuts instead of skating. A centered hole gives the extractor better bite and reduces collateral damage.
Extractor bits can snap if forced, and a broken extractor is harder than the original screw. Keep the tool straight, turn slowly, and stop if it feels like the bit is twisting instead of biting. More pressure won’t fix a poor angle. Patience protects the tool, the screw hole, and the washer frame.
A portable washer can make panel access different because compact designs often place screws closer to trim and control areas. Compare danby portable washer details if space-saving laundry gear is part of the bigger fix, especially in apartments where every inch counts. Compact machines still need careful maintenance, and small panels leave even less room for sloppy tool angles.
Know When Drilling Is The Last Move
Drilling the screw head off should stay near the end of the list. This method removes the head so the panel can lift away, leaving the screw shaft exposed for pliers afterward. It works, but it can enlarge holes or damage the panel if the bit slips. Treat drilling as a last-resort method, not the first swing.
Pick a drill bit slightly larger than the screw shaft but not larger than the head. Run the drill slowly and keep it centered until the head separates from the shaft. Once the panel is off, grip the remaining stud with locking pliers and turn it out. This approach gives access, but it demands steady alignment.
Metal shavings can fall into the washer cabinet, so clean them up before reassembly. A magnet, small vacuum nozzle, or damp cloth can catch loose bits around the opening. Shavings left behind may scratch surfaces or find their way into unwanted places. Cleanup is part of proper repair work, not an optional extra.
Replace the damaged screw instead of reusing it. Match the length, thread type, and head style so the panel seats properly without cross-threading. Stainless or zinc-coated screws can reduce future rust in damp laundry areas. A fresh fastener turns a frustrating repair into a more durable maintenance fix.
Prevent The Next Stuck Screw
Once the panel is open, look for the reason the screw rusted in the first place. Water marks, detergent crust, or a tiny leak nearby can keep moisture around the fastener. Cleaning the area before reassembly reduces future corrosion. A dry panel joint helps protect new hardware.
Apply a tiny amount of anti-seize compound to the screw threads if the location is prone to rust. Use only a small dab, since too much can attract dirt or smear onto visible surfaces. The goal is easier future removal, not a greasy mess behind the panel. Simple prevention saves future repair time.
Don’t overtighten panel screws during reassembly. Washer panels need to sit secure, but crushing the metal around the hole can distort the fit and make the next removal harder. Turn until snug, then stop. Snug beats strained because thread damage often starts with overconfidence.
Laundry rooms can also trap odors, dust, and humidity, especially near bedrooms or small apartments. For cleaner air around compact living spaces, explore best bedside air purifier options that help manage everyday dust and stale air near sleeping areas. Better airflow won’t remove a stuck screw, but it can make cramped home maintenance feel less miserable while protecting comfort around the laundry zone.
How To Remove Stripped Or Rusted Screw From Washer Panel Safely
A stuck washer panel screw can make a simple repair feel like a standoff, especially after the head starts rounding and the panel edge begins looking fragile. The second half of the job is all about damage control, because the screw still has to come out without bending the panel, cracking trim, or chewing up the mounting hole. Good technique matters here, and how to remove stripped or rusted screw from washer panel gets easier once each move is based on the screw’s actual condition, not just frustration.
Inspect The Panel Before Prying
Panel screws rarely fail alone, so check the surrounding metal before pulling or prying. A washer panel can hide small clips, tabs, and seams that bend if pressure lands in the wrong place. Look for panel flex, rust stains, cracked paint, or lifted edges near the stuck screw. Those clues tell you whether the screw is simply seized or whether the panel itself has started to corrode.
A flashlight helps spot hidden fasteners that may still be holding the panel tight. Pulling on a panel with one screw removed and another still buried can warp the opening. That warped edge may never sit flush again, which creates rattles during spin cycles. Slow inspection protects the panel alignment before the repair gets messy.
Use plastic trim tools before metal pry bars around visible washer surfaces. Plastic tools spread pressure better and reduce scratches near painted edges. A flat screwdriver can work in a pinch, but it should be wrapped with tape and used gently. The goal is controlled separation, not forcing the panel open like a paint can.
If the screw area moves but the screw doesn’t, stop and support the panel from behind if possible. Thin sheet metal can flex enough to weaken the screw hole, especially on older machines. A supported panel gives the tool a firmer surface to push against. That extra support often restores enough downward pressure for the driver to bite.
Clean Rust And Residue Around The Screw
Rust often sits on top of detergent film, lint, and old moisture marks, so clean the surface before trying another removal method. A stiff nylon brush can remove crust without scraping the washer finish. Wipe the area dry, then inspect the screw slot again for any remaining shape. Better visibility can reveal usable edges you couldn’t see before.
Old detergent residue can act like glue around panel seams and screw heads. That buildup may also trap moisture long enough to speed up corrosion. For machines that already have age-related buildup issues, better wash care can help reduce future grime, and the right laundry detergent for older washing machine can be a practical upgrade for cleaner rinsing and less residue around metal parts. Cleaner surfaces make future washer maintenance less annoying.
Use a small amount of rust remover only if it is safe for the washer’s finish and nearby parts. Some chemical products can stain paint, dull coatings, or damage plastic trim if left too long. Test carefully on a hidden area if the finish looks delicate. Mild cleanup first is usually safer than attacking the screw with harsh chemicals.
A pick or awl can clear packed debris from a screw recess. Work slowly so you don’t widen the damaged slot or scratch the surrounding panel. Once the recess is cleaner, reseat the screwdriver and press straight in. That small cleanup step may restore enough tool contact to avoid drilling.
Choose The Right Extraction Method
The screw’s condition should decide the method, not your mood. A lightly stripped screw may need only a larger bit, rubber band, or extra pressure. A rusted screw with an intact head needs penetrating oil and patience. A fully rounded screw usually needs locking pliers, an extractor, or careful drilling.
Match the tool to the access space around the washer panel. Wide pliers may grab well, but they can scratch nearby trim if the screw sits in a recessed corner. A compact extractor may fit better, though it needs a centered pilot point. Tool choice should balance grip, reach, and risk to the panel.
Don’t jump straight from screwdriver failure to drilling. Drilling creates metal shavings and can enlarge the screw hole if the bit wanders. Try grip recovery first, then pliers, then extractor bits. That order keeps the repair more forgiving and protects the mounting point.
A left-hand drill bit can sometimes back the screw out while cutting into it. Run it slowly in reverse and keep the bit centered on the screw head. If the screw begins turning, stop drilling and remove it with pliers or a driver. This method can feel satisfying, but only if the angle stays straight and steady.
Protect Threads And Mounting Holes
The screw hole matters as much as the screw itself. If the hole gets stripped, the replacement screw may spin without tightening. Washer panels need secure fasteners because vibration during spin cycles can loosen weak connections fast. Preserving the hole keeps the panel from rattling later.
After removing the screw, inspect the threads and surrounding metal. Rust flakes, worn edges, or stretched holes mean the area needs cleanup before reassembly. A small brush can clear debris from the hole without removing extra metal. Clean threads help the new screw seat with less resistance.
If the hole is slightly enlarged, a same-length screw with a slightly wider thread may restore grip. Don’t use a much longer screw unless you know what sits behind the panel. Longer screws can hit wiring, brackets, or internal parts. Matching length protects hidden washer components.
For repeated panel access, choose corrosion-resistant replacement screws. Stainless steel or coated screws can handle humid laundry spaces better than cheap bare metal. Add a tiny dab of anti-seize if the area is prone to rust, but keep it light. Too much lubricant can attract grime and weaken fastener hold.
Avoid Common Screw Removal Mistakes
The biggest mistake is using the wrong screwdriver size and hoping pressure will fix it. A loose bit chews the head faster with every turn. Match the bit carefully, press inward, and turn slowly. Proper fit gives the screw the best shot before stronger methods become necessary.
Another common mistake is using a power drill too early. Speed feels helpful, but it can strip a soft screw head almost instantly. A manual screwdriver gives more feedback and lets you feel small movement. That feel is valuable when working around fragile washer panels.
Prying the panel while the screw is still partly attached creates bent edges and ugly gaps. Washer panels are not heavy steel covers, and they can crease under pressure. Loosen every fastener first, then separate the panel evenly. Gentle movement protects panel shape and keeps reassembly clean.
Some people also forget to replace bad screws after removal. Reusing a stripped or rusted screw invites the same headache during the next repair. Keep a small hardware assortment nearby so the damaged fastener can be replaced immediately. Fresh hardware turns a stressful repair into a smarter long-term fix.
Handle Broken Screw Shafts
A screw can snap if rust has locked the threads too tightly. Once the head breaks off, the washer panel may come free, but the remaining shaft still needs attention. If enough metal sticks out, locking pliers can turn it slowly. Grip, twist, pause, and repeat until the broken shaft starts moving.
If the shaft sits flush, a center punch helps create a starting point for drilling. Keep the mark centered so the bit doesn’t walk into the panel metal. Start with a small bit, then step up gradually if needed. A careful pilot hole keeps the repair accurate and less risky.
Extractor bits can remove broken shafts, but they need patience. Turn the extractor slowly and avoid side pressure because hardened extractor tips can snap. A broken extractor inside a screw is a bigger problem than the original rusted fastener. Gentle torque protects the repair path.
After the shaft comes out, check whether the original threads survived. If they look rough, clean them with the proper tap size only if you know the thread pattern. Guessing with the wrong tap can ruin the hole. A clean thread path helps the replacement screw tighten without cross-threading.
Reduce Rust Problems In Damp Laundry Areas
Laundry rooms often carry more moisture than people realize. Wet floors, poor airflow, and small leaks create the kind of damp environment rust loves. Keep the area around the washer dry and wipe up drips near the control or access panels. Moisture control helps protect screws, panels, and nearby hardware.
Check hose connections and panel seams after running a wash cycle. A slow drip can travel along a seam and settle near fasteners, causing corrosion over time. Fixing that drip matters more than repeatedly removing rusty screws. The real win is stopping the source of moisture.
Ventilation helps too, especially in closets or apartment laundry nooks. Leave space behind the washer so damp air doesn’t stay trapped against the panel. A small fan can help dry the area after heavy laundry days if the room feels stuffy. Better airflow reduces surface rust before it grabs the screw threads.
Separate from washer repair, homes with damp utility areas sometimes benefit from smart airflow and energy planning, and homeowners comparing off-grid support can review a vertical axis wind turbine for small-space renewable power ideas. That doesn’t replace washer maintenance, but it fits the bigger picture of managing equipment in practical home spaces. Dry surroundings and steady ventilation still do the real work for rust prevention.
Reassemble The Washer Panel Cleanly
Before reinstalling the panel, wipe the screw area and remove leftover oil, rust dust, and metal shavings. Dirty contact points can keep the panel from sitting flat. Line up tabs and clips before tightening any screws fully. Proper alignment prevents panel stress once the washer starts vibrating again.
Start all screws by hand for the first few turns. Hand-starting helps prevent cross-threading and gives you time to feel whether the screw is entering cleanly. If it binds right away, back it out and try again. Forcing a crooked screw damages threads faster than most people expect.
Tighten screws evenly instead of locking one corner down first. A washer panel seats better when pressure is spread across all mounting points. Snug each screw, then make a final gentle pass. Tight enough is good, but over-tightening can distort thin metal edges.
Run a short test cycle after reassembly and listen for rattles. A buzz near the panel may mean one screw is loose, a clip missed its slot, or the panel edge is sitting unevenly. Stop and adjust before the vibration gets worse. A quiet panel tells you the repair landed where it should.
Know When To Stop And Call For Help
Some screws are too damaged, too recessed, or too close to electrical parts for a safe home repair. If drilling would put wiring or a control board at risk, pause. A technician has better access tools and replacement hardware for awkward appliance fasteners. Knowing when to stop protects the washer from a bigger repair bill.
Snapped screws inside structural brackets can also require extra care. Those brackets may hold panels, suspension parts, or internal supports depending on the washer design. Removing material in the wrong place can weaken the connection. A cautious stop is better than damaging a load-bearing mounting point.
Call for help if rust has spread beyond the screw into the panel seam. Severe corrosion may mean the screw problem is only the visible part. A professional can check whether the panel, frame, or nearby components need replacement. That kind of inspection helps prevent repeat failures.
Repair confidence is useful, but stubborn fasteners have a way of turning pride into extra damage. Stop once the method requires more force than the panel can safely handle. The washer should come apart cleanly, not through bending, gouging, or guessing. Smart restraint keeps washer panel repair from becoming a bigger headache.


10 Best Quality Semi Automatic Washing Machine of 2026 For Leak-Free Laundry

11 Best Small Washer Machine of 2026 For Everyday Laundry

12 Best Vibration Pads For Washing Machine of 2026 To Stop Walking and Shaking

11 Best Selling Front Load Washing Machine of 2026 For Quiet Odor-Free Laundry

11 Best Washing Machine For King Size Bedding of 2026 To Prevent Cycle Errors

10 Best Small Front Loader Washing Machine of 2026 For Tight Closets

12 Best Side Load Washing Machine of 2026 For Low Vibration

11 Best Single Tub Washing Machine of 2026 For Apartments Without Hookups






