
How to Remove Seized Inner Basket From Washer Fast

How to remove seized inner basket from washer becomes a real headache once corrosion, detergent buildup, and years of vibration lock everything into place like concrete. Plenty of people start the repair thinking it’ll be a quick afternoon task, then suddenly the basket refuses to budge no matter how hard they pull. Frustration kicks in fast. Sore hands, stripped bolts, cracked plastic parts, and endless guessing usually follow right behind it.
A stuck washer basket rarely happens out of nowhere. Moisture sneaks into the shaft area over time, mineral deposits harden around the hub, and rust slowly fuses metal components together. Old top-load washers are especially notorious for this issue because years of detergent residue create a stubborn seal underneath the basket. Even experienced DIY repair attempts can stall out once the tub locks itself in place and refuses to separate cleanly.
Proper removal techniques matter far more than brute force. Yanking upward without loosening corrosion first can warp the basket, damage suspension components, or crack mounting areas hidden underneath. Smart repair work usually starts with penetrating oil, controlled movement, and careful pressure instead of panic pulling. Sometimes a gentle rocking motion works better than heavy impacts, especially on washers that haven’t been opened in years.
Temperature changes also play a sneaky role here. Damp laundry rooms, humid garages, and poor ventilation speed up rust formation around the drive shaft and basket hub. That’s why some washers practically fall apart easily while others fight back every inch of the way. Little environmental details often decide whether the job becomes manageable or turns into a weekend-long battle.
Tool selection can completely change the experience. A spanner wrench, rubber mallet, puller tool, or even wood blocks for leverage may help release stubborn pressure points safely. Improvised tools sometimes cause more damage than the seized basket itself, especially if sharp metal edges gouge the tub or bend support structures underneath. Careful positioning and patience usually save far more money than aggressive shortcuts.
Noise, wobbling, and grinding sounds often show up long before the basket fully seizes. Ignoring those warning signs allows residue and corrosion to keep spreading deeper into the assembly. Once the basket locks tight, regular maintenance becomes nearly impossible until the tub finally separates. That’s why many repair situations spiral from a small issue into a major teardown project faster than expected.
How to remove seized inner basket from washer also depends heavily on washer design. Some models release with minimal effort after removing the hub nut, while others require soaking, repeated loosening attempts, and gradual upward pressure from multiple angles. A repair approach that works perfectly on one machine may completely fail on another. Brand differences, age, and internal construction all influence how stubborn the basket becomes.
Patience honestly does most of the heavy lifting here. Rushing the process usually snaps fragile components or damages parts that still work perfectly fine. Slow progress may feel annoying at first, yet controlled force combined with steady preparation often succeeds where aggressive pulling doesn’t. Bit by bit, the seized basket eventually loses its grip and starts moving again.

- TAR Score10.0
TAR Score is a ranking system developed by TopAppliancesReviews.com. TAR score has no relationship or impact from any manufacturers or sales agent websites. Learn more
- Brandlasenersm
- TAR Score9.2
TAR Score is a ranking system developed by TopAppliancesReviews.com. TAR score has no relationship or impact from any manufacturers or sales agent websites. Learn more
- BrandBeaquicy

- TAR Score9.2
TAR Score is a ranking system developed by TopAppliancesReviews.com. TAR score has no relationship or impact from any manufacturers or sales agent websites. Learn more
- Brandsuoundey

- TAR Score9.0
TAR Score is a ranking system developed by TopAppliancesReviews.com. TAR score has no relationship or impact from any manufacturers or sales agent websites. Learn more
- BrandNIDAYE

- TAR Score9.0
TAR Score is a ranking system developed by TopAppliancesReviews.com. TAR score has no relationship or impact from any manufacturers or sales agent websites. Learn more
- BrandMOWPOG

- TAR Score8.8
TAR Score is a ranking system developed by TopAppliancesReviews.com. TAR score has no relationship or impact from any manufacturers or sales agent websites. Learn more
- BrandKujunpao
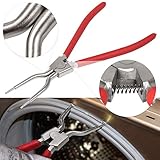
383EER4004A/383EER4001A Washing Machine Inner/Outer Spring Expansion Tool Washer Door Boot
View on Amazon- TAR Score8.6
TAR Score is a ranking system developed by TopAppliancesReviews.com. TAR score has no relationship or impact from any manufacturers or sales agent websites. Learn more
- BrandE-cowlboy

- TAR Score8.6
TAR Score is a ranking system developed by TopAppliancesReviews.com. TAR score has no relationship or impact from any manufacturers or sales agent websites. Learn more
- BrandMoker

- TAR Score8.6
TAR Score is a ranking system developed by TopAppliancesReviews.com. TAR score has no relationship or impact from any manufacturers or sales agent websites. Learn more
- BrandSunluway
Last update on 2026-06-25 / Affiliate links / Images, Product Titles, and Product Highlights from Amazon Product Advertising API
How To Remove Seized Inner Basket From Washer
A washer teardown can feel pretty harmless until the basket refuses to move and the whole repair hits a wall. Rust, detergent sludge, mineral buildup, and years of vibration can lock the tub parts together so tightly that how to remove seized inner basket from washer turns into the main problem, not the original repair. The biggest mistake is grabbing harder, twisting harder, and hoping the basket gives up before something cracks. Slow prep, controlled force, and the right release method usually beat muscle every time.
Seized Basket Basics
A seized inner basket usually starts with trapped moisture around the drive shaft, hub, or basket sleeve. That moisture mixes with detergent residue, lint, minerals, and tiny rust particles until the basket bonds itself to the washer like it signed a long lease. A machine that handled muddy jeans, pet blankets, or heavy towels for years tends to collect more grime around the hidden parts. To keep future laundry loads from overwhelming a home machine, compare options like washing machine for horse laundry before pushing a standard washer past its comfort zone.
Rust pressure does more than make parts ugly. It swells between metal surfaces, which means the basket can feel welded in place even after the main fasteners are removed. That swelling grabs the shaft and hub from the inside, where you can’t easily see what’s going on. No wonder the basket laughs at normal pulling.
Soap buildup can be just as stubborn as corrosion. Too much detergent, cold-water washing, and skipped cleaning cycles leave a sticky film that hardens under the basket. Once that film dries into a crust, it works almost like glue around the center post. A proper cleaner can help reduce future sludge, so maintain the tub area with drum cleaner for lg washing machine after the repair is done and the washer is back together.
Patience matters because a washer basket is not built to survive wild prying from one side. Uneven force can bend the basket rim, stress the outer tub, or damage the suspension system underneath. A stuck part needs pressure from several angles, not one desperate yank from the strongest corner. That mindset saves parts that still have plenty of life left.
Tools That Save The Tub
The right tools keep the job from turning into a demolition project. A spanner wrench, penetrating oil, rubber mallet, wood blocks, socket set, and a basket puller give you control without chewing up the tub. Cheap shortcuts can work in a pinch, but sharp pry bars against plastic tub edges are asking for trouble. A washer tub can crack faster than you’d think once pressure lands in the wrong spot.
Penetrating oil should go where the basket meets the shaft or hub, not all over the machine like salad dressing. Let it soak long enough to creep into the rusted joint, then add more after a few gentle taps around the center area. The tapping creates tiny vibration paths that help the oil move deeper. It’s boring, sure, but boring often wins this repair.
A rubber mallet gives you impact without the nasty bite of steel. Tap around the basket hub in a circular pattern, then pull upward with even pressure. Avoid hammering the basket rim like you’re ringing a bell, because that can warp the metal and create fresh problems. The goal is to wake the seized joint up, not punish the washer.
Wood blocks help spread pressure safely during lifting or prying. Place them where they support the basket evenly and protect the outer tub from direct tool contact. A small block under a pry point can prevent gouges, cracks, and ugly dents. That little detail can be the difference between a clean repair and a replacement tub bill.
First Safety Checks
Power disconnection comes first, no debate. Unplug the washer before touching anything inside the cabinet because switches, harnesses, and control boards are still part of the repair environment. Shut off the water supply too, especially if the washer needs to be tilted or moved. A dry, powered-down machine is far easier to manage than a slippery surprise.
Sharp edges hide around cabinet panels, tub openings, and stamped metal brackets. Gloves help, but they don’t replace careful hand placement. Keep fingers away from pinch points while rocking the basket because a stuck part can suddenly break loose. That sudden release can feel like victory and still smash a knuckle.
Standing water should be removed before heavy pulling starts. Water in the tub adds weight, shifts during movement, and can splash into places you don’t want wet. A shop vacuum, towel, or drain cycle before disassembly can make the whole job cleaner. Less mess also makes it easier to spot rust trails and residue around the hub.
Ventilation matters if you’re using penetrating oil or cleaning agents. Laundry rooms can be tight spaces with poor airflow, and strong fumes get annoying fast. Open a window, run a fan, and keep oily rags away from heat sources. For homes where laundry dust, pet dander, and cleaner odors hang around, reduce air irritation with a large room air purifier for allergies in nearby spaces.
Loosen The Center Area
The center hub is usually where the fight begins. Remove the agitator, wash plate, cap, bolt, hub nut, or retaining hardware based on the washer design. Keep every part in order as it comes out because small washers and spacers love to disappear. A simple bowl or magnetic tray saves a lot of grumbling later.
Corroded fasteners need a little finesse. Spray the threads, wait, then use a snug-fitting socket or proper wrench so the head doesn’t strip. If the bolt feels frozen, work it back and forth in tiny movements instead of forcing one hard turn. That gentle seesaw motion often breaks rust without snapping the hardware.
Hidden residue around the hub can block basket movement even after the fasteners are gone. Scrape away loose detergent crust with a plastic tool, then wipe the area so you can see the joint clearly. Avoid stabbing at plastic or aluminum parts with a screwdriver unless you’re ready to leave scars. Clean visibility makes the next step less of a guessing game.
Heat and cold can help in some stubborn cases, but they need restraint. Warm air around the metal hub may expand it slightly, while a cooler shaft can sometimes shrink away from the bond. Don’t blast plastic parts with high heat or pour boiling water blindly into the assembly. Controlled temperature changes are useful, but careless heat can warp parts or damage seals.
Use Controlled Lifting
Even upward pressure is the heart of removing a seized basket. Pulling from one side jams the opposite side harder against the shaft, which makes the basket feel even more stuck. Grip from two sides, rock gently, then lift straight up. Small movement is progress, even if it feels laughably tiny at first.
A basket puller can be worth it when hand force gets nowhere. The puller applies steady pressure through the center instead of twisting the whole tub assembly. Tighten it gradually, pause, tap the hub area, then tighten again. That rhythm gives the rust bond time to crack without shocking the washer frame.
Rocking motion should feel deliberate, not chaotic. Move the basket a fraction to the left, then right, then forward, then back while keeping upward tension. Listen for faint creaks, little pops, or gritty movement near the shaft. Those sounds usually mean the bond is starting to fail.
Hard stops deserve respect. If the basket rises slightly and then locks again, don’t force it like a crowbar contest. Add penetrating oil, clean exposed residue, and work the basket back down a touch before lifting again. That back-and-forth movement can clear rust flakes trapped between the basket sleeve and shaft.
Avoid Damage While Prying
Prying can help, but it’s also where many washer repairs go sideways. The outer tub often uses plastic that doesn’t forgive sharp pressure, especially on older machines. Use wood as a cushion and spread the load across a wider area. Tiny, balanced lifts are safer than one heroic shove.
The basket rim should not be treated like a lifting handle for the whole machine. Thin metal can bend, and once it warps, the basket may rub during spin cycles. Grab closer to stronger structural points whenever possible. A round basket needs to stay round or the washer will complain later.
Suspension parts underneath the tub can suffer if the machine gets tilted, bounced, or twisted too aggressively. Watch the tub position while you work so it doesn’t hang crooked on the rods or springs. A washer that already had balance issues may be extra sensitive during teardown. Support the tub before applying serious lifting force.
Outer tub cracks are expensive mistakes. If you hear a sharp snap or see whitening plastic near a stress point, stop and change tactics. More oil, more soak time, and a puller are safer than pushing through cracking sounds. A stuck basket is annoying, but a cracked tub can turn the repair into a whole different mess.
Read The Washer’s Clues
Grinding sounds before teardown can point to bearing wear, hub damage, or corrosion around the shaft. A seized basket may be only one symptom of a deeper problem. Once the basket moves, inspect the shaft and drive area before rushing to reassemble everything. Hidden wear can bring the same noise back after one load.
Brown streaks or orange stains near the hub are strong signs of rust migration. That rust may come from the shaft, bearing area, or metal sleeve inside the basket. Clean the stains and check whether the surface underneath is pitted. Smooth rust stains are less scary than deep, flaky corrosion.
Black sludge usually points to old detergent, fabric softener, lint, and soil buildup. It smells bad, sticks to gloves, and often hides inside the basket holes or under the wash plate. Clean it thoroughly before judging the condition of the parts. A grimy basket can look ruined until the buildup is gone.
Wobble after release is worth checking right away. Set the basket on a flat surface if possible and look for bent edges or uneven movement. A basket that warped during removal can cause spin problems later. Catching that issue early saves the hassle of assembling the washer twice.
Know When To Pause
A seized washer basket can test anyone’s patience, especially after an hour of soaking, tapping, and pulling with barely any movement. Pausing isn’t quitting. It gives penetrating oil more time to work and keeps frustration from turning into broken parts. Tired hands make sloppy choices.
Repeated force in the same direction rarely helps once the basket refuses to move. Change the angle, clean more residue, add oil, or switch to a puller instead. The washer is giving feedback, even if that feedback feels rude. Listening to it keeps the repair under control.
Part availability should also guide how aggressive you get. Older washers may have discontinued baskets, hubs, or outer tubs, so damaging one part can end the whole machine. Before going heavy on impact or leverage, check whether replacement parts are realistic. A repair with rare parts needs a gentler hand.
Professional help makes sense if the basket is frozen to the shaft and the washer has major bearing noise, tub cracks, or severe rust. A technician may have stronger pullers and better judgment about whether the repair is worth continuing. Sometimes the smartest move is stopping before the washer becomes scrap. That’s not defeat, it’s just good math.
How To Remove Seized Inner Basket From Washer Safely
Stubborn washer parts rarely loosen because somebody got louder with a hammer. The repair usually moves forward once steady pressure, clean contact points, and patient soaking start working together. A seized basket can feel personal, almost like the washer is picking a fight, but the trick is staying calm. Careful steps protect the tub, shaft, bearings, and basket from damage you didn’t need in the first place.
Clean Around The Basket Before Pulling
Built-up lint can pack itself around drain holes, basket seams, and the lower hub area until everything feels tighter than it should. Before pulling again, wipe away grime, loose rust, detergent crust, and fabric softener sludge from every reachable spot. A clogged lint path also makes future buildup worse, so routine cleanup with a lint trap for washing machine can help reduce the mess that settles inside the washer. Clean parts give you a clearer view and a better shot at controlled movement.
Plastic scrapers work better than sharp screwdrivers for removing residue near the basket sleeve. Metal tools can gouge the tub or score the shaft, and those scratches become new places for grime to cling later. A soft brush, warm water, and a little patience can loosen film without creating fresh damage. Messy work now often saves a bigger repair later.
Rust flakes should be cleared as they appear during rocking or lifting. Those flakes can wedge between the shaft and basket sleeve, causing the basket to jam again after it moves slightly. Wipe, spray, tap, and lift in small cycles instead of forcing one dramatic pull. Little by little, the basket gets fewer reasons to stay stuck.
Drainage areas deserve a close look while the washer is open. If the basket seized because water sat around the hub, poor drainage or heavy debris may have helped create the problem. Cleaning the visible openings won’t fix every hidden issue, but it reduces the gunk that feeds corrosion. A cleaner tub area also makes reassembly less nasty.
Work The Basket In Small Cycles
Small movements matter more than big dramatic pulls. Lift slightly, rock the basket, lower it back down, then repeat the same pattern from another angle. That back-and-forth motion helps break the bond without stressing one side of the tub. The first tiny pop usually feels minor, but it’s often the moment the repair starts turning around.
Penetrating oil needs time to travel into the tightest part of the joint. Spray the center area, tap around the hub, and walk away for a while instead of wasting energy on a frozen part. Coming back with fresh hands and a cooler head can make the next pull far more effective. Rushing only makes the washer fight harder.
Balanced pressure keeps the basket from cocking sideways on the shaft. If one side rises higher than the other, push it back down gently and restart with more even force. A tilted basket can lock itself tighter, almost like a jar lid going on crooked. Straight upward movement is slower, but it protects the parts that matter.
Noise feedback tells you what’s happening under the basket. A gritty scrape may mean rust is breaking loose, while a sharp crack can mean plastic stress. Stop immediately if the outer tub flexes too much or the basket rim starts bending. Good repairs pay attention before damage gets loud.
Inspect The Shaft And Hub
The shaft condition decides whether removal was only half the battle. After the basket releases, look for pitting, grooves, heavy rust, or uneven wear where the basket was stuck. A smooth shaft can often be cleaned and reused, but deep corrosion may cause wobble or leaks later. Don’t rush reassembly just because the basket finally came free.
The basket sleeve may hide rough buildup inside the center opening. Clean it carefully so it slides back over the shaft without scraping or binding. A wire brush may be too aggressive on softer metal, so start gently and only increase pressure when needed. The goal is smooth contact, not shiny damage.
The hub parts should sit flat and tighten evenly. Warped hubs, rounded splines, cracked plastic, or stripped bolt holes can make the washer shake during spin. Replace damaged parts instead of hoping the machine won’t notice. Washers always notice, usually during the loudest load possible.
Bearing clues should not be ignored. Rust trails, grinding, wobble, or water stains around the lower assembly may point to a deeper failure. A freed basket won’t fix a worn bearing or leaking seal. Fixing the stuck basket while ignoring the root cause can bring the same headache right back.
Prevent The Basket From Seizing Again
Proper detergent use helps prevent sticky buildup around the hidden basket area. Too much soap doesn’t make clothes cleaner, it leaves film that traps lint, minerals, and body oils. High-efficiency washers especially hate over-sudsing because residue settles where water flow is limited. Use the right amount and the washer has less junk to chew on later.
Routine cleaning cycles keep residue from hardening under the basket. Warm cleaning cycles, washer-safe cleaners, and open-lid drying all help reduce moisture around the shaft area. The washer doesn’t need pampering, but it does need a chance to dry. Trapped dampness is the quiet troublemaker behind many seized parts.
Heavy loads should be managed with some common sense. Oversized blankets, muddy gear, and pet bedding can overload the basket and push grime into lower spaces. Splitting loads may feel annoying, but it reduces stress on the hub, suspension, and drive components. A washer that isn’t constantly overloaded stays easier to service.
Airflow around the laundry space also matters more than people think. Damp rooms keep metal parts wet longer, and that encourages corrosion near the tub shaft. In off-grid laundry sheds or remote utility spaces, steady ventilation may depend on practical power planning, and a vawt wind turbine can support airflow setups where regular power access is limited. Dry conditions make rust less eager to move in.
Know The Limits Of DIY Force
DIY repair works best while the washer still responds to careful methods. Once the basket refuses to move after soaking, pulling, tapping, and proper tool use, more aggression may only break parts. A seized assembly with severe corrosion can cross the line from repairable to risky. That line matters because one cracked tub can cost more than the original problem.
Specialty pullers are worth considering before destructive force. These tools apply centered pressure in a way hands and pry bars usually can’t match. They also reduce the chance of bending the basket or stressing the outer tub. Renting or borrowing the right tool can be cheaper than replacing broken washer parts.
Older machines need extra caution because replacement parts may be limited. A basket, hub, or tub that was easy to buy years ago may now be hard to find. Before forcing anything, check whether the damaged part can actually be replaced. A careful pause can save a washer that still has usable life.
Repair value should guide the final decision. If the washer has bearing noise, rusted supports, leaking seals, and a seized basket, the job may be bigger than a simple teardown. Spending more time and money only makes sense if the rest of the machine is in decent shape. Honest inspection beats stubborn optimism every single time.


10 Best Quality Semi Automatic Washing Machine of 2026 For Leak-Free Laundry

11 Best Small Washer Machine of 2026 For Everyday Laundry

12 Best Vibration Pads For Washing Machine of 2026 To Stop Walking and Shaking

11 Best Selling Front Load Washing Machine of 2026 For Quiet Odor-Free Laundry

11 Best Washing Machine For King Size Bedding of 2026 To Prevent Cycle Errors

10 Best Small Front Loader Washing Machine of 2026 For Tight Closets

12 Best Side Load Washing Machine of 2026 For Low Vibration

11 Best Single Tub Washing Machine of 2026 For Apartments Without Hookups






