
How to Remove Rusted Bolts From Washer Tub Assembly

How to remove rusted bolts from washer tub assembly becomes a whole different battle once years of moisture, detergent residue, and vibration lock everything in place like concrete. One minute the repair looks simple. The next minute, the bolt head rounds off, the socket slips, and frustration starts boiling over. Plenty of washer repairs stall right at this step because rust doesn’t play fair, especially around older tub assemblies that have been exposed to humidity for years.
Stubborn hardware usually hides deeper problems too. Corrosion often spreads around mounting brackets, tub supports, and threaded shafts, which means forcing the bolt too aggressively can snap components that are expensive to replace. That’s why patience matters more than brute force. A controlled approach with penetrating oil, heat management, proper socket grip, and gradual pressure helps loosen frozen bolts without wrecking surrounding parts. Rushing the process tends to backfire fast.
Penetrating lubricants make a noticeable difference, but timing matters just as much as the product itself. Letting the oil soak overnight gives rusted threads a chance to loosen internally instead of just coating the surface. Some bolts break free after a few careful turns back and forth rather than one hard yank. Oddly enough, tightening slightly before loosening sometimes cracks the corrosion seal. Sounds backward, sure, but seasoned repair techs use that trick all the time.
Heat can help too, although washer components require caution. Plastic tubs, nearby seals, and wiring harnesses don’t tolerate excessive temperatures well. Small bursts from a controlled heat source usually work better than blasting everything at once. Then again, overheated metal expands unevenly and can create fresh headaches if handled carelessly. Slow pressure paired with moderate heat often works better than muscle alone.
Socket selection gets overlooked constantly. Worn-out sockets slip easier on rusted bolt heads, especially in cramped washer cabinets where movement feels awkward. Six-point sockets grip tighter than twelve-point versions and reduce rounding under pressure. Locking pliers may help on damaged heads, but they’re rarely the first choice unless the hardware is already compromised. Tiny details like this can save hours of aggravation.
Old washers sometimes hide years of mineral buildup around the tub assembly, making bolts look welded into place. White residue, rust flakes, and detergent sludge create extra resistance that basic hand tools struggle against. Cleaning exposed threads with a wire brush before removal can improve grip and reduce thread damage. Messy job? Absolutely. Worth it? No question.
How to remove rusted bolts from washer tub assembly also depends heavily on knowing when to stop forcing the hardware. Some bolts simply won’t survive removal intact. In those cases, bolt extractors, cutting tools, or replacement hardware become part of the repair process. Trying to save every rusted fastener usually wastes more time than replacing damaged parts outright. Sometimes the smartest move is accepting the tradeoff early instead of fighting a losing battle.

- TAR Score9.2
TAR Score is a ranking system developed by TopAppliancesReviews.com. TAR score has no relationship or impact from any manufacturers or sales agent websites. Learn more
- BrandMoxweyeni

- TAR Score9.2
TAR Score is a ranking system developed by TopAppliancesReviews.com. TAR score has no relationship or impact from any manufacturers or sales agent websites. Learn more
- BrandHAUTMEC

- TAR Score8.8
TAR Score is a ranking system developed by TopAppliancesReviews.com. TAR score has no relationship or impact from any manufacturers or sales agent websites. Learn more
- BrandSuperior Tool

- TAR Score8.6
TAR Score is a ranking system developed by TopAppliancesReviews.com. TAR score has no relationship or impact from any manufacturers or sales agent websites. Learn more
- BrandMILMUMU
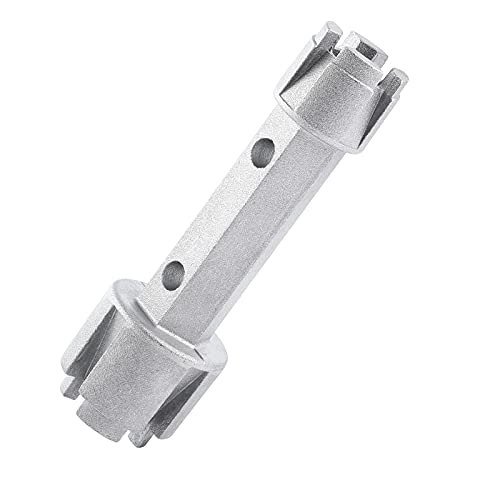
- TAR Score8.6
TAR Score is a ranking system developed by TopAppliancesReviews.com. TAR score has no relationship or impact from any manufacturers or sales agent websites. Learn more
- BrandWMAZtool
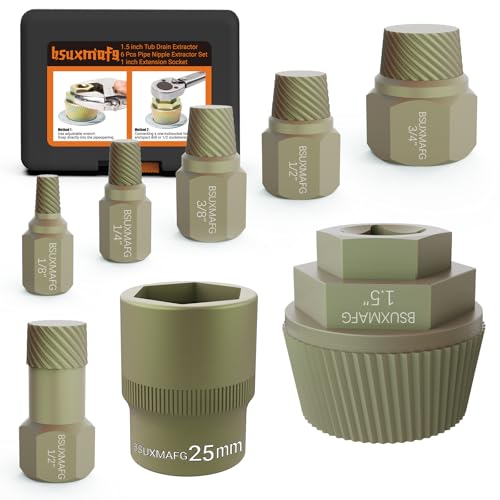
- TAR Score8.4
TAR Score is a ranking system developed by TopAppliancesReviews.com. TAR score has no relationship or impact from any manufacturers or sales agent websites. Learn more
- BrandBSUXMAFG

- TAR Score8.0
TAR Score is a ranking system developed by TopAppliancesReviews.com. TAR score has no relationship or impact from any manufacturers or sales agent websites. Learn more
- BrandJIECHFZ

- TAR Score7.8
TAR Score is a ranking system developed by TopAppliancesReviews.com. TAR score has no relationship or impact from any manufacturers or sales agent websites. Learn more
- BrandTopec
Last update on 2026-06-25 / Affiliate links / Images, Product Titles, and Product Highlights from Amazon Product Advertising API
How To Remove Rusted Bolts From Washer Tub Assembly
A stuck washer repair can turn ugly fast once the tub bolts refuse to move, especially after years of moisture, detergent residue, and vibration have baked rust into the threads. The job looks small from the outside, but how to remove rusted bolts from washer tub assembly takes patience, steady hands, and the right order of attack. Force alone usually makes things worse because a rounded bolt head or snapped fastener can turn a basic repair into a wallet-pinching mess.
Start With Access And Safety
Power disconnection comes first, not after the cabinet is half-open and tools are already scattered across the floor. Unplug the washer, shut off both water valves, and move the machine far enough to work without twisting your back like a pretzel. Water trapped in hoses can still spill, so keep towels nearby and expect a little mess. That small setup step protects both the machine and your patience.
The tub area usually hides sharp brackets, wiring clips, plastic shields, and awkward corners. Clear visibility matters because rusted bolts often sit behind grime, lint, and old detergent crust. A flashlight, a small mirror, and a phone photo can help you see the bolt angle before you commit to force. Guessing blindly is how sockets slip and knuckles lose skin.
Older washers can be especially stubborn because the tub assembly has lived through thousands of spin cycles. Vibration slowly tightens some fasteners while moisture creeps into the threads. Rust then acts like glue, especially around steel bolts threaded into brackets near damp areas. That’s why the first move should be inspection, not muscle.
A clean work zone also makes tool control easier. Brush away loose rust, wipe greasy residue, and remove anything blocking a straight shot at the bolt head. For related laundry setup decisions, compare practical machine layouts with washing machine for blind person before choosing a washer that’s easier to access and operate. Better access means fewer repair headaches later, especially around hidden parts.
Clean Rust Before Turning
Surface rust may look harmless, but it keeps sockets from sitting fully on the bolt head. Use a wire brush, pick, or small scraper to clean the flats before reaching for a ratchet. A few minutes of cleaning can save the bolt from rounding off. Sounds boring, sure, but boring beats broken hardware.
Penetrating oil needs contact with the thread area, not just a shiny puddle on top. Spray around the bolt base, tap the bolt head lightly, and let the oil creep into the corrosion. Soak time is the real trick here because rust doesn’t loosen just because it got wet for ten seconds. Give it time, then add a second round if the bolt still looks crusty.
Hard water and detergent buildup can make rust worse around washer tubs. Mineral deposits hold moisture against metal, which speeds corrosion in tight spots. To reduce future buildup, upgrade your laundry setup with washing machine for soft water if soft-water performance fits your home. Less residue around internal parts can make long-term maintenance less annoying.
Tap the bolt with a hammer and a punch after soaking, but keep the hits controlled. Light vibration helps break the rust bond without bending brackets or cracking nearby plastic. Don’t swing like you’re framing a deck. Small, repeated taps often do more good than one angry blow.
Choose Tools That Grip Properly
Six-point sockets are usually the safer choice for rusted washer tub bolts because they grip the flat sides instead of the corners. Twelve-point sockets feel convenient, but they slip more easily when corrosion has already softened the bolt edges. Use the correct metric or SAE size and test the fit before applying real pressure. A loose socket is trouble wearing a disguise.
A short extension can help reach recessed bolts, but too much extension creates wobble. Straight alignment keeps pressure even and lowers the chance of rounding the head. Press the socket firmly onto the bolt while turning slowly. If the tool starts to cam out, stop right away instead of grinding the head smaller.
Breaker bars add leverage, but leverage cuts both ways. Too much force can snap the bolt inside the tub support, which makes extraction far harder. Controlled torque works better than a full-body yank. Pull smoothly, pause, and feel whether the bolt is moving or twisting toward failure.
Locking pliers belong near the end of the plan, not the beginning. They can help once the bolt head is already damaged, but they also chew up metal fast. Bolt extractor sockets are cleaner for rounded heads because their spiral grooves bite into damaged hardware. Keep one nearby before the repair turns into a circus.
Use Heat With Care
Heat expansion can help break rusted threads loose, but a washer tub assembly isn’t a bare engine block. Plastic tubs, rubber seals, wiring, and nearby insulation can suffer if heat is handled carelessly. A small controlled heat source is safer than blasting the area. Keep movement slow and watch nearby materials closely.
Apply heat around the metal bracket or nut area rather than directly cooking plastic parts. The goal is to expand the surrounding metal just enough to disturb the rust bond. Moderate heat followed by penetrating oil can sometimes pull oil deeper as the metal cools. That little temperature change can do more than another hard pull.
Ventilation matters because old detergent residue, oil, and dust can smell rough once warmed. Open the laundry area, run a fan, and clear flammable clutter before using heat. For cleaner air during messy utility-room repairs, improve the workspace with medium room air purifier if dust and odors linger. A fresher room won’t loosen bolts, but it makes the job less miserable.
After heating, try a gentle tighten-then-loosen motion. That sounds backward, but micro-movement can crack the rust seal without shearing the bolt. Move the fastener a hair tighter, then back it out a hair, then repeat. Slow progress still counts, especially with old washer hardware.
Know When To Stop Forcing It
Resistance with movement is different from resistance with twisting. If the bolt turns slightly and backs out, keep working it with oil and patience. If the bolt head feels springy or the shank seems to twist, stop before it snaps. Broken bolts buried in a washer tub assembly can eat up hours.
A rounded head doesn’t mean the repair is dead. Hammer-on extractor sockets, left-hand drill bits, and careful slot cutting can still save the job. Extraction tools work best when used early, before the bolt becomes a polished nub. Waiting too long usually leaves fewer choices.
Some washer designs make bolt replacement smarter than bolt rescue. Rusted fasteners may look reusable after removal, but damaged threads can fail during reassembly. Fresh hardware gives the tub assembly a cleaner, safer hold and helps prevent future teardown drama. Match size, thread pitch, grade, and coating instead of grabbing random bolts from a drawer.
Label parts as they come off because washer repairs can blur together once panels, brackets, and clips pile up. Put bolts from each section in separate cups or bags. Organization keeps reassembly from turning into a guessing game. The real win isn’t just removing rusted bolts, it’s getting the machine back together without extra parts sitting on the floor.
Removing Rusted Washer Tub Bolts Without Extra Damage
A bolt that finally starts moving can still cause trouble if the threads are packed with rust flakes, soap residue, and old grime. Keep the pace slow, because how to remove rusted bolts from washer tub assembly is just as much about protecting the surrounding parts as freeing the fastener. A washer tub support can crack, bend, or shift if the bolt is pulled unevenly. That’s why careful removal after the first breakaway matters more than one big victory twist.
Back Out Bolts Slowly
Slow removal keeps damaged threads from tearing through brackets or tub supports. Once the bolt moves, turn it out a quarter turn, then turn it back in slightly. That back-and-forth motion clears rust from the threads instead of dragging the corrosion through like sandpaper. It feels tedious, but it saves parts that aren’t fun to replace.
Penetrating oil still helps after the bolt breaks loose. Add a small amount near the thread opening and keep working the fastener gradually. Thread lubrication lowers friction and helps prevent the bolt from binding halfway out. Half-removed bolts can be nastier than fully stuck ones because there’s less solid grip left to work with.
Watch the washer tub while turning the bolt. If the assembly flexes, shifts, or creaks, stop and support it before moving forward. Tub stability protects nearby seals, mounting points, and brackets from stress. A second set of hands can help hold the tub steady, especially on larger machines.
Keep old towels or cardboard under the work area because rusty liquid may drip during removal. That mess can stain floors and make tools slippery. Clean handling also helps you spot cracks, stripped threads, or broken washers as parts come free. Small clues matter once the machine is opened up.
Handle Broken Bolt Heads
Broken bolt heads can make the repair feel like it went sideways, but the job isn’t automatically doomed. First, check whether any bolt shank remains above the surface. If there’s enough exposed metal, locking pliers may grip it after another round of penetrating oil. Clamp hard, keep the tool straight, and turn slowly to avoid snapping it lower.
Extractor sockets work better when the damaged head still has some shape left. Tap the extractor onto the bolt so it bites firmly before turning. Extractor grip depends on steady pressure, not wild jerking. A breaker bar can help, but too much force can shear the bolt below the surface.
Left-hand drill bits are useful when the bolt breaks flush. Drill carefully in the center of the broken fastener, using light pressure and cutting oil. Centered drilling matters because wandering into the bracket or tub support can ruin the mounting hole. Sometimes the reverse rotation grabs the bolt and backs it out while drilling, which feels like a small miracle.
Avoid jumping straight to oversized drilling unless replacement inserts are part of the plan. Enlarging the hole can weaken the mounting point or make the replacement bolt sit poorly. Thread preservation keeps the washer repair cleaner and more reliable. If the hole is already damaged, a thread repair insert may be smarter than forcing a mismatched bolt.
Inspect Parts Before Reassembly
Inspection starts the moment each bolt comes out. Look for stretched threads, rusted washers, cracked brackets, and worn mounting surfaces. A bolt that fought hard on removal usually shouldn’t go back in. Reusing badly corroded hardware is like putting old tape on a leaking pipe and hoping for the best.
Clean the bolt holes with a small brush, compressed air, or a careful thread chaser. Old rust and detergent crust can keep new bolts from seating properly. Clean threads help the replacement hardware tighten evenly without false resistance. That smooth feel during reassembly tells you the parts are lining up correctly.
Laundry residue contributes to corrosion around washer hardware over time. Using the right cleaner can reduce buildup inside the machine, and routine detergent choices matter more than people think. To keep wash residue from becoming a long-term nuisance, pair better maintenance habits with best detergent bosch washing machine guidance for cleaner cycles. Less leftover film means fewer crusty surprises later.
Check nearby rubber seals and plastic surfaces before tightening everything back down. Rust removal can knock debris into places it doesn’t belong. Seal protection matters because a tiny tear or trapped metal shaving can turn into a leak. Wipe the area clean before new hardware goes in.
Replace Hardware The Smart Way
Replacement bolts need to match the original size, thread pitch, length, and strength. A bolt that is too long can bottom out before clamping the part properly. A bolt that is too short may not hold through heavy spin cycles. Washer tubs vibrate hard, so close enough isn’t always close enough.
Stainless hardware sounds tempting, but mixed metals can create corrosion issues in some assemblies. Coated steel may match the original design better depending on the washer model. Material compatibility keeps the repair from creating a new problem months later. Check the service diagram or compare the old bolt carefully before buying replacements.
Apply a small amount of anti-seize only where it makes sense. Too much compound can affect torque feel and attract grime. Light coating on threads can help future removal without making the fastener sloppy. Keep anti-seize away from rubber, belts, and surfaces that need friction to stay put.
Tighten bolts evenly in stages instead of locking one side down all at once. Uneven tightening can pull the tub assembly out of alignment. Balanced pressure helps brackets sit flat and reduces stress during spin cycles. A torque wrench is helpful if the service manual lists a specification.
Prevent Rust From Returning
Moisture control is the boring habit that saves future repairs. Leave the washer door or lid open after use so trapped humidity can escape. Wipe around the tub opening, detergent drawer, and accessible metal areas if residue builds up. Small maintenance habits beat another fight with seized bolts later.
Leaks should never be ignored around the tub assembly. Even a slow drip can feed rust for months before anything looks serious. Early leak repair protects bolts, bearings, brackets, and nearby wiring. A damp machine cabinet is basically a rust nursery.
Outdoor or off-grid laundry setups need extra planning because humidity, power changes, and storage conditions can affect appliance life. For remote utility spaces, compare practical energy options with best 48 volt wind turbine before building a setup around steady appliance use. Stable support systems help reduce stress on laundry equipment over the long haul.
Run cleaning cycles as recommended by the washer maker, but don’t overdo harsh cleaners. Strong chemicals may help with odor yet still be rough on seals, finishes, and exposed metal. Balanced maintenance keeps the machine cleaner without punishing parts that already live in a damp environment. The goal is fewer deposits, less trapped moisture, and hardware that doesn’t weld itself in place again.
Recheck The Repair After Testing
Test cycles reveal problems that hand-tightening can miss. Run a short rinse or spin cycle with the panels still accessible if the design allows it safely. Listen for knocking, scraping, or uneven vibration near the tub area. A repair that sounds wrong probably needs another look before the machine goes back into regular use.
Check for leaks after the tub has moved under load. Water can travel along brackets, hoses, and seams before dripping somewhere unexpected. Leak tracking requires patience because the first visible drip may not be the actual source. Dry the area, run the cycle again, and watch closely.
After the first test, inspect the replacement bolts for shifting or loosening. Freshly cleaned parts can settle slightly once vibration starts. Final tightening should be careful, not aggressive, especially around plastic or cast components. Over-tightening can crack parts just as easily as loose bolts can rattle them apart.
Put panels back only after the machine runs smoothly and stays dry. Keep the removed rusted bolts nearby for a moment so you can compare what failed and why. Repair awareness helps catch patterns like chronic leaks, detergent buildup, or poor ventilation. That last check turns a frustrating bolt removal job into a cleaner, safer washer repair.


10 Best Quality Semi Automatic Washing Machine of 2026 For Leak-Free Laundry

11 Best Small Washer Machine of 2026 For Everyday Laundry

12 Best Vibration Pads For Washing Machine of 2026 To Stop Walking and Shaking

11 Best Selling Front Load Washing Machine of 2026 For Quiet Odor-Free Laundry

11 Best Washing Machine For King Size Bedding of 2026 To Prevent Cycle Errors

10 Best Small Front Loader Washing Machine of 2026 For Tight Closets

12 Best Side Load Washing Machine of 2026 For Low Vibration

11 Best Single Tub Washing Machine of 2026 For Apartments Without Hookups






