
How to Remove Pump From Pressure Washer Safely

How to remove pump from pressure washer sounds simple at first glance, yet plenty of people hit a wall halfway through the job. Rusted mounting bolts, stuck pump shafts, hidden retaining clips, and tight hose connections can turn a quick repair into a sweaty headache. One wrong move may damage the crankshaft or crack the pump housing, and honestly, nobody wants that kind of expensive surprise sitting in the garage. A careful approach keeps the machine intact while making the entire repair process far less frustrating.
Pressure washers collect grime in all the worst places. Dirt, detergent residue, moisture, and heat slowly lock components together over time. That stubborn buildup often causes the pump to cling to the engine shaft like it never plans to come off again. Using the right tools, loosening fittings in the correct order, and applying steady pressure instead of brute force usually prevents stripped bolts or bent parts. Patience matters here more than muscle.
Several warning signs push people toward pump removal in the first place. Strange knocking sounds, leaking seals, pressure loss, or water dripping beneath the housing often point to internal wear. Ignoring those symptoms tends to snowball into larger engine problems, especially after repeated use during heavy cleaning sessions. A worn pump can also strain the motor unnecessarily, making the machine run hotter and less efficiently. That rough performance usually becomes impossible to ignore after a while.
Proper preparation makes this task smoother from the start. Disconnecting spark plugs, draining leftover water, and relieving trapped pressure reduce the risk of accidental spray or damaged fittings. Small details matter more than people expect. Even forgetting to label hose connections can create confusion during reassembly, particularly on older units with faded parts and dirty fittings. A few extra minutes upfront can save an hour of guesswork later.
Some pumps slide off with barely any resistance, while others practically weld themselves onto the shaft after years of exposure to moisture. Corrosion tends to be the biggest troublemaker. Penetrating oil, rubber mallets, and controlled movement help loosen stubborn assemblies without cracking delicate components. Yanking aggressively usually backfires, especially on aluminum pump housings that don't tolerate excessive force very well. Slow and steady wins this fight almost every time.
Maintenance habits also play a huge role after reinstalling or replacing the pump. Flushing the system, checking oil levels where applicable, and storing the pressure washer away from constant moisture can extend the life of both the engine and pump assembly. Skipping routine upkeep often leads right back to seized fittings and failing seals down the road. Nobody enjoys repeating the same repair twice because of neglected maintenance.
Repair jobs around outdoor equipment can feel intimidating at first, especially with older pressure washers that haven't been touched in years. Still, removing the pump becomes far more manageable once the process is broken into clear steps with realistic expectations. Careful handling, organized parts, and a little persistence usually make the difference between a smooth repair and a garage full of scattered hardware. That sense of relief after finally separating a stuck pump from the engine? Yeah, it feels pretty satisfying.

- TAR Score9.6
TAR Score is a ranking system developed by TopAppliancesReviews.com. TAR score has no relationship or impact from any manufacturers or sales agent websites. Learn more
- BrandJingzan
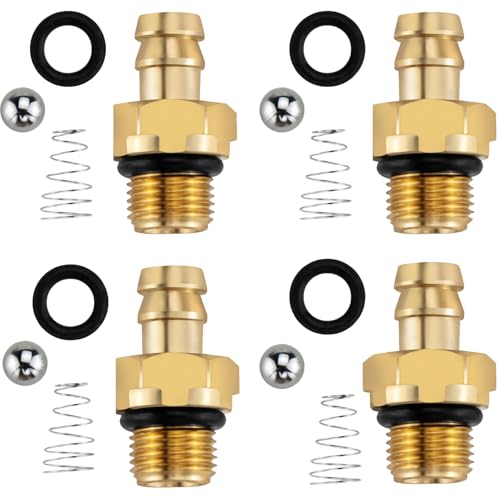
- TAR Score9.6
TAR Score is a ranking system developed by TopAppliancesReviews.com. TAR score has no relationship or impact from any manufacturers or sales agent websites. Learn more
- BrandJingzan

- TAR Score9.0
TAR Score is a ranking system developed by TopAppliancesReviews.com. TAR score has no relationship or impact from any manufacturers or sales agent websites. Learn more
- BrandTool Daily
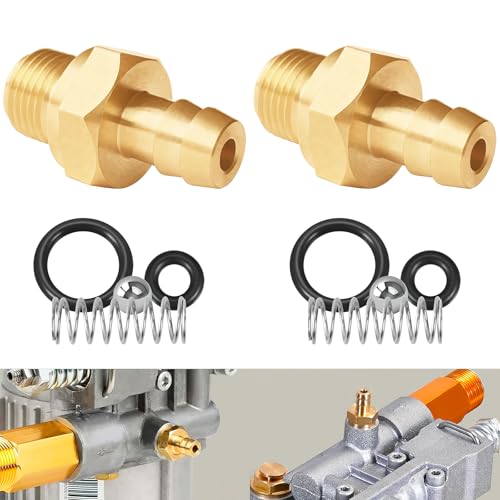
- TAR Score9.0
TAR Score is a ranking system developed by TopAppliancesReviews.com. TAR score has no relationship or impact from any manufacturers or sales agent websites. Learn more
- BrandTOHAXPLS

- TAR Score7.0
TAR Score is a ranking system developed by TopAppliancesReviews.com. TAR score has no relationship or impact from any manufacturers or sales agent websites. Learn more
- BrandYAMATIC
Last update on 2026-06-20 / Affiliate links / Images, Product Titles, and Product Highlights from Amazon Product Advertising API
How To Remove Pump From Pressure Washer
A pressure washer can act perfectly fine one weekend, then spit weak spray, leak underneath, or make that awful rattling noise the next. That’s usually the moment the pump moves from “I’ll deal with it later” to “Alright, this thing has to come off.” The job isn’t scary, but how to remove pump from pressure washer does call for a steady hand, the right order, and a little respect for stuck bolts. Skip the rush, and you’ll avoid turning a repair into a busted shaft, cracked housing, or stripped mounting plate.
Pump Removal Basics
Pressure washer pumps take a beating because they sit right where water, vibration, heat, and detergent residue all meet. Over time, that mix can gum up fittings, dry out seals, and make the pump cling to the engine shaft like it’s been glued there. A weak spray pattern, pulsing pressure, or water dripping near the pump body usually means something inside has started to wear. Catching those signs early can save the engine from extra strain.
Safety prep should happen before a wrench touches the machine. Shut the engine off, disconnect the spark plug wire, turn off the water supply, and squeeze the trigger until trapped pressure bleeds out. That last step matters because pressurized water can surprise you even after the washer looks dead quiet. A few seconds of prep keeps the job calmer and a whole lot safer.
Tool choice makes the difference between a smooth removal and a knuckle-busting mess. A socket set, penetrating oil, pliers, a rubber mallet, and a small puller may be needed, depending on how stubborn the pump is. Cheap adjustable wrenches can round soft bolt heads, especially on older machines with rust around the mounting area. Use snug-fitting sockets whenever possible, because sloppy grip is where trouble starts.
Workspace setup matters more than people admit. Put the pressure washer on level ground, wipe away mud and grease, and keep a tray nearby for bolts, washers, and small clips. Losing one spacer can make reassembly feel like solving a puzzle with missing pieces. A clean setup also helps you spot leaks, cracks, or worn seals once the pump is loose.
Remove Hoses And Fittings
Hose removal should come before loosening the pump from the engine. Start with the high-pressure hose, then remove the garden hose connection and any chemical injection tube attached to the pump body. These parts may look simple, but old fittings can seize from mineral buildup and dried detergent. Work them loose with controlled pressure instead of twisting hard enough to crack the inlet.
Residual water can drip out as soon as fittings come free, so keep a towel or shallow pan nearby. That little bit of water may carry grit, rust flakes, or detergent residue that you don’t want running over the engine base. Take a quick look at the hose ends while they’re off. Cracked O-rings, chewed threads, or flattened seals often explain pressure problems before the pump is even removed.
Plastic fittings deserve extra caution because they can snap faster than metal ones. If a fitting feels stuck, a few drops of penetrating oil around the thread can help, but give it time to creep in. For tight laundry spaces or small utility rooms where water hookups are already a headache, compare space-saving cleaning setups like washing machine for apartment before crowding more equipment into the same corner. Separate chores stay easier to manage when each machine has enough room for safe access.
Labeling connections may sound fussy, but it saves grief during reassembly. A strip of tape on the chemical hose or a quick phone photo can prevent mix-ups later. Some pumps have similar-looking ports, and older machines don’t always have readable markings left. A small record now keeps the repair from turning into a guessing game later.
Loosen Mounting Bolts Carefully
Mounting bolts usually hold the pump directly to the engine face or frame bracket. Spray each bolt with penetrating oil first, especially if the washer has lived in a damp shed or garage. Let the oil sit for a bit while you inspect the bolt heads and surrounding metal. Rushing this step can lead to rounded heads, and once that happens, the job gets ugly fast.
Correct socket size is non-negotiable here. A slightly loose socket may feel fine for the first half turn, then suddenly slip and chew up the bolt. Apply steady pressure instead of jerking the wrench, because sudden force can snap old hardware. If a bolt refuses to move, tighten it a hair first, then loosen it again to break corrosion’s grip.
Bolt order helps keep the pump from binding as it separates from the engine. Loosen each bolt a little at a time instead of removing one completely while the others stay tight. That keeps pressure even across the pump housing. Uneven force can cock the pump sideways and make the shaft harder to release.
Rusty hardware tells a story about storage habits. Machines stored outside or near wet floors often fight harder during pump removal because moisture creeps into every seam. The same space planning issue shows up with indoor appliances, so to reduce future cramped repair headaches, explore a practical top loader washing machine if laundry access and service clearance matter at home. Better access means fewer scraped hands and fewer “why is this wedged here?” moments.
Separate The Pump From The Shaft
Pump separation is the point where patience pays off. Once the bolts are loose or removed, the pump may slide away from the engine with a gentle pull. Great, lucky day. More often, corrosion on the crankshaft makes the pump stick, and that’s where people get tempted to pry too hard against the housing.
Steady pressure works better than brute force. Wiggle the pump evenly from side to side while pulling straight away from the engine. A rubber mallet can help if you tap around the pump body lightly, but don’t hammer on the shaft or thin aluminum edges. Aluminum cracks before it forgives careless force.
Penetrating oil can be applied where the pump hub meets the shaft if the assembly refuses to budge. Let it soak, then try again with slow, even movement. A small puller may be needed for badly seized pumps, but it should pull straight and evenly. Crooked pulling can damage the crankshaft keyway or bend parts that still need to line up during reassembly.
Hidden keys or spacers may appear once the pump starts moving. Keep an eye out for a shaft key, small sleeve, or alignment spacer dropping onto the floor. Those small parts help the pump drive properly, and losing them can make the new pump vibrate or fail early. Set every piece aside in order, even if it looks minor.
Inspect Parts Before Reassembly
Inspection should happen while everything is exposed. Look at the engine shaft for rust, scoring, burrs, or leftover bits of the old pump hub. A shaft with rough spots can make the next pump hard to install and even harder to remove later. Clean it gently with a rag and mild abrasive pad, but don’t grind away metal or change the shaft shape.
Pump condition tells you whether repair or replacement makes more sense. A cracked housing, leaking seal area, or damaged inlet threads usually points toward replacement. Minor seal wear may be repairable if parts are available and the housing is still sound. Be honest with the machine, because forcing a tired pump back into service can waste time and money.
Airborne dust, pet hair, and garage debris can settle on open fittings while the washer sits apart. Keep ports covered with a clean rag if the repair takes longer than expected. For nearby utility spaces with pets and floating lint, improve the room setup with an air purifier for large rooms with pets so loose debris doesn’t constantly settle on tools, hoses, and stored equipment. Cleaner storage areas help small engine gear stay less grimy between uses.
Replacement matching needs careful checking before anything gets bolted back on. Match shaft size, bolt pattern, pressure rating, flow rate, inlet orientation, and outlet placement. A pump that almost fits can still cause alignment stress, leaks, or awkward hose routing. Measure twice, because “close enough” is usually where pressure washer repairs go sideways.
Avoid Common Removal Mistakes
Over-prying is one of the fastest ways to ruin a pump housing or scar the engine face. Screwdrivers wedged between mating surfaces can gouge soft aluminum and create uneven seating later. If the pump won’t move, the better move is more penetrating oil, more patience, or a proper puller. Force has its place, but random force is just expensive noise.
Ignoring pressure before disassembly creates avoidable risk. Even a small amount of trapped water pressure can spray from a fitting once it breaks free. Squeeze the trigger after shutting off the machine and water supply, then wait until the system fully relaxes. That little habit protects your hands, eyes, and mood.
Mixing hardware can slow reassembly and create alignment issues. Some pumps use bolts of different lengths, washers, or spacers that belong in specific positions. Tossing everything into one pile may feel harmless until the new pump sits crooked. Keep parts organized in the order they came off, and the final install becomes much less annoying.
Skipping lubrication during reassembly can make the next removal just as painful as this one. A light coat of anti-seize on the engine shaft, where appropriate, can help prevent corrosion from locking the pump in place again. Don’t slather it everywhere, though, because excess grease can attract grit. Use just enough to protect the contact surface without creating a dirty paste.
How To Remove Pump From Pressure Washer Without Damage
Stubborn pump removal gets a lot easier after the machine is already opened up, but the second half of the job still deserves care. The parts may look loose, yet misalignment, hidden corrosion, and damaged seals can still cause trouble during inspection, replacement, and reassembly. A clean finish matters because how to remove pump from pressure washer is not just about getting the old pump off. It is about keeping the engine shaft, fittings, and new pump ready for reliable pressure later.
Clean The Shaft And Mounting Face
The engine shaft should be cleaned before any new or repaired pump goes back on. Rust, grit, and old grease can keep the pump from sliding on evenly, even if the part looks like the right fit. Use a clean rag first, then a light abrasive pad only where buildup refuses to move. Avoid grinding or filing aggressively because shaft shape matters for proper pump alignment.
The mounting face also needs a careful wipe-down. Dirt trapped between the engine and pump can create a tiny gap, and that gap may turn into vibration once the machine starts. A flat, clean surface helps the pump sit square instead of leaning slightly under bolt tension. That small detail can protect bearings, seals, and bolt threads from uneven stress.
Old gasket material, dried detergent, and mineral crust can stick around the pump area like concrete. Scrape gently with a plastic scraper if needed, not a screwdriver that can gouge the metal. A damaged mounting surface may not seal or align correctly later. Slow cleaning feels boring, sure, but it beats chasing leaks after everything is bolted back together.
Small workspace habits make repair work cleaner and less frustrating. Keep tools away from open ports, cover exposed fittings, and avoid setting greasy parts on clean seals. Home maintenance can pile up fast, especially after appliance repairs, so plan bigger utility upgrades around practical options like washing machines under 500 if cost control matters. Saving money on one project helps leave room for parts, tools, and repairs elsewhere.
Check Seals, Valves, And Oil
Pump seals often reveal why the pressure washer started acting up in the first place. Cracked seals may cause water leaks near the pump head, while worn internal seals can create weak or pulsing pressure. Look for milky residue, oily streaks, or water marks around the housing. These clues tell you whether repair or replacement makes better sense.
Valve condition matters because even a clean-looking pump can lose pressure through worn or stuck valves. If the pump design allows access, inspect the valve caps and check for debris, corrosion, or damaged springs. Tiny grit can cause uneven spray patterns that feel like a bad pump, even when the main housing is still usable. That is why inspection before reassembly pays off.
Pump oil should be checked on models that use an oil-filled pump. Milky oil usually means water has entered where it should not, and dark gritty oil may point to internal wear. Some axial cam pumps are sealed and not meant for oil service, so check the model style before forcing anything open. Guessing here can damage sealed components that were never designed for home repair.
Food storage habits may seem unrelated, but the same practical mindset applies around the house. Small details prevent waste, leaks, and unpleasant surprises, whether it is a washer pump or knowing how long grapes last before they turn soft in the fridge. Maintenance works best when little issues get handled before they turn into bigger messes. That habit saves time without making every chore feel like a project.
Match The Replacement Pump Correctly
Pump compatibility is where many repairs go sideways. The replacement pump must match the shaft diameter, shaft orientation, bolt pattern, pressure rating, flow rate, and inlet and outlet locations. A pump that bolts up but points hoses into the frame can still be the wrong fit. Matching the numbers protects performance, safety, and hose routing.
Pressure rating should not be treated like a bragging number. Installing a pump rated far beyond what the engine can support will not magically create better cleaning power. The engine, pump, hose, gun, and nozzle all work as one system. A mismatch can create strain, leaks, or disappointing spray instead of better results.
Flow rate matters just as much as PSI. A pump with the wrong gallons-per-minute rating can make the washer feel sluggish or unstable. Too much demand may overload the engine, while too little flow can reduce cleaning efficiency. Good matching keeps the washer working within its real mechanical limits.
Connection layout deserves a final check before installation. Compare the old pump and new pump side by side, especially the water inlet, pressure outlet, chemical tube port, and thermal relief valve position. A few minutes here can prevent awkward hose bends and clearance problems. Nobody wants to install a pump twice because one fitting points the wrong way.
Install The Pump With Even Pressure
Reinstallation should feel smooth, not forced. Slide the pump onto the shaft in a straight line and make sure the key, sleeve, or spacer sits where it belongs. If the pump stops halfway, pull it back and inspect the alignment instead of hammering it into place. Force can damage the shaft keyway or push internal parts out of position.
Anti-seize compound can help prevent future corrosion on the shaft, but use it lightly. Too much paste attracts dirt and can migrate where it does not belong. A thin coat on the proper contact area is enough for easier service later. Clean, controlled application beats slathering grease everywhere.
Bolt tightening should happen gradually in a crisscross pattern if the bolt layout allows it. Start each bolt by hand so the threads do not cross. Then snug them evenly instead of fully tightening one side first. Even pressure helps the pump sit flat against the engine face and reduces vibration risk.
Hose connections should be reattached after the pump is secured. Check O-rings, thread condition, and fitting alignment before tightening. Hand-start every connection first, then use tools only as needed for a snug fit. Over-tightening can crush seals or crack fittings, especially on plastic inlet parts.
Test For Leaks And Pressure Problems
Testing should start with water flow before the engine fires up. Connect the garden hose, turn on the water, and squeeze the trigger to purge air from the system. This fills the pump and reduces dry-start stress. Running a pressure washer pump dry, even briefly, can damage seals and internal surfaces.
Leak checks should happen while the machine is still off. Watch the inlet, outlet, pump seam, and chemical hose connection for drips. A slow leak now is easier to fix than a spraying leak after the engine starts shaking. Tighten carefully, because small adjustments usually work better than cranking down hard.
First startup should be brief and calm. Start the washer, hold the trigger open, and listen for rough noises, rattling, or pulsing. A smooth spray pattern suggests the pump is seated well and water is moving properly. Strange knocking or immediate leaking means the machine needs to be shut down and checked before more damage happens.
Nozzle condition can fool people after a pump repair. A clogged or worn nozzle may still cause weak spray even with a fresh pump installed. Check the nozzle, wand, and hose before blaming the new pump. Pressure washer troubleshooting works best when the whole water path gets inspected, not just the biggest part.
Prevent The Pump From Seizing Again
Storage habits have a huge effect on pump life. Leaving water inside the pump during freezing weather can crack internal parts or damage seals. Even in warm climates, standing water encourages corrosion and mineral buildup. Draining the system after use keeps the pump chamber cleaner and easier to service later.
Pump protector can help during long storage periods, especially before winter or months of non-use. It pushes out leftover water and leaves protective fluid inside the pump. That small step can reduce corrosion around seals and internal valves. It is not glamorous, but preventive maintenance rarely is.
Clean water supply also protects the pump. Dirt from hoses, buckets, or outdoor spigots can enter the inlet and scratch internal parts. Use the inlet screen and clean it regularly, because that tiny filter catches more junk than people expect. A clogged screen can also starve the pump and create pressure pulsing.
Detergent cleanup should not be skipped after soap use. Run clean water through the system so chemical residue does not dry inside fittings or valves. Some detergents can leave sticky deposits that affect spray consistency later. A few minutes of flushing helps protect seals, hoses, and pump valves.
Know When Replacement Beats Repair
Repair limits matter because not every pump is worth saving. A pump with a cracked body, badly scored internals, stripped fittings, or repeated seal failure may cost more in parts and time than a replacement. That is especially true for sealed residential pumps with limited service parts. Spending wisely means knowing when the old pump has had enough.
Replacement makes sense when the engine still runs well and the frame, hose, and wand remain usable. A fresh pump can bring the washer back to useful life without replacing the whole machine. Still, the new pump must match the original setup closely. A bad match can turn a smart repair into another frustrating breakdown.
Repair makes sense if the pump housing is solid and only wear items need attention. Seals, valves, thermal relief parts, and O-rings may be cheaper than a full pump assembly on some models. Availability matters, though, because waiting on rare parts can stall the job. Practical repair choices balance cost, time, and confidence.
Final checks should focus on what the washer does after the pump is back in service. Watch for steady pressure, dry fittings, normal engine sound, and smooth trigger response. Any leak, rattle, or pressure drop deserves attention before the next big cleaning job. Careful removal and reassembly protect the machine from repeat failures and keep pressure washer pump maintenance from becoming a yearly headache.


10 Best Quality Semi Automatic Washing Machine of 2026 For Leak-Free Laundry

11 Best Small Washer Machine of 2026 For Everyday Laundry

12 Best Vibration Pads For Washing Machine of 2026 To Stop Walking and Shaking

11 Best Selling Front Load Washing Machine of 2026 For Quiet Odor-Free Laundry

11 Best Washing Machine For King Size Bedding of 2026 To Prevent Cycle Errors

10 Best Small Front Loader Washing Machine of 2026 For Tight Closets

12 Best Side Load Washing Machine of 2026 For Low Vibration

11 Best Single Tub Washing Machine of 2026 For Apartments Without Hookups






