
How to Remove Dishwasher From Cabinet Smoothly

How to remove dishwasher from cabinet sounds straightforward until the appliance refuses to budge, the mounting brackets won’t loosen, or the water line starts dripping out of nowhere. Plenty of kitchens hide years of grime, warped flooring, and cramped installation gaps behind that dishwasher panel. One wrong move can scratch hardwood floors, kink plumbing lines, or leave electrical wiring hanging awkwardly under the sink. That’s exactly why understanding the little details matters before pulling anything out.
Most built-in dishwashers slide into place tightly, especially in older kitchens where cabinets may have shifted over time. A stuck leveling leg or swollen laminate floor can suddenly turn a quick project into a frustrating afternoon. Safe dishwasher removal depends on shutting off power correctly, disconnecting water lines carefully, and creating enough clearance before forcing the appliance forward. Slow, deliberate steps usually prevent expensive surprises later.
Space often becomes the biggest headache. Tight cabinet openings leave barely enough room for tools, hands, and hoses all at once. That cramped setup causes people to tug too hard on drain lines or overlook hidden screws mounted beneath the countertop edge. Dishwasher cabinet clearance plays a bigger role than many expect, especially in kitchens with custom cabinetry or uneven flooring.
Older dishwashers can also carry hidden issues that only show up during removal. Corroded fittings may crumble once touched, while brittle drain hoses sometimes crack after years of heat exposure. Yikes, that’s the kind of thing nobody wants leaking beneath kitchen cabinets overnight. Careful inspection during the process helps avoid extra repairs while giving a better sense of whether replacement parts are worth the trouble.
Floor protection deserves attention too. Sliding a heavy appliance across tile or wood without support can leave scratches, dents, or chipped grout lines behind. Many people place cardboard, thin plywood, or protective mats underneath before moving the dishwasher forward. Protecting kitchen flooring during appliance removal keeps cleanup manageable and prevents cosmetic damage that’s far more annoying than the actual dishwasher itself.
Electrical connections tend to make people nervous, and honestly, that hesitation isn’t misplaced. Some dishwashers connect through a simple plug, while others are hardwired directly into a junction box behind the kickplate. Taking a few extra minutes to confirm power is fully shut off can prevent dangerous mistakes. Dishwasher wiring safety becomes especially important in older homes where labeling inside breaker panels may not always be accurate.
Then there’s the weight factor. Dishwashers may not look massive, but awkward positioning makes them tougher to maneuver than expected. Tilt the unit too far, and leftover water can spill unexpectedly onto the floor. Move too quickly, and hoses may snag on nearby plumbing. A steady approach makes the entire process smoother, cleaner, and far less stressful from start to finish.

- TAR Score9.2
TAR Score is a ranking system developed by TopAppliancesReviews.com. TAR score has no relationship or impact from any manufacturers or sales agent websites. Learn more
- BrandAffresh

- TAR Score9.2
TAR Score is a ranking system developed by TopAppliancesReviews.com. TAR score has no relationship or impact from any manufacturers or sales agent websites. Learn more
- BrandFinish
- TAR Score9.2
TAR Score is a ranking system developed by TopAppliancesReviews.com. TAR score has no relationship or impact from any manufacturers or sales agent websites. Learn more
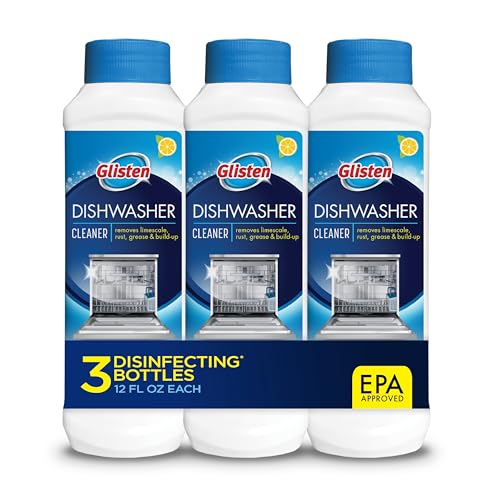
- BrandGlisten

- TAR Score9.2
TAR Score is a ranking system developed by TopAppliancesReviews.com. TAR score has no relationship or impact from any manufacturers or sales agent websites. Learn more
- BrandFinish

- TAR Score9.0
TAR Score is a ranking system developed by TopAppliancesReviews.com. TAR score has no relationship or impact from any manufacturers or sales agent websites. Learn more
- BrandY-Kelin
- TAR Score8.8
TAR Score is a ranking system developed by TopAppliancesReviews.com. TAR score has no relationship or impact from any manufacturers or sales agent websites. Learn more
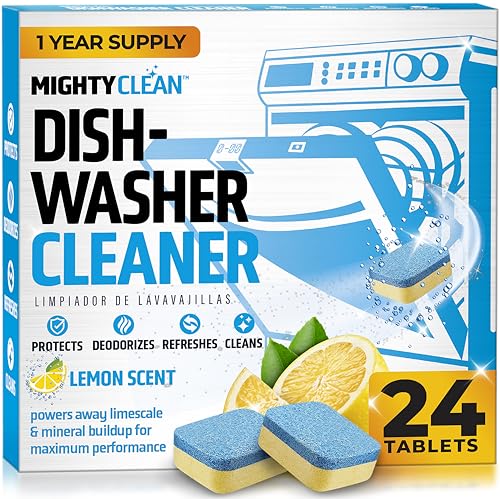
- BrandMIGHTY CLEAN

- TAR Score8.4
TAR Score is a ranking system developed by TopAppliancesReviews.com. TAR score has no relationship or impact from any manufacturers or sales agent websites. Learn more
- BrandFinish
Last update on 2026-06-20 / Affiliate links / Images, Product Titles, and Product Highlights from Amazon Product Advertising API
How To Remove Dishwasher From Cabinet Without Damage
A stuck appliance can make a calm kitchen project feel like a wrestling match with plumbing, wiring, and stubborn old flooring. The trick is slowing down before the first screw comes out, because how to remove dishwasher from cabinet depends on more than pulling the machine forward. Power safety, water control, and floor protection all matter before the dishwasher moves an inch. Rushing this job can turn one repair into a sink-cabinet leak, a scratched floor, or a bent mounting bracket.
Dishwasher Removal Setup
Good prep keeps this job from going sideways. Start by clearing the sink cabinet so the water supply line, drain hose, and electrical connection are easy to reach without knocking over cleaners or trash bags. A shallow pan and a few towels should sit nearby because old hoses almost always hold leftover water. That small setup step saves a lot of muttering later.
Power comes first, not after the kickplate is already off. Some dishwashers plug into an outlet under the sink, while others are hardwired behind the lower access panel. Flip the correct breaker, then test the unit to confirm it won’t start. Electrical safety is the one detail that shouldn’t be treated like a “yeah, probably fine” moment.
Water shutoff needs the same careful attitude. Turn the hot water valve under the sink clockwise until it stops, then run the faucet briefly to reduce pressure. Older shutoff valves can feel gritty, stiff, or sketchy, so don’t crank them like a jar lid. Controlled water shutoff helps prevent drips from sneaking into the cabinet floor after the line is disconnected.
Floor protection is worth doing even on a “quick” removal. Slide cardboard, thin plywood, or a moving blanket in front of the dishwasher before tugging it out. Tile can chip at the edge, vinyl can wrinkle, and hardwood can get scratched by gritty leveling feet. Protected flooring makes the whole removal feel cleaner, safer, and less like a gamble.
Cabinet Screws And Brackets
Most built-in dishwashers stay put because of small brackets mounted to the countertop or side cabinet walls. Open the door and look along the top rim first, since screws often hide just under the counter lip. Granite or stone counters may use side brackets instead, which can be easy to miss in dim lighting. Hidden mounting screws are usually the reason a dishwasher refuses to move even after everything else looks disconnected.
A short screwdriver often fits better than a long drill in this cramped spot. Keep one hand on the bracket area while loosening screws so they don’t drop behind the door frame. If a screw head is stripped, press firmly and turn slowly instead of chewing it up further. Gentle bracket removal keeps the cabinet edge from splintering or cracking around the fastener.
Paint, caulk, or years of kitchen grime can make the dishwasher look glued into the opening. Run a utility knife carefully along any visible caulk line between the appliance and countertop trim. Don’t dig into the cabinet finish, because a light pass is usually enough to break the seal. Clean edge separation helps the dishwasher slide free without pulling finish off the surrounding wood.
Side clearance matters more than it seems. A dishwasher installed too tightly may rub against the cabinet face frame as it comes forward. Wiggle it lightly from both sides instead of yanking from the handle, since the door handle isn’t built for hauling the full appliance weight. Even pulling pressure protects both the door and the cabinet opening.
Water Line And Drain Hose
The water supply line usually connects to the dishwasher through the front lower access area or routes from the sink cabinet to the appliance inlet. Place a towel below the connection before loosening the compression nut. Even after the valve is off, trapped water can drip out and make a small mess. Leak control keeps the job calm instead of turning the floor into a slippery little pond.
Drain hoses can be sneaky. They often loop high under the sink before connecting to the garbage disposal or drain tailpiece, and that loop helps prevent dirty water from flowing backward. Loosen the clamp slowly, then twist the hose free rather than pulling straight back. Careful drain hose removal lowers the chance of cracking an old rubber hose or spilling stale water into the cabinet.
Old fittings deserve patience. Mineral buildup can lock a nut in place, especially in kitchens with hard water. A small adjustable wrench and steady pressure usually beat brute force. Stuck plumbing parts may need a few gentle back-and-forth turns before they loosen without damage.
Appliance work often reveals the bigger picture in the laundry room too. To plan smarter replacements beyond the kitchen, compare long-term appliance habits with this guide to best washing machine longevity before buying another major machine. Durability planning matters because cheap parts, poor access, and awkward maintenance can make future repairs more expensive than expected. A little research now helps prevent that “why did I buy this thing?” feeling later.
Kickplate And Leveling Legs
The kickplate hides the front working area, so remove it before trying to slide the dishwasher out. Most kickplates use two or four screws near the floor, and some have a second insulation panel behind the visible cover. Set the screws in a cup or bowl because they love rolling under cabinets. Kickplate access gives you room to inspect wiring, water connections, and the front leveling legs.
Leveling legs often cause the biggest hang-up. Dishwashers are raised during installation so the top sits snug under the counter, which means they may need to be lowered before removal. Turn the front legs clockwise or counterclockwise depending on the design, watching the top gap as the unit drops. Lowering the dishwasher creates clearance and helps prevent countertop scraping.
Back legs can be trickier. Some models adjust from the front with a screw mechanism, while others require a little more patience and careful tilting. Don’t force the appliance if the top edge still rubs the counter. Proper height adjustment is the difference between a smooth slide-out and a scratched countertop underside.
Smells trapped behind appliances can hint at moisture or old residue. For laundry areas with similar odor problems, reduce sour buildup with a practical option from best cleaner smelly washing machine instead of masking the smell with fragrance. Odor source control beats spraying the room and hoping for the best. The same mindset helps in the kitchen: clean the hidden space after the dishwasher comes out, especially if old leaks left grime behind.
Sliding The Dishwasher Forward
Pull the dishwasher forward slowly from the sides of the frame, not from the open door. The door can flex, and the hinges aren’t meant to act like handles for the whole unit. Watch the supply line, drain hose, and power cord as the appliance moves. Slow movement keeps hoses from snagging behind the cabinet wall.
A second person helps more than most people expect. One person can guide the hoses under the sink while the other eases the dishwasher forward. This prevents the classic problem where the machine moves three inches, then jerks to a stop because a hose caught on a valve. Two-person control reduces stress on both the appliance and the plumbing.
Leftover water may spill if the dishwasher tilts too far forward. Keep it level as much as possible and have towels ready near the base. If water shows up, stop and clean it before continuing, because wet floors make the appliance harder to control. Spill management protects the floor and keeps the workspace safe.
Indoor air can feel stale after pulling out an old appliance, especially if damp insulation or hidden grime has been sitting behind it. Separate odor problems in pet areas need their own solution, so improve litter-box air with best air purifier cat litter instead of expecting kitchen cleaning tricks to fix every smell. Right-tool thinking matters around the home. Dishwasher removal solves one hidden mess, but each odor source needs its own fix.
Common Problems During Removal
A dishwasher that won’t move usually still has a fastener, tight leg, or trapped hose holding it back. Stop pulling and inspect the top, sides, and lower front again. Yanking harder can bend the frame or damage the cabinet face. Resistance means recheck, not “pull like you’re starting a lawn mower.”
Rusty screws can slow the whole job down. Press the driver firmly into the screw head and turn with steady pressure to avoid stripping it. If the screw refuses to move, a small amount of penetrating oil may help, but keep it away from electrical parts and finished cabinet surfaces. Patient screw removal protects the surrounding wood and saves the bracket from tearing loose.
Old flooring can trap the dishwasher like a lip at the front edge. New tile, laminate, or vinyl may have been installed after the dishwasher, leaving the appliance sitting lower than the finished floor. Lowering the legs might not be enough in that case. Floor height changes may require careful lifting over the edge with help instead of dragging the unit across it.
Hardwired units need extra caution before the final pull. After confirming power is off, open the junction box and disconnect the wires according to the setup you see. Wire nuts, strain relief clamps, and ground wires should be handled calmly and kept visible. Safe wire disconnection matters because guessing around electricity is never a smart shortcut.
Cleaning The Empty Cabinet Space
The space behind a removed dishwasher can look rough, even in a tidy kitchen. Dust, grease film, old food bits, and dried mineral stains often collect where nobody can reach during normal cleaning. Use towels, mild cleaner, and a small brush to clear the area before sliding in another appliance. Cabinet cleanup helps reveal hidden leaks, soft wood, or damaged flooring before those problems get covered again.
Check the cabinet floor closely before calling the job done. Swollen particleboard, dark stains, or a musty smell can point to a slow leak that’s been hanging around for months. Press gently near the back corners and plumbing openings to feel for soft spots. Water damage checks matter because a new dishwasher won’t fix a rotten cabinet base.
Old insulation, loose screws, and broken clips should be removed from the opening. Tiny metal pieces can scratch flooring or block the new dishwasher from sitting level. A shop vacuum makes this part easier, but a handheld brush works fine in a pinch. Clean installation space gives the next appliance a better chance of fitting without weird bumps or wobbles.
Appliance age can shape the whole repair decision. Some older machines were simpler to service, and that same practical thinking shows up in laundry rooms too, where a best old style washing machine may appeal to people who prefer fewer electronic headaches. Simple mechanical access can be a real advantage if future maintenance matters more than flashy controls. Still, every machine has tradeoffs, especially with noise, water use, and available replacement parts.
Checking Plumbing Before Reinstalling
The water valve deserves a closer look after the dishwasher is out. A valve that drips, spins loosely, or refuses to shut fully should be handled before anything new goes in. Replacing a questionable valve now is usually easier than fighting it later inside a tight cabinet. Reliable shutoff control keeps future repairs from turning into emergency towel duty.
The drain connection should be clean and firmly attached. Grease buildup inside the disposal inlet or drain tailpiece can cause slow draining after the dishwasher is reinstalled. Wipe the connection area and inspect the clamp for rust or weak tension. Drain path inspection helps prevent standing water and sour smells after the first wash cycle.
Look at the supply line without rushing. Braided stainless lines usually age better than older plastic or copper tubing, but kinks, corrosion, and worn fittings still happen. A cheap-looking line with crusty ends isn’t worth trusting behind a newly installed appliance. Fresh water connections reduce leak risk and make future service easier.
Kitchen storage can get messy during appliance work, especially with towels, tools, and food items shifting around under the sink. To keep perishables from becoming another side problem, small habits like labeling leftovers and knowing how long ginger root lasts can keep the fridge side of the kitchen from getting ignored during repairs. Kitchen order makes the whole project feel less chaotic. Little things add up fast during a repair day.
Handling Wiring The Safe Way
Dishwasher wiring can be simple or annoying, depending on how the unit was installed. A plug-in model is usually less stressful, while a hardwired unit asks for more care around the junction box. Confirm the breaker is off again before touching any wires, even if you already checked earlier. Power verification is not overkill, because one wrong assumption can bite hard.
Open the junction box slowly and take a quick photo before separating wires. That photo helps show how the connections were arranged if anything needs to be restored or checked later. Keep wire nuts, screws, and the cover plate together so nothing disappears under the cabinet. Organized wiring parts make the process less frustrating and safer.
Damaged insulation, loose wire nuts, or scorched marks should stop the project immediately. Those signs point to a problem that needs proper repair before another dishwasher is connected. Don’t tuck questionable wiring back into place just because the appliance is already out. Electrical red flags deserve attention before the cabinet opening gets filled again.
Hardwired connections should sit inside the junction box with strain relief properly secured. Loose cables can rub against the dishwasher frame as it vibrates during cycles. That kind of movement may not cause trouble right away, but it can create wear over time. Secure wiring placement protects the connection long after the removal job is finished.
Preparing For The Next Dishwasher
Measure the cabinet opening before buying or installing the next unit. Height, width, and depth can vary just enough to cause a headache, especially in older kitchens with uneven floors. Measure at the front and back because cabinet openings aren’t always perfectly square. Accurate appliance clearance saves you from forcing a machine into a space that won’t cooperate.
Check the floor height near the front lip of the opening. New flooring installed around an old dishwasher can trap the appliance in a lowered pocket. If the new dishwasher needs to slide over that raised edge, leveling and clearance become more important. Floor height gaps can make installation feel harder than the removal itself.
Plan the hose and cord path before pushing anything back into place. Drain hoses should avoid sharp bends, and water lines should sit where they won’t pinch behind the frame. A cord or hose caught behind the unit can create noise, leaks, or poor drainage later. Clean routing helps the dishwasher slide in smoothly and operate without hidden strain.
Keep the first test cycle boring. That means no leaks, no scraping sounds, no cabinet vibration, and no water pooling near the kickplate. Watch the connections with a flashlight during filling and draining instead of walking away right after pressing start. First-cycle inspection catches small issues while they’re still easy to fix.
Mistakes That Make Removal Harder
Pulling before disconnecting everything is the fastest way to damage something. A dishwasher may move a few inches, then suddenly stop because the drain hose or wire is still attached. That hard stop can yank fittings loose or bend the appliance frame. Complete disconnection keeps the removal controlled instead of chaotic.
Ignoring the leveling legs causes plenty of scraped countertops. If the top of the dishwasher is tight against the counter, lower the legs before pulling forward. Even a small drop can create enough space to avoid rubbing trim or stone. Height adjustment is a small step with a big payoff.
Using the door as a handle is another bad habit. The door feels convenient, but it can flex, twist, or stress the hinges when used to drag the appliance. Grab the frame edges instead and move the machine in short, steady pulls. Frame-based pulling gives better control and protects the door alignment.
Skipping cleanup after removal leaves old problems waiting for the next appliance. Damp dust, loose clamps, and hidden food debris can create odors or interfere with installation. Take the extra few minutes to wipe, inspect, and reset the space before moving on. Clean finish work turns dishwasher removal from a messy chore into a repair that actually sticks.


10 Best Quality Semi Automatic Washing Machine of 2026 For Leak-Free Laundry

11 Best Small Washer Machine of 2026 For Everyday Laundry

12 Best Vibration Pads For Washing Machine of 2026 To Stop Walking and Shaking

11 Best Selling Front Load Washing Machine of 2026 For Quiet Odor-Free Laundry

11 Best Washing Machine For King Size Bedding of 2026 To Prevent Cycle Errors

10 Best Small Front Loader Washing Machine of 2026 For Tight Closets

12 Best Side Load Washing Machine of 2026 For Low Vibration

11 Best Single Tub Washing Machine of 2026 For Apartments Without Hookups






