
How to Remove Broken or Stuck Agitator Cap Fast

How to remove broken or stuck agitator cap sounds simple right up until the thing refuses to budge. One minute you're trying to clean a washer or reach the agitator bolt, and the next minute you're wrestling with cracked plastic that feels practically welded into place. Frustration builds fast because most agitator caps don’t give obvious signs about where to pry, twist, or pull. Push too hard, and suddenly tiny plastic tabs snap off like dry twigs.
Stubborn washer parts usually hide years of detergent residue, fabric softener buildup, trapped moisture, and plain old grime underneath the surface. That sticky combination turns a basic repair into a messy headache. Broken agitator caps often crack around the edges first, making grip nearly impossible. Meanwhile, older washing machines sometimes develop mineral deposits that lock the cap tighter than expected, especially in humid laundry rooms.
Patience matters more than brute force here. A flat screwdriver jammed aggressively into the wrong spot can scratch the washer drum or damage the agitator housing itself. Small adjustments usually work better than one hard yank. Gentle rocking motions, warm water, penetrating lubricant around stubborn edges, or even using rubber gloves for better grip can slowly loosen the cap without creating extra repair bills.
Another overlooked problem pops up after the cap finally comes off. Tiny plastic clips or fragments may drop into the agitator assembly, creating rattling sounds later during spin cycles. That’s why careful removal techniques save more time than rushed shortcuts. Safe agitator cap removal keeps the washer functioning properly while avoiding hidden damage that may not show up until laundry day turns chaotic again.
Different washer brands also play by their own rules, honestly. Some agitator caps twist off cleanly while others rely on hidden locking tabs underneath the rim. A few designs even include inner dust covers that confuse people into thinking the entire assembly is stuck. Spotting those design differences early helps prevent unnecessary force and wasted effort.
Then there’s the awkward reality nobody talks about. Laundry rooms rarely give enough space to work comfortably. Bent over the washer opening, hands slippery from cleaner, flashlight balanced somewhere unstable, people often end up irritated before the repair even starts. Clear guidance and realistic methods make the process feel manageable instead of turning it into an all-day battle with one stubborn plastic part.

- TAR Score9.6
TAR Score is a ranking system developed by TopAppliancesReviews.com. TAR score has no relationship or impact from any manufacturers or sales agent websites. Learn more
- BrandWhirlpool

- TAR Score9.6
TAR Score is a ranking system developed by TopAppliancesReviews.com. TAR score has no relationship or impact from any manufacturers or sales agent websites. Learn more
- BrandAngzhili

- TAR Score9.4
TAR Score is a ranking system developed by TopAppliancesReviews.com. TAR score has no relationship or impact from any manufacturers or sales agent websites. Learn more
- BrandBudora
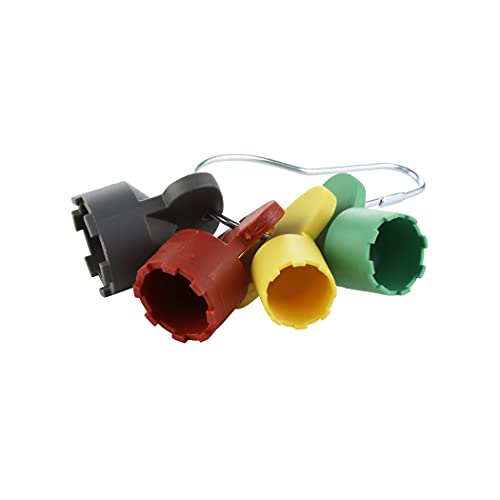
- TAR Score8.8
TAR Score is a ranking system developed by TopAppliancesReviews.com. TAR score has no relationship or impact from any manufacturers or sales agent websites. Learn more
- BrandDanco

- TAR Score8.6
TAR Score is a ranking system developed by TopAppliancesReviews.com. TAR score has no relationship or impact from any manufacturers or sales agent websites. Learn more
- BrandSzliyands
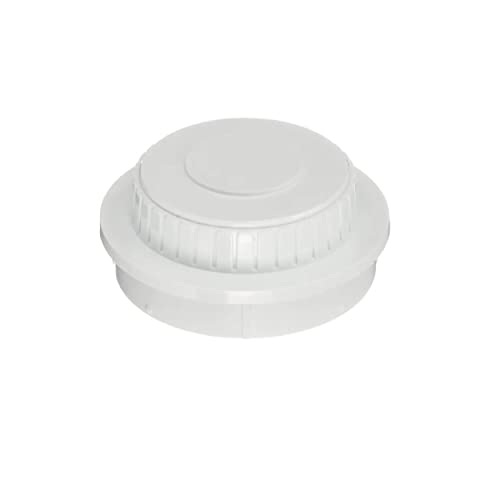
- TAR Score8.4
TAR Score is a ranking system developed by TopAppliancesReviews.com. TAR score has no relationship or impact from any manufacturers or sales agent websites. Learn more
- BrandGeneric
Last update on 2026-06-25 / Affiliate links / Images, Product Titles, and Product Highlights from Amazon Product Advertising API
How To Remove Broken Or Stuck Agitator Cap
A washer repair can go sideways fast once a small plastic cap refuses to move. The real headache isn’t just the stuck part, it’s the fear of cracking the agitator housing, scratching the tub, or losing a broken piece down inside the machine. That’s where how to remove broken or stuck agitator cap becomes more about patience than muscle. A careful method keeps the job cleaner, safer, and a whole lot less annoying.
Stuck Agitator Cap
A stuck cap usually tells a story before it breaks. Years of detergent film, lint paste, hard-water minerals, and damp laundry-room air can glue the cap into place like old tape. The main problem is that the plastic looks simple, so people assume it should pop off with one quick tug. Then the rim cracks, the center flexes, and the washer suddenly feels more fragile than expected.
Start by checking how the cap is held in place before grabbing the nearest screwdriver. Some caps lift straight up, some twist slightly, and others sit over hidden locking tabs that hate rough handling. A flashlight helps because shadows inside the agitator can hide small grooves or pry points. That tiny inspection step can save the agitator assembly from a nasty gouge.
Warm water is often the friendliest first move. Pour a small amount around the cap edge, then let it sit long enough to soften soap residue without flooding the washer. The goal is controlled loosening, not soaking every part under the cap. After that, press a towel around the area so your hands stay dry and you don’t slip at the worst possible moment.
A rubber glove or jar opener can give better grip than bare fingers. Grip matters because a stuck agitator cap often needs steady upward pressure instead of a dramatic yank. Rock it a little from side to side, then pause, then try again. That slow rhythm protects brittle plastic and keeps you from turning a stuck cap into a broken one.
Tools That Help Without Wrecking Plastic
The best tools for this job are boring, and that’s a good thing. A flat plastic trim tool, a soft cloth, needle-nose pliers, warm water, and a flashlight cover most situations. A metal screwdriver can help, but only with padding under the tip and gentle pressure. Bare metal against washer plastic is where ugly scratches and chipped edges usually begin.
Use leverage like a grown-up, not like you’re opening a paint can. Slide a cloth under the tool tip before lifting around the cap edge. Work in small movements around different sides instead of forcing one corner higher than the rest. That keeps pressure even and lowers the chance of snapping retaining clips.
Penetrating lubricant can help, but use it sparingly. A tiny amount around the edge may loosen crusty buildup, while too much can drip into places where it becomes a greasy mess. Keep the spray straw controlled and wipe away extra residue right away. The safe repair habit is simple: less product, more patience.
For rental laundry setups or shared machines, durability matters beyond this one cap. To reduce repeat service headaches, compare washing machine for rental house options before buying another washer that’s hard to service. A machine with accessible parts, simple controls, and sturdy agitator components can make future maintenance less of a circus. That kind of practical design saves time when small parts start acting stubborn.
Remove A Broken Cap Piece By Piece
A broken agitator cap changes the whole mood of the repair. Once the top edge cracks, there may not be enough surface left to grip evenly. The smart move is to remove loose pieces first so they don’t fall into the agitator shaft. Keep a small cup nearby for plastic fragments, screws, dust covers, or anything else that comes out during the job.
Needle-nose pliers work well on cracked tabs, but squeezing too hard can make the plastic crumble. Grab only the part that’s already broken or exposed, then pull upward with a slight wiggle. Avoid twisting deep inside the opening unless you can clearly see what the pliers are touching. A hidden wire, spring, or bolt cover doesn’t need a surprise tug from an impatient hand.
A shop vacuum can help if tiny pieces drop into the agitator cup. Use a narrow nozzle and keep the suction controlled so you don’t pull out small parts that still belong there. This step sounds fussy, but loose plastic debris can rattle later and make the washer sound worse than it is. Nobody wants to fix one issue and accidentally create a new mystery noise.
For washers installed upstairs, every repair deserves extra caution because leaks, vibration, and rough handling carry bigger consequences. Upgrade planning should include washing machine for second floor choices that control vibration and remain easier to access. A stuck cap repair is small, but a shaky washer on an upper level can turn small maintenance into a bigger household problem. The best setup makes repairs safer before anything breaks.
Loosen Soap Film And Mineral Buildup
Soap film is sneaky because it doesn’t always look dramatic. A thin ring under the agitator cap can act like glue after months of hot cycles and leftover detergent. Warm water, a soft brush, and a little dish soap can break that bond without attacking the washer plastic. The key is softening the buildup before trying to lift the cap again.
Hard water creates a different kind of stubborn. Mineral deposits can form a gritty crust around the cap edge, especially in laundry rooms with poor airflow. A vinegar-dampened cloth placed around the rim may help loosen the crust, but don’t pour vinegar wildly into the machine. Targeted cleaning protects rubber seals, nearby finishes, and the parts hidden below the cap.
Give the cleaner time to work, then come back with gentle pressure. People often rush this part because the cap looks close to moving. That’s the trap. A few extra minutes can mean the difference between a clean pop and a cracked agitator cap rim.
Laundry rooms also collect moisture, lint, and stale air, which can make small repair jobs feel grimy fast. Separately, to keep the room breathing better during routine washer maintenance, consider a wall mounted air purifier for tight utility spaces where floor space is already spoken for. It won’t remove the cap for you, of course. But cleaner airflow can help reduce that damp, dusty feeling around laundry maintenance.
Avoid Damage While Pulling The Cap Free
Force feels satisfying for about two seconds, then the crack appears. The safer approach is steady pressure from two sides, especially if the cap has already softened from warm water or cleaner. Keep your shoulders relaxed and let the tool do small work instead of big drama. Washer plastic often fails from sudden stress, not from careful pressure.
Use a towel as a buffer anywhere a tool touches the agitator. That soft layer spreads pressure and helps prevent dents or sharp tool marks. Lift a little, move to another side, then lift again. This even lifting method keeps the cap from tilting and jamming harder against the opening.
Stop immediately if the agitator body starts flexing. That movement means the force is traveling into the wrong part, not freeing the cap. Reapply warm water, clean the rim again, and inspect for tabs you may have missed. A short pause beats replacing a damaged agitator assembly.
Once the cap comes loose, don’t celebrate by tossing it aside too quickly. Check the underside for broken clips, warped edges, or leftover residue. Clean the opening before reinstalling a new cap so the replacement sits flat. A clean seat helps the new agitator cap stay secure without getting stuck again right away.
Check Hidden Clips Before Pulling Harder
Hidden clips can make a stuck agitator cap feel like it’s glued down, even after the buildup has softened. The frustrating part is that many clips sit below the rim, so they don’t shout for attention. Shine a flashlight into the cap edge and look for tiny slots, tabs, or uneven gaps before adding more force. That quick check protects the cap seat, the agitator rim, and the plastic locking points.
A thin plastic trim tool works better than a sharp metal blade for this step. Slide it slowly around the cap edge and feel for resistance that repeats in the same spots. That repeated resistance usually means a clip is holding firm, not that the whole cap needs a harder yank. Gentle pressure around each tab helps prevent broken clips and keeps the repair from turning ugly.
Some agitator caps loosen better with a twist before lifting. Others need straight upward pressure after the tabs release. Guessing wrong can jam the cap tighter, especially if one side lifts while the other stays locked. Controlled movement keeps the cap aligned and lowers the chance of cracking the agitator cover.
Small laundry setups often make this kind of repair feel awkward because there’s barely room to lean over the tub. For tight apartments, dorm rooms, or compact utility corners, compare a countertop washing machine before dealing with another bulky machine that’s hard to service. Smaller machines still need care, but easier access can make routine maintenance feel less like a wrestling match.
Clean The Agitator Opening After Removal
The job isn’t finished just because the cap finally comes off. Soap paste, lint, and mineral crust often sit inside the opening like old glue. Wipe the area with a damp cloth and use a soft brush around the inner lip. A clean opening helps the replacement cap sit evenly and reduces the odds of another stuck mess later.
Avoid scraping the inside with anything sharp unless a piece of broken plastic is clearly trapped. Metal picks can gouge the agitator cup and create rough edges that catch future caps. Use tweezers or needle-nose pliers for visible fragments, then vacuum loose debris if needed. That extra cleanup protects the agitator shaft and keeps rattles from showing up during the next spin cycle.
Dry the opening before reinstalling anything. Moisture trapped under the cap can mix with detergent residue and start the same sticky cycle all over again. A dry cloth, a few minutes of air time, and a quick inspection are enough for most washers. Clean, dry contact points give the cap tabs a better grip without forcing them into place.
Check the old cap before tossing it. Broken clips, warped edges, or brittle plastic tell you why it got stuck in the first place. Reusing a damaged cap usually creates another removal headache down the road. A fresh part with intact locking tabs is usually cheaper than fighting the same cracked piece twice.
Know When Heat Helps And When It Hurts
Warmth can help loosen a stubborn cap, but too much heat can ruin the plastic. Warm water around the rim is usually safer than a heat gun or hair dryer blasted at close range. The goal is to soften residue, not warp the cap into a new shape. Gentle heat supports safe cap removal without stressing the surrounding washer parts.
A hair dryer may help if the cap is cold, brittle, or slightly expanded from grime, but keep it moving. Hold it back from the surface and warm the area in short passes. Stop if the plastic smells hot, looks shiny, or starts flexing too easily. Washer plastic can go from stubborn to damaged fast, so temperature control matters.
Heat also works better after cleaning the exposed rim. Dirt and residue can block warmth from reaching the sticky layer underneath. Wipe first, warm second, then try gentle rocking pressure. That sequence gives the stuck agitator cap a better chance of loosening without a fight.
Laundry rooms with poor airflow can keep moisture hanging around longer than expected. In homes that lean on backup power or off-grid setups, explore a micro wind turbine if small-scale energy support fits the property and local conditions. It’s a separate home project, sure, but better utility planning can support laundry reliability in places where power interruptions make appliance care more annoying.
Reinstall The Cap Without Creating A New Problem
A new or cleaned cap should slide in with firm, even pressure. If it needs heavy force, something is still wrong. Check for leftover debris, bent tabs, or a misaligned dust cover before pushing harder. Proper fit protects the agitator connection and keeps the cap from getting jammed again.
Press around the cap evenly instead of slamming the center with your palm. A sharp hit can crack thin plastic, especially on older parts that have already lived through years of heat and vibration. Listen for a soft snap or feel for the cap settling into place. That small feedback usually means the locking tabs are seated correctly.
Run a short rinse or spin cycle after the repair if the washer is ready to use. Listen for rattling, scraping, or odd vibration from inside the agitator area. Strange sounds may mean a plastic piece fell inside or the cap didn’t seat flat. Catching that early helps avoid repeat repairs and keeps the washer from sounding worse than it is.
Keep detergent habits in check after the cap is back on. Too much detergent leaves sticky film that hardens around removable parts over time. Fabric softener can do the same, especially in machines that don’t rinse aggressively. Cleaner dosing helps prevent soap buildup, stuck caps, and that stale washer smell nobody wants near fresh laundry.
Prevent The Cap From Getting Stuck Again
Prevention starts with simple cleaning, not fancy tools. Wipe the agitator top every few weeks, especially after heavy loads, pet bedding, towels, or work clothes. Those loads shed lint and grime that settle into seams around the cap. Regular wiping keeps detergent residue from turning into a hard ring.
Leave the washer lid open after use if the space allows it. Air movement helps dry the tub, the agitator, and the cap area. A damp washer gives soap film and mildew more chances to cling. Better drying supports cleaner washer parts and makes future maintenance much easier.
Use the right detergent amount for load size and soil level. More soap doesn’t mean cleaner clothes, and extra suds often leave behind the gunk that causes stuck caps. High-efficiency detergents can still build up if poured with a heavy hand. Measured detergent keeps the agitator cap cleaner and helps the washer rinse properly.
Inspect the cap during routine washer cleaning instead of waiting for a repair day. Lift it gently if your model allows easy removal, clean underneath, and check for cracks before they spread. Small cracks are warning signs, not harmless cosmetic flaws. Replacing a worn cap early protects the agitator assembly from harder repairs later.


10 Best Quality Semi Automatic Washing Machine of 2026 For Leak-Free Laundry

11 Best Small Washer Machine of 2026 For Everyday Laundry

12 Best Vibration Pads For Washing Machine of 2026 To Stop Walking and Shaking

11 Best Selling Front Load Washing Machine of 2026 For Quiet Odor-Free Laundry

11 Best Washing Machine For King Size Bedding of 2026 To Prevent Cycle Errors

10 Best Small Front Loader Washing Machine of 2026 For Tight Closets

12 Best Side Load Washing Machine of 2026 For Low Vibration

11 Best Single Tub Washing Machine of 2026 For Apartments Without Hookups






