How Do You Safely Open Oysters Without an Oyster Knife?

Missing a dedicated shucking tool is nothing to panic about right before dinner. A clean flathead screwdriver works remarkably well to pry raw shells apart, or you can use gentle heat to pop them open naturally in just a few minutes. Kitchen knives are tempting, but flexible, razor-sharp blades easily slip or snap under hard pressure and cause painful hand injuries.
The best approach depends mainly on how you plan to serve them. Eating them raw requires a stiff, blunt household tool and a thick folded towel to pin the shell down firmly while guarding your skin. If you do not mind them slightly warm, a covered skillet, grill grate, or microwave will spring the back joint open with almost no physical effort. Here is how to work through your batch safely using items already sitting around your house.
Put Down Your Chef Knife and Grab a Rigid Household Tool
Using a regular kitchen knife to force open an oyster is one of the most common causes of emergency room visits for home cooks. Slicing knives have thin, flexible blades engineered for sliding cleanly through soft meats and vegetables. Even sturdy blades from German high-carbon steel premium knife block sets are ground to narrow slicing bevels. When you wedge a thin blade into a tight shell seam and twist, the steel cannot handle that sideways torque. The blade will flex, slip, or snap off at the tip, driving straight into the palm holding the shell.
To open an oyster safely without specialized equipment, you need a blunt, thick metal tool with zero blade flex. Check your drawers or toolbox for these safe options:
- A clean flathead screwdriver: This is your best household option. The thick steel shank cannot bend under pressure, and the blunt tip lets you apply heavy twisting force without slicing your skin if it slips. Wash it thoroughly with hot water and dish soap before bringing it near food.
- A thick, sturdy butter knife: Choose the heaviest butter knife in your drawer. It must have a solid handle and a rigid blade that does not bend when you press firmly against the tip with your thumb. Avoid thin stamped silverware that flexes under light pressure.
- A clean paint can opener: The curved metal lip on a standard loop opener is rigid enough to hook into shell seams, though it gives you less leverage than a screwdriver.
Avoid chef knives, paring knives, ceramic blades, and folding pocket knives. Folding pocket knives are especially dangerous because the internal lock can fail under prying pressure, causing the blade to snap shut directly onto your fingers.
Build a Stable Workstation With a Heavy Kitchen Towel
The secret to shucking oysters (prying open the shell) without getting hurt is controlling the shell before applying force. Never hold an oyster in mid-air in your palm while pushing a tool toward yourself. A slip on a wet shell will push the metal straight into your palm or wrist.
Start by setting a wooden or plastic cutting board on your counter. Place a damp paper towel or silicone mat underneath so the board cannot slide when you lean into it.
Grab a thick kitchen towel or a clean bath towel. Fold the towel twice so you have four thick layers of fabric to act as an impact shield. Lay the folded towel flat on your cutting board.
Every oyster has a flatter top shell and a deep, rounded bottom cup. Place the rounded cup side down on the towel. Keeping the deep cup on the bottom prevents the oyster liquor (the natural salty juice inside) from spilling onto the board once the shell splits.
Point the hinge (the pointy back joint where shells connect) toward your dominant hand. Pull the front edge of the towel over the oyster, wrapping the sides and front of the shell completely. Leave only the pointy hinge exposed. Press down firmly on top of the covered shell with your non-dominant hand. This locks the shell flat to the board while keeping your fingers safely shielded behind heavy fabric.
Pry the Hinge Open Using Controlled Lever Action
Opening an oyster without a purpose-built knife requires patience and mechanical leverage rather than raw force. If you try to pry the shell apart violently, you will crush the brittle edges into chalky powder. Follow these steps to open the shell cleanly:
- Find the hinge seam: Look closely at the narrow V-shaped point at the back of the shell. Feel along the junction with the tip of your clean screwdriver or butter knife until you locate the hairline seam where the shells meet.
- Seat the tool tip: Place the flat tip directly into that seam. Angle the tool downward at roughly forty-five degrees, pointing slightly into the lower cup rather than straight between the shells.
- Wiggle to sink the tip: Rock the tool gently from side to side while pressing forward with firm, steady pressure. Do not hit the tool with a hammer. Push until the tip sinks about a quarter inch into the joint and feels firmly seated.
- Twist like a key: Do not pry upward like a crowbar. Prying upward snaps tool tips and shatters shell lips. Instead, twist your wrist sideways, exactly like turning a key in an ignition. This rotary force pops the hinge apart with a distinct crack.
- Slide along the upper shell: Once the hinge pops open, keep the tool level. Slide the flat blade along the underside of the flat top shell toward the middle of the oyster.
- Cut the upper muscle: When you feel resistance near the center, you have reached the adductor muscle (the meat band holding the shells shut). Scrape your tool flat against the ceiling of the top shell to sever that muscle. Lift away the top shell and set it aside.
Apply Gentle Heat to Pop Stubborn Shells Without Cooking the Meat
Some oysters have thick, irregular shells that make finding the hinge seam almost impossible with a flathead screwdriver. If your tool keeps slipping or the shell begins to crumble under pressure, turn to gentle heat. Brief warmth naturally relaxes the oyster's adductor muscle, causing the shell to unseal and pop open on its own.
The goal is to apply just enough warmth to pop the seal without cooking the raw oyster meat inside. You can do this using three different kitchen methods:
- Steam over boiling water: Pour an inch of water into a large pot and set a steamer basket inside. Bring the water to a rolling boil over high heat. Arrange the cleaned oysters in the basket with their deep cup side down. Cover the pot with a tight lid. Steam for one to two minutes. The moment the shells pop open by an eighth of an inch, remove the oysters with metal tongs.
- Flash on the grill: Place the oysters deep cup down directly onto a medium-hot grill grate. Close the lid for two to three minutes. As soon as the steam inside forces the top shell to crack open, pull them off immediately.
- Short microwave burst: Place three or four oysters cup-side down on a microwave-safe plate. Cover them with a damp paper towel to trap steam. Microwave on high for fifteen to twenty seconds. Stop the microwave the instant you see the shells separate.
Always let heated oysters rest for one minute before touching them. Heated shells retain steam and can cause minor burns. Use an oven mitt or towel to grasp the hot shell while you finish separating the halves.
Slice the Adductor Muscle Cleanly and Save the Briny Liquor
Once you remove the top shell, the oyster meat is exposed, but it remains anchored to the bottom shell. Leaving the meat connected makes it difficult to eat and risks tearing the tender belly. You must also preserve the oyster liquor (the natural salty juice inside), which carries the distinct briny flavor of fresh seafood.
Follow this checklist to finish preparing your oysters for the table:
- Cut the bottom muscle attachment: Slide a clean butter knife or a small spoon under the oyster meat. Keep the tool pressed flat against the curve of the bottom shell. Slice cleanly through the lower adductor muscle attachment so the meat floats freely in its pool of juice.
- Flip the meat for presentation: Use the edge of your spoon to flip the oyster meat over in the shell. The smooth underside looks plumper and cleaner than the side where the muscle was severed.
- Pick out shell fragments: If your prying chipped small flakes of shell, dab them away using a clean finger or the tip of a moist paper towel. Do not rinse the open oyster under the faucet. Running tap water flushes away the rich liquor and makes the meat soggy and bland.
- Verify ocean freshness: Smell every oyster before serving it. Fresh oysters smell clean, cold, and briny, like ocean air. Discard any oyster that smells sour, sulfurous, or fishy, or any shell that feels dry and empty inside.
Pick Up a Dedicated Shucker and Safety Glove for Your Next Batch
Household tools and quick steam tricks solve the immediate problem when you bring oysters home unexpectedly. However, opening dozens of shells with a screwdriver or butter knife takes extra effort and wears out your hands. If you plan to serve fresh shellfish regularly, having the right gear in your kitchen drawer makes the entire process faster and far safer.
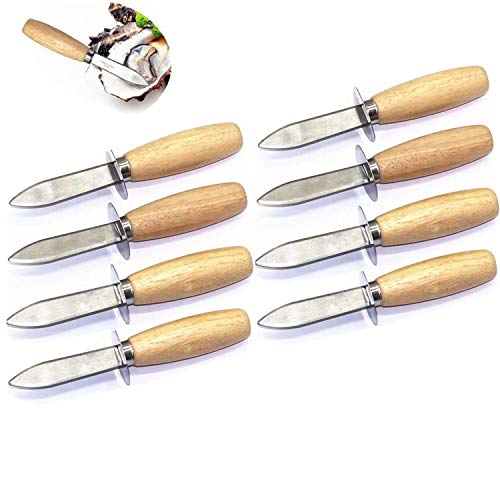
A true oyster shucker is built specifically for heavy prying. It features a short, rigid blade forged from thick stainless steel (rust-resistant, easy-to-clean metal) that will not bend or twist under lateral force. The tip is slightly rounded or beveled, allowing it to wedge cleanly into the hinge without gouging the tender meat inside. Most importantly, a good shucking knife includes a wide protective bolster or hand guard. This guard acts as a physical barrier that stops your fingers from sliding forward onto jagged shells or barnacles if the blade slips.
Handle design is equally critical. Look for a knife with an ergonomic, textured handle made from slip-resistant synthetic material or treated hardwood. When shell grit and cold juices coat your hands, a textured grip prevents the tool from turning in your palm.
Pair your shucking knife with a fabric safety glove rated for Level 5 cut protection. Wearing a cut-resistant glove on your non-dominant hand shields your skin from razor-sharp shell edges and absorbs the impact if your tool ever slips. Together, a rigid shucker and a safety glove turn a stressful kitchen chore into a smooth, effortless routine.

- TAR Score9.2
TAR Score is a ranking system developed by TopAppliancesReviews.com. TAR score has no relationship or impact from any manufacturers or sales agent websites. Learn more
- BrandNonley

- TAR Score9.2
TAR Score is a ranking system developed by TopAppliancesReviews.com. TAR score has no relationship or impact from any manufacturers or sales agent websites. Learn more
- BrandMercer Culinary

- TAR Score9.2
TAR Score is a ranking system developed by TopAppliancesReviews.com. TAR score has no relationship or impact from any manufacturers or sales agent websites. Learn more
- BrandSPEENSUN

- TAR Score9.0
TAR Score is a ranking system developed by TopAppliancesReviews.com. TAR score has no relationship or impact from any manufacturers or sales agent websites. Learn more
- BrandWENDOM

- TAR Score9.0
TAR Score is a ranking system developed by TopAppliancesReviews.com. TAR score has no relationship or impact from any manufacturers or sales agent websites. Learn more
- BrandNonley
- TAR Score9.0
TAR Score is a ranking system developed by TopAppliancesReviews.com. TAR score has no relationship or impact from any manufacturers or sales agent websites. Learn more
- BrandTANG SONG

- TAR Score8.8
TAR Score is a ranking system developed by TopAppliancesReviews.com. TAR score has no relationship or impact from any manufacturers or sales agent websites. Learn more
- BrandAmviner

- TAR Score8.8
TAR Score is a ranking system developed by TopAppliancesReviews.com. TAR score has no relationship or impact from any manufacturers or sales agent websites. Learn more
- BrandSPEENSUN

- TAR Score8.4
TAR Score is a ranking system developed by TopAppliancesReviews.com. TAR score has no relationship or impact from any manufacturers or sales agent websites. Learn more
- BrandZeroPone
Last update on 2026-10-03 / Affiliate links / Images, Product Titles, and Product Highlights from Amazon Product Advertising API
FAQs
Can you eat an oyster that opened before cooking or shucking?
If an oyster is already gaping open while sitting on ice or in your refrigerator, tap the shell firmly against the counter. If the shell snaps tightly shut, the oyster is alive and safe to prepare. If the shell remains open, loose, or does not react to your tap, the oyster has died, and you should throw it away immediately to prevent foodborne illness.
Will a quick microwave burst make raw oysters taste cooked?
A short burst of fifteen to twenty seconds will not cook the center of the meat if you stop the microwave the second the shell cracks open. The hinge expands and releases under steam before the oyster meat absorbs enough heat to cook. If you leave it in even thirty seconds too long, however, the edges will turn rubbery and the natural liquor will boil away.
What should you do if shell fragments crumble into the juice?
Pick out individual shell pieces using the clean tip of a butter knife or the damp corner of a paper towel. Avoid dumping the liquid through a fine wire strainer unless the shell completely shattered, because pouring causes you to lose much of the briny liquor along the sides of the bowl. Never rinse the meat under the kitchen faucet, as fresh tap water ruins the natural salinity.
Can a flat pry bar or putty knife work instead of a screwdriver?
A small, rigid putty knife or miniature flat bar can open shells if the metal is completely rigid. But wide blades disperse your leverage across too much surface area, which often crumbles the thin outer edges of the shell rather than popping the joint. A clean flathead screwdriver is far more effective because its narrow, thick tip concentrates all your twisting force directly into the hinge.

Top Rated Best Quality Range Hoods: 2026 Expert Picks
The 12 Best Small Solar Generators 2026

10 Best Quality Semi Automatic Washing Machine of 2026 For Leak-Free Laundry

11 Best Small Washer Machine of 2026 For Everyday Laundry

12 Best Vibration Pads For Washing Machine of 2026 To Stop Walking and Shaking

11 Best Selling Front Load Washing Machine of 2026 For Quiet Odor-Free Laundry

11 Best Washing Machine For King Size Bedding of 2026 To Prevent Cycle Errors

10 Best Small Front Loader Washing Machine of 2026 For Tight Closets