How to Open an Oyster Safely Without an Oyster Knife?

Set down any thin kitchen blades and grab a thick cloth towel immediately. Regular knives snap easily under prying pressure, so the safest route is to use gentle heat to pop the shell open or carefully pry the hinge with a clean flathead screwdriver. A folded towel protects your fingers and anchors the rough shell against the counter while you work.
The best method depends on how you plan to eat them and the tools in your drawer. A quick steam or brief microwave cycle releases the shell muscle without any physical struggle if warm oysters fit the meal. If you prefer them chilled and raw, opening them requires a rigid tool like a stiff butter knife, steady prying at the rear joint, and an intact, solid shell. Here is how to get inside without risking your fingers or ruining your dinner.
Why Kitchen Knives Snap on Oyster Shells
Facing a bowl of fresh oysters on ice, your first impulse is often to grab the sharpest knife in your drawer. A chef knife or paring blade looks pointed enough to enter the shell seam. But kitchen cutlery is engineered for slicing soft food, not prying rock-hard calcium carbonate. Using kitchen knives as pry bars leads directly to hand lacerations and ruined steel.
Culinary blades rely on thin edge geometry designed for downward slicing. A knife from one of your high-carbon Japanese chef knife sets is ground to an acute fifteen-degree slicing angle per side for delicate prep. That thin edge has no lateral strength. Twisting a slender kitchen tip inside a rigid shell seam bends the hardened steel sideways past its breaking point, snapping the tip off immediately.
Heavier blades from German high-carbon steel knife block sets also fail under prying pressure. Their steel is sturdy, but their edges are shaped for culinary cutting rather than prying leverage. Sideways torque against a rock-hard shell chips or folds the cutting edge. Grinding out that damage requires removing significant steel, permanently altering the blade profile.
Paring knives carry even greater injury risks. Many paring blades use partial tang construction, meaning the blade metal narrows or stops inside the handle rather than extending through the full grip. Heavy prying pressure easily snaps the blade at the handle joint. When the steel fractures under load, your hand surges forward onto the broken stub or jagged shell edges.
Slip injuries happen just as quickly as broken blades. Oyster shells are wet, uneven, and coated in slick ocean grit. If a razor-sharp blade slips off the seam, your pushing force drives the edge straight into the bracing hand. Utility knives and folding pocket knives present identical risks, as folding locks can easily buckle under rotational torque and close on your fingers.
Popping Shells Hands-Free with Gentle Heat
Gentle heat is the safest way to open oysters when you lack specialized shucking gear. Every oyster relies on an adductor muscle (the small, tough muscle clamping the two shell halves shut) to protect itself from predators. Mild warmth relaxes the muscle fibers, causing the shell to pop open on its own without any dangerous prying.
You do not need to cook the oyster through to release the hinge. Pulling the shells from heat the moment they crack open keeps the meat cool or lightly warmed, preserving its natural liquor and delicate texture. Three simple methods pop shells open using everyday kitchen heat sources.
Method 1: Steaming on the Stovetop
- Rinse the oysters under cold running water to remove loose mud and grit.
- Bring one inch of water to a boil in a stockpot fitted with a steamer basket, keeping the water level below the basket.
- Place the oysters cup-side down in the basket, cover with a tight lid, and steam over high heat for two to four minutes.
- Remove each oyster with tongs the instant the shell cracks open a quarter inch, then set it on a cool tray.
Method 2: Popping Shells on an Outdoor Grill
- Preheat a gas or charcoal grill to medium-high heat, roughly four hundred degrees Fahrenheit.
- Place clean oysters directly on the grate with their deep cup side down to catch the liquor.
- Close the lid for three to five minutes until the top shells lift slightly and release steam, then transfer them to a platter with tongs.
Method 3: The Microwave Burst Trick
- Place three or four cleaned oysters on a microwave-safe plate with hinges pointing outward.
- Cover the shells with a damp paper towel to trap moisture and catch small pops.
- Microwave on high in fifteen-second bursts, stopping the instant shells crack open an eighth of an inch (usually thirty to forty-five seconds total).
After heating, use a plain dinner spoon or dull butter knife to finish opening the shell. Slide the blade under the loosened lid to slice through the relaxed adductor muscle. The top shell lifts away easily, leaving your warm oyster resting in its clean, salty juice.
Opening Raw Oysters with a Screwdriver or Butter Knife
If you want to serve raw oysters on the half shell over crushed ice, applying heat is out of the question. You can still crack the shells cold using sturdy tools from your garage or kitchen drawer. A clean flathead screwdriver or a heavy butter knife delivers rigid leverage without placing a razor-sharp edge near your hands.
A medium flathead screwdriver works well because its thick steel shank resists rotational torque without flexing. Unlike a kitchen knife, a screwdriver has a blunt, squared tip that will not slice your skin if it slips. If using a butter knife, choose a heavy forged model rather than a thin spreader. Wash and scrub the tool with warm soapy water before touching food.
- Fold a towel nest: Fold a thick kitchen towel into thirds on a flat counter. Place the oyster flat-shell up in the center with the pointed hinge (the rear joint connecting both shells) facing outward. Fold the towel over the shell so only the hinge shows, and press your non-dominant hand down firmly with fingers curled back.
- Seat the tool in the hinge: Push the flat tip of your screwdriver or heavy butter knife into the narrow seam at the hinge. Wiggle the tool with steady forward pressure until the tip bites roughly an eighth of an inch into the joint. Keep the tool angled slightly downward toward the counter.
- Twist like a door key: Stop pushing forward once the tip sits firmly in the seam. Do not pry upward like a crowbar, which shatters the brittle shell into your food. Instead, twist your wrist sideways with a firm snap like turning a key in a lock until the hinge pops open.
- Cut the adductor muscle: Wipe away any loose shell dust at the hinge with a damp cloth. Slide your butter knife flat along the underside of the top shell toward the center. Slice through the adductor muscle (the small muscle clamping the shells shut) and lift the top shell away.
- Free the meat: Slide your dull knife gently underneath the oyster meat in the bottom cup shell. Sever the lower muscle attachment so the oyster floats freely in its natural ocean liquor (the salty juice inside the shell).
Inspect the oyster immediately after opening to confirm it is fresh and safe to eat. Raw shellfish must be alive right up to the moment they are cracked open. Use this clear checklist before serving any raw oyster:
- Shell tap check: Tap any open shell firmly with a spoon. A live oyster pulls shut within seconds. If it stays open, discard it immediately.
- Scent check: Smell the opened oyster up close. Fresh oysters smell cleanly of sweet ocean water and sea breeze. Throw away any shell with a sour, pungent, or strongly fishy odor.
- Liquor check: A fresh oyster rests in clear or slightly milky natural brine. If the shell is bone-dry or the fluid looks murky and discolored, discard it.
- Meat appearance check: The meat should look plump, glossy, and firm in the cup shell. Discard oysters with meat that looks shriveled, thin, gray, or dried out.
If loose shell fragments fall into the cup during prying, avoid rinsing the oyster under running tap water. Fresh water washes away the savory oyster liquor and dulls the rich ocean flavor. Use a clean fingertip or the tip of a dull butter knife to lift stray shell flakes off the meat instead.
What to Look for in Dedicated Oyster Shucking Gear
Opening shellfish with screwdrivers and butter knives solves an immediate dilemma, but it is awkward for large batches. Dedicated shucking tools make the task faster, cleaner, and far safer for your hands. If you plan to serve oysters again, proper gear turns an intimidating chore into a relaxed kitchen routine.
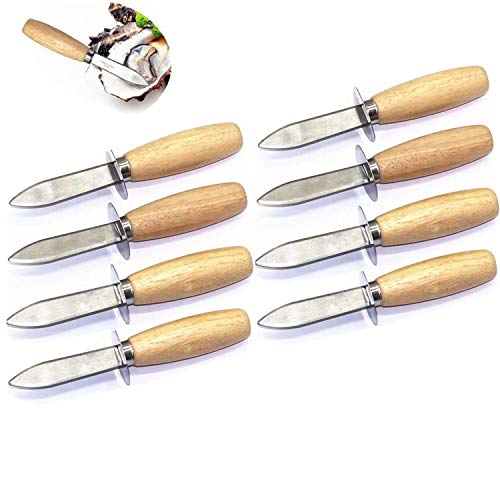
A genuine oyster knife features a short, rigid blade measuring two to three inches long. The blade is thick and blunt, engineered to handle twisting leverage without bending or snapping. Look for durable stainless steel or high-carbon stainless alloys that resist rust from salty ocean brine. A rounded tip or slight upward bend helps you enter tight hinges without tearing the delicate meat.
Handle design is equally critical for safety. Choose a knife with full tang construction (one solid piece of blade steel extending all the way through the handle) for maximum strength under pressure. A textured, non-slip handle made from molded polymer or treated wood stays secure in wet hands. A built-in guard between handle and blade prevents your fingers from sliding forward onto sharp shell margins.
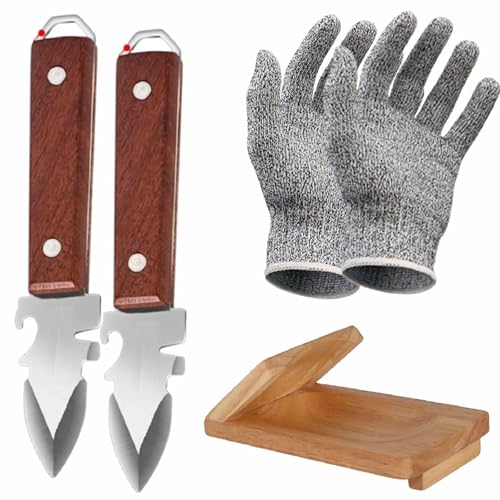
A cut-resistant glove completes your shucking setup. Most kitchen injuries happen when the bracing hand slips against razor-sharp shell edges or an off-target tool. A woven glove offering level-five cut protection shields your fingers and palm from slips, cuts, and punctures. Pairing a rigid blade with a protective glove lets you open shellfish with complete confidence.

- TAR Score9.2
TAR Score is a ranking system developed by TopAppliancesReviews.com. TAR score has no relationship or impact from any manufacturers or sales agent websites. Learn more
- BrandSPEENSUN

- TAR Score9.2
TAR Score is a ranking system developed by TopAppliancesReviews.com. TAR score has no relationship or impact from any manufacturers or sales agent websites. Learn more
- BrandNonley

- TAR Score9.2
TAR Score is a ranking system developed by TopAppliancesReviews.com. TAR score has no relationship or impact from any manufacturers or sales agent websites. Learn more
- BrandMercer Culinary

- TAR Score9.0
TAR Score is a ranking system developed by TopAppliancesReviews.com. TAR score has no relationship or impact from any manufacturers or sales agent websites. Learn more
- BrandWENDOM

- TAR Score9.0
TAR Score is a ranking system developed by TopAppliancesReviews.com. TAR score has no relationship or impact from any manufacturers or sales agent websites. Learn more
- BrandNonley
- TAR Score9.0
TAR Score is a ranking system developed by TopAppliancesReviews.com. TAR score has no relationship or impact from any manufacturers or sales agent websites. Learn more
- BrandTANG SONG

- TAR Score8.8
TAR Score is a ranking system developed by TopAppliancesReviews.com. TAR score has no relationship or impact from any manufacturers or sales agent websites. Learn more
- BrandAmviner

- TAR Score8.8
TAR Score is a ranking system developed by TopAppliancesReviews.com. TAR score has no relationship or impact from any manufacturers or sales agent websites. Learn more
- BrandSPEENSUN

- TAR Score8.4
TAR Score is a ranking system developed by TopAppliancesReviews.com. TAR score has no relationship or impact from any manufacturers or sales agent websites. Learn more
- BrandZeroPone
- TAR Score8.4
TAR Score is a ranking system developed by TopAppliancesReviews.com. TAR score has no relationship or impact from any manufacturers or sales agent websites. Learn more
- Brandaccufine
Last update on 2026-10-03 / Affiliate links / Images, Product Titles, and Product Highlights from Amazon Product Advertising API
FAQs
Can I open an oyster with a paring knife or a folding pocket knife?
Avoid using paring knives and pocket knives because both carry high injury risks under prying pressure. Paring knives have thin blades that snap sideways when twisted, driving sharp broken metal into your fingers. Folding pocket knives can suffer lock failure under rotational torque, snapping the blade shut across your knuckles. Stick to a thick, blunt flathead screwdriver or use gentle heat instead.
Will steaming or microwaving oysters ruin their raw texture?
Brief heat does not cook the oyster meat if you remove the shells the instant they crack open. Gentle warmth simply relaxes the adductor muscle, releasing the hinge while keeping the meat cool or lightly warmed. As long as you pull them immediately and set them on a cool tray, the oysters retain their delicate ocean flavor, tender texture, and natural liquor.
What is the best way to remove shell fragments without losing the oyster juice?
Never rinse an opened oyster under running kitchen tap water to remove shell grit. Fresh tap water washes away the natural salty liquor and dilutes the ocean flavor of the meat. Instead, use a clean fingertip or the tip of a dull butter knife to lift individual shell flakes from the cup. If there is heavy grit, lift the meat out with a fork, wipe the shell clean, and lay the meat back into its juices.


Top Rated Best Quality Range Hoods: 2026 Expert Picks
The 12 Best Small Solar Generators 2026

10 Best Quality Semi Automatic Washing Machine of 2026 For Leak-Free Laundry

11 Best Small Washer Machine of 2026 For Everyday Laundry

12 Best Vibration Pads For Washing Machine of 2026 To Stop Walking and Shaking

11 Best Selling Front Load Washing Machine of 2026 For Quiet Odor-Free Laundry

11 Best Washing Machine For King Size Bedding of 2026 To Prevent Cycle Errors

10 Best Small Front Loader Washing Machine of 2026 For Tight Closets