
How to Open an Oyster with a Knife Safely

A mesh bag of fresh oysters sits on the counter smelling of cold saltwater, with every shell clamped shut like a gray stone. The cleanest way into the shell is to wrap it in a folded towel, wiggle a rigid oyster knife into the rear hinge, and twist the handle like a key. That simple lever motion snaps the seal open without mangling the meat inside.
The exact effort you need depends on your blade, your hand protection, and the shape of the shell. A sharp kitchen knife can easily bend or slip off the slick calcium, which makes a thick shucking blade and a sturdy glove essential. Flat shells usually yield quickly, while deep, uneven shells take a bit more patience to find the narrow rear joint. Here is how to hold the shell, pop the seal, and keep your fingers safe every time.
Set Up a Stable Surface and Protect Your Holding Hand
Shucking oysters safely starts with preparing your counter before you pick up any tool. An unsteady shell on a slick countertop invites the blade to slip directly into your fingers. You need friction, a solid boundary, and the right barrier between the shell and your skin.
Set up your work area using this basic checklist:
- A heavy cutting board: Place a thick wooden or heavy plastic cutting board flat on your counter. Wet counters cause boards to slide, so lay a damp kitchen cloth or silicone mat underneath the board to anchor it completely.
- A thick kitchen towel: Fold a heavy cotton dish towel into thirds lengthwise, then fold it in half. You will use this folded cloth to cradle the oyster and shield your non-dominant hand.
- Cut-resistant hand protection: Wear a glove rated for Level 5 cut resistance on the hand that holds the oyster. If you do not own a protective glove, rely on the folded towel to create a barrier of at least six layers of dense cloth between your palm and the shell.
- A wide platter of crushed ice: Keep a rimmed baking sheet or shallow bowl filled with crushed ice nearby. Freshly opened oysters need to sit upright on ice immediately so they stay cold and level without tipping their liquid onto the counter.
- A stiff scrub brush: Use cold tap water and a brush to scrub exterior dirt, grit, and loose sand off the shells before you start opening them.
Position your body squarely in front of the board. Stand with your feet shoulder-width apart so you can lean your body weight into the movement rather than relying only on arm strength. Keep your work area free of clutter so you have full elbow room to work smoothly.
Put Away Thin Kitchen Cutlery Before You Snap a Blade
The single most dangerous mistake home cooks make is grabbing an ordinary kitchen knife to force open a closed oyster. Chef knives, utility knives, and paring knives feature thin, ground blades engineered for slicing soft vegetables and raw meats. When you wedge a thin edge into calcium carbonate rock and twist your wrist, the lateral pressure snaps the steel instantly.
A broken kitchen knife creates two immediate hazards. First, the snapped blade edge flies off under tension. Second, the sudden release of resistance causes your hand to thrust forward into the jagged, razor-sharp edge of the oyster shell. High-end cutlery, such as blades found in German high-carbon steel kitchen knives, uses hard steel tempered for clean slicing. Forcing those fine bevels against rock chips the edge instantly. Similarly, the acute edges on Japanese chef knives are far too brittle for prying.
A proper oyster knife works as a pry bar rather than a cutting blade. It features a short blade, typically two to three inches long, crafted from thick stainless steel (rust-resistant, easy-to-clean metal). The tip is narrow enough to enter small crevices, but the spine remains stout and rigid so it will not bend or flex under hand torque. The edges of an oyster knife are intentionally dulled or beveled blunt. You are cracking open a tight joint through mechanical leverage, not slicing through an edge.
Wedge into the Hinge and Twist Like a Car Key
Opening an oyster cleanly comes down to leverage and patience, never raw brute force. Follow these five steps to pop the shell safely without mangling the meat inside.
- Orient the oyster correctly. Look at the shell to find the cupped shell (the deep, rounded bottom half that cradles the oyster meat) and the flat top shell. Place the oyster cupped side down against your towel-lined cutting board. Point the hinge (the narrow pointed rear joint where the two shells connect) outward toward your dominant hand. The wide, flared lips of the shell should face away from your knife hand.
- Anchor the shell securely. Place your non-dominant hand, covered in your glove or heavy folded towel, over the body of the oyster. Press downward firmly against the cutting board. Keep your fingers tucked back behind the shell rather than wrapping around the front where the blade will enter. Never hold an oyster mid-air in the palm of your hand like an apple. Always pin it flat against the board.
- Find the hinge entry point. Place the tip of your oyster knife directly into the tiny crevice at the hinge. Rest the blade parallel to the cutting board or angled slightly downward into the joint. Do not jab or lunge forward. Apply steady, firm pressure while wiggling the tip with a gentle side-to-side shimmy. You only need the first quarter-inch of the blade tip to bite into the joint.
- Twist your wrist to pop the seal. Once the tip is firmly lodged into the hinge, do not lever the handle up and down like a crowbar. Prying upward will snap the brittle shell lips and shower stone grit into the meat. Instead, rotate your wrist in a quick turning motion, exactly like turning a key in an automobile ignition. This rotational torque forces the two shell halves apart with an audible pop.
- Wipe away loose shell grit. After the hinge pops, stop moving forward. Pull the blade out gently. Use the corner of your damp kitchen towel to wipe the blade tip and the cracked hinge area clean of any loose shell dust or calcium fragments before working inside the shell cavity.
Slide Flat Across the Top Shell to Save the Brine
Once you break the hinge, the shell halves will loosen slightly, but the oyster will still hold itself tightly shut. This tension comes from the adductor muscle (the firm white muscle holding the two shells tightly shut). Your goal now is to slice this muscle away from the top lid without damaging the soft oyster belly underneath.
Reinsert the blade into the popped hinge seam. Work the blade gently down the right-hand side of the shell toward the wider front edge. Keep the flat side of the knife blade pressed tightly against the inner ceiling of the top shell. Angle the edge upward against the roof of the shell so you feel the metal scraping calcium rather than slicing soft tissue.
About halfway down the shell, you will encounter resistance. That is the adductor muscle. Maintain steady upward pressure against the top shell and slide the blade smoothly through that muscle in a single flat stroke. Once the muscle gives way, the tension vanishes completely. Lift the flat top shell away and discard it.
Inspect the exposed oyster meat resting in the deep cupped bottom. It should be floating in oyster liquor (the natural salty juice inside the shell). This clear liquid carries the fresh brine and minerals of the seafood. Spilling this liquid leaves the oyster dry and chewy. Never rinse the opened oyster under running tap water to wash away debris. Tap water washes away the natural salinity and makes the delicate oyster flesh waterlogged and bland.
If you see a stray fragment of broken shell on top of the meat, lift it out carefully using the tip of your knife or a clean finger. Finally, slide your knife blade underneath the oyster meat along the floor of the cupped shell. Slice through the lower attachment of the adductor muscle. Once cut loose from the bottom, the oyster sits free in its liquor, ready to slide smoothly off the half shell when served.
Inspect the Shell and Sniff the Meat Before Serving
Oysters must be alive right up until the moment you pop the hinge. Eating a dead or spoiled oyster poses serious risks of foodborne illness. Check each shell and use your senses during prep using this safety checklist:
- Check for tightly closed shells: Before shucking, inspect every closed oyster. If a shell is already gaping open, tap it firmly against your cutting board. A live oyster will close its shell within a few seconds. If the shell remains open and limp, the oyster is dead. Discard it in the trash right away.
- Check for heavy shell weight: A healthy live oyster feels surprisingly heavy for its size because it remains tightly clamped around its natural sea brine. If an oyster feels remarkably light or hollow when you pick it up, the liquid has leaked out and the meat has perished.
- Sniff the shell and the liquor: Fresh oysters have a clean, pleasant aroma of sea breeze, cold salt water, and fresh ocean air. If an oyster smells foul, sour, fishy, or pungent like ammonia or rotten eggs, throw it away immediately. Trust your nose every single time.
- Inspect meat texture and color: The meat should look glossy, plump, and slightly translucent with healthy cream, gray, or tan coloring. Avoid oysters with flesh that looks shriveled, dried against the shell wall, muddy brown, or milky and dull.
- Look for clear liquor: The natural juice pooled inside the cupped shell should look clear or slightly opalescent. If the internal liquid appears thick, dirty brown, or slimy, discard the entire oyster.
Choose a Sturdy Oyster Knife and Cut-Resistant Hand Wear
Opening oysters without frustration requires tools designed specifically for handling heavy prying forces. Standard kitchen knives flex too easily, while blunt household tools lack the precise point needed to bite into tight calcium joints.
When selecting an oyster knife, prioritize full tang construction (one solid piece of blade steel extending all the way through the handle). A full tang build ensures the handle will not snap loose or twist out of your grip when you apply heavy torque to a stubborn shell. Look for a blade forged from thick stainless steel (rust-resistant, easy-to-clean metal) that will withstand direct exposure to corrosive saltwater without pitting or rusting. Blades with a small safety guard or widened bolster between the handle and the blade offer helpful protection, preventing your hand from slipping forward onto rough shells.
Pair your knife with dedicated hand protection. A cut-resistant glove rated for Level 5 protection provides peace of mind while learning the twisting technique. Gloves woven with reinforced fibers protect against both sharp shell edges and accidental slips of the blade tip. For maintenance, always wash your shucking gear by hand with warm water and soap immediately after use, then dry the steel completely before storing.

- TAR Score9.2
TAR Score is a ranking system developed by TopAppliancesReviews.com. TAR score has no relationship or impact from any manufacturers or sales agent websites. Learn more
- BrandSPEENSUN

- TAR Score9.0
TAR Score is a ranking system developed by TopAppliancesReviews.com. TAR score has no relationship or impact from any manufacturers or sales agent websites. Learn more
- BrandWENDOM

- TAR Score9.0
TAR Score is a ranking system developed by TopAppliancesReviews.com. TAR score has no relationship or impact from any manufacturers or sales agent websites. Learn more
- BrandNonley

- TAR Score9.0
TAR Score is a ranking system developed by TopAppliancesReviews.com. TAR score has no relationship or impact from any manufacturers or sales agent websites. Learn more
- BrandMYBMHTNB

- TAR Score8.8
TAR Score is a ranking system developed by TopAppliancesReviews.com. TAR score has no relationship or impact from any manufacturers or sales agent websites. Learn more
- BrandAmviner

- TAR Score8.8
TAR Score is a ranking system developed by TopAppliancesReviews.com. TAR score has no relationship or impact from any manufacturers or sales agent websites. Learn more
- BrandSPEENSUN

- TAR Score8.8
TAR Score is a ranking system developed by TopAppliancesReviews.com. TAR score has no relationship or impact from any manufacturers or sales agent websites. Learn more
- BrandSPEENSUN

- TAR Score8.8
TAR Score is a ranking system developed by TopAppliancesReviews.com. TAR score has no relationship or impact from any manufacturers or sales agent websites. Learn more
- BrandZOAMEACY
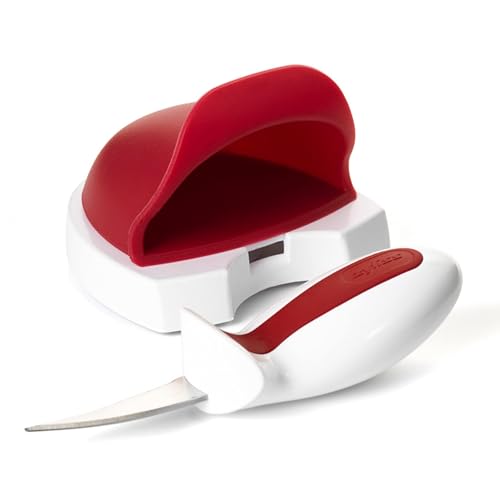
- TAR Score8.4
TAR Score is a ranking system developed by TopAppliancesReviews.com. TAR score has no relationship or impact from any manufacturers or sales agent websites. Learn more
- BrandZyliss
Last update on 2026-10-03 / Affiliate links / Images, Product Titles, and Product Highlights from Amazon Product Advertising API
FAQs
Can I use a flathead screwdriver or a butter knife if I have no oyster knife?
You should avoid both tools. Butter knives are made from soft metal that bends easily and lacks the tapered point needed to enter the hinge, causing severe slips. Screwdrivers are thick enough to pry, but their long shafts create poor leverage and their tips shatter brittle shell margins, dumping metal filings and dirty shell powder directly into the seafood.
What should I do if the hinge crumbles while prying?
If the rear joint shatters, turn the oyster sideways. Wrap the oyster securely in your towel, place the blade tip into the thin seam along the side lips where the top and bottom shells meet, and work the knife in from the side. Once inside the seam, twist the blade gently to pry the shells apart and slice the adductor muscle from the side entry.
Do oysters need to be washed before you open them?
Yes, but only scrub the outside shell under cold running tap water before inserting the knife. Scrubbing removes loose sand, mud, and algae so they do not fall inside the shell cavity during shucking. Never rinse the inside meat or the open shell under running water after opening, because tap water ruins the natural brine and softens the meat texture.
How long can shucked oysters sit on ice before eating?
Shucked oysters taste best when eaten immediately after opening. If you are preparing a large batch for a party, lay the opened half shells level on a deep bed of crushed ice and serve them within two hours. Keep the platter refrigerated or shaded from direct heat until the moment you set them on the dining table.


Top Rated Best Quality Range Hoods: 2026 Expert Picks

The 12 Best Small Solar Generators 2026

10 Best Quality Semi Automatic Washing Machine of 2026 For Leak-Free Laundry

11 Best Small Washer Machine of 2026 For Everyday Laundry

12 Best Vibration Pads For Washing Machine of 2026 To Stop Walking and Shaking

11 Best Selling Front Load Washing Machine of 2026 For Quiet Odor-Free Laundry

11 Best Washing Machine For King Size Bedding of 2026 To Prevent Cycle Errors

10 Best Small Front Loader Washing Machine of 2026 For Tight Closets






