
How to Open a Stanley Utility Knife Safely

Getting into a utility knife is nothing to stress over as long as the sharp edge stays safely tucked away while working. For a standard metal model, simply retract the slider and loosen the center screw to separate the two handle halves. Quick-change designs are even easier, requiring only a firm press on the front release button to slide the old razor free without taking the casing apart.
The exact method depends on the build of the handle and the tool resting on the workbench. Classic screw-together shells need a flathead or Phillips screwdriver to reach the blade carrier and internal storage pins. Push-button and folding versions skip the hardware entirely, using spring latches to swap blades on the fly. Here is how to identify the casing style and open it cleanly without dulling blades or jamming the slider.
Check your knife body style before grabbing any tools
Stanley has manufactured utility knives for decades, and while many look similar at a glance, they do not all open the same way. Trying to force open the wrong seam or prying at a button-release knife with a screwdriver will crack the cast metal or ruin the internal springs. Take five seconds to look closely at the handle so you know exactly which design you are holding.
- The classic split-body metal knife: This is the iconic grey painted knife found in millions of toolboxes. It features a single visible screw right in the center of the handle and a seam running along the top and bottom edge from the front tip to the lanyard hole at the back. It requires a manual screwdriver to open the body.
- The push-button quick-change knife: These models feature a molded rubber grip or a curved handle with a small release button located directly next to the front tip. The blade slides out through the front opening when you press the button, and the handle swings open on a hinge or slides out like a drawer to reveal spare blades without any loose screws.
- The folding pocket utility knife: Shaped like a pocket knife, this version folds in half at a central pivot hinge. The blade locks inside a metal arm, and you replace the blade by pressing a small lever on the arm rather than taking the handle apart.
If you see a screw head sitting dead center in the metal casing, you have a classic model that splits into two separate halves. If you see buttons near the front nose or a sliding latch on the side, put the screwdriver away because your knife opens by hand.
Open the classic screw-together metal handle step by step
Opening a classic split-casing knife is straightforward, but doing it carelessly can cause loose spare blades to tumble out or strip the soft threads inside the handle. Work over a flat, cleared table or workbench so parts cannot drop to the floor.
- Retract the blade completely into the body: Push down on the retractable slider (the thumb button that pushes the blade out) and pull it all the way back until it clicks into the rear resting slot. Never attempt to take the casing apart while the razor edge extends past the nose.
- Lay the knife flat on your work surface: Place the knife flat with the screw head facing up toward you. Keeping the knife flat against a table prevents the spare blades stored inside from sliding out of their alignment posts when the halves separate.
- Turn the center screw counterclockwise: Insert a standard flathead or a #2 Phillips screwdriver firmly into the screw head. Apply downward pressure as you turn counterclockwise so the driver tip does not slip and strip the metal slot. Keep turning until the screw spins freely.
- Lift the top half of the metal casing straight off: You do not need to pull the screw entirely out of its hole; you can leave it resting loosely in the top shell. Hold the bottom half flat against the table with one hand, take hold of the top half with your other hand, and lift it straight upward.
- Separate stuck halves gently without prying the nose: If old paint, drywall dust, or dried tape adhesive holds the two halves glued together, do not wedge a chisel or flat screwdriver into the front opening. Instead, hold the knife over your table and tap the butt end lightly against the heel of your hand to break the seal. The top shell will lift away cleanly.
Use the release button on quick-change and folding models
Modern quick-change utility knives do not require you to take the entire handle apart just to replace a dull edge. They separate the blade-changing action from the spare-blade storage compartment to keep your fingers safe.
- Extend the blade fully forward: Push the retractable slider (the thumb button that pushes the blade out) as far forward as it will travel. The blade carrier must sit at the furthest front position for the release trigger to disengage the blade notches.
- Press and hold the front release button: Look right behind the interlocking nose (the overlapping metal tip that clamps the blade in place) for a brass or plastic button. Press this button down firmly with your thumb. You will feel an internal pin lift out of the notch on top of the razor blade.
- Pull the dull blade straight out: While keeping the button pressed down with steady pressure, grip the dull blade by its blunt sides and pull it forward out of the nose channel. Release the button once the old blade clears the casing.
- Insert the fresh blade until it locks: Hold the button down again, slide a fresh blade straight into the front slot until it stops, and release the button. Tug forward gently on the blade to confirm that the internal locking pin snapped securely into the blade notch.
- Access the internal storage compartment: To reach the spare blades inside a quick-change handle, look along the back spine or the bottom belly of the grip for a secondary release latch. Press this latch to swing open the internal storage tray. The tray pivots outward like a car door, allowing you to lift out a fresh blade while the rest remain held behind a spring clip.
Swap the razor blade and manage internal blade storage safely
Once you open the casing of a classic knife, you will see how simple the internal layout is. The handle contains two primary functional areas: the sliding track near the front and the storage chamber in the back.
Near the nose sits the blade carrier (the small metal bracket inside that holds the razor notches). The razor blade rests flat against this bracket, held in place by two small raised metal nubs that fit precisely into the half-moon cutouts along the top edge of the blade. To remove the blade, lift it straight up off these two nubs. If the edge you were using is dull, remember that utility blades are reversible. You can simply flip the blade around so the unused pointed end faces outward.
Unlike kitchen cutlery where owners seek out lasting sharpness through forged metal and careful maintenance, or sharpen delicate edges on specialized high-carbon Japanese chef knife sets, utility knives use inexpensive carbon steel blades meant for heavy demolition and rough box cutting. When both ends lose their edge, dispose of the blade immediately rather than trying to salvage it. Wrap the used razor in heavy masking tape or slide it into the disposal slot built into your blade dispenser pack before tossing it into the trash.
In the rear half of the open handle, you will see two raised pins cast into the metal shell. This is your spare blade reserve. Fresh blades must sit flat against the metal wall, nested between these guide pins. Always keep the spare blades stacked neatly on top of one another. If a spare blade tilts diagonally or slips out from between the pins, it will stick out into the seam when you close the handle, preventing the casing from sealing shut.
Line up the interlocking nose before tightening the shell back down
Putting a classic Stanley knife back together causes more frustration than taking it apart. If the pieces do not align down to the millimeter, the thumb slider will stick, or the blade will wobble loosely in the nose. Follow these steps to ensure the body closes flush every time.
- Seat the blade squarely on the blade carrier: Place the razor onto the blade carrier so the raised metal nubs push completely through the blade cutouts. The razor must sit perfectly flat against the bracket without any tilt.
- Position the slider in the middle track: Slide the thumb button so the carrier sits in the middle position notch of the lower handle half. This keeps the carrier away from both the far front tip and the rear storage pins while you position the cover.
- Confirm that spare blades sit flat: Check the back storage compartment. Make sure the spare blades are stacked flat on their pins and do not protrude above the perimeter rim of the lower casing.
- Hook the interlocking nose first: Do not drop the top shell straight down flat onto the bottom shell. Instead, tilt the top shell forward at a slight angle and mate the interlocking nose (the overlapping metal tip that clamps the blade in place) together first. The small metal tab on the nose of one half must slip under the corresponding lip on the other half. This interlock is what keeps the blade from twisting out when you press down hard during a cut.
- Lower the back handle down and check the seam: Once the nose tabs engage, lower the rear of the handle down until the two halves meet. Squeeze the halves together firmly using your fingers. Look along the entire perimeter seam. The seam should be tight with zero visible gap. If you feel springy resistance or see a gap wider than a fingernail, pull the top half off and recheck your spare blades.
- Tighten the center screw by hand: Thread the center screw clockwise into the handle post. Turn it until it feels snug against the casing. Stop as soon as it is firm. The internal post is made of cast zinc alloy, which strips easily if you use excessive force or power tools.
- Verify the slider movement: Before using the knife, push the thumb button back and forth through all three locking stops. The slider should click into each notch cleanly with a smooth, firm action.
Free up a stuck center screw or a jammed thumb slider
Utility knives often sit in damp basements, truck beds, or dusty drywall buckets for years. When you finally go to open them, the mechanical parts can seize up. You can resolve these issues without damaging the knife if you follow a few basic rules.
If the center screw will not budge, the threads are likely bound by dried joint compound, paint, or light surface corrosion. Forcing a stubborn screw with the wrong screwdriver will strip the head completely. First, scrape away any dried drywall mud or paint clogging the screw recess using an awl or the tip of a nail. Next, place a wide rubber band flat across the screw head and press your screwdriver firmly into the band. The rubber fills the microscopic gaps between the driver and the screw slot, providing extra grip to break the screw free.
If the screw remains frozen, apply a single drop of light household oil or penetrating spray directly into the screw recess. Let the knife sit horizontally for ten to fifteen minutes so the oil can seep down along the threads. Once loosened, wipe away any remaining oil so the handle does not become slippery to hold.
If the screw turns fine but the slider mechanism jams when you try to close the knife, the problem almost always comes down to the internal slider spring. The retractable slider uses a small spring-steel tab that presses against the interior notched track. If this tab slips out of alignment or bends backward during reassembly, the thumb button will jam solid. Lift the top shell off, remove the blade carrier, clean out any grit or drywall powder with an old dry toothbrush, and confirm the spring arm flexes freely before reassembling the halves.
Choose a tool-free utility knife if you want to avoid loose screws
If you regularly open your utility knife to rotate blades or access spare storage, dealing with a loose center screw can become a hassle. Dropping a tiny screw into deep grass or hunting through a garage for a flathead screwdriver in the middle of a project wastes time and slows down your work.
Modern utility knives solve this by incorporating tool-free mechanisms. When shopping for an upgrade, look for models featuring push-button blade changes on the nose combined with a hinged internal storage door. These designs allow you to reverse a dull blade in five seconds flat without loosening a single fastener. Ensure the knife still provides a rigid metal body and a dependable locking nose that holds the razor steady under heavy downward pressure.
Folding utility knives offer another excellent alternative. They combine the fast, tool-free blade swaps of modern designs with a compact body that folds safely into your pocket, keeping sharp edges away from your fingers while you move around the job site.

- TAR Score9.6
TAR Score is a ranking system developed by TopAppliancesReviews.com. TAR score has no relationship or impact from any manufacturers or sales agent websites. Learn more
- BrandWORKPRO

- TAR Score9.4
TAR Score is a ranking system developed by TopAppliancesReviews.com. TAR score has no relationship or impact from any manufacturers or sales agent websites. Learn more
- BrandDEWALT

- TAR Score9.4
TAR Score is a ranking system developed by TopAppliancesReviews.com. TAR score has no relationship or impact from any manufacturers or sales agent websites. Learn more
- BrandREXBETI

- TAR Score9.2
TAR Score is a ranking system developed by TopAppliancesReviews.com. TAR score has no relationship or impact from any manufacturers or sales agent websites. Learn more
- BrandDEWALT

- TAR Score9.2
TAR Score is a ranking system developed by TopAppliancesReviews.com. TAR score has no relationship or impact from any manufacturers or sales agent websites. Learn more
- BrandDEWALT

- TAR Score9.2
TAR Score is a ranking system developed by TopAppliancesReviews.com. TAR score has no relationship or impact from any manufacturers or sales agent websites. Learn more
- BrandM MEEPO

- TAR Score8.8
TAR Score is a ranking system developed by TopAppliancesReviews.com. TAR score has no relationship or impact from any manufacturers or sales agent websites. Learn more
- BrandSTANLEY

- TAR Score8.6
TAR Score is a ranking system developed by TopAppliancesReviews.com. TAR score has no relationship or impact from any manufacturers or sales agent websites. Learn more
- BrandSTANLEY
- TAR Score8.6
TAR Score is a ranking system developed by TopAppliancesReviews.com. TAR score has no relationship or impact from any manufacturers or sales agent websites. Learn more
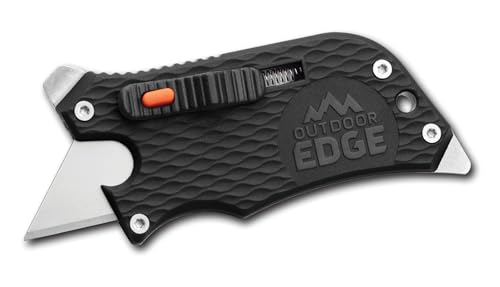
- BrandOUTDOOR EDGE

- TAR Score8.4
TAR Score is a ranking system developed by TopAppliancesReviews.com. TAR score has no relationship or impact from any manufacturers or sales agent websites. Learn more
- BrandSTANLEY
Last update on 2026-10-03 / Affiliate links / Images, Product Titles, and Product Highlights from Amazon Product Advertising API
FAQs
Why will my Stanley knife not close flush after changing the blade?
The two handle halves fail to close flush when an internal part sits outside its alignment groove. This happens most often when spare blades stored in the handle tilt diagonally off their guide pins, or when the blade carrier is not seated completely flat on its sliding track. Take the top shell off, push the spare blades flat against the bottom casing, ensure the razor cutouts sit deep on the carrier nubs, and hook the interlocking nose together before pressing the rear handle down.
Do all Stanley utility knives require a screwdriver to open?
No, only classic split-body models use a center screw to hold the handle halves together. Many contemporary Stanley models feature quick-change buttons near the front nose that release the blade with a single push, paired with tool-free side latches or swinging compartments that let you access spare blades without any tools. Folding pocket models also use manual push-levers to swap blades entirely by hand.
Can I flip the utility blade around to use the other side?
Yes, standard utility razor blades are completely symmetrical and feature two pointed cutting tips. When the front point becomes dull or chipped, open the knife, lift the blade out, flip it end-for-end, and place it back onto the blade carrier nubs. This gives you a fresh, factory-sharp edge immediately without needing to open a new spare blade from storage.
What should I do if the center screw on my knife is stripped?
If the screw slot has rounded out so your screwdriver slips, place a wide, flat rubber band over the screw head and press the screwdriver firmly down into the rubber while turning slowly counterclockwise. If the head is completely ruined, grip the outer edge of the screw head using small locking pliers to turn it by hand. Once the screw is out, replace it with a matching thread fastener before using the knife again, as a loose handle can cause the blade to slip during heavy cuts.


Top Rated Best Quality Range Hoods: 2026 Expert Picks

The 12 Best Small Solar Generators 2026

10 Best Quality Semi Automatic Washing Machine of 2026 For Leak-Free Laundry

11 Best Small Washer Machine of 2026 For Everyday Laundry

12 Best Vibration Pads For Washing Machine of 2026 To Stop Walking and Shaking

11 Best Selling Front Load Washing Machine of 2026 For Quiet Odor-Free Laundry

11 Best Washing Machine For King Size Bedding of 2026 To Prevent Cycle Errors

10 Best Small Front Loader Washing Machine of 2026 For Tight Closets






