How to Open a Clam Safely Without a Knife

Staring at a bowl of tightly shut shellfish with no specialty tools in the drawer is nothing to stress over. The easiest solution is to let gentle heat do the heavy lifting by steaming the shells until they pop open naturally. If the goal is serving raw clams on the half shell, chilling them in the freezer for twenty minutes relaxes the hinge muscle holding the shell shut so the halves ease apart without a struggle.
The right approach depends on how the meal is being prepared and what appliances are running in the kitchen. Hot steam works best for soups and pastas, while a cold freeze protects the natural salty juice inside raw clams. Just confirm that every shell is alive and tightly clamped before starting. Here is how to get each shell open cleanly without risking a slip from a sharp kitchen blade.
The Steam Method: How Heat Naturally Releases Clam Shells
Clams are held shut by the adductor muscle, which is the hinge muscle holding the shell shut. In the ocean, this muscle clamps tight against predators and rough tides. When you cook fresh clams, gentle heat does the hard work for you. As steam builds inside the pot, the hinge muscle warms, relaxes, and lets go of the shell walls. Once that muscle releases, the natural rubbery hinge on the back pops the shell wide open automatically.
Steaming is much better than boiling clams in deep water. Boiling washes away the clam liquor, which is the natural salty juice inside the shell. That juice holds incredible ocean flavor. Steaming keeps the juice concentrated in the bottom of your pot, giving you a rich broth for dipping crusty bread or building a flavorful pasta sauce.
- Scrub and rinse the shells. Run cold tap water over the clams and brush off loose sand and grit. Throw away any clams that feel hollow or cracked. Never soak clams in plain tap water for hours, because fresh water will kill saltwater shellfish.
- Prepare a wide pot. Choose a wide skillet or Dutch oven with a tight lid. A broad pan lets the clams sit in a single layer so heat reaches each shell evenly. Add about a half cup to one cup of liquid. Water works fine, but white wine, garlic broth, or sliced shallots add great flavor.
- Bring the liquid to a boil. Turn your burner to medium-high heat. Wait until the liquid reaches a rolling boil with plenty of steam rising from the surface.
- Add the clams and cover tightly. Place the clams in the pot and put the lid on immediately. Trapping the steam raises the internal temperature quickly and evenly.
- Shake the pot gently. Let the clams cook undisturbed for four minutes. Then, grab the pot handles with oven mitts and give the pan a gentle shake to redistribute the shells.
- Remove opened clams right away. Lift the lid around the five-minute mark. Use tongs to lift out each clam as soon as it pops open, placing it in a warm bowl. Pulling them out one by one keeps the tender meat from turning tough and rubbery while slower shells finish opening.
The Freezer Trick: Opening Raw Clams for the Half Shell
If you want to serve raw clams on the half shell with fresh lemon or make baked clams casino, heat is not an option. Cooking changes the tender, silky texture of raw seafood. At the same time, trying to pry open an alert, live clam at room temperature is frustrating and risky because the shell stays clamped with incredible force.
The easiest way around this is chilling the clams in your home freezer. As the clams get cold, their systems slow down and the hinge muscle goes limp. This relaxes the shell halves just enough to reveal a tiny hairline crack along the front lip, giving you an opening without dangerous forcing.
- Clean and dry the shells. Scrub the shells under cold running water with a stiff brush. Pat them dry with a clean paper towel so excess water does not freeze into a crust of ice.
- Arrange them flat on a rimmed tray. Place the clams in a single layer on a tray with their deeper, bowl-shaped shell on the bottom. This keeps the tasty clam liquor from spilling out once the shell relaxes.
- Chill for fifteen to twenty minutes. Put the tray in the freezer and set a kitchen timer. Do not leave them in longer than twenty minutes. If clams freeze solid, ice crystals will crush the delicate meat fibers, turning the flesh watery and soft once thawed.
- Check the front seam. Pull the tray out when the timer rings. Look along the curved edge opposite the hinge. You should see a fine hairline gap where the shell has parted slightly.
- Hold the shell in a thick towel. Fold a clean kitchen towel around the clam, resting it flat on your counter. The towel cushions your palm from sharp edges and keeps the shell steady.
- Slide a blunt edge inside. Slide the flat tip of a butter knife or small spoon into the crack. Glide the metal along the roof of the upper shell to sever the hinge muscle. Lift away the top shell, keeping the bottom shell level so you save every drop of the natural brine.
The Spoon Technique and the Crucial Freshness Check
When you cannot wait for the freezer and need raw clams opened quickly, never reach for a sharp paring knife. High-end blades from knife sets for essential kitchen prep have delicate edges ground for slicing food, not prying rock-hard shells. Calcium shells easily chip fine blade steel or snap pointed tips. Worse, a sharp knife slipping off a wet shell will slice right into your hand.
A standard stainless steel dinner spoon is far safer. The rounded spoon tip cannot cut your skin if it slips, and the curved bowl provides natural leverage that a flat blade lacks. To use this technique, place a damp cloth under your cutting board so it cannot budge. Wrap the back of the clam in a thick towel, leaving the front seam exposed. Press the clam firmly down on the board with one hand. With your other hand, push the tip of the spoon firmly into the seam between the shells. Push downward on the handle to use the spoon bowl as a wedge. Once the shell cracks open, twist the spoon to pop the seal and slide the edge along the top shell to release the hinge muscle holding the shell shut.
Safe shucking means nothing if your clams are spoiled. Dead shellfish develop dangerous bacteria rapidly and cause severe food poisoning. Use this quick checklist before and after opening your clams to ensure every bite is safe:
- Tap open shells: Check each clam before cooking. If a shell is open, tap it on the counter or flick the edge. A live clam will pull shut within a few seconds. If it stays open and loose, toss it in the trash.
- Check shell condition: Discard any clams with cracked, punctured, or crushed shells, since broken shells invite bacteria.
- Smell the batch: Fresh clams smell clean and salty, like cold ocean air. If a clam smells sour, fishy, or like rotten eggs, throw it away immediately.
- Inspect after cooking: Steaming forces healthy clams to open. If a clam stays clamped shut after six to eight minutes of steady steam, discard it. A shell that will not open after cooking was likely dead before it hit the heat.
- Check raw meat and juice: Fresh raw clam meat should look plump, moist, and clear, resting in clean clam liquor. Toss out any clam with dull, discolored, or dried-out meat.
What to Look for in a Real Clam Knife for Next Time
Steaming, chilling, and using a heavy spoon work well in a pinch, but a dedicated clam knife is the safest tool if you plan on opening shellfish regularly. An authentic clam knife is built specifically for the tight, smooth fit of clam shells, protecting your hands while keeping shells from splintering into your food.
Do not confuse a clam knife with an oyster knife. Oyster knives often have sharp, pointed tips to pierce through rough, irregular rear hinges. Clams have smooth, tightly sealed edges. A pointed tip will easily slip off a clam shell or crush the brittle calcium rim into tiny grit. A proper clam knife features a rounded blade tip and a beveled edge that is dull enough to touch safely, allowing it to slide into narrow seams without gouging your hands.
When selecting a clam knife, keep these features in mind:
- A rigid, sturdy blade: Pick a blade made of rust-resistant stainless steel or high-carbon steel that will not bend under pressure. Unlike thin kitchen cutlery from German high-carbon steel premium knife block sets, a clam knife has a thick, rigid spine that can twist shells open without snapping.
- A rounded tip profile: Look for a rounded tip that slides along the inside roof of the shell. This severs the hinge muscle cleanly without puncturing the tender belly of the clam.
- A slip-resistant handle: Clam liquor and water make tools slick. Look for handles made of textured plastic or non-slip rubber with a secure finger guard to prevent your hand from sliding forward.
- Protective accessories: A cut-resistant kitchen glove or a rubber shucking pad gives beginners extra grip and keeps sharp shell edges from scraping your knuckles.
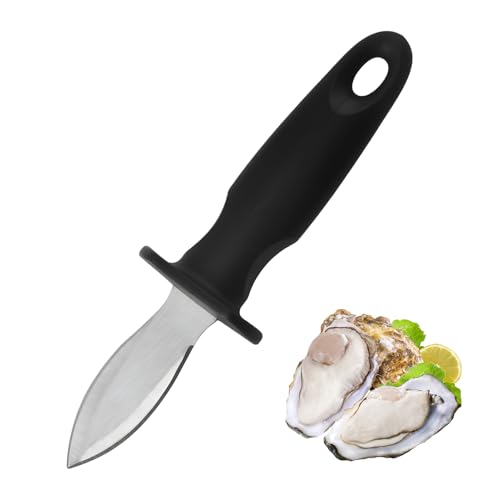
- TAR Score9.6
TAR Score is a ranking system developed by TopAppliancesReviews.com. TAR score has no relationship or impact from any manufacturers or sales agent websites. Learn more
- Brandsmrtcol

- TAR Score9.4
TAR Score is a ranking system developed by TopAppliancesReviews.com. TAR score has no relationship or impact from any manufacturers or sales agent websites. Learn more
- BrandM. E. Heuck, Inc
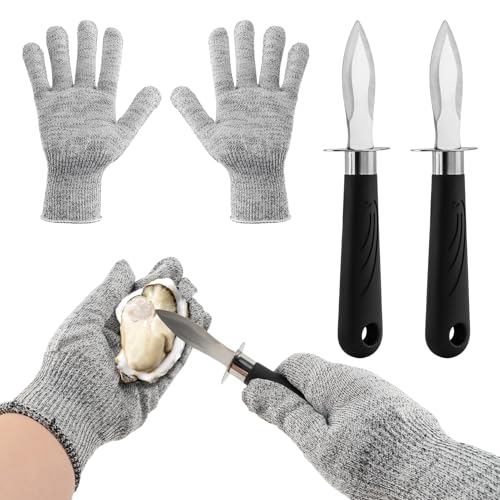
- TAR Score9.2
TAR Score is a ranking system developed by TopAppliancesReviews.com. TAR score has no relationship or impact from any manufacturers or sales agent websites. Learn more
- BrandGiyochie

- TAR Score9.2
TAR Score is a ranking system developed by TopAppliancesReviews.com. TAR score has no relationship or impact from any manufacturers or sales agent websites. Learn more
- Brandsuoundey

- TAR Score9.2
TAR Score is a ranking system developed by TopAppliancesReviews.com. TAR score has no relationship or impact from any manufacturers or sales agent websites. Learn more
- BrandMercer Culinary

- TAR Score9.2
TAR Score is a ranking system developed by TopAppliancesReviews.com. TAR score has no relationship or impact from any manufacturers or sales agent websites. Learn more
- BrandRkiiqii
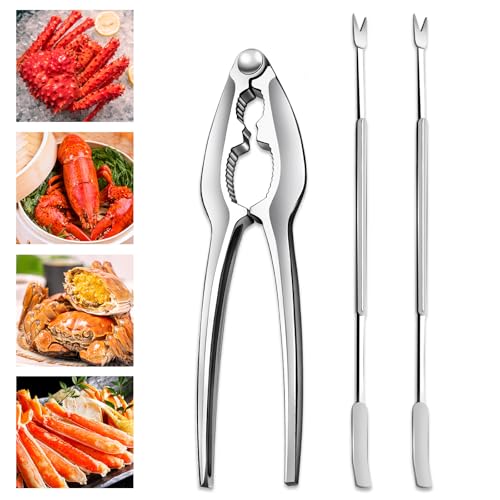
- TAR Score8.8
TAR Score is a ranking system developed by TopAppliancesReviews.com. TAR score has no relationship or impact from any manufacturers or sales agent websites. Learn more
- BrandVicsamer

- TAR Score6.0
TAR Score is a ranking system developed by TopAppliancesReviews.com. TAR score has no relationship or impact from any manufacturers or sales agent websites. Learn more
- BrandTorSor
Last update on 2026-10-03 / Affiliate links / Images, Product Titles, and Product Highlights from Amazon Product Advertising API
Frequently Asked Questions
Can you open live clams in a microwave?
Yes, a microwave heats the moisture inside the shell quickly, releasing steam that forces the hinge muscle to let go. Place three or four rinsed clams on a microwave-safe plate, cover them with a damp paper towel to catch pops, and cook on high for twenty to thirty seconds. Pull them out the moment they crack open so the tender meat does not turn tough and rubbery.
Why do some clams stay shut after cooking?
A clam that stays clamped shut after several minutes of steaming was almost certainly dead before cooking started. When a clam dies, its muscle tissues decompose and can dry out or seize against the shell, preventing heat from releasing the hinge. Never force open and eat a clam that refused to open with heat, because it poses a high risk of food poisoning.
How do you save the clam liquor without spilling it?
Work directly over a wide, clean bowl and keep the deeper, cupped half of the shell facing downward. The cupped shell acts as a natural bowl that holds the clam liquor as you slice the hinge muscle. Once the top shell is removed, pour the liquid from the shell and the bowl through a fine-mesh strainer to catch any stray sand.

Top Rated Best Quality Range Hoods: 2026 Expert Picks
The 12 Best Small Solar Generators 2026

10 Best Quality Semi Automatic Washing Machine of 2026 For Leak-Free Laundry

11 Best Small Washer Machine of 2026 For Everyday Laundry

12 Best Vibration Pads For Washing Machine of 2026 To Stop Walking and Shaking

11 Best Selling Front Load Washing Machine of 2026 For Quiet Odor-Free Laundry

11 Best Washing Machine For King Size Bedding of 2026 To Prevent Cycle Errors

10 Best Small Front Loader Washing Machine of 2026 For Tight Closets