
How to Open a Butterfly Knife Without Getting Cut

Learning to flip a butterfly knife looks intimidating, but it is completely safe once the basic hand movement clicks. The standard one-handed open simply requires you to grip the safe handle and flick the blade forward away from your skin before snapping the handles together in your palm. Holding that correct handle ensures the dull spine hits the back of your fingers instead of the sharp edge.
Smooth flipping comes down to a few practical details. Spotting the safe handle instead of the bite handle (the handle facing the sharp cutting edge) is the most critical step. Covering a live edge with household tape or starting with an unsharpened trainer takes away the fear of nicks while your muscle memory builds. The pivot screws (the hinge pins that connect the handles to the blade) must also swing freely without feeling loose or sloppy. Here is the exact finger movement to get it swinging cleanly every time.
Safe Handle vs. Bite Handle: The Anatomy That Protects Your Fingers
Every butterfly knife, also known as a balisong, features a central blade attached to two handles that counter-rotate around hinge pins. When the knife is closed, the handles enclose the blade. When opened, they swing around to meet at the base, creating a sturdy handle for cutting. Flipping relies on letting one handle and the blade swing freely while you hold the other. But this swinging motion carries serious risk if you grip the wrong side.
Identifying your handles before moving the knife is the most important habit to build. Every butterfly knife has a safe handle and a bite handle. The safe handle faces the dull spine, which is the flat, unsharpened back of the blade. The bite handle faces the sharp cutting edge. When you grip the safe handle, only the smooth spine can bump against your knuckles or fingers during a flip. The sharp edge stays pointed away from your hand through the entire swing.
If you hold the bite handle by mistake, the physics reverse. The swinging blade will fling around its pivot and drive the cutting edge straight into your knuckles. Enthusiasts call it the bite handle because it will slice into your skin whenever you miscalculate. Beginners often think they can react fast enough to move their fingers out of the way, but the swinging blade moves much faster than human reflexes.
Many people check the latch (the small catch locking the handles together) to tell the handles apart. On traditional models, the latch sits on the bite handle. But you cannot rely on this shortcut. Some makers place the latch on the safe handle, while others use spring latches or leave them off entirely. Always look directly at the blade. Open the knife with two hands, check which handle sits against the dull spine, and grip only that handle. Wrapping a strip of colored tape around the safe handle provides a clear visual cue while you learn.
The Basic One-Handed Open: Four Steps to a Clean Flip
The standard forward flip is the core opening move for any butterfly knife. It relies on gravity, wrist momentum, and proper finger clearance rather than force. Stand comfortably with your elbow bent at ninety degrees and your forearm parallel to the ground. Keep your wrist loose. Squeezing the handle too tightly creates jerky movements that cause fumbles and pinched skin.
Hold the safe handle vertically between your thumb and index finger near the top pivot (the hinge screw where the handle meets the blade). Release the latch so the bite handle hangs freely downward.
Follow these four steps to open the knife:
- Throw the bite handle outward: Flick your wrist upward and forward, sending the bite handle and blade swinging up and over the back of your hand. Keep your remaining fingers relaxed and tucked back slightly. The dull spine will lightly tap the back of your fingers. Because you are holding the safe handle, the cutting edge faces safely away from your skin.
- Rotate your grip: As the bite handle rebounds off your fingers, drop your wrist slightly. Let gravity pull the bite handle downward. At the same time, roll the safe handle slightly between your thumb and index finger so the swinging handle can drop past your knuckles without hitting them.
- Clear the path: As the bite handle swings down, open your other fingers flat. This clears an open lane for the incoming handle. If you keep your fingers curled into a fist, the bite handle will smack your fingertips and stall midway through the flip.
- Snap the handles together: When the bite handle reaches the bottom of its arc, flick your wrist back upward toward your body. The bite handle swings up to meet the safe handle right in your open palm. Close your fingers firmly around both handles. The knife is now locked open and ready for use.
Keep your movements controlled. Beginners often fling their whole arm from the shoulder. A clean flip requires only a light snap of the wrist, like flicking water off your fingertips.
The Basic Close, Safety Habits, and Pivot Tuning
Closing the knife safely uses the exact reverse mechanics of the opening flip. The goal is bringing the blade back inside the handles without trapping your fingers between the metal channels.
- Isolate the safe handle: From the open position, release your grip on the bite handle so you are holding only the safe handle between your thumb and index finger.
- Flick the bite handle over your knuckles: Snap your wrist upward and forward. The bite handle and blade swing up and over your hand, letting the dull spine bounce against the back of your fingers.
- Move your thumb clear: As the bite handle bounces off your fingers, pull your thumb back and outward. If your thumb stays resting on the safe handle channel, the closing bite handle will pinch your skin hard against the frame.
- Snap the handles shut: With your thumb safely cleared, flick your wrist upward. The bite handle swings up to meet the safe handle, trapping the blade securely inside. Squeeze both handles shut in your palm.
Building muscle memory takes time, so establishing safe practice habits protects both your hands and your knife while you learn.
Use this safety checklist every time you practice:
- Wrap two layers of blue painter's tape or electrical tape over the entire cutting edge of a live blade.
- Practice over a bed, sofa, or carpeted rug so drops do not damage the knife tip or scratch floors.
- Clear pets, children, and fragile objects out of arm's reach before starting.
- Confirm you are holding the safe handle before every opening sequence.
- Take a break when your wrist feels tired, since fatigue leads to poor coordination and slips.
Mechanical adjustments also affect how smoothly the knife moves. The pivot screws (the hinge screws where the handles meet the blade) control the balance between swing speed and handle play. If the screws are too tight, the handles drag and refuse to swing freely. If they are too loose, the handles wobble side to side, causing the blade to slap the inner handle channels.
Use a matching Torx driver to adjust the screws in tiny eighth-turn increments. The handle should swing freely under its own weight when held horizontal, with minimal side-to-side rattle. Once adjusted, a single drop of blue threadlocker on the screw threads prevents them from vibrating loose during practice. Much like maintaining German high carbon steel knife sets, keeping metal pivot points clean and lightly oiled stops friction from ruining the smooth swing. When you finish practicing, storing folding tools safely or keeping sharp knives on magnetic knife block sets keeps blades protected from edge damage.
What to Look for in a Practice Butterfly Knife
Starting with a trainer (an unsharpened practice knife that cannot cut) is the easiest way to learn basic flips without injury. A dedicated trainer replaces the sharp blade with a solid, blunt piece of steel featuring rounded edges and a dull tip. This removes the stress of getting cut, giving you the confidence to focus on finger positioning, timing, and smooth wrist mechanics.
When selecting a practice tool, look for a model that mirrors the weight, size, and balance of an authentic knife. Flimsy or ultra-light practice tools flip unnaturally fast and bounce off your fingers unpredictably. Look for handles made from solid aluminum or stainless steel that offer realistic inertia.
Handle styles generally fall into channel designs or sandwich designs. Channel handles are carved from a single piece of solid metal with a groove for the blade, offering smooth edges and durable construction. Sandwich handles use two separate metal slabs joined by spacers and screws, which makes replacing parts or cleaning easier.
Pay close attention to the pivot mechanism as well. Basic trainers use thin washers, while higher-grade options feature precision bushing systems. A bushing is a tiny metal sleeve fitted around the pivot pin inside the blade hole. It lets you tighten the pivot screws securely while keeping the handle swinging smoothly with almost no side-to-side play. Finally, verify local knife laws in your area, as carry rules differ widely even though unsharpened practice trainers are generally considered harmless training aids.

- TAR Score9.2
TAR Score is a ranking system developed by TopAppliancesReviews.com. TAR score has no relationship or impact from any manufacturers or sales agent websites. Learn more
- BrandNabalis

- TAR Score9.2
TAR Score is a ranking system developed by TopAppliancesReviews.com. TAR score has no relationship or impact from any manufacturers or sales agent websites. Learn more
- BrandNabalis

- TAR Score9.2
TAR Score is a ranking system developed by TopAppliancesReviews.com. TAR score has no relationship or impact from any manufacturers or sales agent websites. Learn more
- BrandNabalis

- TAR Score8.8
TAR Score is a ranking system developed by TopAppliancesReviews.com. TAR score has no relationship or impact from any manufacturers or sales agent websites. Learn more
- BrandGOOD WORKER

- TAR Score8.6
TAR Score is a ranking system developed by TopAppliancesReviews.com. TAR score has no relationship or impact from any manufacturers or sales agent websites. Learn more
- BrandWAYDA
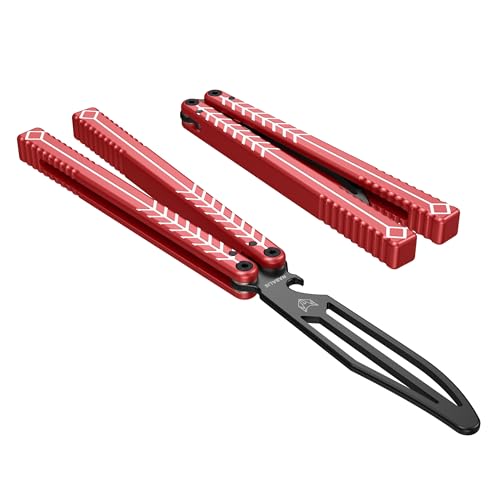
- TAR Score8.6
TAR Score is a ranking system developed by TopAppliancesReviews.com. TAR score has no relationship or impact from any manufacturers or sales agent websites. Learn more
- BrandNabalis

- TAR Score8.6
TAR Score is a ranking system developed by TopAppliancesReviews.com. TAR score has no relationship or impact from any manufacturers or sales agent websites. Learn more
- BrandNabalis

- TAR Score8.0
TAR Score is a ranking system developed by TopAppliancesReviews.com. TAR score has no relationship or impact from any manufacturers or sales agent websites. Learn more
- BrandBILYSKEP
Last update on 2026-10-03 / Affiliate links / Images, Product Titles, and Product Highlights from Amazon Product Advertising API
FAQs
How do I know if my butterfly knife pivot screws are too loose?
Hold one handle and gently wiggle the other handle from side to side. If the handle rocks laterally or makes a distinct rattling sound against the blade, the pivot screw has backed out. Tighten the screw in small eighth-turn increments using a matching Torx wrench until the side-to-side wobble stops while the handle still swings freely.
Can I learn basic flipping using a taped live blade?
Covering a live blade with two or three layers of painter's tape or electrical tape helps prevent shallow cuts while you learn basic handle movements. However, tape can wear thin over time, especially at the tip and along the sharp belly after repeated impacts. An unsharpened practice trainer remains the safest option for extended practice because its dull metal edges cannot cut through.
Why does the knife pinch my hand when I snap it closed?
Pinching happens when your thumb or fingertips linger in the gap where the two handles meet. As the bite handle swings shut, it collides with the safe handle and pinches any skin resting in the channel. To prevent this, pull your thumb back and spread your fingers wide the moment the swinging handle rebounds off the back of your hand.


Top Rated Best Quality Range Hoods: 2026 Expert Picks

The 12 Best Small Solar Generators 2026

10 Best Quality Semi Automatic Washing Machine of 2026 For Leak-Free Laundry

11 Best Small Washer Machine of 2026 For Everyday Laundry

12 Best Vibration Pads For Washing Machine of 2026 To Stop Walking and Shaking

11 Best Selling Front Load Washing Machine of 2026 For Quiet Odor-Free Laundry

11 Best Washing Machine For King Size Bedding of 2026 To Prevent Cycle Errors

10 Best Small Front Loader Washing Machine of 2026 For Tight Closets






