
How to Open a Balisong Knife Safely

Opening a balisong cleanly starts with holding the safe handle, which rests against the dull spine of the blade so the sharpened side never touches your fingers. The movement changes depending on whether you open both handles with two hands or swing the frame open using wrist momentum. Squeezing the wrong handle by mistake turns that motion inward, dropping the sharp side directly against your knuckles.
Your knife style also shapes how you begin. A dull trainer allows fast, relaxed practice, whereas a sharp blade requires slow movements or a protective layer of tape across the steel. The lock at the base can also differ, since spring latches pop free with a gentle squeeze while manual latches need a push from your thumb. Learning the core parts first keeps your fingers out of harm's way.
Always Hold the Safe Handle to Protect Your Fingers
A balisong knife features a single blade attached to two handles by pivot pins at its base. One handle rests against the dull spine of the blade, while the other rests against the sharp cutting edge. The handle covering the dull back is the safe handle, and the handle covering the cutting edge is the bite handle. If you grip the safe handle, the dull metal spine is the only part that can touch your fingers during a flip. If you grip the bite handle by mistake, the razor edge will snap across your fingers with full force.
Before you unlock or move the knife, take a moment to look closely at how the blade sits between the handles. Trace the cutting edge of the blade back to the base to confirm which handle houses it. Traditional designs place the locking clasp on the bite handle, but some modern knives place it on the safe handle instead. Because latch placement varies across manufacturers, never rely on the clasp alone to tell which handle is safe.
- Examine the blade edge: Follow the sharp bevel from the tip down to the pivot. The channel covering that sharp side is the bite handle.
- Locate the dull spine: Find the flat, thick back of the blade. The channel enclosing this dull edge is your safe handle.
- Mark the bite handle: Wrap a small piece of colored tape or a rubber band around the bite handle while learning. This visual cue stops you from grabbing the wrong side in a hurry.
- Keep clear of the closing channels: Remember that both handles have hollow inside tracks. Even the safe handle can pinch skin when the metal halves slap together.
Squeeze the Handles to Release the Latch Cleanly
The latch is the small metal clasp at the base of the handles that keeps the knife locked shut. When the knife is closed, the latch wraps around an internal pin to hold both channels tight. If you pull directly on the latch with your fingernails while the handles are spreading apart, the clasp wedges tight against the pin. Trying to pry a wedged clasp open can pinch your fingertips or cause you to drop the knife.
To release the latch smoothly, grip both handles in your palm and squeeze them gently together. This simple squeeze takes all the mechanical tension off the latch bar. Once the pressure releases, use your thumb or little finger to flip the clasp outward. It will swing free without resistance.
Some knives use a spring latch, which contains a tiny internal spring inside the pivot joint. When you squeeze the handles of a spring-latch model, the clasp pops open on its own without needing any finger contact. Other knives are latchless, using pocket clips, subtle handle friction, or small magnets to stay closed. If your knife has no latch at all, you can skip this release step and move straight to opening the handles.
Open the Knife with Both Hands for Total Control
The two-handed opening is the safest way to deploy a balisong knife. It completely eliminates momentum, keeping the blade away from your knuckles at every point in the motion. It also gives you a quiet, controlled way to open the blade for everyday cutting tasks without drawing unwanted attention. Unlike kitchen blades such as German high-carbon steel premium knife block sets that stay parked in a wooden counter block, a balisong is handled constantly and endures frequent mechanical impacts.
- Establish your grip: Hold the safe handle securely in your dominant hand, keeping your fingers wrapped around the sides of the metal channel. Keep your knuckles and fingertips completely off the top opening where the blade rests.
- Disengage the lock: Squeeze the handles together with your dominant hand and swing the latch open using your other hand. Let the bite handle hang loose under gravity.
- Swing the bite handle open: Use your free hand to grasp the bite handle and pull it outward in a wide, sweeping arc. Keep the blade pointing away from your body and chest.
- Rotate through the full arc: Continue rotating the bite handle 180 degrees until it travels completely around the pivot and meets the safe handle back-to-back. The dull spine of the blade will rest firmly inside the safe handle channel.
- Secure the open handles: Squeeze both handles together in your palm to lock the blade into a rigid cutting position. If your knife features a latch that locks in the open position, hook the clasp over the pin to secure it.
Flip the Safe Handle with Four Simple Wrist Motions
The standard horizontal flip is the core opening technique for anyone learning a balisong. It uses simple wrist momentum and gravity to open the knife smoothly using one hand. The entire trick relies on holding only the safe handle from start to finish. Because you never let go of the safe handle, the sharp edge of the blade never faces your skin during the swing.
- Set your starting grip: Pinch the safe handle between your thumb and the side of your index finger, near the pivot end. Hold the knife upright at chest height with the latch unlocked and the blade pointing straight up. Allow the bite handle to hang down freely.
- Perform the outward drop: Flick your wrist downward and slightly forward. This flick throws the bite handle and the blade away from you. As momentum carries them over, the dull spine of the blade will bounce harmlessly off the back of your knuckles or index finger.
- Turn the handle in your fingers: As soon as the spine taps the back of your hand, roll the safe handle a half-turn between your thumb and index finger. This quick 180-degree rotation shifts your knuckles out of the path of the closing handles. Your palm should now face slightly upward.
- Snap the handles closed: Flick your wrist upward and back toward yourself. The bite handle will swing up and snap firmly against the safe handle right in your palm. Close your remaining fingers around both handles to secure your grip.
Rushing this sequence is the most common reason beginners get pinched. Beginners often try to whip the knife as fast as possible, which causes their fingers to tense up and drift into the path of the handles. Keep your wrist loose and let gravity do most of the work. If the motion feels jerky or stalls midway, slow down and practice each motion separately until your hand remembers the rhythm.
Another frequent mistake is letting your thumb ride high along the spine of the safe handle. If your thumb extends past the pivot screws, the incoming bite handle will slam directly into your thumb joint. Always keep your thumb flat against the side of the handle casing. Think of your fingers as an axle that the safe handle spins on, rather than a tight clamp.
Cover Sharp Edges or Use a Dull Practice Tool
Learning handle manipulation with a live, sharpened blade carries real risks of cuts and deep punctures. A live blade has a sharp cutting edge that will easily slice skin during an awkward catch or a mistimed wrist snap. You can protect your hands by preparing your workspace and neutralizing the blade edge before practicing.
- Apply protective tape to the edge: Take two strips of blue painter tape or electrical tape and wrap them directly over the sharp cutting edge. Cover the entire sharpened bevel from the pointed tip down to the ricasso (the flat, unsharpened area of blade steel right above the pivot screws). The tape acts as a physical shield that prevents cuts if the blade makes contact with your fingers.
- Create a soft drop zone: Stand or sit over a soft surface like a bed, sofa, or thick rug while practicing. Dropping a steel knife onto hard tile, wood, or concrete will snap pointed tips, bend pivot pins, and scratch the handle finish.
- Protect your feet: Never flip a folding knife while barefoot or wearing thin socks. If the knife slips from your fingers, let it fall to the floor instead of trying to catch it mid-air with your hands or feet.
- Clear your arm space: Ensure you have an arm-length perimeter of empty space around you. Hitting a table edge, desk corner, or wall during a flip will deflect the blade directly back toward your hand.
- Take regular hand breaks: Hand fatigue leads to sloppy grips and missed catches. When your fingers start feeling stiff or slow, set the knife down and rest your wrist for a few minutes.
Adjust Pivot Screws to Balance Smooth Swing and Stability
The pivot screws are the threaded fasteners at the base of the blade where both handles rotate. How these screws are tensioned determines how freely the knife moves. If a balisong binds up or feels clumsy in your hand, improper pivot tension is almost always the cause rather than your hand technique.
When pivot screws are tightened down too far, the handle walls squeeze directly against the blade tang. This creates intense friction, causing the handles to freeze halfway through an arc instead of swinging freely. On the other hand, if the pivot screws are too loose, the handles will wobble from side to side. Excessive wobble causes handle play and blade rub, where the sharp edge scrapes against the inner aluminum or steel walls of the handle channel.
To check your handle swing, hold the safe handle horizontally with the blade hanging down, then lift the handle slightly and let go. The blade and bite handle should swing back and forth several times under their own weight like a smooth pendulum. If they stop swinging immediately, the pivot is too tight. If the handles rattle loudly and shift sideways when you shake them, the pivot is too loose.
Adjusting the pivots requires a small Torx screwdriver, usually a T8 or T10 size depending on the knife brand. Turn the pivot screw in tiny increments, moving no more than an eighth of a turn at a time before re-checking the handle swing. Because flipping creates continuous vibration, pivot screws will naturally back out over time. Applying a single drop of removable blue threadlocker liquid to the screw threads prevents them from loosening during practice. Let the threadlocker liquid cure for 24 hours before flipping the knife again.
Between the blade tang and the handle scales sit small bronze, copper, or steel washers. These thin washers reduce friction so the metal surfaces glide smoothly without wearing down. Keep these pivot washers clean by blowing out pocket lint with compressed air. Add one tiny drop of light mineral oil or dedicated pivot lubricant to each joint once a month to keep the rotation fluid and quiet.
Choose a Dull Metal Trainer to Build Muscle Memory
The most reliable way to learn opening mechanics without hesitation or injury is to start with a dedicated balisong trainer. A trainer replaces the sharpened cutting blade with a blunt, rounded piece of steel that cannot cut skin under any circumstances. Practicing with a blunt tool removes the natural fear of getting cut, allowing your fingers to relax and build muscle memory much faster.
When selecting a trainer, look for an unsharpened practice tool crafted from sturdy stainless steel, such as 420 or 404 grade metal. Stainless steel handles and blades absorb repeated impacts from drops onto carpet or furniture without cracking or bending out of shape. Lightweight aluminum models are easy on the wrist, but steel trainers provide solid momentum that carries the handles through each rotation naturally.
Pay close attention to overall weight and balance before deciding on a practice tool. A good trainer weighs between 3.5 and 5 ounces, matching the balance point and hand feel of a standard utility folding knife. Avoid cheap novelty plastic toys, as their lack of mass prevents you from learning proper wrist rhythm and momentum control. Sturdy screw-together pivot construction, smooth bronze washers, and a reliable latch will give you a durable practice setup that handles thousands of drops while you master the basic open.
Finally, always check your local and state laws regarding balisong carry and ownership. Even though unsharpened trainers with skeletonized blades are widely recognized as practice tools rather than weapons, certain jurisdictions regulate any folding design that opens with centrifugal force or gravity. Verifying your local rules ensures you can practice your opening techniques with total peace of mind.

- TAR Score9.2
TAR Score is a ranking system developed by TopAppliancesReviews.com. TAR score has no relationship or impact from any manufacturers or sales agent websites. Learn more
- BrandNabalis
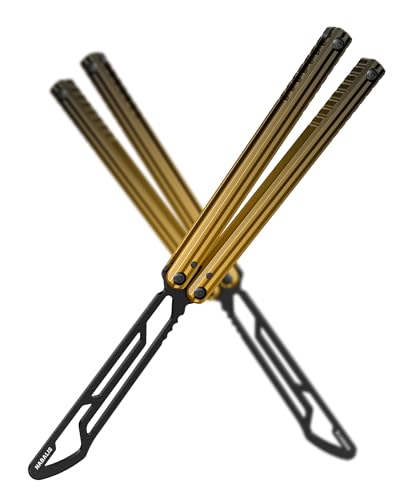
- TAR Score9.2
TAR Score is a ranking system developed by TopAppliancesReviews.com. TAR score has no relationship or impact from any manufacturers or sales agent websites. Learn more
- BrandNabalis

- TAR Score9.0
TAR Score is a ranking system developed by TopAppliancesReviews.com. TAR score has no relationship or impact from any manufacturers or sales agent websites. Learn more
- BrandVORNNEX

- TAR Score9.0
TAR Score is a ranking system developed by TopAppliancesReviews.com. TAR score has no relationship or impact from any manufacturers or sales agent websites. Learn more
- BrandVudwson

- TAR Score8.8
TAR Score is a ranking system developed by TopAppliancesReviews.com. TAR score has no relationship or impact from any manufacturers or sales agent websites. Learn more
- BrandGrand Way

- TAR Score8.8
TAR Score is a ranking system developed by TopAppliancesReviews.com. TAR score has no relationship or impact from any manufacturers or sales agent websites. Learn more
- BrandGOOD WORKER

- TAR Score8.6
TAR Score is a ranking system developed by TopAppliancesReviews.com. TAR score has no relationship or impact from any manufacturers or sales agent websites. Learn more
- BrandDIMROM

- TAR Score8.6
TAR Score is a ranking system developed by TopAppliancesReviews.com. TAR score has no relationship or impact from any manufacturers or sales agent websites. Learn more
- BrandDIMROM

- TAR Score8.6
TAR Score is a ranking system developed by TopAppliancesReviews.com. TAR score has no relationship or impact from any manufacturers or sales agent websites. Learn more
- BrandGOOD WORKER
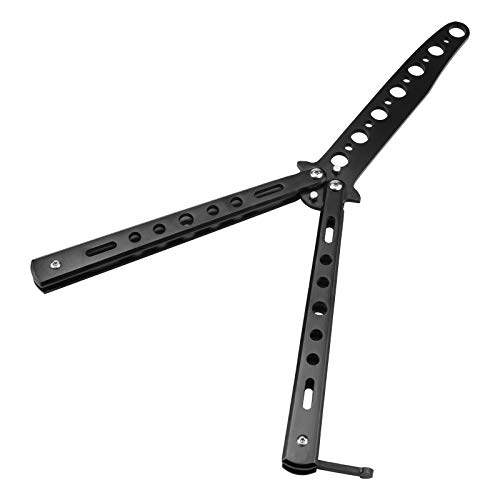
- TAR Score8.2
TAR Score is a ranking system developed by TopAppliancesReviews.com. TAR score has no relationship or impact from any manufacturers or sales agent websites. Learn more
- BrandLittle World
Last update on 2026-10-03 / Affiliate links / Images, Product Titles, and Product Highlights from Amazon Product Advertising API


Top Rated Best Quality Range Hoods: 2026 Expert Picks

The 12 Best Small Solar Generators 2026

10 Best Quality Semi Automatic Washing Machine of 2026 For Leak-Free Laundry

11 Best Small Washer Machine of 2026 For Everyday Laundry

12 Best Vibration Pads For Washing Machine of 2026 To Stop Walking and Shaking

11 Best Selling Front Load Washing Machine of 2026 For Quiet Odor-Free Laundry

11 Best Washing Machine For King Size Bedding of 2026 To Prevent Cycle Errors

10 Best Small Front Loader Washing Machine of 2026 For Tight Closets






