
How to Manually Drain a Washer Without the Mess

How to manually drain a washer safely sounds simple until you're standing ankle-deep in water with a pile of soaked towels nearby. A washer that refuses to drain can throw the whole day off balance fast. One minute everything seems normal, then suddenly the machine stops mid-cycle, starts humming strangely, or flashes an error code that doesn't explain much. Frustration kicks in pretty quickly, especially when dirty water starts creeping across the laundry room floor.
Small mistakes during draining can create bigger headaches later. Pulling the drain hose too quickly, opening the pump filter without preparation, or tilting the machine carelessly can send water everywhere. That's why a calmer, more practical approach matters. Safe draining methods help reduce spills, protect flooring, and prevent damage around electrical connections or nearby cabinets. A little preparation saves a ton of cleanup afterward.
Most washers hide water deeper inside the system than people expect. Even after scooping out the visible water, leftover liquid can remain trapped inside hoses, filters, and pump chambers. That's where patience comes into play. Slowly draining the machine in stages usually works better than rushing through the process and hoping for the best. Honestly, that's the part many people underestimate until they're mopping for half an hour straight.
Different washer styles also change the process. Front-load machines often include a small emergency drain tube near the bottom panel, while some top-load models require repositioning the main drain hose manually. Older washers can behave differently from newer digital units too. Understanding these little differences makes the entire task feel far less intimidating. Proper preparation, dry towels, shallow containers, and careful hose handling often matter more than fancy tools.
Water damage is another concern people rarely think about until it's already happened. Hardwood flooring, laminate seams, and nearby drywall can absorb moisture surprisingly fast. Even a slow leak left unnoticed overnight can create lingering odors or warped surfaces later on. Safe draining isn't only about removing water from the washer. It's also about protecting the surrounding space from problems that quietly build up over time.
Power safety deserves attention too. Washers combine water and electricity in one tight space, which means careless handling can become risky fast. Unplugging the machine before opening access panels or touching internal components helps avoid unnecessary hazards. Electrical safety might sound obvious, yet plenty of rushed cleanup situations lead people to skip that first step. That's usually where trouble starts.
A washer full of stagnant water can smell rough after sitting for a while. Soap residue, lint buildup, and trapped moisture create the perfect environment for funky odors that linger longer than expected. Proper draining paired with filter cleaning often improves both smell and machine performance afterward. Sometimes the issue isn't a serious breakdown at all. A clogged filter or partially blocked drain hose can be the real culprit hiding in plain sight.
Knowing how to manually drain a washer safely gives peace of mind during stressful situations. Instead of panicking over standing water or random error messages, the process becomes manageable step by step. Careful draining, steady cleanup, and a little patience usually make the situation far less chaotic than it first appears.
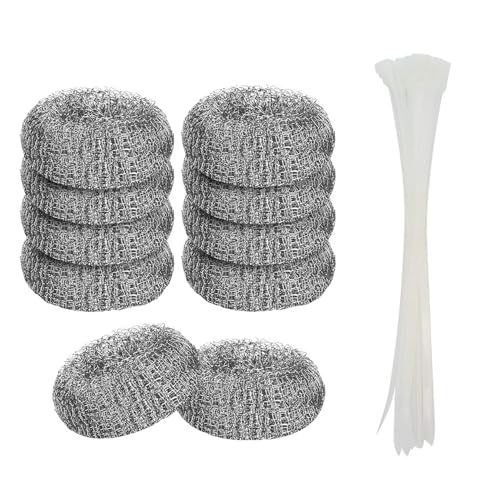
- TAR Score9.4
TAR Score is a ranking system developed by TopAppliancesReviews.com. TAR score has no relationship or impact from any manufacturers or sales agent websites. Learn more
- BrandYeasing

- TAR Score9.2
TAR Score is a ranking system developed by TopAppliancesReviews.com. TAR score has no relationship or impact from any manufacturers or sales agent websites. Learn more
- Brandsuoundey

- TAR Score9.0
TAR Score is a ranking system developed by TopAppliancesReviews.com. TAR score has no relationship or impact from any manufacturers or sales agent websites. Learn more
- BrandMarsrut

- TAR Score8.8
TAR Score is a ranking system developed by TopAppliancesReviews.com. TAR score has no relationship or impact from any manufacturers or sales agent websites. Learn more
- BrandLehman's

- TAR Score8.8
TAR Score is a ranking system developed by TopAppliancesReviews.com. TAR score has no relationship or impact from any manufacturers or sales agent websites. Learn more
- BrandManste

- TAR Score8.6
TAR Score is a ranking system developed by TopAppliancesReviews.com. TAR score has no relationship or impact from any manufacturers or sales agent websites. Learn more
- BrandJHBKing
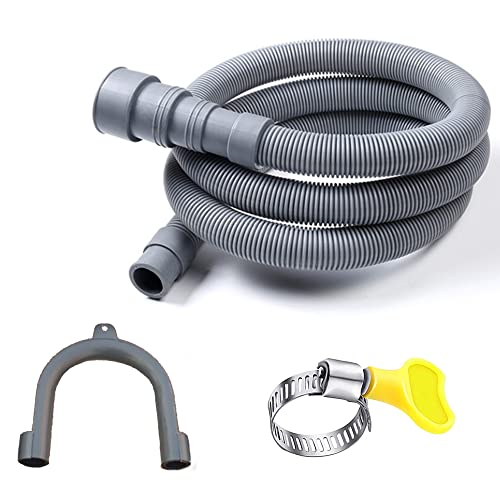
- TAR Score8.6
TAR Score is a ranking system developed by TopAppliancesReviews.com. TAR score has no relationship or impact from any manufacturers or sales agent websites. Learn more
- BrandHLMOptimo

- TAR Score8.4
TAR Score is a ranking system developed by TopAppliancesReviews.com. TAR score has no relationship or impact from any manufacturers or sales agent websites. Learn more
- BrandWZRAXJ

- TAR Score7.2
TAR Score is a ranking system developed by TopAppliancesReviews.com. TAR score has no relationship or impact from any manufacturers or sales agent websites. Learn more
- BrandShappy
Last update on 2026-06-25 / Affiliate links / Images, Product Titles, and Product Highlights from Amazon Product Advertising API
How To Manually Drain A Washer Safely
A stalled washer can turn a normal laundry day into a soggy little disaster. Wet clothes sit heavy in the drum, dirty water refuses to move, and the floor suddenly feels like the next thing to panic about. That is exactly where how to manually drain a washer safely matters, because the goal is not just getting water out, but keeping electrical parts, flooring, hoses, and your back out of trouble. A calm setup with towels, a shallow pan, and a steady hand beats rushing every single time.
Start With Safety Before Touching Water
Power safety comes first, even if the washer looks completely dead. Unplug the machine before reaching near the drain hose, pump filter, or lower access panel. Water and electricity make a lousy pair, and there is no reason to gamble with that. A washer may still have stored power or active components even after the cycle stops acting normal.
Floor protection deserves attention before any hose gets moved. Place old towels around the front and sides of the washer, then slide a shallow tray or baking pan near the lowest drain point. A deep bucket may seem smarter, but it often sits too high for low drain tubes. Small containers emptied often usually keep the mess under better control.
Water weight can fool people fast. A drum full of laundry and standing water is heavy, awkward, and easy to strain against. Do not tilt the washer sharply or yank it forward without checking the hoses behind it. Slow movement protects the drain line, supply lines, wall valves, and the floor underneath.
Dirty wash water is not something to splash around casually. It can carry detergent residue, lint, soil, pet hair, and whatever came off the clothes during the cycle. Gloves are a smart move, especially if the water has been sitting for hours. Keep kids and pets away from the area until everything is drained, wiped, and dry.
Find The Drain Point Without Guessing
Front-load washers often have a small access door near the bottom front panel. Behind that door, many machines include a short emergency drain tube and a pump filter cap. That little tube is usually the least chaotic place to begin because it releases water slowly. Still, keep the pan low and towels close, because the flow can surprise you once the cap comes off.
Top-load washers usually drain through the main drain hose at the back of the machine. Lowering that hose carefully into a floor-level container can let gravity pull the water out. The hose should not be forced lower than it can comfortably reach, since bending or cracking it can create a second problem. Keep the hose end controlled so it does not whip loose and spray water behind the washer.
Pump filter access can be messy if opened too soon. The filter sits low because it catches lint, coins, buttons, and debris before they reach the pump. That location also means water behind it wants to escape fast. Drain through the emergency tube first if your washer has one, then loosen the filter cap slowly instead of twisting it wide open.
Machine design changes the safest approach. Some compact washers, portable washers, and older models do not have a visible emergency drain tube at all. In that case, the drain hose becomes the main route, and patience matters even more. For separate small-load laundry setups, compare space-saving wash options through mini washing machine baby clothes before adding another appliance to a tight laundry area.
Drain Slowly To Avoid A Floor Flood
Controlled draining works better than trying to empty everything in one big rush. Pull the drain tube cap gently, aim the tube into the shallow pan, and let the water flow until the container is almost full. Stop the flow, empty the pan, then repeat. It feels a little tedious, sure, but it keeps water from racing across the floor.
Gravity draining from the main hose needs the same careful rhythm. Hold the hose end lower than the washer tub but keep it aimed securely into a bucket or floor drain. If the water starts surging too quickly, raise the hose slightly to slow the flow. That simple movement gives you more control without forcing any parts.
Overflow prevention is mostly about staying close and not multitasking. Do not walk away while water is draining, even if the flow looks gentle at first. Lint clumps can shift, trapped water can suddenly release, and a nearly full pan can spill with one small bump. Keep one hand ready to lift the hose or recap the tube quickly.
Wet laundry can hold a surprising amount of water after the tub drains. Move clothes into a plastic basket or bathtub if they are too soaked to carry across the house. Wringing them over the washer is usually messy and awkward, so use the nearest safe drain area instead. That extra step helps keep hallways, carpets, and laundry room rugs from becoming part of the cleanup.
Washer capacity also changes the mess level. A large front-loader may release more leftover water than expected, especially if the cycle stopped before a spin. A smaller washer can still spill plenty if the hose slips or the pan fills too fast. The old repair-shop advice fits here: Slow water is controlled water, and controlled water is what keeps a bad afternoon from getting worse.
Clear The Filter Without Forcing Parts
Drain pump filters catch the annoying little stuff that sneaks through pockets. Coins, hair pins, lint mats, collar stays, and tiny toy parts can block water flow enough to stop a washer mid-cycle. Once most water has drained, turn the filter cap slowly and listen for water movement. If water starts pouring out, tighten it again and drain more through the tube or hose first.
Gentle pressure matters because plastic filter caps can crack if handled like a stubborn jar lid. Use a towel for grip instead of pliers unless the manual specifically allows a tool. A stuck cap may mean debris is wedged behind it, not that it needs brute force. Rocking it slightly back and forth usually works better than twisting harder.
Filter cleaning should be practical, not fancy. Pull out visible lint, coins, hair, and detergent sludge, then rinse the filter under warm water. Wipe inside the filter cavity with a rag, but do not shove anything deep into the pump area. Sharp poking can damage the impeller or push debris farther into the system.
Re-sealing the filter is just as important as cleaning it. Thread the cap straight, tighten it firmly by hand, and wipe the area dry before testing the washer again. A crooked cap can drip slowly and make you think the machine has a bigger leak. For households comparing larger laundry upgrades, weigh drum access, drainage layout, and service panels while reviewing front load washing machine choices.
Handle Odors And Leftover Water After Draining
Stagnant washer water can smell rough because detergent residue, body oils, lint, and moisture sit together in a warm drum. After draining, leave the door or lid open so trapped humidity can escape. Wipe the gasket on front-load machines, especially the lower fold where water likes to hide. That rubber lip can hold grime even after the tub looks empty.
Leftover moisture may still sit inside the drain hose and pump chamber. Run a short drain or rinse cycle only after the filter and hose are secured again. Stand nearby during the first test, because a loose cap or hose end can leak right away. Keep towels on the floor until the machine proves it is sealed.
Odor control starts with removing the cause, not covering it up. A washer that has been holding dirty water may need the filter cleaned, the gasket wiped, and the detergent drawer checked. Too much detergent can leave sticky buildup that traps lint and smells sour later. Use the right amount for the load size and water hardness instead of pouring by habit.
Air quality around a damp laundry area can feel stale if water sat too long or leaked into nearby materials. Dry the floor, baseboards, and corners carefully, then keep airflow moving until the room feels normal again. For homes dealing with lingering damp smells beyond the washer, improve indoor freshness with a separate look at a pco air purifier for odor-prone rooms. The washer still needs proper cleaning, but better air movement can help the space recover faster.
How To Manually Drain A Washer Safely After The First Cleanup
A washer may look drained, but sneaky leftover water can still sit inside the pump housing, hose bends, and lower drum area. That hidden moisture is the stuff that causes sour smells, surprise leaks, and a second round of towel-grabbing later. After the first drain, how to manually drain a washer safely becomes more about checking the machine carefully instead of rushing to start another load. Slow checks help catch small problems before they turn into soaked flooring or another failed cycle.
Check The Drain Hose For Hidden Blockages
Drain hose blockages can be sneaky because the washer may drain a little, then stop again like nothing makes sense. Pull the hose gently from the standpipe or sink connection and look for lint clumps, sludge, or a kinked section. A crushed hose behind the machine can act like a clogged pipe even if the inside is clean. Keep a towel nearby because trapped water can spill from the hose end without much warning.
Hose height matters more than most people expect. A drain hose pushed too far into the standpipe can create siphoning issues, while a hose sitting too low may drain at the wrong time. Keep the hose positioned according to the washer manual, and avoid taping it so tightly that air cannot move. Good airflow helps the washer drain without fighting pressure inside the line.
Lint buildup often collects where the hose bends or connects to the wall drain. Flush the hose with water only if it is fully removed and aimed somewhere safe, like a utility sink or outdoor drain. Do not force sharp tools through the hose because one small puncture can cause a slow leak later. A soft cleaning brush or careful rinse is usually safer than poking around blindly.
Heavy laundry loads can make drain problems show up faster because blankets, towels, and bulky bedding hold more water than everyday clothes. A washer that struggles after large loads may not be broken, but it might be overloaded or draining through a restricted hose. For bulky bedding routines, compare capacity and drum support through washing machine heavy blankets before blaming every drainage issue on the pump. Bigger loads need enough room to spin, drain, and rebalance without beating up the machine.
Clean Around The Pump Without Damaging It
The drain pump is a hardworking little part, but it is not built for rough handling. After the washer is unplugged and mostly drained, open the filter area slowly and inspect what you can see. Coins, hair ties, lint knots, and fabric scraps can block the pump impeller. Remove debris gently and avoid twisting anything that does not clearly belong to the removable filter.
Pump impellers should move with slight resistance, not spin like a loose toy or feel jammed solid. A small obstruction can stop the blades from turning and leave water sitting in the tub. Use your fingers carefully or a soft cloth to remove visible debris, but do not shove screwdrivers into the pump cavity. That shortcut can damage the blades and turn a simple clog into a repair call.
Rubber seals around the filter cap need a quick look before you close everything up. A grain of sand, lint wad, or twisted gasket can let water drip after the washer runs again. Wipe the seal clean and make sure the cap threads straight. A steady hand here saves you from chasing a mystery puddle later.
Test cycles should be short and watched closely. Run a drain or rinse cycle without a full load, then check the filter door, hose connection, and floor edges. Keep the access panel off until you know nothing is dripping. Once the washer drains normally, dry the area fully so any new leak stands out right away.
Protect Floors And Walls From Water Damage
Water damage rarely looks dramatic at first. A few slow drips under the washer can slide beneath vinyl, seep into laminate seams, or leave a damp smell near baseboards. After manually draining, pull the washer forward only as far as the hoses safely allow and check the floor behind it. A flashlight helps spot dark wet patches that overhead lighting misses.
Baseboards and corners deserve a close look because water tends to travel there quietly. Wipe along the wall line with a dry towel and check whether the towel picks up moisture. If the area feels damp, keep air moving with a fan and leave the washer pulled out until surfaces dry. Closing everything up too soon can trap moisture where mildew likes to settle.
Ventilation helps laundry spaces recover after spills, especially in small rooms with poor airflow. Open a window if possible, run a fan, and avoid piling wet towels in the same tight area. Damp air can make the room feel musty long after the washer problem is fixed. For nearby kitchen or utility spaces with lingering moisture and odors, improve airflow planning with a range hood vent if cooking steam and laundry humidity share the same indoor air.
Floor protection also means thinking ahead. A washer pan, leak sensor, or simple habit of checking behind the machine can prevent bigger headaches later. Manual draining teaches one thing fast: water always finds the lowest spot. Keeping that spot visible and protected makes future washer trouble much easier to handle.
Know What The Washer Is Telling You
Error codes can feel cryptic, but many drainage warnings point to the same suspects. A blocked filter, kinked hose, overloaded drum, or slow household drain can all make the washer stop with water inside. Write down the code before unplugging the machine if the display is still visible. That note helps you look up the right issue instead of guessing from scratch.
Strange sounds can give useful clues too. A humming pump may be trying to drain but cannot push water past a blockage. A clicking sound near the filter area may suggest debris near the impeller. Silence during the drain phase can point toward a power, control, lid switch, or pump problem that needs more than basic cleanup.
Repeated draining failures should not be ignored after one successful manual drain. If the washer fills and washes normally but keeps stopping before spin, the pump or drain path likely still has a restriction. Running load after load and hoping it clears itself can overwork the machine. Fix the cause before the next full basket of clothes goes in.
Professional help makes sense when water keeps returning, the pump smells hot, the breaker trips, or the washer leaks from underneath. Manual draining is a safe response to trapped water, not a cure for every internal failure. A clear pattern of repeated drain trouble means the washer needs a closer inspection. Guesswork gets expensive once electrical parts, flooring, and plumbing are all involved.
Prevent The Next Drain Problem
Small laundry habits can prevent a surprising number of drain issues. Empty pockets before every wash, especially after kids’ clothes, work pants, and jackets. Coins, tissues, screws, hair clips, and tiny toy pieces can all end up inside the pump filter. One forgotten pocket can clog a washer faster than a month of normal lint.
Load balance matters because a washer that cannot spin properly may leave water behind. Bulky items should have room to move instead of packing the drum tight. Mix large pieces with a few smaller items so the machine can distribute weight more evenly. A badly balanced load can stop the spin cycle and make it look like the washer has a drain failure.
Detergent control is another boring habit that pays off. Too much soap creates residue that traps lint and leaves sticky buildup in hoses, filters, and the pump area. High-efficiency washers need less detergent than many people pour by instinct. Clean draining starts with water that can move freely instead of fighting suds and sludge.
Routine filter checks keep small clogs from becoming emergency drain jobs. Front-load washers often need the filter checked every few weeks or months, depending on use, pets, fabric type, and how much lint your laundry creates. Keep a towel and shallow pan stored nearby so the task does not feel like a whole production. Safe washer draining gets easier once the setup is already within reach.


10 Best Quality Semi Automatic Washing Machine of 2026 For Leak-Free Laundry

11 Best Small Washer Machine of 2026 For Everyday Laundry

12 Best Vibration Pads For Washing Machine of 2026 To Stop Walking and Shaking

11 Best Selling Front Load Washing Machine of 2026 For Quiet Odor-Free Laundry

11 Best Washing Machine For King Size Bedding of 2026 To Prevent Cycle Errors

10 Best Small Front Loader Washing Machine of 2026 For Tight Closets

12 Best Side Load Washing Machine of 2026 For Low Vibration

11 Best Single Tub Washing Machine of 2026 For Apartments Without Hookups






