
How to Make a Knife Sharpener Using a DC Motor at Home

Making a benchtop sharpener comes down to mounting a high-torque DC motor to a solid base and fitting the spinning shaft with a fine abrasive wheel. That simple rig works well, but keeping the motor spin speed slow is what protects thin blade steel from overheating and losing its temper (the hardness that lets an edge stay sharp).
A safe, steady build depends on using a motor with enough turning power so it will not stall when you press a knife against it. It also requires a balanced shaft connector (the metal sleeve that locks the wheel to the spindle) to prevent violent shaking while running. Wiring in a basic dial gives you variable speed control to keep friction low. Here is how to assemble the frame, wire the motor, and grind clean cutting edges at home.
Gathering the right parts stops motor stalls and slips
Building a homemade knife sharpener requires parts that can handle mechanical pressure without burning out. A common toy motor lacks the twisting force needed to spin an abrasive pad while pressing a steel blade against it. You need components that maintain steady spin speed under real contact resistance.
Take time to source balanced hardware before starting assembly. Collecting the proper parts prevents electrical short circuits, reduces wobble, and protects your blades from accidental damage.
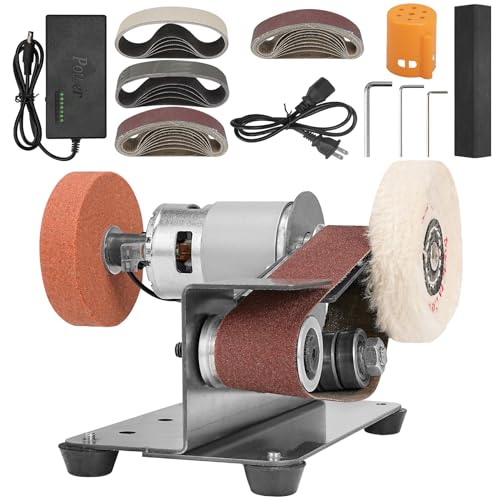
- High-torque DC motor: Look for a 775-size or 795-size DC motor rated for 12 to 24 volts. These motors deliver high twisting force, which stops the spinning wheel from stalling when you touch a blade to the abrasive surface.
- Variable speed controller (PWM dial): A pulse-width modulation speed dial lets you turn down the motor spin speed (measured in RPM, or revolutions per minute) without losing motor power. Slow spin speeds keep friction heat low so you do not soften blade metal.
- Matched DC power supply: Use a 12-volt power adapter rated for at least 5 to 10 amps. A standard small wall charger will overheat or shut off because it cannot deliver enough electrical current under load.
- Shaft connector (arbor): An arbor (a small metal adapter that locks onto the smooth motor shaft and provides a threaded post) secures your grinding wheel. Choose an arbor with an inside diameter that matches your motor shaft exactly, which is usually 5 millimeters for standard 775 motors.
- Abrasive wheel or sanding pad: Use a 3-inch or 4-inch fine grinding stone or hook-and-loop sanding disc backer. Choose fine abrasives between 400 and 1000 grit (a number that measures sandpaper roughness, where higher numbers mean smoother surfaces) to avoid gouging your knives.
- Heavy base material: A thick block of hardwood, dense plywood, or a scrap metal plate provides weight. A heavy platform absorbs vibration and stops the machine from sliding across your table.
- Motor mounting bracket: A rigid steel U-bracket made for your specific motor size holds the casing securely. Flimsy aluminum strips bend under pressure and throw the alignment off.
- Safety gear: Keep protective safety glasses, a dust mask to block fine metal dust, and a wide mug of cold water on hand before turning anything on.
A heavy base stops dangerous vibration during grinding
Vibration is the main enemy of a clean knife edge. When a motor vibrates on a workbench, the spinning abrasive bounces against the blade, creating a wavy, uneven bevel rather than a flat, razor-sharp edge. Setting up a solid foundation guarantees smooth contact from heel to tip.
- Cut your base block to size: Cut a piece of hardwood or dense plywood to roughly 8 inches wide and 10 inches long, with a thickness of at least 1.5 inches. This footprint provides enough room for the motor, the speed dial, and the power switch while giving the assembly a low center of gravity. Sand the top surface flat so the motor bracket sits completely flush without rocking.
- Install rubber dampening feet: Flip the base block over and screw four thick rubber feet into the corners. You can also glue strips of dense rubber or scraps from an old bicycle inner tube across the bottom. The rubber stops the base from wandering across your workbench and isolates table noise while the motor runs.
- Mark and drill the bracket holes: Place your steel motor bracket near the front edge of the base so the grinding wheel hangs slightly over the wood border. This clearance gives you full freedom of motion to sweep long blades across the wheel without striking the base. Mark the mounting holes with a pencil, drill pilot holes, and bolt the bracket down using wood screws and flat washers.
- Fasten the motor securely: Slide your DC motor into the bracket collar. Thread the bracket screws into the front face of the motor housing and tighten them firmly with a hand screwdriver. Push on the motor casing with your thumb to confirm there is zero wiggle or play inside the mount.
Align the shaft connector and wire the variable switch
Connecting the abrasive wheel and wiring the power circuit requires patience. A wheel that sits crooked on the motor shaft will vibrate aggressively and can throw dangerous grit across the room. Wiring your switch correctly ensures the wheel spins in the right direction to sweep metal dust safely away from your hands.
- Attach the shaft connector (arbor): Inspect the motor shaft to locate the flat notch cut into its side. Slide the shaft connector (arbor) over the shaft until it sits close to the motor body without touching the front casing. Tighten the primary grub screw directly onto the flat notch using a hex wrench, then tighten the secondary screw against the round side. Spin the shaft by hand to verify the adapter rotates on a straight center axis.
- Mount and balance the abrasive disc: Slide your inner backing washer onto the threaded arbor post. Place your fine-grit abrasive wheel or sanding backer plate against the washer, add the outer clamp washer, and thread on the retaining nut. Hold the motor shaft still with a wrench while tightening the nut securely. Spin the wheel by hand while holding a pencil tip steady right next to the rim; if the gap between the pencil and the rim widens and narrows, loosen the nut and re-center the disc.
- Wire the variable speed controller: Strip a quarter inch of insulation from your power supply lead wires. Connect the positive and negative incoming wires to the power input terminals on your speed controller board. Run two output wires from the controller board to the two solder tabs on the rear of your DC motor. Install a simple rocker switch on the positive wire line so you can cut power instantly without touching the speed knob.
- Confirm the rotation direction: Plug in your power supply and switch the unit on at the lowest speed setting. Watch the direction the abrasive disc turns. You want the top of the wheel to rotate downward and away from your body, sweeping sparks and steel dust down toward your bench rather than up into your face. If the wheel spins in reverse, unplug the power and switch the two motor tab wires to reverse the polarity.
- Secure and insulate all wiring: Fasten the speed dial and rocker switch into a small plastic project box or screw them neatly to the wooden base. Wrap every exposed wire joint in heat-shrink tubing or electrical tape to prevent accidental short circuits or loose wires touching the spinning wheel.
Control the grinding angle and cool the blade frequently
Motorized sharpening removes metal much faster than a manual bench stone. Because the abrasive moves quickly, it creates instant friction heat on thin knife edges. Managing blade temperature protects the temper (the specific steel hardness created during factory heat treatment) so the blade can hold its edge during kitchen prep.
High-carbon steel alloys heat up fast under friction. If you sharpen German high-carbon steel knives on a motorized disc, excessive heat can ruin the factory temper in less than two seconds of dry grinding. Keeping a gentle touch protects your cutlery from permanent edge damage.
- Dial the spin speed down: Turn your speed control knob to roughly one-third of its maximum setting. You want a slow, gentle hum rather than a high-pitched whine. Low spin speeds give you total control over the blade pass and reduce the rate of heat buildup on the thin edge.
- Establish the correct edge angle: Rest the flat side of the blade lightly against the spinning wheel, then tilt the spine upward until the factory bevel touches the abrasive evenly. Aim for a steep 15-degree slicing edge per side for delicate Japanese chef knives, or choose a sturdier 20-degree utility edge for pocket and hunting knives. Keep your wrist locked to preserve this angle across the entire stroke.
- Draw the blade smoothly across the wheel: Start at the heel of the knife and pull the blade across the face of the wheel toward the tip in one continuous, even motion. Use very light pressure, roughly equivalent to the weight of a ripe lemon resting in your hand. Let the grit do the cutting instead of pushing the steel hard against the disc.
- Dip the blade in cold water after every pass: Quench the entire blade edge in a wide cup of cold water immediately after each stroke. Touching the metal to water removes friction heat before it can travel up into the blade core. If the steel changes color to yellow, purple, or blue, the edge has overheated and lost its hardness, requiring you to grind back past the soft metal to find solid steel again.
- Feel for the burr: Continue making light passes until you raise a burr (the microscopic wire edge or curved sliver of metal that forms on the opposite side during sharpening). Slide your dry thumb pad upward from the spine out past the edge on the unground side. When you feel a continuous rough catch along the entire blade length, the bevel is fully apexed.
- Switch sides and refine the edge: Turn the knife over and repeat the exact same process on the second side with the same angle and stroke count. Once the burr flips back and forth easily, switch to an ultra-fine 1000-grit pad to polish the bevel, then finish by stropping the blade against a scrap of leather rubbed with polishing paste to wipe the tiny wire burr completely away.
Avoid edge overheating, wheel wobble, and motor stalls
Homemade power tools can cause frustration or blade damage if you overlook basic mechanical limits. Keeping these practical guidelines in mind keeps your work area safe and ensures clean sharpening results every time.
- Never apply heavy hand force: Pushing a knife hard against the spinning wheel will stall a 12-volt DC motor, bend the motor shaft, or burn the edge steel. Let the speed of the abrasive remove the metal naturally under light, gliding contact.
- Never run the motor without a speed dial: Connecting a 775 motor straight to an unregulated power supply can spin the wheel at over 10,000 RPM. This extreme spin speed will destroy knife steel hardness in the blink of an eye and risks tearing sanding discs apart from centrifugal force.
- Check arbor set screws before every session: Motor vibration can slowly loosen the small grub screws that hold the shaft connector in place. Check them with a hex wrench before plugging the tool in to stop the spinning wheel from sliding loose during use.
- Do not wear loose gloves near rotating parts: Heavy work gloves can snag on the spinning arbor or wheel edges and drag your fingers into the machine. Work bare-handed or use snug, cut-resistant gloves that have no loose fabric or hanging threads.
- Never sharpen dirty or greasy blades: Wipe food oils, sap, and kitchen grease off your knives before touching them to the wheel. Oil clogs abrasive sandpaper quickly, which produces high friction heat without cutting metal effectively.
Factory electric sharpeners offer balanced safety without the setup
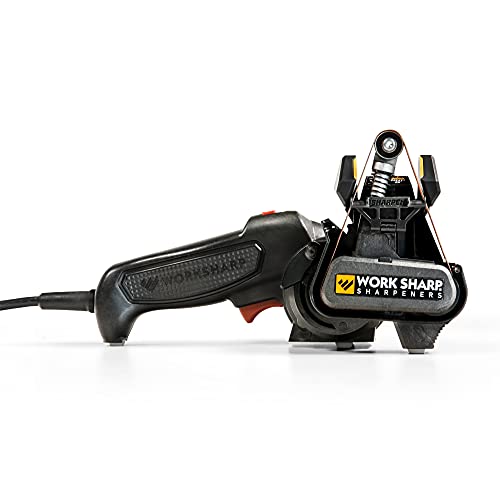
Building a homemade sharpener using a DC motor is a rewarding hobby project, but sourcing matching components, balancing shafts, and wiring electronics is not ideal for everyone. If you want razor-sharp kitchen cutlery without dealing with electrical wiring or vibration issues, ready-made benchtop electric knife sharpeners provide a balanced, reliable alternative.
Factory-built electric sharpeners eliminate the primary risks of homemade tools by providing built-in angle guides that lock your blade at precise slicing angles. They also feature balanced, pre-aligned internal drive motors that run smoothly without wobbling. When looking for a ready-made model, verify that it includes multi-stage abrasives, moving from coarse grit to reshape dull edges up to fine ceramic stages or flexible belts to polish the steel. Built-in magnetic guides, internal speed governors, and metal dust collection boxes also make blade maintenance clean, safe, and repeatable right on your kitchen counter.
- TAR Score9.4
TAR Score is a ranking system developed by TopAppliancesReviews.com. TAR score has no relationship or impact from any manufacturers or sales agent websites. Learn more
- BrandWORK SHARP

- TAR Score9.0
TAR Score is a ranking system developed by TopAppliancesReviews.com. TAR score has no relationship or impact from any manufacturers or sales agent websites. Learn more
- BrandKITCHELLENCE

- TAR Score9.0
TAR Score is a ranking system developed by TopAppliancesReviews.com. TAR score has no relationship or impact from any manufacturers or sales agent websites. Learn more
- BrandNarcissus
- TAR Score9.0
TAR Score is a ranking system developed by TopAppliancesReviews.com. TAR score has no relationship or impact from any manufacturers or sales agent websites. Learn more
- BrandPresto

- TAR Score8.8
TAR Score is a ranking system developed by TopAppliancesReviews.com. TAR score has no relationship or impact from any manufacturers or sales agent websites. Learn more
- BrandNarcissus

- TAR Score8.8
TAR Score is a ranking system developed by TopAppliancesReviews.com. TAR score has no relationship or impact from any manufacturers or sales agent websites. Learn more
- BrandNorthmas

- TAR Score8.8
TAR Score is a ranking system developed by TopAppliancesReviews.com. TAR score has no relationship or impact from any manufacturers or sales agent websites. Learn more
- BrandDawnstar
- TAR Score8.2
TAR Score is a ranking system developed by TopAppliancesReviews.com. TAR score has no relationship or impact from any manufacturers or sales agent websites. Learn more
- BrandSbestily
Last update on 2026-10-03 / Affiliate links / Images, Product Titles, and Product Highlights from Amazon Product Advertising API


Top Rated Best Quality Range Hoods: 2026 Expert Picks

The 12 Best Small Solar Generators 2026

10 Best Quality Semi Automatic Washing Machine of 2026 For Leak-Free Laundry

11 Best Small Washer Machine of 2026 For Everyday Laundry

12 Best Vibration Pads For Washing Machine of 2026 To Stop Walking and Shaking

11 Best Selling Front Load Washing Machine of 2026 For Quiet Odor-Free Laundry

11 Best Washing Machine For King Size Bedding of 2026 To Prevent Cycle Errors

10 Best Small Front Loader Washing Machine of 2026 For Tight Closets






