
How to Make a Butterfly Knife Quiet Without Ruining Balance

A sharp metallic clicking echoes off the living room walls late at night until a frustrated roommate asks for quiet. The fastest fix is to wrap the stop pins with thin tape, tie down the swinging lock, and cushion the pivot joints with thick oil. These simple adjustments muffle the harsh metal contact points right away so practice stays quiet without losing its smooth rhythm.
How much damping is needed depends on the knife build. Exposed stop pegs on the blade face take tape easily, but hidden stop screws tucked inside the handles require smaller, tighter wraps. A loose lock bar at the handle base rattles constantly unless secured, and solid steel handles ring far louder than plastic frames. A few careful adjustments will calm the noise while keeping the natural swing intact.
Finding the Noise Spots: Where Butterfly Knives Create Clatter
A butterfly knife, traditionally known as a balisong, is one of the most mechanically loud pocket items you can handle. When you practice opening sequences, rollovers, or aerial catches in a quiet bedroom or apartment, the noise does not stay in the room. The rhythmic, high-pitched clacking travels straight through drywall and closed doors. To silence the knife, you first need to pinpoint exactly where that racket originates.
The bulk of the noise comes from metal slamming into metal at high velocity. Every single trick requires the handles to swing around the blade and stop abruptly. When metal surfaces collide without any cushioning, they produce a sharp crack followed by a brief acoustic ringing sound. This clatter comes from three specific spots on the frame.
The first and loudest spot is the stop pin system. A stop pin is a tiny metal peg that keeps the handles from collapsing past the blade. Some knives use tang pins, which are metal pegs pressed directly into the base of the blade that strike the inside channels of the handles. Other models use zen pins, which are internal stop screws mounted inside the handle walls that hit small tabs on the blade base. Regardless of the design, your handles strike these pins with heavy force dozens of times every minute.
The second noise maker is the latch, the small lock bar at the bottom of the handles that keeps the knife closed in your pocket. On many standard models, this latch swings freely on a pin. As you manipulate the handles through aerials or basic twirls, that loose metal bar rattles uncontrollably against the inside liners. It sounds like a loose screw bouncing inside a tin can.
The third source of noise is handle slap and frame resonance. If your knife features skeletonized handles made from solid stainless steel, which is a rust-resistant, easy-to-clean metal, the handles act like tiny tuning forks. When the handles bump together at the bottom of a swing, the energy vibrates through the entire length of the metal frame. Understanding which of these three spots makes the most noise on your knife allows you to quiet the clatter without turning your smooth flipping action into a mushy, unresponsive mess.
Damping Stop Pins and Quieting the Latch Step by Step
Silencing the knife requires softening the points of impact while maintaining proper clearance between moving parts. If you add too much padding, the handles will bounce or fail to close properly. Follow these clear steps to silence your stop pins and latch using simple household materials.
Damping the Stop Pins
The goal on the stop pins is to absorb the kinetic shock of the handles without altering the balance of the blade. Heat-shrink tubing designed for electrical wiring offers the cleanest, longest-lasting fix, but standard vinyl electrical tape also works well if applied cleanly.
- Clean the contact surfaces thoroughly. Dip a cotton swab in rubbing alcohol and wipe down the tang pins or zen pins. Remove all lingering pocket lint, dried grease, and grime so your wrap sticks firmly to the metal.
- Cut your damping material to size. If you use heat-shrink tubing, select a small diameter such as one-sixteenth of an inch or three-thirty-seconds of an inch. Cut a tiny collar that matches the exact width of the pin. If you use electrical tape, slice a narrow strip using a razor blade, keeping the width equal to the contact zone on the pin.
- Apply the wrap in a single layer. Slide the tubing collar over the pin, or wrap the electrical tape smoothly around the strike face. Never overlap the tape into multiple bulky layers. A single snug layer provides sufficient acoustic padding without disrupting the handle spacing.
- Shrink the tubing with gentle warm air. If using heat-shrink tubing, run a warm hair dryer over the pin for several seconds until the collar contracts tight against the steel. Avoid using open lighter flames near your knife pivots, as intense heat can damage pivot washers or ruin the heat treatment of the metal.
- Confirm your handle gap. Handle gap refers to the open space between the two handles when you squeeze the knife fully open or shut. Squeeze the handles together firmly. If the handles touch each other or feel springy and resistant, your wrap is too thick. Peel it off and reapply with a thinner strip.
Quieting or Removing the Latch
A rattling latch ruins the rhythm of your practice and creates constant background chatter. You can either cushion the latch or remove it entirely depending on how your knife is built.
- Install a rubber buffer ring. Slide a miniature silicone O-ring or a tiny orthodontic elastic band over the latch bar. Position the rubber ring right where the latch neck meets the base of the handle. When the latch swings and strikes the channel, the rubber takes the hit and eliminates the metallic clack.
- Tie the latch open with a band. If you do not want to remove hardware, swing the latch completely outward away from the handle channel. Wrap a small elastic band around the bottom of the handle to lock the latch flush against the outer spine. This keeps the latch stationary so it cannot swing freely during practice.
- Remove the latch hardware completely. Most modern butterfly knives feature screw-together construction. Check the screw head on the latch pivot, which usually requires a small Torx wrench such as a T6 or T8 size. Carefully unscrew the pivot, slide the latch bar free from between the handle scales, and reinstall the pivot screw.
- Secure the empty pivot with threadlocker. When you reinstall the screw without the latch, add a single drop of medium-strength blue threadlocker to the screw threads. This keeps the handle spacer snug and prevents the screw from backing out during rapid flips. Store the original latch and washers in a labeled bag so you can reinstall them whenever you want to carry the knife locked shut.
Tuning the Pivots with Lubricant to Kill Metallic Ringing
The pivot is the rotating screw joint at the blade base that holds the blade and handles together. Inside this joint, small bronze or steel washers sit between the blade tang and the handle liners to reduce friction. When your knife is completely dry, every impact causes the blade and handles to vibrate freely against each other. This creates a high-pitched ring that echoes across a silent room.
Lubricating your pivots does more than smooth out handle rotation. A quality lubricant acts as a hydraulic cushion between the moving steel parts, deadening sound waves before they travel down the handle channels. However, the thickness of the oil you choose dictates both the noise level and the speed of your flips.
Thin, watery oils allow the handles to swing lightning-fast, but they do almost nothing to mute the metallic sound of the mechanism. Medium-viscosity knife lubricants or heavier silicone damping fluids create a dense film across the washers. This fluid layer absorbs the shock wave each time the stop pin catches the handle. The result is a much deeper, muted thud instead of an ear-piercing ping.
To lube the knife properly, place one single micro-drop of medium-weight oil on the seam where the blade meets the internal washer on both sides of the pivot. Avoid dumping excessive oil directly into the joint. Cycle the handles through basic open-and-close motions for thirty seconds to spread the oil evenly across the entire surface of the washers.
Immediately after cycling the action, take a clean microfiber cloth and wipe away every trace of oil that seeps out onto the external handle surface. Any excess oil left on the outside will attract pocket dust, dirt, and grit, turning your smooth joint into an abrasive paste that wears out the washers. Proper lubrication also protects the metal from moisture and body sweat. Just like maintaining kitchen cutlery such as German high-carbon steel knife sets requires wiping and oiling to prevent tarnishing, keeping your folding knife pivots clean and lightly coated preserves the steel and keeps the action quiet.
Damping Mistakes That Ruin Flip Speed or Leave Gunk
In an effort to silence a loud knife quickly, many flippers grab whatever materials they find in a junk drawer. Doing this often ruins the delicate balance of the knife, gums up the action, or makes the handles sticky. Avoid the common missteps below to protect your knife and keep your flipping consistent.
The most frequent error is using aggressive adhesives like duct tape, masking tape, or foam mounting tape on the stop pins. These tapes break down rapidly under repeated impacts. Within an hour of practice, the backing splits open, releasing gooey adhesive across the blade base. That sticky residue migrates directly into the pivot washers, slowing down your flips and attracting grime that grinds down the metal.
Another mistake is over-padding the pin to silence handle slap. When you wrap multiple thick layers around a stop pin, the handles can no longer travel their intended distance. This pinches your fingers during certain rollover maneuvers and places extreme outward torque on the pivot screws. Over time, that constant leverage can loosen pivot screws, strip threads, or bend the stop pins out of alignment.
Never spray household penetrating oils or aerosol cooking sprays into the handle channels. Aerosols contain thin solvents that evaporate quickly, leaving behind sticky residues that turn rancid and attract pet hair and dirt. Use dedicated knife pivot oils, mineral oil, or synthetic silicone lubricants designed specifically for pocket hardware.
Before you begin practicing with your silenced setup, run through this quick checklist to ensure your modifications are safe and effective:
- Handle gap is still visible and does not allow the handles to pinch together completely.
- Both handles swing freely under their own weight when held horizontally.
- Stop pin wraps are smooth, uniform, and free of fraying edges.
- No sticky tape residue touches the blade face or pivot washers.
- The latch is either removed or held completely rigid with an elastic buffer.
- All excess oil has been wiped clean from the exterior handle grip.
If you already applied the wrong tape and your knife feels sluggish, clean it immediately. Soak a cotton rag in high-percentage isopropyl alcohol and wipe away the sticky residue. Avoid scraping the gunk off with metal blades or screwdrivers, as hard steel can scratch the finish on your handles and gouge the stop pins.
Choosing Naturally Quieter Polymer and ABS Practice Trainers
If you have taped the pins, removed the latch, and lubricated the pivots, but your knife still bothers people in the next room, the issue is the metal itself. Solid stainless steel and aluminum handles are naturally resonant. They reflect kinetic energy as sound waves. For total late-night practice, switching to a lightweight polymer or ABS plastic practice tool is often the most practical solution.
Plastic materials absorb impact energy rather than echoing it. When an ABS plastic handle strikes a blade stop, it creates a soft, dull tap that rarely penetrates beyond a few feet. These trainers feature completely unsharpened, blunt edges designed specifically for practicing hand mechanics without cuts, bruises, or loud noise.
When selecting a quiet practice trainer, look for models that use dense ABS or composite handles with balanced internal weight liners. A trainer that is too featherlight will feel floaty and will not build the proper finger coordination needed for steel tools. Aim for a trainer that maintains a comfortable weight around two to four ounces. Check that the unit uses adjustable Torx pivot screws rather than pressed metal rivets, which allows you to fine-tune the handle swing and service the pivot washers whenever necessary.
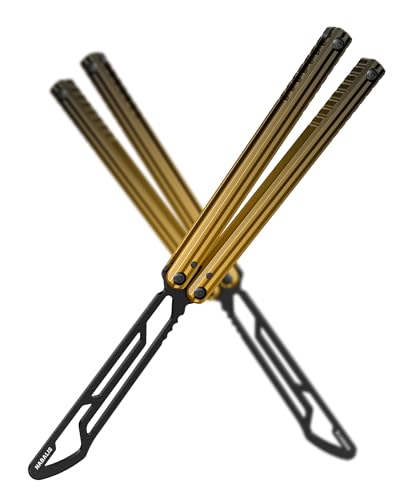
- TAR Score9.4
TAR Score is a ranking system developed by TopAppliancesReviews.com. TAR score has no relationship or impact from any manufacturers or sales agent websites. Learn more
- BrandNabalis

- TAR Score9.4
TAR Score is a ranking system developed by TopAppliancesReviews.com. TAR score has no relationship or impact from any manufacturers or sales agent websites. Learn more
- BrandNabalis

- TAR Score8.8
TAR Score is a ranking system developed by TopAppliancesReviews.com. TAR score has no relationship or impact from any manufacturers or sales agent websites. Learn more
- BrandVORNNEX

- TAR Score8.8
TAR Score is a ranking system developed by TopAppliancesReviews.com. TAR score has no relationship or impact from any manufacturers or sales agent websites. Learn more
- BrandZABEES

- TAR Score8.6
TAR Score is a ranking system developed by TopAppliancesReviews.com. TAR score has no relationship or impact from any manufacturers or sales agent websites. Learn more
- BrandGrand Way
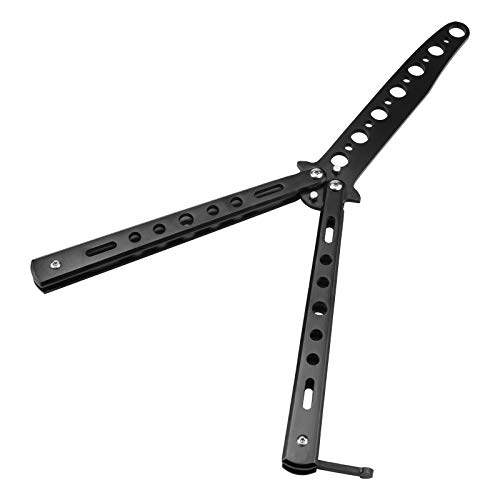
- TAR Score8.2
TAR Score is a ranking system developed by TopAppliancesReviews.com. TAR score has no relationship or impact from any manufacturers or sales agent websites. Learn more
- BrandLittle World

- TAR Score8.2
TAR Score is a ranking system developed by TopAppliancesReviews.com. TAR score has no relationship or impact from any manufacturers or sales agent websites. Learn more
- BrandAIFUSI

- TAR Score8.2
TAR Score is a ranking system developed by TopAppliancesReviews.com. TAR score has no relationship or impact from any manufacturers or sales agent websites. Learn more
- BrandDispatch

- TAR Score8.2
TAR Score is a ranking system developed by TopAppliancesReviews.com. TAR score has no relationship or impact from any manufacturers or sales agent websites. Learn more
- BrandDispatch

- TAR Score7.6
TAR Score is a ranking system developed by TopAppliancesReviews.com. TAR score has no relationship or impact from any manufacturers or sales agent websites. Learn more
- BrandLittle World
Last update on 2026-10-02 / Affiliate links / Images, Product Titles, and Product Highlights from Amazon Product Advertising API
FAQs
Will adding tape or heat-shrink tubing to the stop pins damage the knife?
No, heat-shrink tubing and thin electrical tape will not harm your knife as long as you keep the layer thin and even. The soft material actually cushions the metal against repetitive impact wear. Just make sure the tape does not extend into the pivot washers where it could leave sticky residue.
Is it better to remove the latch completely or just silence it with a rubber band?
Removing the latch provides the best flipping experience because it eliminates uneven handle weight at the bottom of the knife. Tying it down with an O-ring or rubber band is a great alternative if your knife uses pressed pins that cannot be unscrewed. If your knife features removable Torx hardware, taking the latch off entirely makes the tool significantly quieter.
Can you make an all-metal butterfly knife completely silent?
You can cut the sharp clicking volume down significantly, but an all-metal knife will never be completely silent. Metal parts colliding at flipping speed will always generate a low mechanical thud, even when padded. If you require virtually silent flipping for late-night practice around sleeping roommates, an ABS plastic or polymer practice trainer is your best option.


Top Rated Best Quality Range Hoods: 2026 Expert Picks

The 12 Best Small Solar Generators 2026

10 Best Quality Semi Automatic Washing Machine of 2026 For Leak-Free Laundry

11 Best Small Washer Machine of 2026 For Everyday Laundry

12 Best Vibration Pads For Washing Machine of 2026 To Stop Walking and Shaking

11 Best Selling Front Load Washing Machine of 2026 For Quiet Odor-Free Laundry

11 Best Washing Machine For King Size Bedding of 2026 To Prevent Cycle Errors

10 Best Small Front Loader Washing Machine of 2026 For Tight Closets






