
How to Make a Sturdy Origami Knife

A quiet afternoon at a kitchen table often starts with a pile of scrap paper and the urge to build something fun. Making a clean paper dagger comes down to folding a sharp triangular blade from one sheet and sliding it into a tightly rolled handle made from a second strip. Sharp, pressed folds lock the layers together, so the whole toy holds its shape without tape or glue.
How firm the finished piece feels depends on the paper on hand. Standard printer paper produces a much stiffer blade than delicate craft paper, which tends to flop over. Starting with a rectangular sheet makes a long, straight dagger, while square paper works better for a shorter folding pocket design. Here is how to shape each piece so the blade stays straight and rigid.
What Paper to Grab from Around Your House
You do not need specialty craft sheets, rare tools, or expensive supplies to fold a clean paper knife or toy dagger. Everyday letter-sized printer paper (8.5 by 11 inches) sitting right by your home computer or pulled from a school binder works remarkably well. In fact, standard copy paper offers the exact balance of stiffness, fiber strength, and flexibility that beginners need to make a firm model that holds its shape without drooping.
Paper thickness is the single biggest factor in how your finished craft behaves. Standard 20-pound or 24-pound copy paper bends smoothly without tearing, yet it contains enough wood pulp fiber to stay rigid when layered. Very thin craft paper, like traditional lightweight square origami sheets, often feels too limp to keep a long paper blade straight, causing the tip to sag when held upright. Heavy construction paper or cardstock has the opposite problem. Thick cardstock often cracks, splits, or bulges along tight fold lines, which makes it nearly impossible to roll a neat handle or tuck flaps into narrow slots.
Before starting, knowing two basic paper folding moves will keep every step simple and intuitive. A valley fold simply means you fold forward toward you, creating a small dip or valley in the paper surface. A mountain fold means you fold backward away from you, creating an elevated ridge or peak. Whenever you press a fold flat with your fingers or a tool, you create a crease, which is just a sharp pressed fold line that locks paper fibers in place.
Here is what to gather before making your paper knife:
- Two sheets of standard 8.5 by 11 inch white printer paper or loose-leaf copy paper.
- A hard, flat surface such as a wooden desk, dining table, or smooth countertop.
- A flat pressing tool, such as your thumbnail, a plastic ruler, or the back of a metal spoon to flatten pressed fold lines.
- A pencil, pen cap, or clean wooden chopstick to gently ease open narrow paper channels during assembly.
Folding the Pointed Blade Step by Step
A floppy paper blade happens when folds stay soft and rounded. To give your paper dagger the clean lines and stiffness of a real blade, you must compress the paper flat at every stage. Layering paper works very much like working with sheet metal. Each time you fold a sheet over itself, you double the fiber density, creating a rigid backbone that resists bending under its own weight.
Follow these steps to fold a straight, pointed blade:
- Find the center line: Lay your first sheet of printer paper vertically on your table in portrait orientation. Bring the left long edge across to line up with the right long edge. Make a sharp pressed fold line down the center from top to bottom, then open the paper back flat so the center crease runs straight down the middle.
- Form the primary point: Take the top left corner and fold it down toward the center line, aligning the top edge with your center fold line. Do the same with the top right corner. You now have a clean triangular point at the top of your sheet, matching the nose of a classic folded paper airplane.
- Narrow the cutting edge: Take the upper left slanted outer edge that you just created and fold it inward to meet the center fold line a second time. Repeat this exact fold on the upper right slanted edge. Flatten both sides firmly with your thumbnail or ruler. This second fold narrows the point into a slender, needle-like tip and stacks four layers of paper directly behind the tip so it will not crush.
- Shape the blade body: Look at the long straight sides running down the lower half of your sheet below the triangular point. Take the left long edge and fold it inward toward the center fold line by about three-quarters of an inch. Make a sharp pressed fold line from the base of the point down to the bottom edge. Repeat this on the right long edge. This step establishes the blade width and builds internal thickness along both sides.
- Fold the spine: Take the entire left half of your paper model and fold it in half directly over the right side along your original center fold line, folding backward away from you (a mountain fold). Smooth down the folded outer edge with your ruler. In cutlery, the thick unsharpened back of a blade is called the spine. In your paper knife, this folded spine acts as the primary structural support that keeps the blade straight when held upright.
- Taper the base: Look at the bottom flat edge of your folded blade. Fold both bottom outer corners inward by roughly half an inch to make small angled corners. Slide one paper flap into another (a tuck) to trap the raw edges inside. This gives the base a tapered, wedge-like tail that slides cleanly into the handle socket without catching on interior paper seams.
Rolling the Sturdy Handle and Locking the Blade
A knife blade needs a firm grip to hold it steady and keep it from wobbling. In real metal knives, a full tang means one solid piece of blade steel extends all the way through the handle, giving the tool total strength and preventing the blade from snapping off the grip. A partial tang means the blade metal narrows or stops inside the handle, which can create a weak spot if not fitted tightly. In a paper knife, sliding the blade base deep inside the rolled handle mimics a full tang design, giving your toy knife balance and stability.
Follow these steps to roll the handle and lock the blade in place:
- Start the handle strip: Place your second sheet of printer paper horizontally on your desk in landscape orientation. Starting along the bottom long edge, fold the paper upward by about three-quarters of an inch. Press the fold down firmly across the entire width of the page.
- Roll tight layers: Continue rolling and folding the paper strip upward over itself, keeping each fold tight, straight, and identical in width until you reach the top edge. Each turn adds another layer of compressed paper fibers, creating a dense, solid grip that feels sturdy in your hand.
- Shape the grip and guard: Once you reach the top edge of the sheet, press the entire rolled bar flat using your ruler or the back of a spoon. If you want a small crossguard (the protective bar that sits between the handle and blade on real knives), fold the top two inches of the strip outward at a ninety-degree angle, wrap it around the back of the handle, and press it flat. If you prefer the sleek profile of an everyday carry pocket knife (an EDC knife built for simple daily tasks), keep the rolled handle straight and unbent.
- Open the handle socket: Take a pencil tip or clean chopstick and gently insert it into the hollow pocket between the rolled paper layers at the top end of the handle. Wiggle the tool slightly from side to side to widen the channel without tearing the paper. You only need an opening just wide enough to receive the blade base.
- Insert the blade base: Take the tapered bottom of your folded blade and slide it straight down into the handle opening. Push the blade downward until at least two to three inches of the blade base sit deep inside the handle. Pushing it deep creates strong friction across multiple layers, preventing the blade from tipping forward.
- Lock the parts together: Slide one paper flap into another (a tuck) where the handle edge meets the blade base, or fold the top outer tabs of the handle tightly over the blade base. The natural friction of the tightly compressed paper sheets acts like a mechanical clamp, holding the blade upright without needing tape or glue.
Fixing Floppy Blades and Loose Paper Seams
If your paper blade bends or droops when you pick it up, the problem almost always comes down to soft folds or shallow insertion. When paper folds are left rounded instead of sharp, microscopic cushions of air remain trapped between the sheets. When you lift the knife, gravity pulls on the paper tip, and those loose layers easily buckle under their own weight. To fix a drooping blade, place the finished knife flat on your desk and run the edge of a plastic ruler firmly down the entire folded spine. Pressing down hard collapses those air pockets and binds the paper fibers into a rigid beam.
Paper grain direction also plays a quiet but decisive role in how straight your blade stays. During manufacturing, wood pulp fibers align in one direction along the sheet. Folding parallel to the grain creates crisp, effortless lines, while folding across the grain can cause slight puckering, rough edges, or unwanted curving. If your folded blade bows to the left or right, turn your starting sheet of paper by ninety degrees on your next try so the grain runs straight along the length of the spine.
Insertion depth is the final detail that prevents a wobbly grip. If the base of the blade only sits half an inch inside the handle opening, the joint acts like a loose hinge. Sliding the blade at least halfway down into the rolled handle transfers structural support all the way down through your grip. Learning how paper layers distribute weight along a handle mirrors how full tang blades work in real tools like German high carbon steel knife block sets, where solid metal runs all the way through the grip to stop wobbling. A deep paper tang ensures your toy knife feels solid and balanced every time you pick it up.
What to Look for in Paper Folding Kits for Sturdy Crafts
When you want to move beyond plain printer paper to fold more colorful daggers, folding pocket knives, or medieval swords, beginner paper crafting kits make the process much easier. While standard office sheets work well for practice, dedicated craft kits supply pre-cut square sheets, vibrant patterns, and folding project booklets that help you learn clean technique without needing to measure or cut paper yourself.
Before choosing a paper folding kit or craft pack for making paper blades, check these practical features:
- Paper weight and fiber density: Look for paper rated around 70 to 80 grams per square meter (GSM). Sheets in this weight range fold crisply, hold pressed fold lines without springing open, and provide enough body to support a pointed blade without bending. Steer clear of ultra-thin washi sheets for toy knives, as very light paper lacks the structural stiffness needed for straight blades.
- Sheet dimensions: Larger sheets measuring between 7 and 10 inches square give you enough material to fold multi-layered blades and long, comfortable handles. Small 4-inch sheets make folding handles difficult because the paper layers quickly become too thick to roll tightly.
- Step-by-step visual guides: Choose kits that include clear, illustrated instructions showing fold lines and directional arrows. Clear diagrams help you verify whether a fold goes forward toward you or backward away from you before you make a sharp pressed fold line.
- Dual-sided color or patterns: Craft papers with contrasting colors on the front and back make it easy to follow complex folds. You can see at a glance which side forms the outer handle and which side forms the cutting edge, reducing mistakes as you fold.
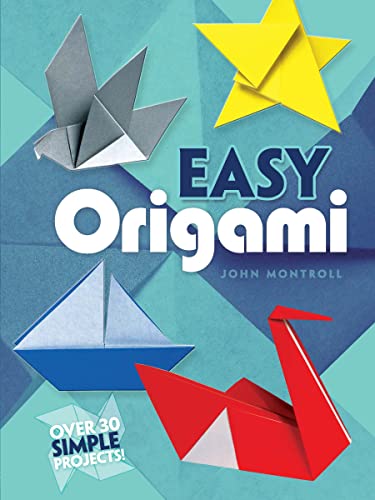
- TAR Score9.2
TAR Score is a ranking system developed by TopAppliancesReviews.com. TAR score has no relationship or impact from any manufacturers or sales agent websites. Learn more
- BrandDover Publications

- TAR Score9.2
TAR Score is a ranking system developed by TopAppliancesReviews.com. TAR score has no relationship or impact from any manufacturers or sales agent websites. Learn more
- BrandTuttle Publishing

- TAR Score9.2
TAR Score is a ranking system developed by TopAppliancesReviews.com. TAR score has no relationship or impact from any manufacturers or sales agent websites. Learn more
- BrandTuttle Publishing

- TAR Score9.2
TAR Score is a ranking system developed by TopAppliancesReviews.com. TAR score has no relationship or impact from any manufacturers or sales agent websites. Learn more
- BrandTuttle Publishing

- TAR Score9.0
TAR Score is a ranking system developed by TopAppliancesReviews.com. TAR score has no relationship or impact from any manufacturers or sales agent websites. Learn more
- BrandTuttle Publishing

- TAR Score9.0
TAR Score is a ranking system developed by TopAppliancesReviews.com. TAR score has no relationship or impact from any manufacturers or sales agent websites. Learn more
- BrandFox Chapel Publishing
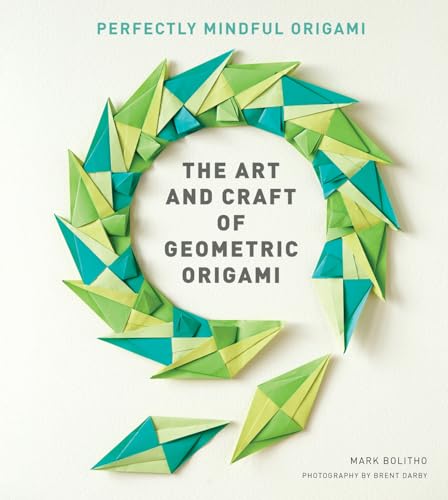
- TAR Score9.0
TAR Score is a ranking system developed by TopAppliancesReviews.com. TAR score has no relationship or impact from any manufacturers or sales agent websites. Learn more
- BrandPrinceton Architectural Press

- TAR Score8.8
TAR Score is a ranking system developed by TopAppliancesReviews.com. TAR score has no relationship or impact from any manufacturers or sales agent websites. Learn more
- BrandDover Publications
Last update on 2026-10-02 / Affiliate links / Images, Product Titles, and Product Highlights from Amazon Product Advertising API
FAQs
Can I make an origami knife using square origami paper instead of printer paper?
Yes, you can fold a paper knife from square origami paper, but the folding steps change slightly. Because a square sheet is shorter than a standard printer sheet, your finished blade will turn out wider and shorter, resembling a pocket knife or kunai rather than a long dagger. If you use square sheets, pick paper that is at least 8 inches wide so you have enough length to form both a sturdy blade point and a deep handle base.
Do I need glue or tape to keep the paper knife from falling apart?
You do not need glue or tape if your creases are sharp and your folds are pressed firmly. Clean paper knives rely on friction fit and interlocking tabs, where you slide one paper flap into another to lock the layers naturally. However, if your paper is old, worn, or starting to fray at the seams, a tiny drop of school glue or a small strip of clear tape inside the handle pocket can add extra durability for active play.
Why does the tip of my paper blade keep flattening or bending?
A bent or flattened tip happens when the initial corner folds do not line up precisely with the center crease. If the paper overlaps unevenly at the point, the tip lacks internal balance and crumbles easily under light pressure. To fix this, make sure your first corner folds meet exactly at the middle line, and run a hard tool firmly over the tip layers to compress the paper fibers before folding the blade in half.


Top Rated Best Quality Range Hoods: 2026 Expert Picks

The 12 Best Small Solar Generators 2026

10 Best Quality Semi Automatic Washing Machine of 2026 For Leak-Free Laundry

11 Best Small Washer Machine of 2026 For Everyday Laundry

12 Best Vibration Pads For Washing Machine of 2026 To Stop Walking and Shaking

11 Best Selling Front Load Washing Machine of 2026 For Quiet Odor-Free Laundry

11 Best Washing Machine For King Size Bedding of 2026 To Prevent Cycle Errors

10 Best Small Front Loader Washing Machine of 2026 For Tight Closets






