
How to Make a Wooden Knife with Basic Hand Tools

Check the grain direction on a solid piece of hardwood before drawing any blade outline. Running the wood grain (the direction of the wood fibers) straight down the length keeps the tip and thin edge from snapping off under pressure. Making a durable wooden knife comes down to tracing the shape along straight grain, cutting the rough wood block with a small saw, and carving the sloped edge with a hand rasp before sanding it smooth.
The exact build depends on how the blade gets used and what tools sit on the workbench. A gentle butter spreader calls for tight-grained wood like maple sealed with food-safe mineral oil, while a martial arts trainer needs thicker oak to withstand drops. Simple hand rasps and sandpaper take more patience than power equipment, but they give better control so the edge does not split. Here is how to pick the right board, carve clean tapered edges, and seal the wood safely.
Selecting Hardwood, Grain Direction, and Workbench Tools
Wood grain refers to the natural direction of the wood fibers running through a tree. Think of wood as a dense bundle of paper drinking straws. When force hits the bundle from the side, the straws separate and split apart easily. If you push directly down against the ends of the straws, they bear significant weight without bending.
Grain direction is the single most critical detail when making a wooden knife. The wood grain must run lengthwise down the entire piece, pointing straight from the handle base out through the blade tip. If the grain runs diagonally or across the blade, light pressure will snap it clean off. Look closely at your board before cutting, checking for straight, continuous grain lines running end to end.
Choosing the right wood species is just as important. Softwoods like pine, cedar, and fir compress, crush, and tear under hand tools, leaving a ragged edge that splinters during use. Dense hardwoods hold crisp lines and allow you to shape a smooth, durable cutting edge. Excellent choices include walnut, hard maple, beech, cherry, and white oak. Walnut and cherry carve smoothly, while hard maple and beech create tough, chip-resistant edges.
Start with a board thickness between 1/4 inch and 3/8 inch. Material under 1/4 inch bends too easily and leaves no thickness for a comfortable handle. Boards over 3/8 inch force you to shave away excessive wood, turning simple shaping into tedious hand work.
Hardwood Selection Checklist:- Choose dense, close-grained hardwoods like hard maple, walnut, beech, or cherry.
- Ensure the wood grain runs straight along the length from blade tip to handle base.
- Select seasoned, dry lumber free from knots, resin pockets, splits, or warping.
- Start with a flat board thickness between 1/4 inch and 3/8 inch.
You do not need heavy machinery or an expensive workshop to build a wooden blade. A sturdy table, basic hand tools, and a clamp are all it takes. Working with hand tools gives you full control over every cut, preventing accidental slips.
Your primary shaping tool is a wood rasp, which is a coarse metal file with raised individual teeth designed to shave away wood quickly. A half-round rasp works best because it features one flat side for smoothing straight blade bevels and one curved side that fits inside handle contours. You will also want a fine-cut double-sided hand file to smooth the coarse ridges left behind by the rasp.
For cutting the knife profile, a coping saw is ideal. A coping saw is a small hand saw with a thin, flexible blade suspended inside a C-shaped steel frame. The thin blade turns easily, allowing you to cut tight curves along the handle and blade outline without binding. A standard bench vise or a pair of rubber-padded bar clamps will hold your workpiece firmly against your table while you cut.
You should also decide on blade construction. In knife making, the tang is the rear section of the blade extending inside the handle. In a full tang build, one solid piece extends through the handle from tip to butt. A partial tang means the blade wood narrows or stops inside the handle, which creates a weak point. Shaping a knife from one solid wooden blank (a flat block of wood before carving) is the most reliable approach for beginners. Carving blade and handle from a single hardwood blank eliminates weak glue joints and keeps the blade secure.
Step-by-Step Guide to Cutting, Beveling, and Sanding
Taking your time during each phase of shaping ensures your blade stays straight, strong, and comfortable in the hand. Follow these practical steps to turn your hardwood blank into a finished knife.
- Trace your design onto the wood blank. Lay your flat hardwood blank on your work surface. Use a sharp pencil to draw the knife outline. Align the blade tip and spine parallel with the grain lines running through the wood. Draw a comfortable handle at least 4 inches long, including a subtle dip behind the blade heel to stop your fingers from sliding forward.
- Cut the rough silhouette. Clamp your blank securely to your workbench so the cut line extends past the table edge. Use your coping saw to cut along your pencil line, staying about 1/16 inch outside the mark. Cutting just outside the line leaves a small buffer, protecting your shape from minor sawing slips. Reposition the clamp often so the wood never vibrates or flexes while sawing.
- Mark the center line along the cutting edge. Once the rough outline is cut, run a pencil down the exact center of the bottom edge where the cutting bevel will meet. This center line acts as your visual guide. When filing wood away, you will file down toward this line from both sides without crossing it, keeping your edge straight and balanced.
- Shape the blade bevels with your rasp. The bevel is the sloped angle running down from the blade spine to the cutting edge. Clamp your knife blank flat against the bench. Push your wood rasp forward at a gentle 20-degree angle, cutting downward from the blade flat toward your pencil center line. Rasps only cut on the forward stroke, so lift the tool on the return. Flip the blank over often to shape both sides equally. Leave the cutting edge roughly 1/16 inch thick. Do not file it down to a paper-thin edge, or the wood fibers will crumble and split.
- Round and sculpt the handle. Move your rasp to the handle area. Use the flat side of the file to soften the sharp square corners along the top and bottom edges. Use the rounded side to hollow out finger contours and smooth the transition into the blade heel. Hold the knife periodically to check the grip in your hand, removing high spots until it rests comfortably in your palm.
- Sand through progressive grits. Start with coarse 80-grit sandpaper wrapped around a small wooden block. Sand along the wood grain to remove all rasp marks and refine the edge bevel. Move to 120-grit paper to erase the scratches from the 80-grit sheet. Finish with 220-grit sandpaper over the entire blade and handle until the wood feels silky smooth, with no rough spots or loose fibers.
Food-Safe Oil Finishing, Edge Maintenance, and Safe Uses
Bare wood dries out, absorbs food grease, and swells when wet, leading to warping and cracked edges. An oil finish seals the wood pores, highlights the natural grain, and creates a water-resistant barrier. Because wooden knives touch food, choosing the right finish matters.
Never use household vegetable oil, olive oil, or canola oil on wooden utensils. These cooking oils contain fats that break down and oxidize over time, turning sticky and rancid inside the wood. Instead, use pure food-grade mineral oil, food-grade walnut oil, or a blend of mineral oil and melted beeswax. Mineral oil is completely odorless, neutral, and will never spoil. Beeswax adds extra water resistance and leaves a soft satin sheen across the wood.
Pour a generous amount of oil directly onto the blade and handle, rubbing it in with a clean cloth. Let the wood soak for 20 to 30 minutes, then wipe away any excess liquid. Apply two to three coats over 24 hours until the wood stops absorbing oil.
A wooden knife makes a practical kitchen tool for spreading butter, serving soft cheeses, spreading jams, cutting warm brownies, or slicing soft fruits like bananas and avocados. It does not replace steel cutlery designed for heavy chopping and butchering, such as German high-carbon steel premium knife block sets that hold razor-sharp edges through dense meats. Wooden edges rely on wedge action and bevel slope rather than microscopic razor teeth.
Care for your wooden knife with simple everyday habits. Wash the knife by hand using lukewarm water and mild dish soap immediately after use. Never soak the blade in the sink, and never put it in a dishwasher. Dishwasher heat and harsh detergents strip the protective oil, raise the wood grain, and warp the blade. Dry the blade with a towel immediately. Storing wooden knives safely on an open shelf or alongside traditional kitchen tools like those found in magnetic knife block and knife set combos keeps moisture from damaging the wood. When the wood looks pale or dry after regular use, rub on a fresh drop of mineral oil to renew the seal.
What to Look for in a Beginner Wooden Knife Kit
If you want to practice wood carving without buying raw boards, hand saws, and heavy clamps, a wooden knife kit offers an easy starting point. These craft sets provide pre-cut hardwood components that allow beginners to practice shaping, assembling, and finishing without sawing rough lumber from scratch.
When shopping for a wooden knife kit, pay close attention to the wood species in the box. Look for sets made from genuine hardwoods such as beech, walnut, or maple rather than soft plywood or thin composite boards. Real hardwood ensures the blade holds its shape during sanding and stands up to light kitchen use.
Check how the handle parts attach to the blade. Many quality kits use pre-shaped handle scales that sandwich around a solid hardwood blade using wooden dowel pins and non-toxic wood glue. This design introduces traditional full-tang knife assembly while keeping the process simple. Verify that the kit supplies multiple grits of sandpaper, clear assembly instructions, and pre-drilled pin holes that align cleanly right out of the box.
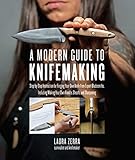
- TAR Score9.4
TAR Score is a ranking system developed by TopAppliancesReviews.com. TAR score has no relationship or impact from any manufacturers or sales agent websites. Learn more
- BrandQuarry Books

- TAR Score9.2
TAR Score is a ranking system developed by TopAppliancesReviews.com. TAR score has no relationship or impact from any manufacturers or sales agent websites. Learn more
- BrandCREATESPACE

- TAR Score8.8
TAR Score is a ranking system developed by TopAppliancesReviews.com. TAR score has no relationship or impact from any manufacturers or sales agent websites. Learn more
- BrandFox Chapel Publishing

- TAR Score8.8
TAR Score is a ranking system developed by TopAppliancesReviews.com. TAR score has no relationship or impact from any manufacturers or sales agent websites. Learn more
- BrandFox Chapel Publishing

- TAR Score8.8
TAR Score is a ranking system developed by TopAppliancesReviews.com. TAR score has no relationship or impact from any manufacturers or sales agent websites. Learn more
- BrandFox Chapel Publishing

- TAR Score8.6
TAR Score is a ranking system developed by TopAppliancesReviews.com. TAR score has no relationship or impact from any manufacturers or sales agent websites. Learn more
- BrandN/A

- TAR Score8.6
TAR Score is a ranking system developed by TopAppliancesReviews.com. TAR score has no relationship or impact from any manufacturers or sales agent websites. Learn more
- BrandN/A

- TAR Score8.6
TAR Score is a ranking system developed by TopAppliancesReviews.com. TAR score has no relationship or impact from any manufacturers or sales agent websites. Learn more
- BrandAudible

- TAR Score7.8
TAR Score is a ranking system developed by TopAppliancesReviews.com. TAR score has no relationship or impact from any manufacturers or sales agent websites. Learn more
- BrandN/A
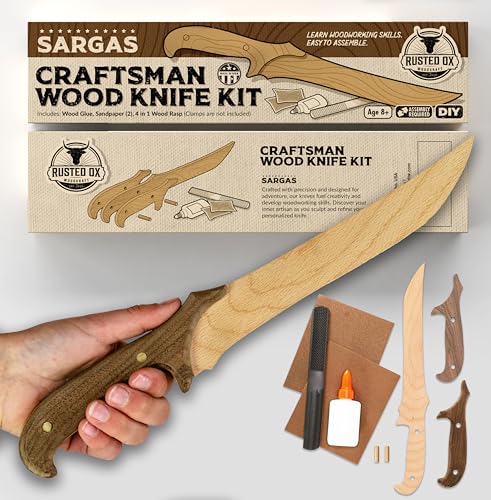
- TAR Score6.8
TAR Score is a ranking system developed by TopAppliancesReviews.com. TAR score has no relationship or impact from any manufacturers or sales agent websites. Learn more
- BrandRusted Ox
Last update on 2026-10-02 / Affiliate links / Images, Product Titles, and Product Highlights from Amazon Product Advertising API
FAQs
Can a wooden knife actually cut food?
A wooden knife cuts soft foods by acting as a thin wedge rather than slicing with razor teeth. It easily glides through room-temperature butter, cream cheese, soft cheeses, hard-boiled eggs, ripe avocados, and warm cakes. It will not cut through tough meat, raw root vegetables, or crusty bread.
How do you resharpen a wooden blade when it gets dull?
You resharpen a wooden blade using a small strip of 220-grit sandpaper backed by a flat wooden stick or sanding block. Lay the sandpaper flat against the existing bevel angle and stroke lightly from the spine down to the edge three or four times per side. Wipe away the fine dust and apply a fresh drop of mineral oil to reseal the exposed wood fibers.
What causes a wooden knife to crack or warp?
Cracking and warping almost always happen because of uneven moisture exposure. Soaking the knife in water or running it through a hot dishwasher forces the wood cells to swell rapidly, splitting the grain when they dry out. Keeping the knife sealed with food-safe oil, washing it quickly by hand, and drying it immediately prevents damage.


Top Rated Best Quality Range Hoods: 2026 Expert Picks

The 12 Best Small Solar Generators 2026

10 Best Quality Semi Automatic Washing Machine of 2026 For Leak-Free Laundry

11 Best Small Washer Machine of 2026 For Everyday Laundry

12 Best Vibration Pads For Washing Machine of 2026 To Stop Walking and Shaking

11 Best Selling Front Load Washing Machine of 2026 For Quiet Odor-Free Laundry

11 Best Washing Machine For King Size Bedding of 2026 To Prevent Cycle Errors

10 Best Small Front Loader Washing Machine of 2026 For Tight Closets






