
How to Make a Wooden Knife Handle with Basic Hand Tools

Putting a fresh grip on a bare blade looks intimidating, but it is actually a relaxed weekend project that requires no special workshop experience. The basic process is straightforward: trace the blade tang (the metal end covered by the handle) onto two wood slabs, drill matching holes, and lock the pieces to the steel with epoxy (a waterproof glue that hardens like plastic) and metal pins before sanding the shape smooth.
The exact build shifts depending on the shape of the steel and the materials at hand. A wide, flat tang needs two wood pieces glued to the sides, while a thin metal rod requires a single carved block. Picking a dense hardwood like walnut prevents splits and stops moisture from weakening the glue joint over time. Basic hand rasps and sandpaper are plenty to shape the wood without power tools. Here is how to build a clean, rock-solid grip that lasts.
Preparing the Blade and Selecting Durable Hardwood
Most knife handles fail when moisture creeps between the wood and the steel. Water causes standard wood to swell, weakens old factory glue, and creates microscopic gaps where rust forms. If you drop a knife on a tile floor or put it in a dishwasher, the sudden impact or intense heat can crack the scales (the two flat wood pieces glued to the sides of the metal). Building your own replacement handle solves this problem by creating a watertight, custom fit that matches your hand.
Before touching any tools, check the style of your blade tang (the metal back end of the blade covered by the handle). Most kitchen and outdoor knives feature a full tang (one solid piece of blade steel extending all the way through the handle). A full tang sandwiches between two flat wooden slabs. Other blades have a partial tang (where the blade metal narrows or stops inside the handle). Partial tangs, often found on traditional Japanese carving knives, slide into a solid block of wood with a carved or drilled slot. This project focuses on the full tang design, which is the most common style for home repairs.
Wood selection directly controls how long your new handle lasts. Never use softwoods like pine, cedar, or fir. Softwoods dent under finger pressure, split easily when you drill them, and absorb kitchen grease like a sponge. Instead, choose dense, slow-growing hardwoods such as black walnut, hard maple, cherry, oak, or desert ironwood. Dense hardwoods have tight grain structures that resist moisture and resist splitting when you insert pins (small metal rods that lock the wood to the blade). If you are restoring kitchen knives made from German high-carbon steel knives, pairing the blade with a stable, close-grained hardwood ensures the handle balances the weight of the thick steel.
Handle Preparation Checklist:
- Wrap the cutting edge: Cover the entire sharp edge of the blade with two layers of blue painter tape or duct tape from the bolster to the tip. Leave only the rear steel tang exposed so you never touch a sharp edge while working.
- Clean the steel bare: Scrape away any dried glue, old epoxy, or rust using 80-grit sandpaper or a wire brush. Epoxy cannot stick to greasy, slick, or corroded metal.
- Flatten your wood slabs: Rub the inner face of each wood scale against flat sandpaper to make sure it sits completely flush against the bare steel without rocking.
- Gather personal safety gear: Put on safety glasses and a snug dust mask. Fine hardwood dust can irritate your lungs, especially when filing dense woods like walnut or ironwood.
Tracing, Drilling, and Pre-Fitting the Wood Scales
The biggest mistake beginners make is drilling the wood pieces separately. If your drill bit wanders by even one millimeter, the metal pins will bind, the wood will crack, and the handle will sit crooked. You can prevent this headache by using the blade tang itself as your drilling guide.
- Trace the outline: Lay your bare steel tang on the inner face of the first wood scale. Use a sharp pencil or a fine-tip pen to trace the outer perimeter of the handle and mark the circular pin holes through the steel. Mark the front of the wood scale clearly so you do not flip it around by accident later.
- Drill the first scale: Clamp the steel tang firmly to the first wood scale with a small hand clamp. Place a flat piece of scrap wood beneath the assembly on your workbench. This scrap wood supports the fibers as the drill bit exits, stopping the wood from splintering out the back. Drill straight through the holes in the steel tang into the wood scale using a drill bit that matches your pin diameter.
- Transfer holes to the second scale: Push your metal pins through the drilled holes of the first scale and the steel tang. Now place the second wood scale underneath. Clamp all three layers together so nothing can slip. Drill through the existing holes of the first scale and the steel tang directly into the second scale. Every hole across both pieces of wood will now line up square.
- Pre-shape the front edge: Remove the clamps and pull the pieces apart. You must shape and sand the front edge of the wood scales (the edge facing the cutting blade) right now. Once the wood is glued to the steel tang, you cannot sand that front curve without dragging abrasive paper across the finished blade face. Sand both front edges smooth up to 400-grit and verify they match each other before moving forward.
Gluing, Pinning, and Shaping the Handle
Wood glue made for furniture will not work for a knife handle because standard wood glue needs to soak into porous fibers on both sides to create a bond. Steel is non-porous. You need two-part epoxy (two-part waterproof glue that hardens like plastic). Choose a slow-setting epoxy with a 30-minute to 60-minute working time. Five-minute quick-setting epoxy dries brittle, leaves air bubbles, and sets before you can align your pins and adjust your clamps properly.
- Scuff and clean the bonding surfaces: Lightly scratch the steel tang and your metal pins with 80-grit sandpaper. These tiny scratches give the epoxy rough valleys to grip onto. Wipe the steel, pins, and wood faces with rubbing alcohol on a clean paper towel to lift away any lingering finger oils or sawdust.
- Apply the epoxy: Mix equal parts of the epoxy resin and hardener on a disposable piece of cardboard until the color is uniform. Spread a smooth, thin layer over the inner faces of both wood scales and across both sides of the steel tang. Coat the outer surface of your metal pins as well.
- Assemble and clamp: Press the first scale to the tang, push the metal pins through the holes, and slide the second scale onto the protruding pins. Place two or three small C-clamps or spring clamps along the length of the handle. Tighten the clamps with light hand pressure until you see a small, even bead of epoxy squeeze out around the edges. Do not crank the clamps down with crushing force, or you will squeeze all the glue out and starve the joint.
- Wipe the front squeeze-out immediately: Dip a cotton swab or clean cloth in rubbing alcohol and carefully wipe away any wet epoxy that oozed out near the pre-shaped front edge of the scales. Cleaning this area while the glue is wet saves you from chipping dried epoxy off your blade later with a razor. Set the clamped knife aside to cure overnight for at least 24 hours.
- Rough out the profile: Once the epoxy cures solid, cut the excess pin lengths down close to the wood with a metal hacksaw. Take a coarse wood rasp or 60-grit sandpaper and grind the wood edges down until they sit flush with the perimeter of the steel tang. Remove material slowly, checking the perimeter with your fingertips to make sure you do not feel any sharp metal ridges.
- Shape the palm grip: Round off the square corners of the wood scales with a medium rasp or a sanding block. Work in long, smooth strokes along the handle length rather than digging deep grooves in one spot. Hold the knife in your normal cutting grip every few minutes to check how it feels. A comfortable handle should fill the palm without sharp edges pinching your skin.
- Smooth the grain: Wrap a strip of 120-grit sandpaper around the handle like a polishing rag, pulling back and forth across the spine and belly in a shoe-shine motion. This rounds the profile evenly. Progress upward through 220-grit and finish with 400-grit sandpaper until the wood and metal pins feel silky smooth to the touch.
Sealing the Grain and Protecting Against Moisture
Bare wood reacts quickly to kitchen moisture, meat juices, and air humidity. Without a protective seal, the wood fibers raise, turn rough, and expand. That movement pulls the wood away from the steel tang, opening fine hairline gaps where bacteria and trapped moisture cause hidden rust.
For kitchen knives, seal the wood with food-grade mineral oil, pure beeswax, or commercial butcher block conditioner. Food-grade mineral oil penetrates deep into the pores, repels water, and never turns rancid or sticky over time. Vegetable oils like canola or olive oil should never be used on knife handles because they break down, smell sour, and leave a gummy residue on your hands. For outdoor utility knives that do not touch food, drying oils like pure tung oil or boiled linseed oil work exceptionally well. Drying oils cure inside the wood grain over several days, hardening into a tough, water-repellent barrier that handles outdoor wetness.
To apply the finish, warm the knife handle slightly with your hands and rub a generous coat of oil into the wood with a soft cloth. Let the wood soak up the liquid for 20 minutes, then wipe off any standing oil with a dry towel. Apply two or three light coats over the course of two days to make sure the core fibers are saturated. Buff the handle vigorously with a clean cotton rag to bring out a natural, satin glow across the hardwood grain.
To preserve your new handle, wash the knife by hand with warm water and mild soap, then dry it immediately with a towel. Never soak the knife in a sink, and never put it inside an automated dishwasher where harsh detergents and steam will crack the hardwood. Storing your knife properly also protects the handle from getting dented. Using a magnetic knife block combo keeps the wooden grip accessible, dry, and safe from being banged around by metal utensils in a crowded drawer.
Choosing Wood Blanks and Knife Repair Materials
When selecting materials for a knife handle project, you do not need expensive lumber milling equipment to get great results. Pre-cut knife handle scales and DIY craft blanks come pre-seasoned and planed flat, which eliminates the risk of using damp wood that warps or shrinks weeks after you glue it to the steel.
Before purchasing wood scales or blank kits, measure the length, width, and thickness of your bare knife tang. Ensure the wood scales are at least a quarter-inch longer and wider than your steel frame so you have plenty of spare material to sand flush during final shaping. If you are replacing a handle on a Japanese-style kitchen blade with a narrow stick tang, look for pre-slotted replacement handles made from dense woods like olive wood or sandalwood. Check the detachment depth of the pre-drilled slot to confirm your blade tang will seat all the way down without hitting the bottom prematurely. For traditional full-tang kitchen knives, selecting pair sets of dense natural woods like ironwood or walnut gives you matching grain patterns on both sides of the blade while providing the moisture resistance needed for daily food preparation.

- TAR Score10.0
TAR Score is a ranking system developed by TopAppliancesReviews.com. TAR score has no relationship or impact from any manufacturers or sales agent websites. Learn more
- BrandKH866

- TAR Score9.2
TAR Score is a ranking system developed by TopAppliancesReviews.com. TAR score has no relationship or impact from any manufacturers or sales agent websites. Learn more
- BrandFox Chapel Publishing

- TAR Score9.0
TAR Score is a ranking system developed by TopAppliancesReviews.com. TAR score has no relationship or impact from any manufacturers or sales agent websites. Learn more
- BrandLark Books,U.S.

- TAR Score8.6
TAR Score is a ranking system developed by TopAppliancesReviews.com. TAR score has no relationship or impact from any manufacturers or sales agent websites. Learn more
- BrandRiakrum

- TAR Score8.4
TAR Score is a ranking system developed by TopAppliancesReviews.com. TAR score has no relationship or impact from any manufacturers or sales agent websites. Learn more
- BrandKichvoe

- TAR Score8.4
TAR Score is a ranking system developed by TopAppliancesReviews.com. TAR score has no relationship or impact from any manufacturers or sales agent websites. Learn more
- BrandTEAMWILL

- TAR Score8.2
TAR Score is a ranking system developed by TopAppliancesReviews.com. TAR score has no relationship or impact from any manufacturers or sales agent websites. Learn more
- BrandCedar Lane Press

- TAR Score7.6
TAR Score is a ranking system developed by TopAppliancesReviews.com. TAR score has no relationship or impact from any manufacturers or sales agent websites. Learn more
- BrandQianly
- TAR Score7.4
TAR Score is a ranking system developed by TopAppliancesReviews.com. TAR score has no relationship or impact from any manufacturers or sales agent websites. Learn more
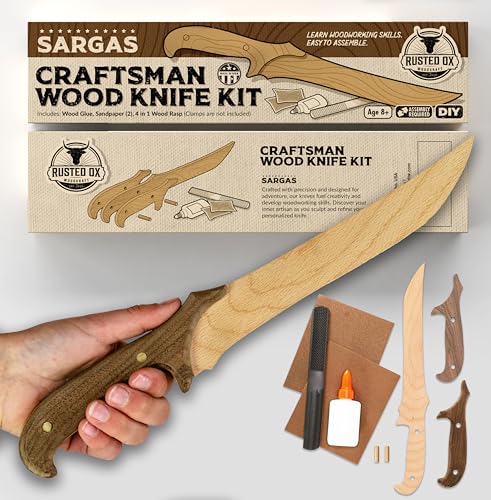
- BrandRusted Ox

- TAR Score5.2
TAR Score is a ranking system developed by TopAppliancesReviews.com. TAR score has no relationship or impact from any manufacturers or sales agent websites. Learn more
- BrandAngoily
Last update on 2026-10-02 / Affiliate links / Images, Product Titles, and Product Highlights from Amazon Product Advertising API
FAQs
Can I use standard yellow wood glue instead of two-part epoxy?
Standard yellow wood glue will not hold because it needs porous surfaces on both sides to form a bond. Steel has no wood fibers for yellow glue to penetrate, so the bond will snap apart the first time you put cutting pressure on the blade. Two-part epoxy creates a mechanical grip on scratched steel and cures into a rigid, waterproof plastic that locks the wood and metal together permanently.
What should I do if my drilled pin holes do not line up with the tang?
Do not force a pin through misaligned holes with a hammer, as this will split your hardwood scales instantly. Remove the pins, clamp the wood scales back onto the tang, and run the drill bit through the holes a second time at a steady, slow speed to clean out the path. If the hole is off by more than a tiny sliver, plug the hole with a small hardwood dowel and epoxy, let it cure overnight, and re-drill the hole accurately using the tang as a guide.
How often should I apply oil to keep the wooden handle in good condition?
Apply a thin coat of food-grade mineral oil whenever the wood begins to look dull, pale, or dry to the touch. For knives used daily in the kitchen, a quick wipe with mineral oil once every month keeps the grain sealed and repels moisture effectively. Knives used infrequently in dry environments usually need a light re-oiling only once or twice a year.


Top Rated Best Quality Range Hoods: 2026 Expert Picks

The 12 Best Small Solar Generators 2026

10 Best Quality Semi Automatic Washing Machine of 2026 For Leak-Free Laundry

11 Best Small Washer Machine of 2026 For Everyday Laundry

12 Best Vibration Pads For Washing Machine of 2026 To Stop Walking and Shaking

11 Best Selling Front Load Washing Machine of 2026 For Quiet Odor-Free Laundry

11 Best Washing Machine For King Size Bedding of 2026 To Prevent Cycle Errors

10 Best Small Front Loader Washing Machine of 2026 For Tight Closets






