
How to Make a Wood Handle for a Knife That Will Not Loosen

A sudden snap in the kitchen leaves an old butcher blade wobbling with cracked wood falling away from the bare metal. Getting a rock-solid grip back on that blade takes drilling two hardwood slabs to match the steel, then securing them with metal pins and waterproof epoxy before sanding. Once clamped and cured, the new wood will not budge or rattle during heavy cuts.
The exact build depends on the shape of the steel tang, which is the metal piece running through the handle. A wide full tang needs two flat wood pieces glued to the sides, while a narrow hidden tang slides into a single drilled block. Choosing a dense hardwood like walnut or maple prevents splitting, while basic hand files and sandpaper give you complete control over the final shape. Here is how to measure, drill, and fit your new handle step by step.
Pick dense hardwoods and gather your basic shop tools
A knife handle takes constant pressure, hand sweat, and impact during daily cutting tasks. Soft woods like pine, cedar, or poplar will dent quickly, soak up kitchen moisture, and split along the grain around pin holes. Dense hardwoods hold their shape under hard work and resist splitting when you drill them.
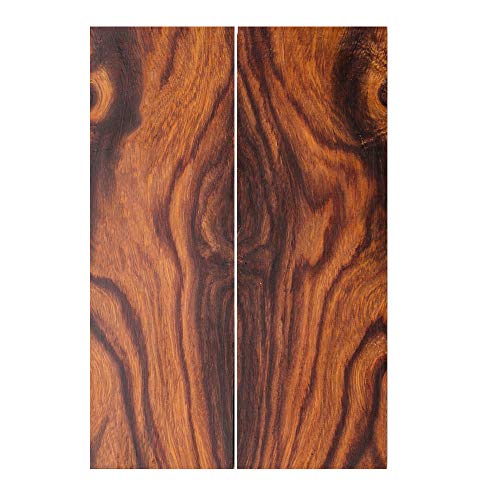
Dense woods like desert ironwood, walnut, hard maple, and oak give you the strongest foundation. Ironwood is naturally heavy and oily, which helps it resist moisture even before you apply a finish. Walnut and maple offer tight grain that shapes smoothly under hand files without chipping out at the corners.
Before you begin, determine your blade style. A full tang means one solid piece of blade steel extends all the way through the handle to the back pommel. This design uses scales, which are the two flat wood handle halves fastened to either side of the metal. While traditional push-in handles found on many high-carbon Japanese chef knife sets rely on a hidden tang slipped into a single bored wood block, full tang builds offer the simplest and sturdiest construction for home workshops.
Gather these basic materials and hand tools before cutting into your wood:
- Two hardwood scales: Flat wood slabs roughly one-half inch longer and wider than your steel handle area, and about three-eighths to one-half inch thick.
- Metal pin stock: Brass, stainless steel, or copper rod cut to match the diameter of the holes pre-drilled in your steel tang.
- Two-part epoxy: A slow-curing, waterproof epoxy adhesive with a thirty to sixty-minute working window.
- Hand drill or drill press: Equipped with clean, sharp metal-cutting drill bits that match your pin stock.
- C-clamps or spring clamps: At least two to three clamps with protective pads to press the wood flat against the steel.
- Hand files and wood rasps: A coarse wood rasp to remove bulk wood, a half-round metal file to blend wood to steel, and a small round needle file.
- Sandpaper assortment: Sheets of 80, 120, 220, and 400-grit silicon carbide or aluminum oxide paper.
- Painter's tape: Heavy masking tape to wrap the sharp blade and prevent severe hand cuts.
Flatten the mating surfaces and drill your pin holes through the tang
Gaps between your wood and the steel tang invite water, grease, and dirt inside. Once moisture seeps between the steel and the wood, the steel begins to rust out of sight and the wood swells, causing the glue joint to pop loose. The inside face of each wood scale must sit completely flat against the steel.
Place a sheet of 120-grit sandpaper face-up on a hard, dead-flat work surface, such as a piece of plate glass or a smooth shop bench. Rub the inner face of each wood scale across the paper in an even figure-eight motion. Check the face under a bright work light to ensure the sanding marks cover the entire surface from edge to edge without low spots in the center.
Follow these numbered steps to drill clean pin holes without misaligning the slabs:
- Protect the cutting edge: Wrap heavy painter's tape around the knife blade from the handle junction all the way to the tip. Cover the edge with at least three layers of tape so an accidental slip cannot cut your hands.
- Clamp the first scale: Lay one wood scale flat on your bench, place the steel tang directly over it, and position the wood so it overhangs the steel perimeter slightly on all sides. Secure the steel to the wood using a small spring clamp or hand clamp.
- Drill through the steel guides: Rest the wood on a scrap piece of plywood to prevent the wood grain from blowing out as the bit exits. Chuck a drill bit that matches the factory holes in the tang. Run the drill through one tang hole into the wood scale, keeping the bit perpendicular to the surface.
- Insert an indexing pin: Immediately push a temporary pin or spare drill bit through the drilled hole. This pin stops the steel from shifting while you drill the remaining pin holes through the first scale.
- Transfer the holes to the second scale: Remove the steel, place your two wood scales face-to-face, and clamp them together. Drill through the existing holes in the first scale directly through into the second scale, inserting guide pins as you go so every hole matches perfectly.
Slide your metal pin stock dry through both scales and the steel tang. Verify that the pins slide all the way through without forcing or bowing the wood. If a pin binds, ream the hole gently with a hand-turned drill bit until the fit is snug but smooth.
Rough up the metal and clamp your scales with slow-cure epoxy
Smooth steel offers no mechanical teeth for glue to grip. Over time, heavy chopping shock will shear a glue bond if the surfaces are too slick or greasy. Quick-setting five-minute adhesives dry brittle and lack the flexibility needed to handle seasonal wood movement or thermal expansion.
Use a quality two-part epoxy designed for waterproof bonds. Slow-curing formulas provide roughly forty minutes of open working time, letting you align the pins, position your clamps, and wipe away excess squeeze-out without rushing. Clean steel and scratch patterns give you a permanent bond that will not peel loose.
- Scuff the steel tang: Rub the steel handle area vigorously with coarse 80-grit sandpaper until the shiny finish is covered in cross-hatched scratches. Do the same to the inside flat faces of your wood scales.
- Degrease all bonding surfaces: Wipe the bare steel tang, the inner face of both wood scales, and the metal pins with pure isopropyl alcohol or acetone on a clean rag. Finger oils prevent epoxy from sticking, so handle the cleaned parts only by their outside edges.
- Mix the epoxy paste: Squeeze equal parts of resin and hardener onto a scrap piece of cardboard. Stir the two components together with a wooden craft stick for two full minutes until the mixture looks uniform with no streaks.
- Coat and assemble the handle: Spread a thin, even coat of epoxy over both sides of the steel tang, across the inside surfaces of both scales, and directly onto the pins. Push the pins through the first scale, slip the steel tang into place, and press the second scale onto the pins.
- Clamp with moderate pressure: Place your clamps over the handle assembly. Tighten them just enough to draw the wood tight against the steel without bowing the wood. Squeezing clamps down with extreme force can push all the glue out of the joint, creating a weak bond that fails later.
- Clean the front handle junction: Use a cotton swab soaked in rubbing alcohol to remove any epoxy that squeezed out at the front front edges where the handle meets the blade. Once epoxy cures fully against bare blade steel, removing it with a scraper without scratching your blade finish becomes very difficult.
Leave the clamped assembly undisturbed for a full twenty-four hours at normal room temperature. Even if the glue feels hard to the touch after two hours, full structural strength requires overnight curing before you apply filing stress.
Shape the handle profile with hand rasps and progressive sandpaper
A rectangular wood block creates painful pressure points in your palm and fatigues your hand quickly during extended slicing or carving. Proper shaping rounds off square corners, blends the wood flush with the steel tang, and adds gentle curves that settle naturally into your grip.
Working on a heavy-duty cutting tool similar to those in German high-carbon steel premium knife block sets requires handle contours that fill your palm comfortably without slipping when wet. Use hand rasps and files slowly, checking the feel with your bare hand every couple of minutes.
- Level the edges to the steel: Clamp the knife blade securely in a bench vise padded with leather scraps or soft wood blocks. Use a coarse metal mill file to bring the outer perimeter of the wood scales down until they sit dead-flush with the exposed steel tang all the way around the grip.
- Trim the metal pins: Cut the protruding pin ends down close to the wood surface using a small hacksaw. File the remaining metal pin heads flat until they sit smooth with the surrounding wood, taking care not to gouge the wood surface around them.
- Chamfer the sharp corners: Take a medium-cut wood rasp and bevel the four outer corners of the handle at a forty-five-degree angle. This removes the bulk material along the top spine and bottom belly of the grip.
- Round the grip into an oval cross-section: Use the curved side of a half-round rasp to blend your bevels into a smooth, oval contour. Thin the handle slightly near the front index finger area and leave slightly more thickness near the center to support the natural hollow of your palm.
- Sand through the grits: Cut two-inch wide strips of 80-grit sandpaper. Wrap the strip around the spine of the handle and pull the ends back and forth in a smooth shoe-shine motion. Repeat this method across the entire grip to remove rasp marks, then repeat the process with 120, 220, and 400-grit papers until the wood feels silky to the touch.
Wipe the handle with a dry rag and close your fingers around it in your normal cutting grip. Feel for sharp ridges, flat spots, or awkward bulges. Sand away any uneven areas before moving to the oil finish, because oil highlights surface flaws rather than hiding them.
Seal the exposed wood grain with drying oil to keep water out
Wood is a porous material composed of natural fibers that draw moisture out of the air. When bare wood gets wet, the cells swell up. When the wood dries back out near room heat, the fibers shrink and pull against the metal pins, which eventually causes cracking along the pin lines.
A drying oil penetrates into the open pores of the hardwood and hardens inside the grain as it cures. Boiled linseed oil, pure tung oil, and Danish oil are standard choices for wooden handles. Unlike surface varnishes or polyurethane, curing oils will not peel or flake when bumped, and they preserve the natural warm texture of the wood grain under your fingers.
Pour a few drops of oil directly onto the sanded handle and rub it into the fibers using your fingers or a lint-free shop cloth. Allow the wood to absorb the oil for fifteen minutes. If dry patches appear where the grain drinks up the liquid rapidly, apply more oil until the entire surface stays wet.
Wipe the handle completely dry with a clean paper towel after twenty minutes. Leaving pools of wet oil on the surface will result in a sticky, gummy film that collects pocket lint and dirt. Allow the first coat to dry overnight, lightly buff the surface with fine steel wool or a 400-grit sanding pad, and apply a second thin coat. Two to three light coats build dependable water resistance.
Keep your wooden handle in top shape by following standard kitchen knife safety and care habits. Never wash a wooden-handled knife in an automatic dishwasher, where intense heat and standing steam will warp the wood and ruin the epoxy bond. Hand-wash the blade with warm water and mild soap, dry it immediately with a towel, and apply a fresh drop of mineral oil or handle wax once or twice a year to keep the wood supple.
Select pre-cut hardwood scales that match your knife tang
If you want to save time cutting down raw timber logs, pre-cut hardwood handle scales provide flat, well-seasoned wood blanks ready for immediate shop work. Choosing the right blanks prevents frustrating fitment problems and ensures your finished knife balances properly in hand.
When selecting knife handle blanks, check the following physical characteristics before you buy:
- Sufficient dimensions: Verify that the length, width, and thickness of the blanks exceed your steel tang by at least one-quarter inch on all sides. Blanks measuring roughly 5 inches long by 1.5 inches wide by 0.37 to 0.5 inches thick fit standard hunting, kitchen, and utility knife blanks comfortably.
- Bookmatched pairs: Look for scale pairs sliced sequentially from the same wood block. Bookmatched wood guarantees that the color, grain direction, and growth ring patterns match symmetrically on both sides of your handle.
- Natural density or stabilization: Choose naturally dense, heavy hardwoods like ironwood or walnut, or wood that has been stabilized with resin under vacuum pressure. Stabilized wood will not shrink, expand, or warp when exposed to kitchen water or humid outdoor air.
- Flat, true surfaces: Inspect the inner faces to ensure they arrive flat and free from deep saw marks, cup warps, or twist, which minimizes the sanding time needed before drilling.

- TAR Score9.2
TAR Score is a ranking system developed by TopAppliancesReviews.com. TAR score has no relationship or impact from any manufacturers or sales agent websites. Learn more
- BrandFox Chapel Publishing

- TAR Score9.2
TAR Score is a ranking system developed by TopAppliancesReviews.com. TAR score has no relationship or impact from any manufacturers or sales agent websites. Learn more
- BrandIMYMEE

- TAR Score8.8
TAR Score is a ranking system developed by TopAppliancesReviews.com. TAR score has no relationship or impact from any manufacturers or sales agent websites. Learn more
- BrandRiakrum
- TAR Score8.4
TAR Score is a ranking system developed by TopAppliancesReviews.com. TAR score has no relationship or impact from any manufacturers or sales agent websites. Learn more
- BrandIECAP LLC

- TAR Score8.0
TAR Score is a ranking system developed by TopAppliancesReviews.com. TAR score has no relationship or impact from any manufacturers or sales agent websites. Learn more
- BrandN/A

- TAR Score8.0
TAR Score is a ranking system developed by TopAppliancesReviews.com. TAR score has no relationship or impact from any manufacturers or sales agent websites. Learn more
- BrandWYDDDARY

- TAR Score7.8
TAR Score is a ranking system developed by TopAppliancesReviews.com. TAR score has no relationship or impact from any manufacturers or sales agent websites. Learn more
- BrandIECAP LLC

- TAR Score7.0
TAR Score is a ranking system developed by TopAppliancesReviews.com. TAR score has no relationship or impact from any manufacturers or sales agent websites. Learn more
- BrandIECAP LLC
Last update on 2026-10-02 / Affiliate links / Images, Product Titles, and Product Highlights from Amazon Product Advertising API
FAQs
What is the best wood for a beginner making a knife handle?
Walnut, maple, and desert ironwood are three of the easiest and most reliable woods for beginners. They are dense enough to hold up against hard work, carve cleanly without splintering around pin holes, and take an oil finish smoothly. Avoid softwoods like pine or highly brittle exotic woods that split easily under light hand pressure.
Can I use standard yellow wood glue instead of two-part epoxy?
No, standard wood glue requires two porous wooden surfaces to bond properly and will not stick to bare steel. Moisture and chopping vibration will quickly snap a wood glue joint off a metal tang. A slow-curing two-part epoxy is required to bond non-porous metal to wood while sealing the interior joint against moisture.
How do I stop the wood from splitting while drilling the pin holes?
Always clamp your wood scale tightly against a flat sacrificial backing board made of scrap plywood or hardwood while drilling. Let the drill bit turn at moderate speed and press down gently without forcing it through the slab. The backing board supports the rear wood fibers so the exiting drill bit cuts cleanly instead of blowing out the grain.
How do I fix a tiny gap between the wood scale and the steel tang?
If a hairline gap appears after your epoxy cures, mix a small drop of slow-cure epoxy and blend it with fine wood dust saved from sanding your handle scales. Pack this tinted paste into the gap using a wooden toothpick and let it cure fully before sanding it flush. To avoid gaps entirely, always flatten your scales against sandpaper laid on a flat surface before assembly.


Top Rated Best Quality Range Hoods: 2026 Expert Picks

The 12 Best Small Solar Generators 2026

10 Best Quality Semi Automatic Washing Machine of 2026 For Leak-Free Laundry

11 Best Small Washer Machine of 2026 For Everyday Laundry

12 Best Vibration Pads For Washing Machine of 2026 To Stop Walking and Shaking

11 Best Selling Front Load Washing Machine of 2026 For Quiet Odor-Free Laundry

11 Best Washing Machine For King Size Bedding of 2026 To Prevent Cycle Errors

10 Best Small Front Loader Washing Machine of 2026 For Tight Closets






