
How to Make a Pocket Knife with Basic Tools

Building a pocket knife takes four basic steps. First-time makers succeed by shaping the blade profile, drilling a straight center pivot hole, heat-treating the metal, and pinning the frame together. Starting with a simple friction folder avoids tricky mechanical locks entirely, using hand pressure against an extended metal tab to hold the blade open safely.
The exact build depends on the tools on your bench, the style you choose, and your starting materials. Hand files and an electric drill can get the job done, though a small drill press makes straight holes much easier. Starting with a flat bar of carbon steel gives you complete creative freedom, while an unassembled parts kit skips the heavy shaping. The steps below walk through the entire build so you can finish a sturdy knife that opens smoothly without blade wobble.
Friction Folder Versus Slipjoint: Picking Your First Build Style
Starting your first folding knife build comes down to how the blade stays open in your hand. Unlike a fixed blade with a full tang (one solid piece of blade steel extending all the way through the handle), any folding EDC (everyday carry pocket knife) relies on moving parts. Beginners usually look at two traditional patterns: the friction folder and the slipjoint.
A friction folder is the most straightforward pocket knife you can make at home. It has no springs, no lock bars, and only three primary moving parts: the blade, the handle, and the pivot (the center pin or screw the blade rotates around). The blade features an extended metal tab, called a tang, that sticks out when closed. As you swing the blade open, that tab rests flat against the handle spine. Your thumb or palm presses against it while you work, holding the blade open with your natural grip. Because there are no springs to balance, you eliminate the risk of accidental snap-closures while learning the basics.
A slipjoint (a folding knife held open by spring pressure rather than a lock) requires much higher precision. A flat spring bar pushes against flat resting spots on the blade tang. If the spring is too stiff, the blade will not open easily. If the spring is too weak or the tang angle is slightly rounded, the blade can fold unexpectedly during a cut and injure your fingers. A liner lock (the spring bar inside the handle that snaps behind the open blade to stop it from closing on your fingers) brings similar geometry headaches.
Building a friction folder first lets you master blade shaping, pivot alignment, and handle construction safely. Once you produce a smooth, wobble-free friction folder, you will have the basic drilling and filing skills needed for sprung mechanisms.
Workshop Checklist: Steel, Handle Materials, and Everyday Tools
Standard hand tools from any hardware store can cut, shape, and assemble a solid pocket knife if you choose the right materials.
Here is what to gather before making your first cut:
- Blade steel: Pick high-carbon or tool steel (such as 1084 or O1) in a 1/8-inch flat bar. Unlike stainless steel (rust-resistant, easy-to-clean metal that requires airtight foil wraps and special kilns), simple carbon steel hardens reliably with a basic hand torch. Many commercial blades use high-carbon steel because it sharpens easily and takes a fine working edge.
- Handle liners: Liners are the flat metal frame plates inside the handle that support the moving parts. Brass, nickel silver, or mild steel sheets between 0.04 and 0.06 inches thick work well.
- Handle scales: Scales are the outer handle pieces you grip. Dense hardwoods like walnut or synthetic micarta shape cleanly with hand files and hold up against moisture.
- Pins and washers: A 1/8-inch brass rod acts as the pivot and stop pin. Thin phosphor bronze or nylon washers sit between the blade and liners to prevent friction.
- Shaping and drilling tools: A hacksaw with bi-metal blades, flat hand files (bastard cut for shaping, smooth cut for bevels), a drill with 1/8-inch bits, and sandpaper (120 to 600 grit).
- Heat tools: A propane or MAPP gas torch, vegetable oil in a metal container, and a household oven.
Shaping the Blade Profile and Drilling the Pivot
Precision at this stage prevents blade wobble and uneven action. Follow these steps in order to keep your blade true:
- Trace your design onto cardstock first. Reason: Checking a paper cutout with a thumbtack lets you confirm that the blade tip stays covered inside the handle when closed.
- Drill the pivot hole before cutting the blade shape. Reason: A flat bar of steel rests square on your drill table, keeping the pivot hole straight so the blade does not tilt sideways.
- Rough-cut the blade profile with a hacksaw. Reason: Straight relief cuts let waste metal drop free quickly, saving wear on your hand files.
- File the outer profile down to your marker lines. Reason: Hand filing keeps the edges square so the blade tang seats firmly against the stop pin.
- File a sturdy 20-degree utility edge for pocket and hunting knives using a filing guide. Reason: A simple eye bolt and guide rod hold your file at a constant angle, preventing uneven bevels.
- Leave the cutting edge about the thickness of a dime before hardening. Reason: A razor-thin edge will warp or crack when exposed to extreme quenching heat.
- Hand-sand the flat sides of the blade to 400 grit. Reason: Soft annealed steel sands quickly now, but cleaning up deep file marks after hardening takes hours.
Hardening and Tempering the Blade Steel Safely
Hardening turns soft steel into a rigid tool that holds an edge, while tempering relieves brittleness so the blade does not snap.
Safety comes first when working with flames and hot oil. Wear heavy leather gloves, safety glasses, and cotton clothing. Keep a metal bucket of dry sand or a fire extinguisher within arm's reach, and work outdoors or in an open garage. If oil catches fire in your container, slide a flat metal lid over it to smother the flame; never throw water onto hot oil.
- Warm your canola oil to roughly 120 degrees Fahrenheit. Reason: Warm oil cools the steel quickly without thermal shock, preventing the blade from warping.
- Heat the blade evenly with your torch from tang to tip. Reason: Heating the thicker spine first prevents the thin point from overheating before the main body reaches critical heat.
- Touch a magnet to the glowing steel to verify temperature. Reason: Carbon steel loses all magnetic pull around 1,475 degrees Fahrenheit, signaling that it is ready to quench.
- Plunge the blade straight down into the warm oil for eight seconds. Reason: Slicing straight down cools both sides equally, while moving sideways pulls the hot steel into a curve.
- Scrape the blade with an old file to confirm hardness. Reason: The file should slide across the steel with a glassy hiss without biting into the metal.
- Temper the blade in an oven at 400 degrees Fahrenheit for two one-hour cycles. Reason: To temper means gently reheating hardened steel so it does not crack; this softens the brittle steel just enough to handle daily impacts.
Assembling the Liners, Backspacer, and Handle Scales
The liners must stay parallel so the blade has room to glide without rubbing. Follow these assembly steps:
- Clamp both liners together and drill all pin holes at once. Reason: Drilling the metal frame plates together guarantees that the pivot and stop pins line up across both sides of the handle.
- Cut and fit a solid backspacer along the handle spine. Reason: The backspacer holds the liners apart at an exact, even gap so the frame does not pinch the blade.
- Epoxy the wooden scales onto the liners with guide pins in place. Reason: Pins prevent the scales from shifting on wet glue, keeping all pre-drilled holes centered.
- Shape the front curved face of the handle scales before final assembly. Reason: You cannot sand the front handle edges once the blade is pinned without scratching the blade finish.
- Slip thin washers onto the pivot pin on both sides of the blade. Reason: Washers prevent metal-on-metal friction between the blade and liners for a smooth swing.
Tuning the Pivot Pin and Fixing Blade Wobble
The pivot pin is the heart of any folding knife. If the pin is too loose, the blade wobbles sideways. If the pin is too tight, you cannot open the knife without prying.
To set a solid mechanical hold, use a peened brass pin. Slide your 1/8-inch brass rod through the scales, liners, washers, and blade pivot. Trim the pin so only 1/16 of an inch sticks out past the handle on each side. Rest one end of the pin firmly against an anvil or the flat back of a bench vise.
Using the round face of a small ball-peen hammer, deliver light, rapid taps around the rim of the pin. Strike from the wrist, not the elbow. These gentle taps mushroom the brass outward like a rivet head, pulling the handle layers snug. Flip the knife and tap the opposite side equally.
Check the action after every few taps. The blade should swing open smoothly under thumb pressure but stay put wherever you release it, with zero side-to-side wiggle. If it binds, slide a thin razor blade between the liner and blade to ease the pressure.
If the blade rubs against one liner, check the pivot hole. A tilted hole forces the blade to swing crooked. You can fix minor rubbing by thinning the washer on that side with sandpaper.
What to Look for in Knifemaking Reference Guides
If you want to move beyond simple friction folders into sprung pocket knives, a specialized knifemaking guidebook is a helpful workshop companion. Building folders with internal springs requires exact geometry that is difficult to guess by eye.
Look for guides that include full-scale printable templates. An exact 1-to-1 blueprint lets you glue paper directly onto steel to center punch your holes accurately. The guide should also list exact heat-treating temperatures for common beginner steels.
Make sure the reference covers common troubleshooting, such as misaligned stop pins, weak spring tension, and blade centring issues. Focus on resources that use hand files and bench tools rather than industrial milling machines.

- TAR Score10.0
TAR Score is a ranking system developed by TopAppliancesReviews.com. TAR score has no relationship or impact from any manufacturers or sales agent websites. Learn more
- BrandN/A
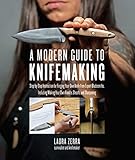
- TAR Score9.4
TAR Score is a ranking system developed by TopAppliancesReviews.com. TAR score has no relationship or impact from any manufacturers or sales agent websites. Learn more
- BrandQuarry Books

- TAR Score9.4
TAR Score is a ranking system developed by TopAppliancesReviews.com. TAR score has no relationship or impact from any manufacturers or sales agent websites. Learn more
- BrandFox Chapel Publishing
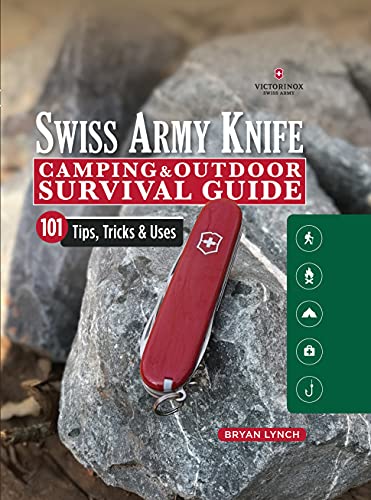
- TAR Score9.2
TAR Score is a ranking system developed by TopAppliancesReviews.com. TAR score has no relationship or impact from any manufacturers or sales agent websites. Learn more
- BrandFox Chapel Publishing

- TAR Score9.0
TAR Score is a ranking system developed by TopAppliancesReviews.com. TAR score has no relationship or impact from any manufacturers or sales agent websites. Learn more
- BrandStackpole Books

- TAR Score9.0
TAR Score is a ranking system developed by TopAppliancesReviews.com. TAR score has no relationship or impact from any manufacturers or sales agent websites. Learn more
- BrandFox Chapel Publishing

- TAR Score8.8
TAR Score is a ranking system developed by TopAppliancesReviews.com. TAR score has no relationship or impact from any manufacturers or sales agent websites. Learn more
- BrandKrause Publications

- TAR Score8.8
TAR Score is a ranking system developed by TopAppliancesReviews.com. TAR score has no relationship or impact from any manufacturers or sales agent websites. Learn more
- BrandBrand: Courage Books

- TAR Score8.4
TAR Score is a ranking system developed by TopAppliancesReviews.com. TAR score has no relationship or impact from any manufacturers or sales agent websites. Learn more
- BrandCREATESPACE
Last update on 2026-10-02 / Affiliate links / Images, Product Titles, and Product Highlights from Amazon Product Advertising API
FAQs
Can I make a pocket knife without a drill press?
Yes, you can drill your parts with a handheld drill if you use a clamp-on drill guide or portable stand. The critical rule is that your pivot hole must go through the steel at a true 90-degree angle. If your drill tilts, the blade will lean to one side and scrape against the handle liners.
What is the easiest steel for a beginner knifemaker to heat-treat at home?
Simple high-carbon steels like 1084 or O1 are the easiest to harden at home. Unlike the high-alloy steel found in specialized blades, like Japanese chef knives, 1084 reaches hardening heat quickly with an ordinary hand torch and quenches safely in warm cooking oil.
How do I sharpen the finished blade to a clean cutting edge?
Sharpen the blade on whetstones at a 20-degree utility angle until you feel a burr. A burr is the microscopic wire edge or curved sliver of metal that forms on the opposite side during sharpening. Once the burr appears along the entire edge, switch to finer stones and a leather strop to polish it away.
Is it safe to temper a knife blade in a regular kitchen oven?
Yes, tempering at 400 degrees Fahrenheit is safe in a kitchen oven if you scrub all quench oil off the blade with soap and water first. Burning oil creates smoke and strong odors inside the home. Place an oven thermometer on the center rack to verify the temperature before putting the blade inside.


Top Rated Best Quality Range Hoods: 2026 Expert Picks

The 12 Best Small Solar Generators 2026

10 Best Quality Semi Automatic Washing Machine of 2026 For Leak-Free Laundry

11 Best Small Washer Machine of 2026 For Everyday Laundry

12 Best Vibration Pads For Washing Machine of 2026 To Stop Walking and Shaking

11 Best Selling Front Load Washing Machine of 2026 For Quiet Odor-Free Laundry

11 Best Washing Machine For King Size Bedding of 2026 To Prevent Cycle Errors

10 Best Small Front Loader Washing Machine of 2026 For Tight Closets






