
How to Make a Wooden Magnetic Knife Holder

Hide strong magnets inside a hardwood board. This simple project clears counter space and protects knife edges from dulling in drawers. To make one, drill shallow flat-bottom holes into the back of a lumber strip, leaving only a thin face, and lock rare-earth neodymium magnets inside with waterproof epoxy. When done right, the wood front grips steel blades cleanly without exposing any bare metal.
Three details make or break the project. The front wood layer cannot be thicker than an eighth of an inch, or the pull drops off quickly. Weak craft magnets will let heavy chef knives slide right to the floor, so industrial-grade discs are a necessity. You also want to hang the strip with solid wall anchors or studs rather than tape so heavy blades never pull it down. Follow these exact steps to build a safe, handsome holder for your kitchen.
Gather dense hardwood, strong neodymium magnets, and epoxy
Building your own magnetic knife holder lets you display your kitchen knives cleanly while protecting their sharp cutting edges. But using weak hardware or the wrong wood will cause knives to slip or fall. Gathering the right materials beforehand prevents dangerous accidents and ruined blades.
Start with a dense hardwood board. Black walnut, hard maple, cherry, and white oak are reliable choices. Hardwoods stay flat across humidity shifts in a kitchen and resist denting when heavy knife spines touch them. Avoid softwoods like pine, cedar, or fir. Softwoods dent easily, absorb grease, and can flex over time, which loosens internal glue joints. A board measuring roughly 12 to 18 inches long, 2.5 to 3.5 inches wide, and 3/4 inch thick holds five to eight kitchen knives easily.
Select neodymium magnets (super-strong rare-earth magnets) rather than standard ceramic craft magnets. Black craft magnets lack the strength to reach through solid wood. To hold a heavy German chef knife or cleaver securely, choose neodymium disc magnets measuring 3/4 inch to 1 inch across and 1/8 to 1/4 inch thick. Plan for two horizontal rows across your board. Two rows create upper and lower contact zones that stop tall blades from swinging or tilting.
Use two-part epoxy (a two-part waterproof glue made of resin and hardener). Yellow wood glue will not bond to smooth metal magnets, and hot glue snaps loose when kitchen temperatures fluctuate. Two-part epoxy creates a permanent bond between metal and wood fibers.
For tools, you need a measuring tape, pencil, painter's tape, clamps, and safety glasses. For boring, use a drill press or hand drill with a Forstner bit (a flat-bottom wood drill bit). Never use a twist bit or spade bit. Twist bits leave cone-shaped holes, and spade bits have long center points that punch through the front face. A Forstner bit cuts a flat pocket so the magnet sits flush against the thin face.
Leave an eighth of an inch of wood face
The thickness of the wood left on the front face determines whether your rack holds blades firmly or drops them onto the counter. Magnetic pull drops sharply as distance increases. If you leave more than 1/8 inch of wood on the front face, magnets cannot hold heavy knives safely. If you drill too deep and leave less than 1/16 inch, the wood can crack or bulge when knives slap against it.
Follow these steps to lay out and drill the magnet pockets:
- Draw two parallel lines lengthwise down the back face of your board. Place the top line 3/4 inch below the upper edge and the bottom line 3/4 inch above the lower edge. Two rows keep blades balanced and prevent handles from tipping sideways.
- Mark drilling centers along both lines, spacing them about 1 inch to 1.25 inches apart. Stagger the top and bottom holes so they alternate. This layout creates an unbroken magnetic field across the board and eliminates dead zones where a knife might slip.
- Measure the board thickness with a ruler and subtract 1/8 inch. For a 3/4-inch-thick board, your target hole depth is 5/8 inch.
- Set an exact depth stop. On a drill press, lock the depth collar. On a handheld drill, wrap blue painter's tape around the Forstner bit so the bottom edge of the tape marks your target depth. Stop drilling the second the tape touches the wood.
- Drill test holes in a scrap piece of the same hardwood first. Insert your magnets and test a heavy knife against the front face. The blade should grab firmly without sliding. If the hold feels weak, drill slightly deeper, but never leave less than 1/16 inch of wood.
- Drill the pockets into your board at moderate speed. Clear wood shavings frequently so the bit does not overheat or bind. Keep the drill perpendicular to the surface so pocket bottoms remain flat.
Check magnet polarity before gluing with two-part epoxy
Magnets have north and south poles. Polarity (the magnetic push or pull direction) determines whether magnets attract or repel each other. If you install adjacent magnets with conflicting polarity, their fields cancel each other out, creating dead spots. Repelling magnets can also push each other out of their pockets while the glue cures.
Follow these steps to glue your magnets securely:
- Keep your magnets stacked in a single column before opening the glue. Because magnets snap together with opposing poles touching, the entire stack shares one orientation. Draw a clear mark with a permanent marker across the top face of every magnet. When placing them into the holes, keep every marked face pointing the same direction.
- Dry-fit the magnets into the pockets without glue. Slide a steel blade across the front face to verify that the magnetic pull feels consistent across the entire board. If a magnet pushes against its neighbor, flip it over so the magnetic fields align.
- Mix your two-part epoxy on cardboard using equal parts resin and hardener. Stir with a wooden stick for sixty seconds until the glue is clear and completely blended. Mix small batches so the adhesive does not set before you seat the magnets.
- Place a small dab of epoxy into the bottom of each pocket. Drop each magnet into place with your marked side facing the proper direction. Press down with a wooden dowel to push out trapped air bubbles and seat the magnet flat.
- Cover the back of the board with wax paper, place a scrap board on top, and clamp it down lightly. This stops magnets from lifting or shifting while the epoxy cures. Allow the glue to cure fully for several hours according to package instructions.
Anchor the rack directly into studs or heavy wall anchors
A falling magnetic rack poses a severe safety risk. A loaded holder carrying heavy, sharp blades can slice feet, damage floors, and chip expensive edges if it pulls away from the wall. Kitchen blades, such as those found in German high-carbon steel knife block sets, add downward weight and leverage every time you pull a handle forward to release a knife.
Never rely on adhesive double-sided tape or foam strips to hang a magnetic knife rack. Cooking heat, humidity, and grease break down sticky adhesives over time. Pulling knives off the magnets also creates outward leverage that peels tape off drywall or tile.
Fasten the rack using one of these two reliable mechanical methods:
- Keyhole slots on the back. A keyhole slot (a hidden mounting slot on the back that slides over a screw head) keeps hardware invisible. Cut slots with a router and keyhole bit, or screw metal keyhole plates into shallow recesses on the back. Drive screws into the wall, leave the heads projecting 1/8 inch, and slide the rack down until it locks tight against the wall.
- Countersunk screws through the front. Drill two screw holes completely through the front face between magnet pockets. Countersink the holes so screw heads sit below the surface. Drive long screws into studs or drywall anchors. Hide the screw heads by gluing hardwood plugs into the holes and sanding them flush.
Before mounting, sand the board with 120-grit, 180-grit, and 220-grit sandpaper. Apply two coats of food-grade mineral oil to protect the wood from kitchen moisture. Let the oil soak in for twenty minutes, then wipe off the excess.
Mount the rack several inches above your countertop and away from doorways. Anchor at least one side into a wall stud. For hollow drywall, use heavy-duty toggle anchors rated for at least fifty pounds.
Buy a manufactured magnetic strip when you lack drilling tools
Building a custom rack gives you full creative freedom over your kitchen decor. You get to match your countertop woods, customize the length, and choose your favorite grain patterns. But getting it right requires specialized tools, precise drilling, and patience. Drilling just 1/32 inch too shallow leaves knives slipping, while drilling 1/32 inch too deep ruins the front face of your wood.
If you lack a workshop space or specialty bits, commercial magnetic knife holders offer a fast, reliable storage option. Factory-made strips feature pre-aligned neodymium magnets set at ideal depths, delivering consistent holding power for all your kitchen blades.
If you rent your home or have a tile backsplash where drilling is not allowed, countertop options provide safe alternatives. Units like magnetic knife block and knife set combos hold blades upright using weighted, slip-resistant bases without putting holes in your walls.
When choosing a manufactured wall strip, check three key features:
- Surface material: Hardwood protects delicate knife steel from scratches, while stainless steel provides maximum durability and easy cleaning.
- Mounting hardware: Choose bars that mount with solid screws rather than sticky tape.
- Length and clearance: Select a strip long enough to leave two inches of clearance between knife handles so blades do not bump into each other.

- TAR Score9.6
TAR Score is a ranking system developed by TopAppliancesReviews.com. TAR score has no relationship or impact from any manufacturers or sales agent websites. Learn more
- BrandModern Innovations
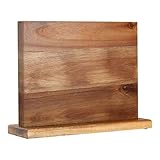
- TAR Score9.6
TAR Score is a ranking system developed by TopAppliancesReviews.com. TAR score has no relationship or impact from any manufacturers or sales agent websites. Learn more
- BrandAomiesen

- TAR Score9.6
TAR Score is a ranking system developed by TopAppliancesReviews.com. TAR score has no relationship or impact from any manufacturers or sales agent websites. Learn more
- BrandHamletoff

- TAR Score9.2
TAR Score is a ranking system developed by TopAppliancesReviews.com. TAR score has no relationship or impact from any manufacturers or sales agent websites. Learn more
- BrandHEREOF

- TAR Score9.2
TAR Score is a ranking system developed by TopAppliancesReviews.com. TAR score has no relationship or impact from any manufacturers or sales agent websites. Learn more
- BrandGORILLA GRIP

- TAR Score9.2
TAR Score is a ranking system developed by TopAppliancesReviews.com. TAR score has no relationship or impact from any manufacturers or sales agent websites. Learn more
- BrandHEREOF

- TAR Score9.2
TAR Score is a ranking system developed by TopAppliancesReviews.com. TAR score has no relationship or impact from any manufacturers or sales agent websites. Learn more
- BrandEnkrio

- TAR Score9.0
TAR Score is a ranking system developed by TopAppliancesReviews.com. TAR score has no relationship or impact from any manufacturers or sales agent websites. Learn more
- BrandHOSHANHO

- TAR Score9.0
TAR Score is a ranking system developed by TopAppliancesReviews.com. TAR score has no relationship or impact from any manufacturers or sales agent websites. Learn more
- BrandHEREOF
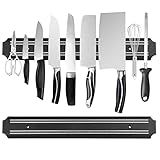
- TAR Score8.8
TAR Score is a ranking system developed by TopAppliancesReviews.com. TAR score has no relationship or impact from any manufacturers or sales agent websites. Learn more
- BrandPENXUA
Last update on 2026-10-02 / Affiliate links / Images, Product Titles, and Product Highlights from Amazon Product Advertising API


Top Rated Best Quality Range Hoods: 2026 Expert Picks

The 12 Best Small Solar Generators 2026

10 Best Quality Semi Automatic Washing Machine of 2026 For Leak-Free Laundry

11 Best Small Washer Machine of 2026 For Everyday Laundry

12 Best Vibration Pads For Washing Machine of 2026 To Stop Walking and Shaking

11 Best Selling Front Load Washing Machine of 2026 For Quiet Odor-Free Laundry

11 Best Washing Machine For King Size Bedding of 2026 To Prevent Cycle Errors

10 Best Small Front Loader Washing Machine of 2026 For Tight Closets






