
How to Make a Countertop Magnetic Knife Block

Building a custom magnetic knife stand comes down to boring hidden pockets into the back of a hardwood slab, gluing powerful rare-earth magnets inside, and mounting the slab to a heavy base. Success hinges on leaving just enough wood on the front so the magnetic pull grips heavy blades firmly without punching through the grain. A flat-bottom drill bit keeps the front face completely seamless.
Getting that hold right depends on three main details. Weak craft magnets will not work through timber, so high-strength neodymium magnets are mandatory. Wood thickness between the hole and the front surface must stay between one-sixteenth and one-eighth of an inch, or heavy knives will slide down. The stand also needs a wide, angled base so lifting a knife never tips the block over. Here is the step-by-step process to build a stable stand that keeps kitchen knives secure and within easy reach.
Dense Hardwood And Strong Rare-Earth Magnets Ensure A Safe Build
Building a reliable countertop knife block starts with selecting materials that can handle the weight of sharp blades and the pulling force of strong magnets. A flimsy piece of soft pine will dent quickly under steel bolsters, and weak magnets will let your knives slide straight down onto the counter. Choosing the right timber and magnetic hardware keeps your blades secure and your kitchen safe.
Dense American hardwoods are the best choice for this build. Walnut, hard maple, cherry, ash, and white oak offer the tight grain structure needed to resist knife tip dings and moisture shifts. A board measuring roughly 3/4 inch to 1 inch thick, 10 to 12 inches tall, and 8 to 14 inches wide easily holds five to eight kitchen knives. Softwoods like cedar or fir are too soft and can split under magnetic tension.
Standard black refrigerator magnets will not work for this project. You must use neodymium magnets (super-strong rare-earth magnets), preferably rated N42 or N52. These magnets produce the intense magnetic flux required to reach through solid wood. Round disc magnets that measure 1 inch in diameter and 1/8 inch or 1/4 inch thick provide plenty of holding power for everyday kitchen cutlery.
Your primary drilling tool must be a Forstner bit (a flat-bottom drill bit that cuts a clean, level recess without a long tip punching through the front). Standard twist bits or spade bits have sharp center spurs that puncture the face before the hole reaches full width. You also need two-part epoxy (a two-tube adhesive made of resin and hardener that sets rock-hard) to lock the metal magnets permanently into the wood grain. Standard wood glue will not bond to metal.
Bore Flat-Bottom Holes Leaving A Thin Wooden Face
The most critical part of this build is getting the depth of your magnet pockets exactly right. You must bore blind holes (holes that stop before breaking through the front of the board) from the back face, leaving a very thin wooden wall on the front. That front wall needs to be between 1/16 inch and 1/8 inch thick.
Magnetic attraction drops off sharply as distance increases. If you leave 3/16 inch or 1/4 inch of solid wood, heavy blades like German high-carbon steel knife sets will slide down or tumble off when bumped. That creates an active cutting hazard on your countertop. If you drill too deep and leave less than 1/16 inch, the wood can crack, blister, or punch through when you press the magnets into place.
Knives also need two distinct points of magnetic contact so they do not spin sideways. A kitchen knife has a heavy handle. If you mount only one magnet per knife, the blade balances on that single point like a compass needle. The heavy handle swings down, twisting the sharp edge toward your fingers.
To stop this spinning action, drill two parallel horizontal rows of pockets across the back of the slab. Place the upper row about 2 inches below the top edge of the board to grip the spine of the knife. Space the second row roughly 3 to 4 inches below the first row to catch the lower blade near the heel.
Use a drill press with a mechanical depth stop rather than a handheld drill. Measure your board thickness with calipers, subtract your magnet thickness, and set the stop to leave a 3/32-inch front wall. Drill a sample cut into a piece of scrap wood of the same thickness first. Inspect the scrap hole with calipers to verify your depth before touching your finished board.
Set Magnet Poles Correctly And Secure Them With Epoxy
Neodymium magnets have north and south poles, and paying attention to their direction is essential. If you insert magnets into adjacent pockets with opposing poles facing forward, the magnetic fields will clash. One spot might grab a knife while the pocket next to it actively pushes the blade away.
Follow these steps to set and glue your magnets safely:
- Check your magnet polarity before opening the glue. Lay out your magnets and touch them with a metal ruler. Mark the back side of every magnet with a permanent marker so you know which face points forward into the wood. Every single magnet must face the exact same direction.
- Mix a small batch of two-part epoxy on a scrap piece of cardboard using a wooden craft stick. Stir the resin and hardener together for about two minutes until the mixture looks completely uniform.
- Apply a thin layer of epoxy into the bottom and inner walls of the flat-bottom hole. Use enough glue to coat the surfaces without overflowing onto your worktable.
- Press the magnet firmly into the pocket using a clean wooden dowel until it rests flat against the bottom. Stacking two magnets inside each pocket can double the magnetic pull if your board is thick enough.
- Fill the remaining pocket recess with a dab of epoxy, or tap a thin wooden plug over the back to seal the hole flush with the board.
- Let the epoxy cure undisturbed for a full 24 hours. Keep kitchen knives and steel tools far away from the drying slab during this period. The strong magnetic pull can suck loose magnets right out of wet epoxy before it hardens.
A Weighted Angled Base Keeps The Stand From Tipping
Countertop stability is just as important as magnetic strength. When you reach for a chef knife with a full tang (one solid piece of blade steel extending all the way through the handle), the magnets hold onto the steel firmly. If your block stands completely vertical on a small, lightweight base, pulling the knife forward can tip the entire block onto your counter.
To eliminate tipping, mount the upright wooden block to the base at a backward tilt of 10 to 15 degrees. This backward slant uses gravity to pull the blades naturally against the wood face. It also shifts the center of mass toward the middle of the base, preventing the block from pitching forward when you lift a heavy knife.
The base footprint needs to be wide and sturdy. Cut your base board so it extends at least 4 to 5 inches forward and backward from the upright slab. If the base feels too light in your hands, bore shallow cavities into the underside of the base and glue in heavy steel washers, brass bars, or lead weights. A finished block weighing between 4 and 7 pounds provides solid resistance against daily knife pulls.
Attach soft rubber or silicone feet to the four bottom corners of the base. Kitchen countertops frequently collect water, oil splatters, or flour during meal prep. Rubber feet keep the stand from sliding across slick quartz or granite countertops while lifting the wood off wet surfaces to prevent water staining.
Sand Smooth And Seal The Board With Kitchen-Safe Oil
Proper sanding and sealing protect both your cutlery and the wooden block. Fine kitchen blades made of high-carbon steel (harder metal that stays sharp longer but requires dry wiping and light oiling to prevent rust spots) or stainless steel (rust-resistant, easy-to-clean metal) can pick up fine scuffs if the wood surface has rough tool marks.
Work through your sandpaper grits methodically. Start with 120-grit paper to remove any milling marks or glue residue, switch to 180-grit to smooth the grain, and finish with 220-grit paper. Wipe away the fine dust with a dry cloth between each grit change until the entire surface feels like smooth satin.
Because this stand sits next to food prep zones and holds blades that cut daily meals, avoid chemical varnishes, polyurethane, or toxic lacquers. Apply food-grade mineral oil (kitchen-safe wood oil) or a blend of mineral oil and natural beeswax. These finishes soak deep into the grain to repel moisture without releasing chemical fumes near your food.
Pour a generous coat of food-grade mineral oil across the face and edges of the wood. Spread it evenly with a lint-free cloth and let it soak into the pores for 20 minutes. Wipe off any excess oil with a clean rag. Apply a second coat after a few hours to ensure deep, even protection.
Keep your knife block in top condition by wiping it down with a damp cloth whenever food splatters hit the face. Never soak the block in water. Always dry your knives completely before sticking them onto the magnetic face so trapped water cannot rust the steel or darken the wood.
Choose Factory Blocks With Heavy Bases If Woodworking Is Impractical
Building your own magnetic stand yields a custom piece of kitchen furniture, but it requires precise boring and specialized woodworking bits. If you lack a drill press, Forstner bits, or the time needed to dial in exact pocket depths, a factory-made magnetic knife block provides a safe and ready solution.
When selecting a pre-built countertop stand, look for models constructed from dense hardwoods like acacia, ash, or bamboo that protect blade edges from dulling. Make sure the unit has a substantial weight, typically between 3 and 7 pounds, along with a broad, weighted base and rubber non-slip pads to stop it from tipping when you pull a blade free.
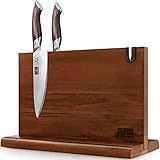
You should also check that the stand features continuous internal magnetic strips rather than weak single spots, ensuring blades of different lengths hang straight without sliding. For home cooks who want both matched cutlery and safe storage ready out of the box, magnetic knife block and knife set combos offer balanced stands engineered to hold their specific blades securely.

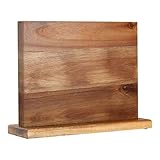
Pailexin Magnetic Knife Block Without Knives—Black Stainless Steel Double-Sided Magnetic
View on Amazon- TAR Score9.8
TAR Score is a ranking system developed by TopAppliancesReviews.com. TAR score has no relationship or impact from any manufacturers or sales agent websites. Learn more
- BrandPailexin
- TAR Score9.6
TAR Score is a ranking system developed by TopAppliancesReviews.com. TAR score has no relationship or impact from any manufacturers or sales agent websites. Learn more
- BrandAomiesen

- TAR Score9.4
TAR Score is a ranking system developed by TopAppliancesReviews.com. TAR score has no relationship or impact from any manufacturers or sales agent websites. Learn more
- BrandConinx

- TAR Score9.2
TAR Score is a ranking system developed by TopAppliancesReviews.com. TAR score has no relationship or impact from any manufacturers or sales agent websites. Learn more
- BrandDmore
- TAR Score9.2
TAR Score is a ranking system developed by TopAppliancesReviews.com. TAR score has no relationship or impact from any manufacturers or sales agent websites. Learn more
- BrandHOSHANHO

- TAR Score9.2
TAR Score is a ranking system developed by TopAppliancesReviews.com. TAR score has no relationship or impact from any manufacturers or sales agent websites. Learn more
- BrandHEREOF

- TAR Score9.2
TAR Score is a ranking system developed by TopAppliancesReviews.com. TAR score has no relationship or impact from any manufacturers or sales agent websites. Learn more
- BrandENOKING

- TAR Score9.0
TAR Score is a ranking system developed by TopAppliancesReviews.com. TAR score has no relationship or impact from any manufacturers or sales agent websites. Learn more
- BrandHOMIQUEEN

- TAR Score8.8
TAR Score is a ranking system developed by TopAppliancesReviews.com. TAR score has no relationship or impact from any manufacturers or sales agent websites. Learn more
- BrandHEREOF
Last update on 2026-10-02 / Affiliate links / Images, Product Titles, and Product Highlights from Amazon Product Advertising API


Top Rated Best Quality Range Hoods: 2026 Expert Picks

The 12 Best Small Solar Generators 2026

10 Best Quality Semi Automatic Washing Machine of 2026 For Leak-Free Laundry

11 Best Small Washer Machine of 2026 For Everyday Laundry

12 Best Vibration Pads For Washing Machine of 2026 To Stop Walking and Shaking

11 Best Selling Front Load Washing Machine of 2026 For Quiet Odor-Free Laundry

11 Best Washing Machine For King Size Bedding of 2026 To Prevent Cycle Errors

10 Best Small Front Loader Washing Machine of 2026 For Tight Closets






