
How to Make a Knife Sheath Out of Household Items

Packing tape screeches against a moving box, and a sharp chef knife sits bare on the kitchen counter with nowhere safe to go. The quickest fix is to fold a piece of clean cardboard or thick plastic over the blade and bind it tightly with duct tape. A simple wrapped sleeve covers the sharp edge instantly, stopping nasty accidents when reaching into a tote or drawer.
The right approach depends on the materials in the recycling bin and where the blade is headed. A flat cereal box works well enough for quiet drawer storage, but heavy shipping cardboard or an empty milk jug gives far better puncture resistance inside a packed duffel. Blade thickness also matters, because a wide outdoor knife needs extra slack along the spine (the dull top edge) so the seams do not burst. Here is how to build a cut-proof cover in minutes using everyday supplies.
Making a Cardboard and Duct Tape Blade Cover in Five Minutes
Cardboard is the most accessible material in any house for crafting a temporary blade cover. You can find suitable scraps in your pantry or recycling bin right now. A clean shipping box made from corrugated cardboard provides the best impact cushion for heavy kitchen knives, while the thinner chipboard from a cereal box or cracker box folds cleanly around smaller paring blades. The goal is to build a snug sleeve that covers the sharp cutting edge and the pointed tip so nobody gets cut when reaching into a drawer or packing a camping tote.
To build this cover, grab your knife, a piece of clean cardboard, a roll of duct tape or heavy packing tape, a pencil, and a pair of sturdy household scissors.
- Measure the cardboard blank: Lay your clean, dry knife flat on the cardboard. The spine is the dull top edge of the blade. Position that dull top edge along a straight section of the cardboard. Trace an outline around the blade with your pencil, leaving at least a half-inch of extra margin past the pointed tip and below the sharp cutting edge. Make sure the cardboard extends at least one inch past the heel, which is the back corner of the blade where the steel meets the handle.
- Plan the spine fold: Cut out a piece of cardboard that is twice as wide as your traced blade pattern. Fold the cardboard over the dull top spine of your knife rather than the cutting edge. Placing the dull top edge against the natural fold ensures that pressing down on the knife will never slice through the crease. The sharp cutting edge should point toward the open side of the cardboard where you will apply tape.
- Form the inner pocket: Wrap the cardboard tightly around both flat sides of the blade with your fingers. Crease the fold firmly along the dull top edge so the cardboard hugs the metal closely. Slide the knife out before you apply any tape so you do not accidentally tape your blade inside the sleeve.
- Seal the cutting edge seam: Lay a strip of duct tape along the open bottom edge of the cardboard sleeve where the sharp blade edge sits. Position the tape so half its width sticks to one side of the cardboard, then fold the remaining half tightly over to the other side. Press the tape down hard with your thumb to push out any air bubbles and create a solid bond.
- Cushion the pointed tip: Knife points can pierce through a single layer of cardboard if the knife shifts inside a bag. Fold the bottom half-inch of the cardboard sleeve upward against itself, or wrap three overlapping layers of duct tape across the tip. This creates a thick, puncture-proof barrier that stops the point from poking through.
- Establish snug retention: Retention is the grip that stops the knife from slipping out of the cover on its own. Pinch the cardboard opening near the top where the blade collar sits. Wrap two tight passes of duct tape around that opening. Slide the knife back into the cover. It should slide in smoothly and hold in place through light friction without wobbling loose.
This quick cardboard sleeve works well for moving day, temporary drawer storage, or protecting your fingers while packing gear for a weekend trip. Because cardboard is soft, it keeps the blade edge protected from clattering against metal spoons, spatulas, and other cutlery.
Building a Washable Plastic Sleeve from an Empty Milk Jug
Cardboard works well in dry conditions, but it falls apart if it gets wet. If you need a blade cover for outdoor cooking, fishing, camping, or a damp kitchen environment, an empty plastic milk jug or heavy detergent bottle is a much better choice. The smooth high-density plastic is naturally cut-resistant, lightweight, and waterproof. It will not absorb water, grease, or food residue, making it far more hygienic than paper products.
Before you begin, wash the plastic jug thoroughly with warm soapy water to remove all milk or soap residue, then dry it completely with a clean towel.
- Cut out a flat plastic panel: Use your scissors to cut away the top handle, the threaded spout, and the bottom base of the jug. Cut down the corner seams to harvest the large, flat rectangular side panels. A standard one-gallon milk jug provides two large flat panels that easily accommodate an eight-inch chef knife or a wide santoku blade.
- Score the center fold line: Plastic from a milk jug tends to spring back when you fold it. To create a crisp, permanent crease, place a ruler down the center of your plastic panel. Run the dull edge of a butter knife or the rounded corner of your scissors along the ruler with firm, steady pressure. This indents the plastic without slicing through it. Once scored, the plastic folds in half cleanly without buckling or snapping.
- Fit the plastic over the blade: Insert the knife into the folded plastic so the dull top edge rests inside the scored crease. Trace the shape of the blade onto the plastic with a permanent marker, leaving a generous three-quarter-inch border around the sharp edge and the point. Cut along your marker line with scissors.
- Tape the perimeter securely: Remove the knife from the sleeve. Run strips of duct tape or heavy gorilla tape along the open edge opposite the spine fold. Press the tape firmly against both plastic faces. For extra strength, run a second layer of tape perpendicular across the bottom to secure the tip pocket. The plastic shields the tape from the knife edge, while the tape keeps the plastic folded tight.
- Add an optional retention tab: Plastic has a slick surface, so knives can slide out more easily than they do from cardboard. To prevent this, cut a small notch on the top corner of the plastic opening near the finger guard. You can loop a common rubber band through this notch and stretch it over the back of the knife handle. This creates an easy, flexible lock that keeps the blade securely seated inside the sleeve during travel.
A plastic jug cover lasts significantly longer than a cardboard sleeve. If it gets dirty around a campfire or on a cutting board, you can simply wipe down the exterior with a damp cloth and continue using it.
Fit Checks and Costly Household Mistakes to Avoid
A homemade blade cover is only helpful if it stays attached to the knife and stops the sharp edge from cutting through. Taking two minutes to inspect your work prevents ruined blades and accidental trips to the medicine cabinet.
Run through this quick safety checklist before putting your covered knife into a drawer or backpack:
- Tip puncture check: Rest the covered knife vertically on a cutting board with the point facing down. Push down gently on the handle using light hand pressure. The tip must remain fully contained inside the tape and cardboard without poking through the bottom.
- Retention check: Hold the covered knife horizontally six inches above a cutting board or folded towel. Tilt the tip downward at a forty-five-degree angle. The knife should remain firmly seated inside the cover rather than sliding out under its own weight.
- Adhesive clearance check: Shine a flashlight down the open mouth of your sleeve. The inside walls must show only clean cardboard or smooth plastic. The cutting edge should never press directly against exposed tape glue.
- Dryness check: Inspect the knife blade before inserting it into the cover. The steel must be completely dry, especially if you are using cardboard, to prevent trapped moisture from ruining the metal.
While making a homemade sheath is straightforward, several common household shortcuts can cause serious problems for your blade and your fingers. The biggest mistake is using metal office staples to close the edges of a cardboard sleeve. Metal staples are harder than many people realize. When you slide a knife in and out of a stapled sleeve, the steel staples will scrape against the polished sides of the blade, leaving deep, permanent scratches. Worse, if your cutting edge bumps directly into a steel staple, it can chip the fine edge bevel, turning a sharp knife dull in a single second.
Another frequent issue is letting duct tape glue contact the cutting edge. When sticky tape adhesive touches the edge inside the sleeve, it leaves a gummy, sticky film across the blade. That residue collects dust, dirt, and food particles. Cutting food with a gummed-up blade feels sluggish, and scraping tape residue off sharp steel requires soaking the blade in rubbing alcohol or cooking oil. Always fold your cardboard or plastic so the material itself forms an internal wall between the cutting edge and the tape seam.
Never rely on flimsy wraps like aluminum foil, plastic cling wrap, or paper towels. These materials offer zero puncture resistance. A sharp tip will poke through ten layers of aluminum foil the moment your hand brushes against it in a drawer. Foil also tears easily, giving you a false sense of security that often leads to deep finger cuts.
Finally, remember that cardboard acts like a sponge. If you slide a damp knife into a cardboard sleeve, the paper fibers pull the moisture in and hold it directly against the steel. Even rust-resistant stainless steel will develop cloudy water marks and surface stains if left in a damp paper sleeve for several days. Harder metals like high-carbon steel can develop heavy rust spots in less than twenty-four hours. Always hand-wash and dry your knives thoroughly before sheathing them.
When to Switch to Permanent Blade Guards or Knife Rolls
Homemade cardboard and plastic sleeves are lifesavers when you need an emergency fix. They cost nothing, take five minutes to assemble, and let you pack your kitchen tools safely for an unexpected move or an impromptu camping trip. But packaging materials are not meant to serve as permanent storage for everyday kitchen prep.
Over several weeks of regular kitchen use, cardboard sleeves absorb ambient kitchen humidity, cooking steam, and oils from your hands. The folded paper edges soften, the tape adhesive begins to slide and lose its grip, and the inside channel collects microscopic crumbs that cannot be cleaned out. If you have invested in quality cutlery, such as long-lasting German high-carbon steel knife block sets, storing those blades in worn cardboard increases the chance of edge damage and rust.
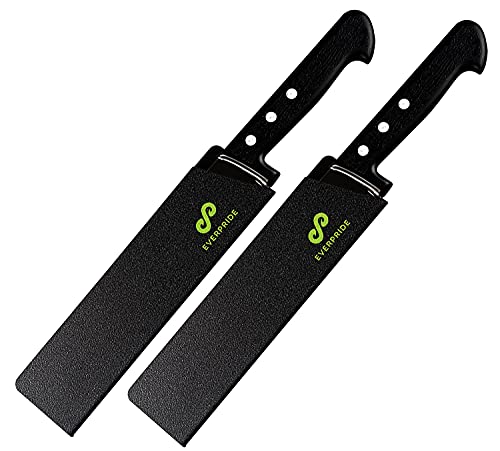
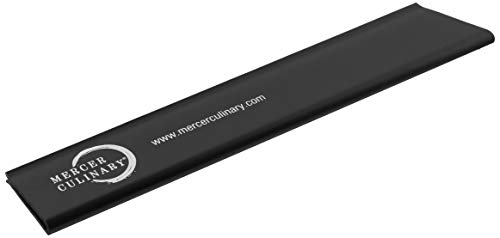
When you are ready for a permanent solution, dedicated edge guards provide reliable protection that lasts for years. Commercial blade guards are molded from rigid ABS plastic that cannot be pierced by sharp tips. Many feature a soft inner felt lining that grips the flat sides of the knife blade. This lining cushions the steel, stops the blade from sliding out accidentally, and prevents tiny scratches on the metal finish as you slide the knife into your kitchen drawer.
When shopping for commercial slip-on guards, check both the length and the height of your knives. A wide chef knife or santoku requires a guard with a wide mouth and a generous height, typically around two inches, to cover the heel completely. A slim paring or boning knife needs a narrow guard so the blade does not wobble inside. Look for guards with an angled opening at the collar, which lets the protector slide flush against handles with slanted bolsters.
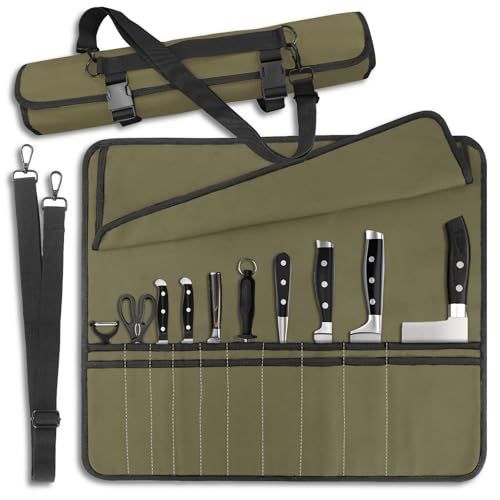
If you regularly travel with your cooking tools, cook at outdoor gatherings, or simply want to keep kitchen drawers uncluttered, a heavy canvas knife roll is another sensible upgrade. Knife rolls feature individual padded pockets that keep handles and edges separated so blades never knock together during transit. Alternatively, home cooks who want their bare blades safely out of drawers without using individual covers can use counter-friendly magnetic knife block combos, which hold knives securely by their flat faces while keeping the sharp edges suspended in open air.

- TAR Score9.4
TAR Score is a ranking system developed by TopAppliancesReviews.com. TAR score has no relationship or impact from any manufacturers or sales agent websites. Learn more
- BrandAsaya
- TAR Score9.2
TAR Score is a ranking system developed by TopAppliancesReviews.com. TAR score has no relationship or impact from any manufacturers or sales agent websites. Learn more
- BrandEVERPRIDE
- TAR Score9.2
TAR Score is a ranking system developed by TopAppliancesReviews.com. TAR score has no relationship or impact from any manufacturers or sales agent websites. Learn more
- BrandMercer Culinary

- TAR Score9.0
TAR Score is a ranking system developed by TopAppliancesReviews.com. TAR score has no relationship or impact from any manufacturers or sales agent websites. Learn more
- BrandDkOvn

- TAR Score9.0
TAR Score is a ranking system developed by TopAppliancesReviews.com. TAR score has no relationship or impact from any manufacturers or sales agent websites. Learn more
- BrandEVERPRIDE

- TAR Score9.0
TAR Score is a ranking system developed by TopAppliancesReviews.com. TAR score has no relationship or impact from any manufacturers or sales agent websites. Learn more
- BrandEVERPRIDE
- TAR Score9.0
TAR Score is a ranking system developed by TopAppliancesReviews.com. TAR score has no relationship or impact from any manufacturers or sales agent websites. Learn more
- BrandQIQU

- TAR Score8.4
TAR Score is a ranking system developed by TopAppliancesReviews.com. TAR score has no relationship or impact from any manufacturers or sales agent websites. Learn more
- BrandHERSENT

- TAR Score8.2
TAR Score is a ranking system developed by TopAppliancesReviews.com. TAR score has no relationship or impact from any manufacturers or sales agent websites. Learn more
- BrandA.I.FORCE
Last update on 2026-10-03 / Affiliate links / Images, Product Titles, and Product Highlights from Amazon Product Advertising API
Frequently Asked Questions
Can a sharp kitchen knife slice through a cardboard sheath?
A sharp knife can slice through cardboard if the cutting edge is forced directly against an open, unreinforced fold. To prevent this, always fold the cardboard over the dull spine of the blade and seal the cutting side with multiple overlapping layers of heavy duct tape. The tape distributes pressure and stops the edge from cutting through the paper barrier.
How do I clean sticky duct tape residue off my knife blade?
Apply a few drops of common cooking oil, mineral oil, or rubbing alcohol directly onto the sticky residue and let it sit for two minutes. Gently wipe the spot with a soft microfiber cloth or paper towel until the adhesive dissolves. Wash the blade immediately with warm soapy water and dry it thoroughly with a clean towel before returning it to storage.
Can I wash and reuse a homemade milk jug knife cover?
You can wipe the outside of a plastic jug cover with a damp soapy cloth, but washing the inside is difficult once tape has sealed the edges. Water and food juices can become trapped in the tiny crevices where the plastic meets the tape adhesive. If the inside of your homemade cover gets dirty or greasy, throw it away and take five minutes to cut a fresh panel from an empty milk jug.


Top Rated Best Quality Range Hoods: 2026 Expert Picks

The 12 Best Small Solar Generators 2026

10 Best Quality Semi Automatic Washing Machine of 2026 For Leak-Free Laundry

11 Best Small Washer Machine of 2026 For Everyday Laundry

12 Best Vibration Pads For Washing Machine of 2026 To Stop Walking and Shaking

11 Best Selling Front Load Washing Machine of 2026 For Quiet Odor-Free Laundry

11 Best Washing Machine For King Size Bedding of 2026 To Prevent Cycle Errors

10 Best Small Front Loader Washing Machine of 2026 For Tight Closets






