
How to Make a Knife Sharpening Angle Guide From Scrap

A dull chef knife skates off a slick tomato skin, and rubbing the blade across a sharpening stone only produces an uneven wobble. A homemade angle guide solves this in minutes, letting anyone lock in a consistent tilt using folded cardboard, a small wood scrap, or a stack of coins. Placing this simple spacer under the spine (the thick back edge of the blade) stops your hand from tilting so the edge sharpens evenly.
The right spacer height changes with each knife. A wide kitchen blade needs a different gap than a narrow pocket knife to hit the same angle, and fine slicing blades sit lower than thick outdoor tools. Some sharpeners prefer a loose wedge that rests on the stone, while others use a clip-on block that rides the steel. Here is how to find the exact height for your blade and build a sturdy guide from scraps.
Finding the Right Spine Height Without Doing Hard Math
Knife sharpening is not a mysterious art, but it does demand consistency. When you sharpen a blade, you are grinding two flat bevels (the angled cutting edges) on either side of the steel until they meet in a crisp line called the apex (the sharp point where the two sides meet). When a knife cuts poorly, that apex has rolled over, chipped, or rounded off like an old crayon. Restoring that keen edge on a whetstone (a flat sharpening stone) requires rubbing the blade against the abrasive surface at a fixed tilt. If your tilt changes with every stroke, you will never get a clean apex.
The biggest struggle for most people is hand wobble. When you hold a blade freehand, your wrists naturally rock back and forth as you push and pull across the stone. One pass sits at twelve degrees, the next lifts to twenty-two degrees, and the pass after that drops to ten degrees. This wobble buffs the cutting edge into a dull, rounded curve instead of a crisp wedge. An angle guide eliminates this guesswork by setting the exact distance between the stone and the spine (the thick back edge of the blade).
You do not need trigonometry formulas or precision workshop gauges to figure out this height. The elevation of the spine depends entirely on the width of your knife, which is the distance from the cutting edge straight across to the dull spine. As a simple rule of thumb, you can calculate your target height using basic fractions of that blade width.
For a steep 15-degree slicing edge per side, which is standard on delicate high-carbon Japanese chef knives, the spine should sit above the stone by roughly one-quarter of the blade width. If your chef knife measures two inches wide from edge to spine, divide that width by four. That gives you half an inch. Prop the back of that knife half an inch off the stone, and the bevel rests right at 15 degrees.
For a sturdy 20-degree utility edge, which you find on pocket knives, hunting blades, and standard German high-carbon steel kitchen knives, the spine should sit about one-third of the blade width off the stone. On that same two-inch wide kitchen knife, one-third of the width is roughly two-thirds of an inch (about 0.68 inches). On a narrower everyday carry pocket knife or a kitchen utility knife that is only one inch wide, a 20-degree bevel requires lifting the spine just one-third of an inch above the whetstone surface. Memorizing these two ratios lets you set the right angle for any knife in your kitchen drawer in seconds.
Three Easy Ways to Build a Homemade Angle Guide
You can build an accurate angle guide using scrap materials sitting around your home right now. None of these options require expensive shop tools or special skills, and you can finish any of them in less than ten minutes.
Method 1: The Stack of Coins
Coins provide the fastest way to check your angle because their thickness is standardized. A standard United States quarter is roughly 0.069 inches thick, which is just over one-sixteenth of an inch. A small stack of coins placed on the corner of your sharpening stone acts as an instant height stop.
- Look up your knife width to determine your target spine height. For a standard two-inch chef knife sharpened to 15 degrees, you need half an inch of height.
- Stack seven quarters together, which creates a solid pile just under half an inch tall. For an eight-inch chef knife at 20 degrees, stack ten quarters to reach roughly 0.7 inches.
- Wrap a small strip of blue painter tape around the coin stack so the coins stay together and do not slide across the wet stone.
- Place the coin stack on the top corner of your whetstone. Rest the spine of your knife on the coins while the cutting edge touches the stone. Pay attention to how that angle feels in your fingers, remove the coins, and begin sharpening.
Method 2: The Waterproof Cardboard Triangle
A folded wedge made from stiff cardstock or shipping cardboard gives you an angle gauge that rests directly against the blade. Cardboard is easy to cut to an exact angle, but water from the stone can soften it quickly if you leave it bare.
- Cut a small rectangle of stiff cardboard measuring about two inches by four inches. Make sure at least one corner is a clean, 90-degree square angle.
- Mark your dimensions along the edges that form that 90-degree corner. For a 15-degree wedge, measure 3.75 inches along the bottom edge and 1 inch up the side edge. For a 20-degree wedge, measure 2.75 inches along the bottom edge and 1 inch up the side edge.
- Draw a straight line connecting those two marks using a ruler. This diagonal line forms the hypotenuse of your triangle.
- Cut along the diagonal line with a utility knife or sharp scissors. The narrow point of that triangle is your sharpening angle.
- Wrap the entire cardboard triangle completely in clear packing tape. The tape seals out water from the stone, keeps the cardboard rigid, and prevents the guide from turning into soggy paper mush while you work.
Method 3: The Wooden Wedge Block
A small wooden block is the most durable homemade option. It will not crush under finger pressure, and it will last through dozens of sharpening sessions without losing its shape.
- Find a small piece of scrap wood, such as a cut-off from a 1x2 pine board or a small piece of hardwood trim. A block about two inches wide and three inches long is comfortable to hold.
- Mark your desired angle on the side of the wood block using a simple school protractor or by tracing your cardboard angle template.
- Clamp the scrap block securely to a sturdy table or workbench. Never hold small wooden pieces in your hand while sawing.
- Cut along your pencil line using a fine-tooth hand saw or a miter saw. Take your time to keep the cut perpendicular so the guide face remains flat and true across its entire width.
- Rub the cut face back and forth over a sheet of 120-grit sandpaper laid flat on your workbench to remove saw marks and high spots.
- Rub a few drops of mineral oil or melted candle wax into the wood. The oil keeps water from soaking into the grain, which prevents the wood from swelling or warping out of square.
Sharpening Technique and Common Pitfalls to Avoid
Once you have built your guide, you must decide how to use it during your sharpening routine. You can treat the guide as a touch block or as a riding wedge. With a touch block, you place the guide on the stone, rest the knife on it to memorize the hand position, set the block aside, and make five to ten passes. If your hands feel unsteady, bring the guide back to the blade to confirm your tilt before continuing.
With a riding wedge, you place the wooden or plastic-wrapped guide directly on the whetstone surface behind the blade. As you slide the knife across the stone, the spine rests against the wedge, and the guide slides along the stone with the blade. This approach guarantees an exact angle on every stroke, but it requires smooth coordination so the guide does not catch on the stone surface.
Follow this quick routine to keep your passes consistent from the heel of the blade to the tip:
- Splash your whetstone with water or apply your honing oil before placing the knife on the surface.
- Rest the knife spine on your guide to align the bevel (angled cutting edge) perfectly flat against the grit.
- Lock your wrist and elbow at that exact tilt before beginning your forward pushing stroke.
- Keep light, even pressure from two fingers placed on the blade face right above the cutting edge.
- Lift the knife handle slightly as you reach the curved tip so the bevel stays in full contact with the stone.
- Check the unsharpened side for a burr (the microscopic wire edge or curved sliver of metal that forms on the opposite side during sharpening).
The most common mistake beginners make is rolling the wrist when sweeping across the curved belly of the knife toward the tip. Because the blade curves upward, keeping the handle at the same height lifts the cutting edge off the stone. People often try to fix this by twisting their wrist, which rolls the bevel and blunts the apex. Instead, raise your elbow slightly while keeping your wrist stiff. That small lift follows the profile of the blade without changing the sharpening angle.
Another frequent issue is steel scratching. Stone slurry (the gray paste of water and loose abrasive grit) collects on the face of the stone during sharpening. If that abrasive paste gets trapped between a wooden guide block and the polished side of your blade, the wood will grind the grit into the metal and leave unsightly scratches. You can easily protect your knife by placing a strip of blue painter tape along the sides of the blade, leaving only the cutting bevel exposed. Wipe the stone and the guide with a damp towel every few minutes to clear away built-up metal filings.
When Commercial Angle Guides Are Worth Buying
Homemade cardboard wedges and wooden scrap blocks work wonderfully for learning the muscle memory of sharpening. They cost virtually nothing, and you can make replacement pieces in minutes. But homemade guides have physical limits, especially if you sharpen multiple kitchen knives every month or work with wet stones that quickly degrade soft materials.
When you want something that snaps into place instantly without measuring stacks of coins, commercial sharpening guides become a practical upgrade. Factory guides generally fall into two categories: clip-on spine guides and multi-angle bench blocks.
Clip-on guides slip directly over the spine of your knife. As you slide the blade across the stone, the guide rides with the knife. Quality clip-on models feature hard ceramic strips or smooth wear guards along the bottom edge. These ceramic guards glide effortlessly over abrasive stones without wearing down, shaving away metal, or gouging soft water stones. They hold the knife at a steady 15-degree angle, making them especially useful for cooks who want to maintain their kitchen cutlery without thinking about hand tilt.
Bench-top pyramid guides or rubber wedge blocks sit directly on the whetstone instead of clipping to the blade. These blocks typically feature several molded angle faces, commonly giving you 14, 17, 20, and 25-degree reference surfaces on a single compact tool. Because they are molded from dense rubber or solid plastic, they never absorb water, swell out of square, or slip around on a wet stone.
If you decide to buy a manufactured sharpening guide, check three details first:
First, verify the spine thickness the guide accommodates. Thin slicing knives need a tight clip that will not wobble, while thick hunting knives or outdoor cleavers require a wider slot. Second, confirm that the guide features ceramic glides or a smooth protective inner lining so it does not scratch the polished finish of your blades. Third, check the base material on bench wedges. A non-slip rubber base is essential so the guide stays put on a slick, wet whetstone while you check your knife position.
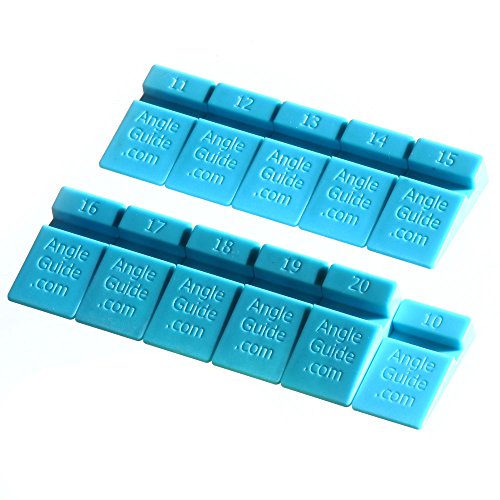
- TAR Score8.8
TAR Score is a ranking system developed by TopAppliancesReviews.com. TAR score has no relationship or impact from any manufacturers or sales agent websites. Learn more
- BrandWedgek

- TAR Score8.6
TAR Score is a ranking system developed by TopAppliancesReviews.com. TAR score has no relationship or impact from any manufacturers or sales agent websites. Learn more
- BrandSHARPAL

- TAR Score8.4
TAR Score is a ranking system developed by TopAppliancesReviews.com. TAR score has no relationship or impact from any manufacturers or sales agent websites. Learn more
- BrandKoja

- TAR Score8.2
TAR Score is a ranking system developed by TopAppliancesReviews.com. TAR score has no relationship or impact from any manufacturers or sales agent websites. Learn more
- BrandFeekoon

- TAR Score8.2
TAR Score is a ranking system developed by TopAppliancesReviews.com. TAR score has no relationship or impact from any manufacturers or sales agent websites. Learn more
- BrandLAVODA
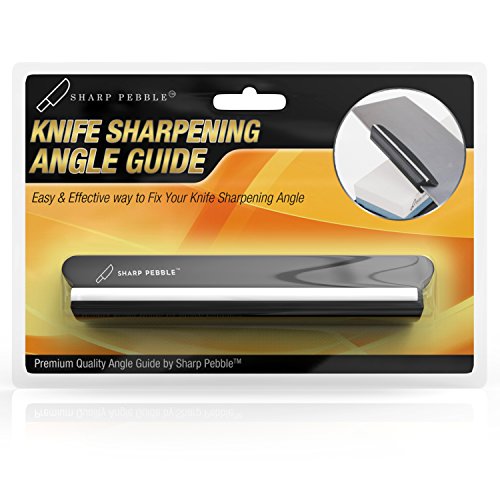
- TAR Score8.2
TAR Score is a ranking system developed by TopAppliancesReviews.com. TAR score has no relationship or impact from any manufacturers or sales agent websites. Learn more
- BrandSharp Pebble

- TAR Score8.0
TAR Score is a ranking system developed by TopAppliancesReviews.com. TAR score has no relationship or impact from any manufacturers or sales agent websites. Learn more
- BrandSHARPAL
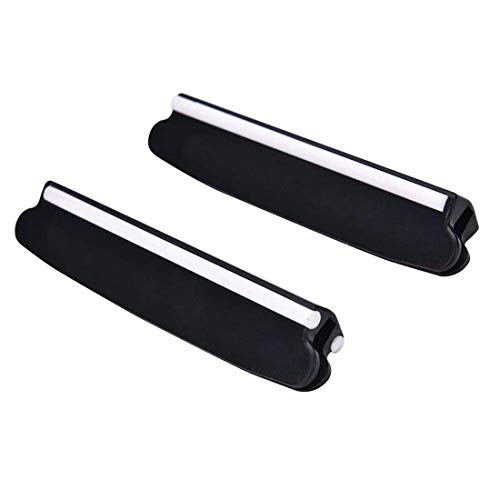
- TAR Score7.8
TAR Score is a ranking system developed by TopAppliancesReviews.com. TAR score has no relationship or impact from any manufacturers or sales agent websites. Learn more
- BrandRANDOM

- TAR Score6.4
TAR Score is a ranking system developed by TopAppliancesReviews.com. TAR score has no relationship or impact from any manufacturers or sales agent websites. Learn more
- BrandGeneric
Last update on 2026-10-03 / Affiliate links / Images, Product Titles, and Product Highlights from Amazon Product Advertising API
FAQs
Does the angle guide stay attached to the blade or sit on the stone?
It depends on the style of guide you make or buy. Clip-on guides attach directly to the spine of the knife and glide along the stone during the sharpening stroke. Wedge blocks and coin stacks sit directly on the stone surface, serving as stationary reference points where you check your blade angle before making each pass.
What is the easiest sharpening angle for everyday kitchen knives?
A 20-degree angle per side is the most forgiving choice for general kitchen prep and everyday utility knives. This angle provides a sharp, durable edge that resists chipping when cutting through tough vegetable skins, hard squash, or wooden cutting boards. Finer 15-degree edges slice softer foods with less resistance, but they require a steady hand and dull more quickly if used roughly.
How do I sharpen the curved tip of a knife using an angle guide?
When sharpening the curved tip, use your guide to confirm your starting tilt, then lock your wrist in that exact position. As the blade sweeps across the stone toward the tip, lift the knife handle slightly upward from your shoulder while keeping your wrist rigid. This lifting motion keeps the curved cutting bevel flat against the abrasive surface without changing the angle or rounding the point.


Top Rated Best Quality Range Hoods: 2026 Expert Picks

The 12 Best Small Solar Generators 2026

10 Best Quality Semi Automatic Washing Machine of 2026 For Leak-Free Laundry

11 Best Small Washer Machine of 2026 For Everyday Laundry

12 Best Vibration Pads For Washing Machine of 2026 To Stop Walking and Shaking

11 Best Selling Front Load Washing Machine of 2026 For Quiet Odor-Free Laundry

11 Best Washing Machine For King Size Bedding of 2026 To Prevent Cycle Errors

10 Best Small Front Loader Washing Machine of 2026 For Tight Closets






