
How to Make a Knife Sharpener from Scrap Wood

The simplest way to build a working knife sharpener is by gluing strips of wet-or-dry sandpaper to a flat scrap of hardwood. How rough that paper needs to be depends entirely on whether the blade is just dull or full of deep nicks. Gluing an old leather belt to the other side gives you a homemade strop (a leather polishing strip) to clean off tiny metal burrs and leave a razor finish.
Your results come down to the scrap materials you have on hand, the initial shape of the steel, and how steadily you can hold the blade against the wood. Wobbling your wrist can round the bevel (the slanted cutting edge) and dull the knife even more. Building the block correctly keeps the surface dead flat so every stroke counts. Here is how to assemble the tool and sharpen your knives safely at home.
Building a Multi-Grit Sandpaper Sharpening Block Step by Step
A scrap piece of wood and a few sheets of automotive sandpaper can put a razor edge on almost any blade in your home. Sandpaper uses silicon carbide or aluminum oxide abrasives, which are much harder than the steel in your kitchen or pocket knives. By mounting different grits on a four-sided block of hardwood, you create a four-stage sharpening bench that costs just a few dollars. Follow these steps to build your sharpening block accurately.
- Select a straight, flat piece of scrap hardwood. Choose a clean offcut of oak, maple, or dense pine measuring roughly 2 inches wide, 2 inches thick, and 8 to 10 inches long. Check the wood against a flat tabletop or metal ruler to make sure it has no twists, warps, or dips, because any hollow in the wood will round off your knife edge instead of keeping it straight.
- Sand the wooden block flat and smooth. Rub all four long faces of the wooden block against medium-grit sandpaper resting on a flat surface to eliminate splinters, rough mill marks, and high spots. Clean, flat surfaces ensure that the sandpaper sheets lie completely level without forming bumps that could catch and nick the blade.
- Cut your sandpaper into matching strips. Measure and cut your wet-or-dry sandpaper sheets to fit each face of the block using a utility knife and a straightedge. You want sheets that cover the entire working face without hanging over the corners or bunching up along the edges.
- Choose four progressive grit ratings. Select 400-grit for reshaping dull edges, 800-grit for smoothing rough scratches, 1500-grit for refining the cutting line, and 2000-grit or 2500-grit for fine polishing. Grit simply means the roughness rating of the abrasive particles on the paper, where smaller numbers cut away metal quickly and higher numbers polish the surface.
- Glue each paper strip to its own side of the block. Apply a light, even coat of aerosol spray adhesive or smooth strips of thin double-sided tape to the wood, then press the sandpaper firmly from one end to the other. Squeegee the paper flat using an old plastic gift card so you do not leave air bubbles or wrinkles beneath the abrasive sheet.
- Label each face with a permanent marker on the end grain. Write the exact grit number on the exposed end of the wooden block next to each face before you begin sharpening. Once wet sandpaper gets covered in fine, dark metal dust from your knives, telling 1500-grit from 2000-grit by eye becomes nearly impossible.
- Anchor the block to your work surface. Place a damp kitchen washcloth or a square of rubber shelf liner directly underneath the block before you lay a blade against it. A sharpener that slides across the counter while you push a knife forward is an easy way to slip, cut your fingers, or scratch the side of your blade.
To use your new sharpening block, place the blade flat on the coarsest paper, raise the spine slightly to match the slanted cutting edge, and slide the blade forward into the paper as if shaving a thin layer off the surface. Always push the sharp edge forward on sandpaper so the knife does not bite into the loose paper and tear it. Move the blade along the full length from the heel near the handle to the pointed tip, taking five to ten smooth strokes on one side before flipping the knife over to balance the work.
Quick Edge Touch-Ups with an Unglazed Ceramic Coffee Mug
When you need to slice ripe tomatoes or trim meat right now and do not have time to set up workshop tools, look inside your kitchen cabinet. Almost every standard ceramic coffee mug, porcelain teacup, or ceramic soup bowl has an unglazed ring on the bottom. Manufacturers wipe the shiny glass glaze off that bottom circle so the cup does not weld itself to the kiln shelf during firing. That exposed white or tan ceramic ring is extremely hard, heat-treated stone, making it hard enough to grind and align kitchen steel in seconds.
This rough ceramic surface works just like a professional ceramic honing rod. It gently scrapes away microscopic folds and rolls in the cutting edge. To use it safely, place your mug upside down on a damp dish towel on your counter. The towel prevents the mug from skidding or tipping while you work. Hold the mug handle firmly with your off-hand, keeping your fingers tucked securely behind the ceramic body and far away from the rim.
Hold your kitchen knife at a shallow angle against the rough ring, roughly the thickness of two quarters stacked together. Draw the blade across the ceramic circle from the heel to the tip, pulling the blade toward you with light, smooth pressure. Take three or four gentle passes on one side, flip the knife, and take three or four matching passes on the other side. Wipe the knife clean with a dry cloth when you finish to remove the thin, gray pencil-like metal marks left behind on the mug. This trick will not repair deep nicks or chips, but it will bring a slightly dull knife back to paper-slicing sharpness in under a minute.
Making a Wooden Leather Strop to Remove the Wire Edge
Sharpening a knife on sandpaper removes metal and creates a sharp apex, but it also leaves behind a burr. A burr is the microscopic wire edge or curved sliver of metal that forms on the opposite side of the blade during sharpening. If you leave this fragile wire edge on the knife, it will bend over the first time you slice through an onion or a piece of cardboard, leaving the blade feeling dull all over again. A strop, which is simply a leather strip used to polish the edge, snaps off that thin wire sliver and leaves a mirror finish.
You can make an effective strop from scrap lumber and an old leather belt. Search your closet or a local thrift store for a thick, plain leather belt made of solid cowhide rather than synthetic or layered bonded leather. Cut a flat piece of scrap wood roughly 3 inches wide and 10 to 12 inches long, leaving a couple of inches at one end to serve as a handle. Cut a matching strip of leather to cover the working surface of the wood.
Spread standard wood glue or contact cement evenly across the wood, then press the leather down flat. You can glue the leather smooth side up or rough suede side up. The rough suede side holds polishing compounds better, while the smooth grain side works great with bare leather. Clamp the leather between two flat boards for two hours until the glue cures fully. If you have buffing compound, rub a tiny amount of the wax block across the leather like a crayon. The green chromium oxide paste acts as an ultra-fine abrasive that speeds up the final polishing stage.
Using a leather strop requires the exact opposite motion of your sandpaper block. Never push the cutting edge forward into leather, because the sharp steel will instantly slice into the hide and ruin your strop. Instead, use an edge-trailing stroke: lay the blade on the leather at your sharpening angle, lead with the dull spine, and drag the knife backward away from the cutting edge. Pull the knife from heel to tip, flip the blade over its spine, and pull the other side back. Twenty light passes across the leather will strip away every scrap of burr and leave a polished cutting line that glides through food with zero resistance.
Keeping a Consistent Angle by Hand and Eye
The single biggest reason homemade sharpeners fail has nothing to do with the materials you use. It happens because your hands wobble while you work. When your wrist tilts up and down as you push a knife across sandpaper, you round off the slanted cutting edge, known as the bevel. A rounded bevel looks dull, feels blunt, and cannot slide cleanly into food. Keeping one steady angle requires a simple setup and a few visual checks.
- Identify your factory bevel angle before touching the abrasive. Most sturdy Western blades, such as sturdy German high-carbon steel knives and everyday pocket knives, use a durable 20-degree utility edge per side. Slender, thinner blades, including delicate Japanese chef knives, typically feature a steeper 15-degree slicing edge per side for clean cuts through raw vegetables and fish.
- Use the pocket coin test to set your starting height. Lay your knife blade flat against the wooden block. To set a 15-degree angle, slide two standard pennies under the spine of the knife and note that height. For a 20-degree angle, stack three pennies under the spine. Memorize how that space looks between the blade spine and the sharpening block so you can return to it naturally.
- Color the edge bevel with a black permanent felt-tip marker. Draw a dark black line right along the cutting edge on both sides of the knife before you take a stroke. Make one gentle pass across your sandpaper block and inspect the blade. If the marker rubs off only at the top of the bevel, you are holding the spine too high; if it rubs off only behind the cutting line, your angle is too low. When the marker wipes away cleanly across the entire bevel width, your hand angle matches the factory edge perfectly.
- Lock your wrists and move from your elbows and shoulders. Do not bend your wrists or wiggle your fingers as the knife travels along the sandpaper. Treat your hands and wrists like a rigid clamp, and rock your upper body slightly forward to push the blade. Keeping your joints steady prevents the blade from tilting at the beginning or end of your stroke.
- Use light hand pressure to keep the paper flat. Pressing down hard with your fingertips compresses the sandpaper, scratches the side of the blade, and causes thin steel to flex out of alignment. Let the sharp abrasive grains do the cutting work while you supply only enough downward force to keep the steel in light contact with the block.
When Homemade Sharpeners Fall Short of Dedicated Systems
A homemade sandpaper block and an unglazed coffee mug can handle ninety percent of routine home maintenance. They keep kitchen slicers sharp, touch up pocket tools, and polish edges without requiring expensive specialty gear. Yet homemade setups have clear physical limits that become obvious when working with severely damaged steel or complex tool shapes.
If your knife has deep chips from striking bone, a snapped tip, or an uneven wavy profile from years of improper grinding, repairing it on sandpaper takes hours of tiring hand rubbing. Sandpaper sheets also wear out quickly against hard steel alloys. High-carbon or tool steel, which is harder metal that stays sharp longer but requires dry wiping and light oiling to prevent rust spots, will strip the abrasive grains off fine sandpaper within a few minutes of heavy reshaping. Furthermore, hand-holding an angle across four different sheets requires practice and muscle memory that not every user wants to master.
When you reach those limits, commercial knife sharpeners offer mechanical consistency that scrap wood cannot match. Guided systems use rigid magnetic angle holders, heavy non-slip counter bases, and rotating diamond or ceramic stones that eliminate human hand wobble completely. When looking for a dedicated commercial sharpener, verify that the unit offers secure blade clamping, distinct angle settings to match your specific knife styles, and coarse diamond or water stone abrasives capable of repairing chips without overheating your blade steel.

- TAR Score9.6
TAR Score is a ranking system developed by TopAppliancesReviews.com. TAR score has no relationship or impact from any manufacturers or sales agent websites. Learn more
- BrandZohro
- TAR Score9.4
TAR Score is a ranking system developed by TopAppliancesReviews.com. TAR score has no relationship or impact from any manufacturers or sales agent websites. Learn more
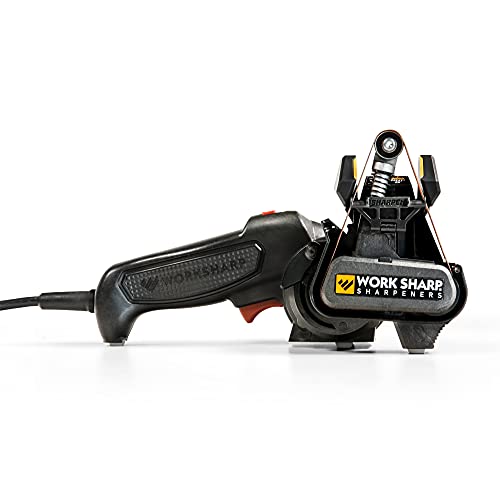
- BrandWORK SHARP

- TAR Score9.2
TAR Score is a ranking system developed by TopAppliancesReviews.com. TAR score has no relationship or impact from any manufacturers or sales agent websites. Learn more
- BrandIntelitopia

- TAR Score9.0
TAR Score is a ranking system developed by TopAppliancesReviews.com. TAR score has no relationship or impact from any manufacturers or sales agent websites. Learn more
- BrandKITCHELLENCE

- TAR Score8.8
TAR Score is a ranking system developed by TopAppliancesReviews.com. TAR score has no relationship or impact from any manufacturers or sales agent websites. Learn more
- BrandParkway Home

- TAR Score8.8
TAR Score is a ranking system developed by TopAppliancesReviews.com. TAR score has no relationship or impact from any manufacturers or sales agent websites. Learn more
- Brandcubikook

- TAR Score8.8
TAR Score is a ranking system developed by TopAppliancesReviews.com. TAR score has no relationship or impact from any manufacturers or sales agent websites. Learn more
- BrandFANERFUN

- TAR Score8.6
TAR Score is a ranking system developed by TopAppliancesReviews.com. TAR score has no relationship or impact from any manufacturers or sales agent websites. Learn more
- Brandlongzon

- TAR Score7.6
TAR Score is a ranking system developed by TopAppliancesReviews.com. TAR score has no relationship or impact from any manufacturers or sales agent websites. Learn more
- BrandAudible
Last update on 2026-10-02 / Affiliate links / Images, Product Titles, and Product Highlights from Amazon Product Advertising API
Frequently Asked Questions
Can you use ordinary cardboard or printer paper to sharpen a knife?
Cardboard and printer paper cannot sharpen a truly dull knife because they do not contain hard abrasives to grind away metal. However, clean corrugated cardboard acts as a mild strop that can align a slightly rolled edge and strip off a microscopic burr. Dragging a clean blade backward across cardboard several times will polish the cutting line, but it will not reshape a blunt bevel.
What sandpaper grits work best for everyday pocket and kitchen knives?
A simple progression of 400, 800, 1500, and 2000-grit wet-or-dry sandpaper handles almost any standard knife chore. Start with 400-grit if the blade feels completely blunt or catches on paper, then step through 800 and 1500 to smooth out the grinding scratches. Finish on 2000-grit to polish the edge before moving to your leather strop for the final wire edge removal.
Should you wet the sandpaper when using a wooden sharpening block?
You can use wet-or-dry sandpaper dry, but adding a few drops of mineral oil or water creates a smoother cut and extends the life of the paper. Liquid floats away tiny metal filings so they do not clog the abrasive particles on the sheet. If you use water, dry and oil your high-carbon steel blades immediately after sharpening to prevent orange rust spots from forming on the fresh metal.
How do you know when you have formed a proper burr on the blade?
You can check for a burr by gently sliding the pad of your thumb from the flat side of the blade down over the spine toward the cutting edge. Never run your finger along the sharp edge from heel to tip. If you feel a rough, scratchy lip or wire edge catching against your skin on the side opposite your stroke, you have successfully shaped the steel and can safely switch to the next grit.


Top Rated Best Quality Range Hoods: 2026 Expert Picks

The 12 Best Small Solar Generators 2026

10 Best Quality Semi Automatic Washing Machine of 2026 For Leak-Free Laundry

11 Best Small Washer Machine of 2026 For Everyday Laundry

12 Best Vibration Pads For Washing Machine of 2026 To Stop Walking and Shaking

11 Best Selling Front Load Washing Machine of 2026 For Quiet Odor-Free Laundry

11 Best Washing Machine For King Size Bedding of 2026 To Prevent Cycle Errors

10 Best Small Front Loader Washing Machine of 2026 For Tight Closets






