
How to Make a Safe Knife Scabbard at Home

Three leather layers make a scabbard safe. Cut a front piece, a back piece, and a middle leather spacer called a welt. Sandwiched along the outer seam, that protective inner spacer blocks the sharp edge so it never slices through your sewing thread. Tracing the blade onto stiff paper first gives you an accurate template, letting you leave extra room for the stitching line while keeping the pocket tight around the steel.
The final shape depends on your blade thickness, handle size, and preferred carry style. A wide outdoor knife needs a thicker spacer and an attached belt loop, while a compact blade might only require a simple pocket slip. Using firm vegetable-tanned leather, which is animal hide preserved with plant extracts, allows you to wet-form the casing directly around the knife for a snug friction fit. Here is how to measure, cut, and sew each piece step by step.
Tools and Materials to Gather
Building a durable scabbard at home requires only a few basic leathercraft supplies and hand tools. You do not need large workshop machinery to produce a rugged, dependable sheath that fits your blade cleanly.
Vegetable-tanned leather is the primary material you will need. This is a firm leather preserved with plant extracts, which makes it rigid, easy to carve, and receptive to water shaping. Avoid chrome-tanned leather, such as upholstery or garment scraps. Chrome salts left inside the hide can cause severe rust spots on steel blades over time.
- 7 to 9 ounce vegetable-tanned leather: This weight measures about 1/8 inch thick. It is thick enough to stop a sharp blade from poking through the sides while remaining supple enough to cut and stitch with hand tools.
- Sturdy cardboard or poster board: You will use this to make your initial template before cutting into your leather hide.
- Utility knife with fresh blades: A fresh razor-sharp blade ensures crisp, vertical cut edges without tearing the hide fibers.
- Leather contact cement: A strong bonding glue that holds your leather layers firmly together so they do not shift while you stitch.
- Stitching groover: This is a small hand tool that carves a shallow trench for thread along the outer edge. Recessing the thread protects your stitches from snagging and wearing out.
- Stitching awl or pricking irons: A stitching awl is a sharp pointed punch for making sewing holes through tough layers. Pricking irons look like small metal forks that mark or punch evenly spaced holes in a straight line.
- Waxed thread and two harness needles: Heavy nylon or polyester thread coated in wax glides smoothly through leather and will not rot when exposed to outdoor moisture.
- Edge burnisher: A grooved wooden wheel used for rubbing rough cut edges until slick and smooth through friction.
- Plastic kitchen wrap: You will wrap this around your blade during wet-forming to protect bare metal from contact with damp leather.
Step-by-Step Instructions to Build a Safe Knife Scabbard
Follow these numbered steps in order to design, cut, assemble, and stitch your scabbard. Take your time during the pattern and sewing phases, as careful layout work keeps the blade seated safely against your hip.
- Trace your knife onto thin cardboard to build a working pattern. Lay your bare blade flat against the cardboard and trace firmly around the edge, the spine, and the first inch of the handle. Mark the widest points of the blade shoulders and any thumb ramp along the spine.
Why this step matters: Building a paper pattern lets you verify fit and adjust your seam spacing before cutting expensive leather. - Add a generous seam allowance around the traced blade profile. Draw a secondary boundary line roughly 1/2 inch to 5/8 inch outside your blade tracing on the cutting edge side. For a fold-over pouch scabbard, duplicate this outline on the opposite side of the spine line so the leather can fold in half around the blade back.
Why this step matters: You must leave enough room for both your stitching line and the protective inner spacer without choking the knife pocket. - Design the protective welt piece directly onto your template. The welt is a leather spacer strip that shields the stitches from the blade. Trace the outer curved seam line of your template, then draw an inner line about 1/2 inch wide that mirrors the profile of your cutting edge from the tip to the sheath throat.
Why this step matters: Without this matching spacer strip, the sharp edge of the knife will rub against the sewing thread and cut the scabbard wide open. - Cut your leather pieces cleanly with a utility knife. Transfer your cardboard shapes to the smooth grain side of your vegetable-tanned leather using a dull pencil or scratch awl. Hold your utility knife completely upright and make multiple shallow passes rather than trying to force the blade through in one stroke.
Why this step matters: Keeping your blade vertical ensures square edges, which makes gluing, hole punching, and edge finishing much simpler. - Create and attach your belt carry loop. If your design uses a fold-over belt loop, groove and stitch the loop flap down to the back panel before closing the main pouch. If using a separate belt loop strip, glue and stitch it securely to the scabbard back panel now.
Why this step matters: Once the scabbard body is glued and stitched shut, you cannot reach inside to sew a belt loop securely to the rear panel. - Roughen the gluing tracks and apply contact cement. Use coarse sandpaper to scuff the shiny grain surface everywhere the welt meets the front and back leather panels. Apply a thin, even coat of contact cement to both mating surfaces, wait until tacky to the touch, and press the welt firmly against the front face.
Why this step matters: Roughening the leather opens the pores so the glue forms a tight bond, preventing the layers from separating during drilling or sewing. - Bond the back panel to close the scabbard sandwich. Coat the exposed surface of the welt and the matching seam track of the back panel with contact cement. Align the outer edges carefully, press them together with your fingers, and gently tap along the seam with a smooth wooden mallet.
Why this step matters: Consistent pressure seals the adhesive and keeps the layers from sliding out of alignment while you punch stitching holes. - Carve your thread groove along the outer seam. Run your leather stitching groover along the perimeter of the glued seam, about 3/16 inch inward from the cut edge. Press with moderate force to cut a clean, shallow trench into the leather surface on both the front and back faces.
Why this step matters: Recessing the thread beneath the leather surface shields it from abrasion against brush, clothing, and gear belts. - Punch your sewing holes straight through all three layers. Use your pricking irons or a sharp stitching awl to punch evenly spaced holes along the groove. Hold your punch at a strict 90-degree angle to the bench so the holes exit cleanly through the groove on the back side.
Why this step matters: Crooked holes make hand sewing difficult and leave an uneven stitch line on the back of your finished scabbard. - Hand-stitch the seam using a traditional saddle stitch. Thread a blunt harness needle onto each end of a long length of waxed thread. Push one needle through the first hole, pull half the thread through, and then pass both needles through each subsequent hole in opposite directions, pulling firmly after every stitch.
Why this step matters: Saddle stitching creates two independent lock lines, meaning the seam will stay together even if an outside stitch snags and breaks. - Trim, bevel, and burnish the exterior seam edge. Trim any minor leather overhang with a sharp blade or sanding block until the three layers look like one solid piece. Dampen the edge with a little water or gum tragacanth, then rub it briskly with an edge burnisher until the surface turns dark, slick, and glossy.
Why this step matters: Burnishing compresses and seals the raw leather fibers, locking out water and preventing the glued seam from fraying apart.
Why the Leather Welt Protects Your Safety
The welt is the single most critical structural piece inside any fixed-blade scabbard. When you slide a sharp knife into its sheath, the cutting edge does not touch the front or back panels. Instead, it rides directly against the inner curved seam.
If you simply sew two pieces of flat leather together without a middle spacer, the razor-sharp blade edge lands directly against your stitching thread. Every time you insert or draw the blade, the steel works like a miniature saw. Within a few dozen draws, the thread severs completely.
Once those stitches fail, the scabbard opens along the side. If you sit down, stumble, or bend over while wearing the knife on your belt, the bare blade can push straight through the severed seam and slice into your hip or thigh. A properly fitted welt creates a physical barrier of solid leather that stops the cutting edge well short of the thread line.
Always verify that your welt is at least as thick as the knife spine. A heavy hunting blade or a full tang knife (meaning one solid piece of blade steel extending all the way through the handle) requires a thick welt to give the blade room to slide freely. If your leather is thinner than the blade spine, cut two matching welt strips and glue them together to create a double-thick spacer.
Wet-Forming for a Secure Friction Fit
A safe scabbard must hold your knife firmly without rattling or falling out when turned upside down. Wet-forming uses moisture to mold vegetable-tanned leather tightly around the unique contours of your knife handle and blade guard.
Before introducing any moisture, protect your steel. Blades made of high-carbon or tool steel will begin rusting within minutes if exposed to damp leather. Wrap the blade and guard tightly in two layers of plastic kitchen wrap, smoothing out air bubbles so the plastic does not distort the sheath shape. If you work with fine outdoor steel or high-end cutlery forged from German high-carbon steel, protecting the blade face from water contact during leather molding is essential.
Submerge the stitched scabbard in a bowl of lukewarm tap water for roughly twenty to thirty seconds. Do not use hot water, which can shrink and ruin vegetable-tanned leather fibers. Remove the scabbard when tiny air bubbles stop rising, and let it drain until the leather feels soft, pliable, and damp rather than dripping wet.
Slide your plastic-wrapped knife smoothly into the sheath until it seats firmly at the bottom. Use your thumbs, fingers, or the smooth bowl of a wooden spoon to press the damp leather deep into the recesses around the handle guard, finger choil, and blade shoulders. Work the leather firmly from both sides to form a distinct ridge behind the guard.
Leave the knife seated inside the scabbard for four to six hours while the leather begins to firm up around the handle contours. Once the leather holds its shape, slide the knife out and set the scabbard on its side to dry completely at room temperature for 24 hours. Keep the drying leather away from direct sunlight, hair dryers, or heat registers, which cause hide fibers to curl and crack.
What to Look for in Knifemaking Reference Guides
If you plan to build scabbards for unusual blade shapes or craft your own fixed blades from scratch, knifemaking reference manuals provide helpful blueprints. A dependable printed guide helps you solve design hurdles before you cut raw materials.
Look for guides that feature clear step-by-step layout schematics rather than vague text summaries. Good visual diagrams show you exactly how to calculate seam allowances for thick spine profiles, drop-point blades, and trailing-point hunting knives. They also illustrate traditional saddle stitch patterns and proper placement for secondary retention straps.
Check that the guide addresses leather selection, welt thickness matching, and blade protection. High-carbon knives demand proper care when stored inside leather gear. While custom field sheaths are wonderful for outdoor travel, kitchen cutlery is usually better served on magnetic racks or wooden stands. If you store kitchen blades long term, using dedicated magnetic knife block sets prevents trapped atmospheric moisture from pitting polished steel.
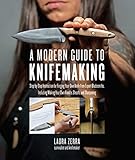
- TAR Score9.4
TAR Score is a ranking system developed by TopAppliancesReviews.com. TAR score has no relationship or impact from any manufacturers or sales agent websites. Learn more
- BrandQuarry Books
Last update on 2026-10-02 / Affiliate links / Images, Product Titles, and Product Highlights from Amazon Product Advertising API
FAQs
What thickness of leather is best for a knife scabbard?
A 7 to 9 ounce vegetable-tanned leather is the ideal weight for most belt scabbards. This weight measures roughly 7/64 to 9/64 inch thick, providing enough stiffness to protect your body from punctures while remaining easy to cut and stitch by hand. Lighter leather bends too easily and can collapse, while heavier hide is difficult to wet-form cleanly around handle contours.
Can I make a scabbard without a leather welt?
No, you should never build a fixed-blade scabbard without an inner welt. Without this middle leather spacer, the sharp cutting edge will saw directly through the stitching thread after only a few uses. Once the stitches break, the knife blade can slice through the open side of the pouch and cause severe cut injuries.
How do I stop my knife blade from rusting inside a leather scabbard?
Vegetable-tanned leather naturally absorbs moisture from the surrounding air, which can cause rust on bare steel. Always wipe your blade clean and apply a thin coat of mineral oil or blade wax before sliding it into the sheath. For long-term home storage, store the knife outside the scabbard in a dry room so trapped humidity cannot pit the blade face.
Why are my stitching holes crooked on the back of the scabbard?
Crooked exit holes happen when your stitching awl or pricking punch is tilted during the strike. Punching through three thick layers of leather magnifies even a tiny hand tilt. To keep your stitches straight, keep the punch at a strict 90-degree angle to the leather and punch over a firm, level cutting mat on a solid bench.


Top Rated Best Quality Range Hoods: 2026 Expert Picks

The 12 Best Small Solar Generators 2026

10 Best Quality Semi Automatic Washing Machine of 2026 For Leak-Free Laundry

11 Best Small Washer Machine of 2026 For Everyday Laundry

12 Best Vibration Pads For Washing Machine of 2026 To Stop Walking and Shaking

11 Best Selling Front Load Washing Machine of 2026 For Quiet Odor-Free Laundry

11 Best Washing Machine For King Size Bedding of 2026 To Prevent Cycle Errors

10 Best Small Front Loader Washing Machine of 2026 For Tight Closets






