
How to Make a Knife Razor Sharp at Home

Most people assume getting a blade truly sharp requires heavy pressure or expensive equipment. In reality, razor sharpness comes down to holding one steady angle against an abrasive surface until a tiny lip of metal forms, and then polishing that edge clean. Pushing down harder only wobbles your hand and rounds off the cutting bevel (the slanted cutting face), leaving the blade just as dull as before.
The exact routine depends on the tool in your hand. Delicate kitchen knives perform best with a slender fifteen-degree angle, while thicker pocket knives need a sturdier twenty-degree slope to survive rough tasks. A blade with visible nicks also demands a coarse grit (a rougher stone) to reshape the steel before any fine polishing can begin. Once you know the right tilt for your blade and how to keep your hands steady, putting a clean edge on any knife is straightforward.
The Short Version
- Match the angle to your knife: Use a steep 15-degree slicing edge per side for thin Japanese kitchen knives, or a sturdy 20-degree utility edge for German blades and pocket knives.
- Grind until a burr forms: Sweep the blade across a medium grit stone until you feel a burr, which is the microscopic wire edge or curved sliver of metal that forms on the opposite side during sharpening.
- Sharpen the other side: Flip the blade, lock your wrists at the same angle, and work the second side until that raised lip curls over.
- Deburr and polish: Step up to fine grits, then make light trailing strokes across a leather strop (a leather strip for polishing) to remove the wire and leave a true razor finish.
Why Blades Stay Dull Without a Burr
When a knife goes dull, the steel along the edge does not vanish. Instead, the fine point of steel rolls over, chips, or wears flat from contact with cutting boards and food. Under a microscope, a dull edge looks like a rounded hill rather than a crisp V-shape. This rounded shape cannot bite into slick tomato skins or glide through raw meat. It skids off surfaces or crushes food through force.
Restoring razor sharpness means grinding away metal along the bevel (the slanted cutting face) until both sides meet at a zero-width point called the apex. You cannot achieve this by lightly rubbing steel across an abrasive for a few quick passes. You must remove enough metal to create a burr.
The burr proves that you have ground deep enough. As your stone grinds down the first side, excess steel rolls over the peak and forms a tiny raised lip along the opposite side. Feeling that wire lip from heel to tip tells you that you have reached the exact apex of the blade. Stopping before you form a burr leaves the rounded edge intact, and the knife stays dull.
Picking the Right Sharpening Angle
The sharpening angle dictates how easily your knife cuts and how long that edge survives. A narrower angle glides through soft ingredients with little friction, while a wider angle puts more steel behind the apex to resist chipping against hard boards or dense food.
For kitchen prep, a steep 15-degree slicing edge per side delivers exceptional cutting ease. This thin geometry is standard on high-carbon Japanese chef knife sets, where harder steel supports a very fine edge during delicate slicing tasks. These thin profiles glide through raw fish, boneless meats, and soft produce without wedging.
For heavier utility work, a sturdy 20-degree utility edge per side provides necessary strength. Knives from classic German high-carbon steel knife block sets use slightly softer, tougher steel built to chop through root vegetables, squashes, and poultry joints without denting. Pocket knives and hunting tools also rely on this 20-degree bevel so they can carve wood or cut thick rope without rolling over.
Whichever angle matches your knife, keeping that angle steady on every stroke matters most. A blade sharpened at a steady 18 degrees cuts much better than an edge that wobbles between 14 and 22 degrees.
Step-by-Step Sharpening Routine
Sharpening a knife to razor sharpness is a calm, repeatable process. Clear a solid counter space and follow these steps:
- Prep your stone: Place your stone on a non-slip base or a damp towel on your counter. If using a water stone, soak it in water for ten to fifteen minutes until bubbles stop rising. Splash water on top to lubricate the surface and flush away metal filings.
- Set your angle: Place the heel of the blade against the medium grit stone (grit means the coarseness of the sharpener). Tilt the spine upward to your target angle. Two stacked quarters beneath the spine approximate 15 degrees, while a matchbook spine matches roughly 20 degrees. Lock your wrist so this angle stays fixed.
- Sweep the first side: Place your free fingers on the blade face just above the edge for light support. Push the knife forward across the stone while drawing it sideways, moving from heel to tip in one smooth sweep. Repeat this motion ten to fifteen times using steady, moderate pressure.
- Check for the burr: Stop and inspect the unsharpened side of the edge with your thumb pad. Gently slide your thumb upward from the blade flat off the edge into open air. Never run your finger along the sharp length of the blade. You should feel a rough, scratchy metal lip catching your skin from heel to tip. If the curved tip feels smooth, make several extra passes focused on that area.
- Sharpen the reverse side: Flip the knife over, match your angle with a locked wrist, and repeat the sweeping strokes on the second side. Continue until that fine wire curls back over toward the first side.
- Refine on fine grit: Move to a fine grit stone (such as 3,000 to 6,000 grit) to smooth away grind marks. Use light pressure here, making alternating single strokes to refine the apex and shrink the wire edge.
Removing the Burr for a True Razor Finish
A blade with a burr attached is not truly sharp. That thin wire of metal feels toothy to the touch, but it is unsupported and fragile. As soon as you slice into a cutting board, that wire snaps off or folds flat, leaving a blunt, ragged edge behind.
To turn raw sharpness into a clean razor edge, you must remove the burr without blunting the apex. Begin with light, alternating passes on your finest stone. Push the edge forward into the stone as if shaving a thin layer off the surface, alternating sides on every stroke under the light weight of the knife alone.
Finish the job on a leather strop (a leather strip for polishing). Place the strop flat on your counter, coated with a fine polishing compound. Stropping uses trailing strokes: lay the bevel flat on the leather at your sharpening angle and draw the knife backward, spine leading and edge trailing behind. Make ten to fifteen light trailing strokes per side. This process pulls off the last microscopic wire fragments and buffs the cutting bevel into a mirror finish.
Safe Sharpness Checks
Never test an edge by pressing or sliding your bare finger along the blade. That habit risks cuts and tells you very little about how the knife slices. Use these three safe, reliable checks instead:
- The paper slice check: Hold a sheet of printer paper by one corner with your free hand. Place the knife heel against the top edge of the paper and slice downward with gentle forward pressure. A dull knife will buckle or tear the sheet with a loud rip. A razor-sharp edge glides straight through silently without snagging.
- The ripe tomato check: Place a ripe tomato on your cutting board. Rest the knife edge on the smooth skin without applying downward pressure. Draw the blade backward using only the knife's own weight. If the edge immediately bites into the skin and produces clean, thin slices without spilling juice, your apex is complete.
- The thumbnail check: Rest the cutting edge very lightly against the top of your thumbnail at a shallow 45-degree angle. Do not press down. If the blade slides across the nail surface, the apex is still rounded. If the blade catches immediately on the nail without slipping, the edge is properly sharpened.
Mistakes That Ruin Knife Edges
Sharpening problems usually come down to a few basic mechanical errors. Avoid these common slip-ups to protect your blade:
- Wobbling your wrist: Shifting your wrist angle while sweeping the blade rounds off the apex. Keep your wrist stiff and move from your elbow and shoulder instead.
- Using heavy downward pressure: Pushing down hard does not speed up sharpening. Heavy force gouges softer whetstones, bends the burr sideways, and creates uneven bevels. Guide the knife with gentle contact and let the abrasive grit do the cutting.
- Rushing to fine stones too early: Moving to a fine polishing stone before you raise a burr on the medium stone wastes time. Fine stones only polish an existing edge; they cannot grind away enough steel to fix a blunt apex.
- Letting your stone dry out: Grinding on a dry water stone clogs the abrasive pores with loose metal filings, creating a slick surface that stops cutting. Keep water nearby and splash a few drops on the stone whenever the surface starts feeling sticky.
- Cleaning knives in the dishwasher: Dishwasher cycles expose knives to harsh detergents and heat, while water jets bounce blades against racks. Wash your knives by hand with warm water and dry them immediately with a towel.
What to Look for in Sharpening Equipment
Achieving a razor-sharp edge at home requires equipment that gives you steady angle control and distinct grit stages. You do not need commercial machinery, but your tools must match your experience level.
Dual-grit whetstones give you complete control over your blade geometry. Look for stones that combine a medium grit (around 1,000) for creating the initial apex with a fine grit (around 3,000 to 6,000) for polishing. Always verify that your stone setup includes a sturdy non-slip rubber base to prevent shifting while you work.
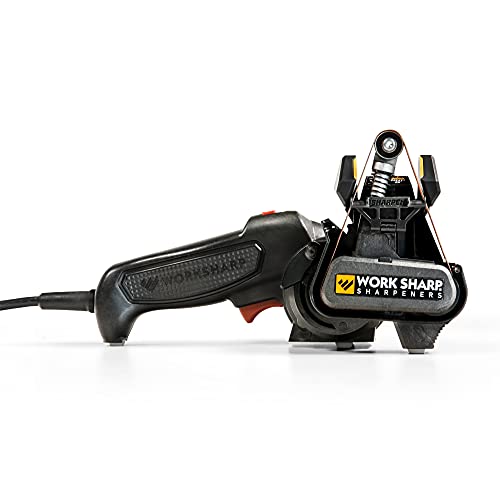
If holding a steady hand angle feels difficult, guided sharpeners and multi-stage manual sharpeners provide built-in angle assistance. Look for systems with adjustable angle settings so you can switch between 15-degree kitchen edges and 20-degree utility edges. Ensure the system includes separate slots or stones for coarse repair, medium sharpening, and ceramic or leather finishing so you can remove the burr cleanly.
- TAR Score9.4
TAR Score is a ranking system developed by TopAppliancesReviews.com. TAR score has no relationship or impact from any manufacturers or sales agent websites. Learn more
- BrandWORK SHARP

- TAR Score9.2
TAR Score is a ranking system developed by TopAppliancesReviews.com. TAR score has no relationship or impact from any manufacturers or sales agent websites. Learn more
- BrandIntelitopia

- TAR Score9.2
TAR Score is a ranking system developed by TopAppliancesReviews.com. TAR score has no relationship or impact from any manufacturers or sales agent websites. Learn more
- BrandWORK SHARP
- TAR Score9.0
TAR Score is a ranking system developed by TopAppliancesReviews.com. TAR score has no relationship or impact from any manufacturers or sales agent websites. Learn more
- BrandWEGAZ

- TAR Score9.0
TAR Score is a ranking system developed by TopAppliancesReviews.com. TAR score has no relationship or impact from any manufacturers or sales agent websites. Learn more
- BrandKITCHELLENCE

- TAR Score9.0
TAR Score is a ranking system developed by TopAppliancesReviews.com. TAR score has no relationship or impact from any manufacturers or sales agent websites. Learn more
- BrandRAZORSHARP
- TAR Score8.8
TAR Score is a ranking system developed by TopAppliancesReviews.com. TAR score has no relationship or impact from any manufacturers or sales agent websites. Learn more
- BrandSharp Pebble

- TAR Score8.6
TAR Score is a ranking system developed by TopAppliancesReviews.com. TAR score has no relationship or impact from any manufacturers or sales agent websites. Learn more
- Brandlongzon

- TAR Score8.6
TAR Score is a ranking system developed by TopAppliancesReviews.com. TAR score has no relationship or impact from any manufacturers or sales agent websites. Learn more
- Brandlongzon
Last update on 2026-10-02 / Affiliate links / Images, Product Titles, and Product Highlights from Amazon Product Advertising API
FAQs
How often should I sharpen my kitchen knives?
Most home cooks only need to sharpen their primary knives on stones every three to six months. You can maintain that edge between sharpening sessions by using a smooth ceramic rod or leather strop once a week to keep the apex aligned.
What is the easiest way to hold a steady angle on a stone?
Rest your index finger along the spine of the blade and lock your wrist completely solid. Move your entire upper body from your shoulders and hips rather than bending your hands or fingers during the stroke.
Can a steel honing rod make a dull knife razor sharp?
A steel honing rod does not remove metal to sharpen a knife; it only realigns an edge that has rolled slightly out of line. If your knife is truly dull with a rounded apex, only an abrasive stone or sharpener can grind a new sharp edge.
Why does my knife slice paper easily but slip on vegetables?
This usually happens when you leave a foil burr on the edge. The ragged metal wire catches and tears through dry paper easily, but it lacks the clean, crisp apex needed to pierce slick, flexible tomato skin without crushing it.


Top Rated Best Quality Range Hoods: 2026 Expert Picks

The 12 Best Small Solar Generators 2026

10 Best Quality Semi Automatic Washing Machine of 2026 For Leak-Free Laundry

11 Best Small Washer Machine of 2026 For Everyday Laundry

12 Best Vibration Pads For Washing Machine of 2026 To Stop Walking and Shaking

11 Best Selling Front Load Washing Machine of 2026 For Quiet Odor-Free Laundry

11 Best Washing Machine For King Size Bedding of 2026 To Prevent Cycle Errors

10 Best Small Front Loader Washing Machine of 2026 For Tight Closets






