How to Make a Knife Lanyard with Paracord

Fold the cord and tie alternating knots. Threading a folded length of parachute cord through the handle opening gives you the base for simple alternating square knots. Working the strands down builds a neat pull tab in just a few minutes. Trimming the extra line and melting the tips flat keeps the braid locked tight so it never unravels under daily pocket tension.
Your exact build depends on the knife handle and how you carry it. Small handle holes often require thinner utility cord or a guide string to fit, while wide holes accept standard parachute rope with ease. A short fob keeps pocket carry snag-free, whereas a loose wrist loop secures a camp knife during heavy swings. Getting the cord through the handle and weaving a clean finish takes only a couple of basic steps.
Materials and Cord Lengths to Gather Before You Start
Making a durable knife lanyard takes only a few basic household supplies. You do not need specialized leather craft tools or dedicated rigging equipment to build a secure cord pull. Gathering the proper cord thickness and cutting tools ahead of time prevents frayed ends and keeps your work neat.
- Standard parachute rope (550 paracord): Cut a piece between 24 and 30 inches long for a standard pocket pull, or 36 inches if you want a wrist loop. Standard 550 cord is roughly 4 millimeters thick, features a smooth woven nylon jacket, and contains seven thin inner strands that give it strength.
- Micro cord or accessory cord (optional): Choose a 1.18-millimeter or 2-millimeter cord if your knife has an unusually narrow lanyard hole. It works well as an adapter loop for standard cord or as a standalone minimalist fob.
- Sharp utility knife or heavy craft scissors: A clean, single-stroke cut prevents the inner nylon yarn from fraying or sliding out of the outer jacket before you can tie your first knot.
- Butane lighter: Any standard pocket lighter works to melt the cut ends. Nylon melts quickly into a liquid bead that seals the fibers permanently when cooled.
- Flat metal surface: The smooth metal side of your lighter case, the flat side of a butter knife, or a metal ruler helps you flatten hot nylon without touching the molten plastic with your fingers.
- Pulling aid (sewing thread or thin wire): A 6-inch strand of dental floss, fishing line, or a thin piece of craft wire helps pull thick cord through tight handle openings.
- Decorative bead (optional): A brass, pewter, or plastic bead with a 4.5-millimeter to 5-millimeter hole adds weight and gives your thumb extra purchase when drawing the blade from deep pockets.
Before cutting your cord, always inspect the weave for flat spots or kinks. Pulling the strand straight with your hands smooths out the inner cores and ensures your knots sit tight and even.
How to Push Paracord Through Tight Knife Handle Holes
The cord opening at the back of the knife handle (commonly called the lanyard hole) is often small. Pocket knives designed for everyday carry (EDC) prioritize slim profiles, so manufacturers frequently drill these holes between 3 millimeters and 3.5 millimeters wide. Pushing a blunt, 4-millimeter standard parachute rope through that opening can cause the outer sleeve to bunch up and bunch into an untidy knot.
To pass the cord through cleanly without snagging, use the melted needle method. Cut one end of your cord at a sharp 45-degree angle. Hold the tip near the base of your lighter flame for two seconds until the nylon turns clear and slightly soft. Wet your thumb and index finger with cold tap water, then quickly roll the warm tip into a hard, pointed cone. This stiff, tapered point acts like a sewing needle and glides straight through narrow handle holes.
If the hole has sharp inner edges or tight clearance, try the loop-pull trick. Fold a 6-inch piece of dental floss, fishing line, or thin florist wire in half to form a narrow loop. Push that loop through the knife hole first. Slide the tip of your paracord through the exposed loop, then pull the wire back out of the handle. The wire collapses the cord slightly and drags it through the steel or scale material without tearing the nylon sheath.
When dealing with micro-sized lanyard pins on compact folding knives, you can also remove the inner strands from the anchor point. Pull back the outer sheath, snip two inches off three of the inner white threads, and smooth the sleeve back over. This flattens the rope where it passes through the handle while keeping the rest of your lanyard thick and easy to grip.
How to Tie a Cobra Braid Knife Lanyard Step by Step
The square knot pattern (commonly called a cobra weave) is the most reliable braid for knife lanyards. It creates a flat, ribbed handle extension (fob) that is comfortable in the hand, sits flat against your pocket seam, and never unravels on its own. Follow these steps in order to tie your lanyard securely.
- Fold your cord in half and push the center bend through the lanyard hole to create a simple hitch.
Reason: Looping the folded cord through itself locks the cord directly to the knife spine without needing metal split rings or loose knots that rattle. - Adjust the base loop to leave a one-inch to two-inch gap between the knife handle and your knot location.
Reason: Leaving empty space prevents the stiff braid from blocking the folding blade pivot path, interfering with a liner lock (the spring bar inside the handle that snaps behind the open blade to stop it from closing on your fingers), or covering your pocket clip. - Lay the left cord strand over the front of the two center base strands, pointing it to the right to form a loose loop on the left.
Reason: This horizontal strand forms the foundation for the first half of your alternating square knot. - Take the right cord strand, place it over the loose end of the left cord, run it behind the two center strands, and bring it up through the left loop.
Reason: Threading the right strand behind the base and up through the loop interlocks the sides and locks the center strands in place. - Pull both working strands outward with steady, equal pressure until the knot sits firmly against your starting point.
Reason: Even tension sets the exact width of the braid and prevents the cord from shifting when you pull the knife out of your pocket. - Reverse the pattern by taking the right cord strand and laying it over the front of the two center strands to form a loop on the right side.
Reason: Alternating sides on every stitch is what keeps the weave flat; forgetting to alternate makes the cord twist into an unintended spiral braid. - Take the left cord strand, lay it over the right strand end, carry it behind the two center strands, and push it up through the right loop.
Reason: This completes the second half of the square knot cycle and locks the pattern firmly against the first stitch. - Pull both ends outward firmly to lock the knot.
Reason: Keeping your pull pressure uniform across every single knot ensures the finished edges look straight and clean. - Repeat the alternating left and right stitches until you have six to eight knots, creating about two inches of braided fob.
Reason: A two-inch fob provides enough textured surface for your pinky or ring finger to catch during a draw without dangling so low that it snags on external objects.
Trimming and Melting Cord Ends Flush and Flat
Once you finish tying your knots, you must secure the loose working strands so they cannot back out. Paracord is slick nylon, and simple friction will not hold loose cut ends over months of daily pocket carry. Sealing the ends properly turns the raw fiber into a permanent mechanical stopper.
Start by pulling both working ends as hard as you can with your hands or small pliers to set the final knot. Use sharp scissors to snip each working strand, leaving roughly one-eighth of an inch (about 3 millimeters) sticking out of the sides of the knot. Cutting the cord too short makes it impossible to form a protective cap, while leaving it too long creates a bulky, scratchy blob.
Hold your lighter so the blue base of the flame sits just beside the trimmed fiber. Avoid placing the yellow top of the flame directly onto the cord, because yellow flames produce black soot that stains colorful paracord. Let the heat melt the nylon down toward the braid until it forms a rounded, clear dome.
Immediately press the flat metal side of your lighter firmly against the melted dome. Hold it flat for five seconds to let the plastic cool. This flattens the molten nylon into a wide disc (often called a mushroom cap) that sits flush against the knot edge. The flat cap is wider than the weave opening, which makes it physically impossible for the cord to pull through. Repeat the same melting and pressing action on the opposite side. Never use your bare fingertips to press hot nylon, as molten synthetic cord sticks to skin instantly and causes deep burns.
Short Pull Fob Versus Wrist Loop: Safety Differences
Deciding between a short handle extension (fob) and a long loop depends entirely on how you use your knife. Both styles offer benefits, but using the wrong design in the wrong environment can create real safety hazards.
A short pull fob measures two to three inches long and hangs freely from the handle. It is the best choice for everyday carry pocket knives. When a folding knife sits deep in your pocket clipped to the seam, grabbing the smooth handle scale can be tricky, especially when wearing heavy work gloves. The textured paracord fob sits right at the pocket hem, giving your fingers an immediate purchase point to slide the tool upward. Because it has no open loop, a short fob cannot snag on door latches, seatbelts, or low tree branches.
A wrist loop is a wide, open circle of cord designed to fit around your hand. Wrist loops are common on large outdoor fixed blades, heavy camp choppers, and machetes used for clearing trails. When swinging a heavy blade in wet weather or with sweaty hands, the loop keeps the knife from flying out of your grasp if your fingers slip off the handle. However, wrist loops introduce serious risks if not handled with care.
If you slip and fall on steep terrain while holding an open knife tethered to your wrist, you cannot drop the tool away from your body. The heavy blade remains tied to your arm, which can lead to severe accidental cuts. In addition, an open wrist loop can catch on moving machinery, power equipment, or boat steering tillers. For regular folding pocket knives, a short fob is significantly safer than a wrist loop.
Keep in mind that fabric lanyards do not belong on every cutting tool. Kitchen cutlery, for example, should never have cordage attached. Braided nylon absorbs raw meat juices, cooking oils, and wash water, turning into a breeding ground for bacteria. Just as you store clean food prep blades safely in a magnetic knife block and knife set combo to keep them dry and sanitary, knives used for meals must remain clean and bare. Outdoor utility blades benefit from cord pulls, but fine kitchen tools such as German high-carbon steel blades require dry storage and clean handles free of absorbent fabric.
What to Look for in Knife Lanyard Hardware and Pre-Made Options
If you prefer not to tie your own cords, or if you want to upgrade your knife with ready-made components, several commercial options are available. Choosing the right hardware comes down to matching your knife size with the proper attachment style.
When shopping for pre-braided lanyards, check the overall length and cord diameter. Look for options made with genuine nylon paracord rather than polyester craft cord. Nylon offers superior stretch resistance, softer hand feel, and reliable melting characteristics when trimmed. A total length between 4.5 inches and 5.5 inches provides plenty of grip without excess bulk in your pocket.
If you want to add decorative lanyard beads, inspect the center hole diameter (the bore). A bead needs a bore of at least 4.5 millimeters to accommodate two strands of standard 550 cord side by side. Check that the inner edges of the bead are smoothly chamfered. Sharp, squared metal edges inside a bead can rub against the nylon under tension and fray your cord over time. Solid brass, titanium, and stainless steel beads add useful rear counterweight to front-heavy blades.
For warehouse settings, work utility cutters, or safety knives, consider coiled retention leashes. These flexible plastic cords extend up to 48 or 59 inches during use and snap back into a compact 14-inch coil when released. They feature belt clips or split rings that anchor the tool to your work apron or belt loop, ensuring you never drop an open blade from ladders or lose utility knives on busy job sites.

- TAR Score10.0
TAR Score is a ranking system developed by TopAppliancesReviews.com. TAR score has no relationship or impact from any manufacturers or sales agent websites. Learn more
- BrandAnjiucc

- TAR Score9.6
TAR Score is a ranking system developed by TopAppliancesReviews.com. TAR score has no relationship or impact from any manufacturers or sales agent websites. Learn more
- BrandTRUFAS

- TAR Score9.2
TAR Score is a ranking system developed by TopAppliancesReviews.com. TAR score has no relationship or impact from any manufacturers or sales agent websites. Learn more
- BrandLix&Rix
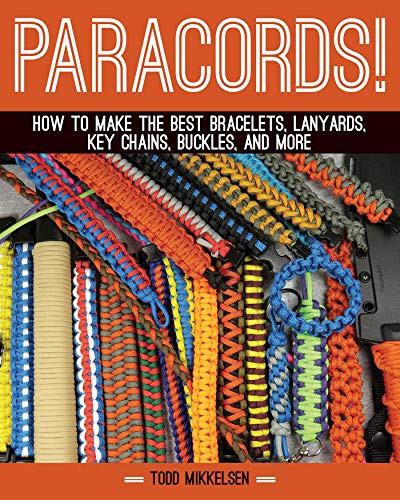
- TAR Score9.0
TAR Score is a ranking system developed by TopAppliancesReviews.com. TAR score has no relationship or impact from any manufacturers or sales agent websites. Learn more
- BrandSkyhorse

- TAR Score9.0
TAR Score is a ranking system developed by TopAppliancesReviews.com. TAR score has no relationship or impact from any manufacturers or sales agent websites. Learn more
- BrandPacific Handy Cutter

- TAR Score8.8
TAR Score is a ranking system developed by TopAppliancesReviews.com. TAR score has no relationship or impact from any manufacturers or sales agent websites. Learn more
- BrandTRUFAS

- TAR Score8.2
TAR Score is a ranking system developed by TopAppliancesReviews.com. TAR score has no relationship or impact from any manufacturers or sales agent websites. Learn more
- BrandCedar Lane Press

- TAR Score7.0
TAR Score is a ranking system developed by TopAppliancesReviews.com. TAR score has no relationship or impact from any manufacturers or sales agent websites. Learn more
- BrandN/A

- TAR Score6.6
TAR Score is a ranking system developed by TopAppliancesReviews.com. TAR score has no relationship or impact from any manufacturers or sales agent websites. Learn more
- BrandN/A
Last update on 2026-10-02 / Affiliate links / Images, Product Titles, and Product Highlights from Amazon Product Advertising API
FAQs
How much paracord do I need to make a knife lanyard?
A standard two-inch cobra knot pocket pull requires roughly two feet (24 inches) of cord. If you want a loose loop that fits over your wrist, cut three feet (36 inches) instead. Having a few extra inches of working cord makes tying your final alternating knots much easier on your fingers.
How do I clean a dirty paracord knife lanyard?
Wash your paracord lanyard by soaking the cord in warm water mixed with a few drops of mild dish soap. Scrub the woven ridges gently with an old soft toothbrush to lift out sweat, grease, and pocket lint. Rinse the cord thoroughly with fresh water and let it air dry completely before folding your knife shut.
Will a metal bead or paracord lanyard scratch my knife handle?
Soft nylon cord will never scratch handle scales, but heavy brass, steel, or pewter beads can leave light surface marks if they strike soft aluminum or polished wood. To prevent contact marks, tie two or three tight knots between the knife handle and the bead so the metal hardware cannot swing against the scales.
Why does my square knot braid start twisting to one side?
A cobra weave twists into a spiral whenever you start the knot from the same side twice in a row. To keep the braid flat, you must alternate your starting strand with every stitch, moving from left to right, then right to left. If you see the braid beginning to curl, untie the last knot and restart it from the opposite direction.

Top Rated Best Quality Range Hoods: 2026 Expert Picks
The 12 Best Small Solar Generators 2026

10 Best Quality Semi Automatic Washing Machine of 2026 For Leak-Free Laundry

11 Best Small Washer Machine of 2026 For Everyday Laundry

12 Best Vibration Pads For Washing Machine of 2026 To Stop Walking and Shaking

11 Best Selling Front Load Washing Machine of 2026 For Quiet Odor-Free Laundry

11 Best Washing Machine For King Size Bedding of 2026 To Prevent Cycle Errors

10 Best Small Front Loader Washing Machine of 2026 For Tight Closets