
How to Make a Knife From a File Using Basic Tools

A rusty metal file sits in the corner of a garage workbench, dull and forgotten under layers of sawdust. Transforming that old piece of scrap into a working blade takes just a few basic steps: soften the steel with heat, shape the edge, and temper it in a kitchen oven so it stays tough instead of snapping.
How quickly the project goes depends on your metal, your tools, and your heat source. Vintage files are made from solid high-carbon steel that holds an edge cleanly, whereas cheap modern files often have only a thin surface coating that ruins the build. A backyard charcoal fire or a small plumbing torch gets the steel cherry-red, while a simple hacksaw and a hand file do the shaping. Here is the straightforward process to build your own working knife from start to finish.
Selecting the Right Scrap File and Checking the Steel
Vintage files forged decades ago were made from solid high-carbon tool steel, such as 1095 or W1. These metals contain around one percent carbon, allowing them to harden properly and take a durable edge that lasts. Many beginners grab any rusty file from a flea market, only to find the finished knife refuses to hold an edge because modern budget files are often made from mild steel with a paper-thin hardened skin. This manufacturing method is known as case hardening. Once you grind past that hardened exterior to form your edge bevels, you hit soft iron that will never stay sharp.
Vintage high-carbon tool steel behaves much like the metal found in durable German high-carbon steel knives, delivering an edge that resists hard wear but requires dry wiping to stop rust. To verify your scrap steel, check the tang (the steel part inside the handle). Established vintage toolmakers stamped their names and marks directly into the metal. If the tool features printed ink or has no stamps at all, leave it on the shelf. You can also inspect the metal using a spark check. Touch the corner of the file lightly against a spinning bench grinder wheel. Solid high-carbon tool steel throws short, dense bursts of sparks that explode into tiny stars close to the wheel. Mild steel throws long, straight, dull yellow lines with almost no bursts.
Use this quick checklist before you start cutting into an old file:
- Maker stamps: Verify the tang features stamped lettering from established toolmakers rather than printed ink.
- Solid carbon steel: Confirm the tool is solid high-carbon steel rather than modern case-hardened mild metal.
- Spark check: Look for dense bursts of sparks that explode like small stars against a grinding wheel.
- Tool size: Pick a flat or mill file at least one inch wide and three-sixteenths of an inch thick to give yourself enough working metal.
- Clean surface: Choose a file free from deep rust pits or hairline cracks along the cutting teeth.
Softening the Steel and Shaping the Blade Profile
Files leave the factory fully hardened to cut other metals. If you try to saw or drill the steel as it sits, you will destroy your tools in seconds. You must first complete annealing (softening the steel with heat). Softening relaxes the internal structure of the steel so you can saw, file, and drill the metal with basic workshop tools.
Softening the file takes a simple heat source and plenty of time to cool:
- Build a charcoal fire: Fill a charcoal grill or fire pit with lump hardwood charcoal, which burns hotter and cleaner than standard briquettes.
- Heat the file: Lay the file horizontally in the burning coals. Use a hair dryer on cool attached to a metal pipe to blow air into the coals until they glow bright orange.
- Watch for cherry red: Heat the file until it glows an even cherry red throughout the entire bar. Touch a magnet to the glowing steel using pliers. When the magnet stops sticking, the steel has reached non-magnetic heat (around 1,500 degrees Fahrenheit).
- Cool the metal slowly: Shut off the air and let the file cool buried in the dying coals overnight, or bury it in a metal bucket of dry sand or wood ashes. Cooling slowly over several hours is mandatory to keep the metal soft.
Cutting the Profile and Grinding the Bevels
Once the file cools to room temperature, the metal should feel soft enough to scratch with an ordinary hand file. Now you can cut your blade shape using hand tools.
- Trace your outline: Draw your blade pattern onto cardboard, cut it out, and trace the shape onto the softened file with a permanent marker. Design a full tang (one solid piece of blade steel extending all the way through the handle) rather than a partial tang (where the blade metal narrows or stops inside the handle) for maximum strength.
- Cut the profile: Secure the file in a bench vise. Cut away excess scrap metal using a hacksaw fitted with a bimetal blade, or use an angle grinder equipped with a thin cutoff wheel. Make straight relief cuts into waste areas, then knock out the pieces.
- Smooth the edges: Clean up the outer profile using a coarse hand file, bench grinder, or belt sander. Smooth the spine and handle perimeter until the shape feels comfortable in your hand.
- Drill pin holes: Mark two or three holes along the handle tang using a center punch. Drill the holes with sharp drill bits at a slow speed, adding a drop of oil to keep the bit cool. Drilling now is essential because you cannot drill hardened steel later.
- Grind the edge bevel: The bevel (the slope leading to the sharp edge) controls how cleanly your knife cuts. Scribe a center line down the bottom edge with a marker. File or grind a flat slope from the spine down to that center line. Aim for a sturdy 20-degree utility edge suitable for camp tasks and outdoor work. Leave the edge about the thickness of a dime (around one millimeter). A thin, razor-sharp edge will warp or crack during the hardening quench.
Hardening, Oven Tempering, and Assembling the Finished Knife
Annealing made your file workable, but a soft blade will dull after a single cut. You must now re-harden the steel, bake it in a kitchen oven to remove brittleness, and install your handle scales.
- Prepare your quench tank: Fill a steel bucket or metal ammo can with two gallons of canola oil. Heat a scrap metal rod red-hot and submerge it to warm the oil to roughly 120 degrees Fahrenheit. Warm oil cools steel rapidly without the violent shock of ice water. Keep a metal lid nearby to snuff flare-ups, and wear leather gloves and eye protection.
- Heat the blade evenly: Place the shaped blade back into your charcoal fire or heat it with a propane torch. Move the heat steadily along the cutting edge so the metal heats evenly from heel to tip.
- Check non-magnetic heat: Watch for the steel to turn an even cherry red. Touch a magnet to the cutting edge every few seconds. Once the steel stops sticking to the magnet, hold it in the heat for thirty more seconds so the temperature penetrates deep into the metal.
- Quench the blade: Plunge the blade straight down into the warm oil point-first. Swish it slightly forward and backward along the spine, but never side to side, which causes warping. Hold the blade under the oil for twenty seconds until the flame dies, then let it cool on a metal surface.
Baking the Hardened Blade in a Kitchen Oven
A freshly quenched file is extremely hard, but it is as brittle as glass. If you drop it on a concrete floor, it will shatter. Tempering (baking hard steel in an oven so it will not snap) relieves internal stresses while keeping the cutting edge sharp and durable.
- Clean the steel: Scrub off the burnt oil and dark scale with 120-grit sandpaper until you see clean, shiny bare metal. Clean metal allows you to watch the oxidation colors during baking.
- Preheat the oven: Set your home kitchen oven to 400 degrees Fahrenheit. Check the internal temperature with an independent oven thermometer to ensure accuracy.
- Bake for two cycles: Place the bare blade directly on the center oven rack and bake it for one full hour. Let the blade cool completely to room temperature, then bake it for a second one-hour cycle at 400 degrees Fahrenheit.
- Check the color: After the second cycle, the steel should show a light straw-gold or bronze color. This color confirms the brittle metal has transformed into tough, springy steel that resists chipping.
Fitting Handle Scales and Honing the Final Edge
- Prepare handle slabs: Cut two dry hardwood pieces to serve as your scales (the handle slabs). Clamp each wooden slab to the tang and drill through the existing pin holes to guarantee an exact match.
- Epoxy and pin the handle: Rough up the tang and the inner side of the scales with 80-grit sandpaper so the glue can bite. Mix two-part epoxy, coat both surfaces, and push brass or steel pins through the holes. Clamp the handle firmly with two C-clamps, wipe away squeezed-out epoxy with rubbing alcohol, and let the glue cure for twenty-four hours.
- Shape the wood: File the pins flush once the epoxy hardens. Use wood rasps and 120-grit sandpaper to round the edges until the grip fits your hand comfortably. Finish with 400-grit paper and rub the wood with boiled linseed oil.
- Hone the sharp edge: While kitchen cutlery uses a steep 15-degree slicing edge per side, like delicate high-carbon Japanese chef knives, an outdoor file knife performs best with a sturdier 20-degree utility angle. Stroke the blade across a coarse whetstone until you feel a burr (the microscopic wire edge or curved sliver of metal that forms on the opposite side during sharpening). Switch sides until a burr forms there, then polish on a fine-grit stone and strop across a leather belt to wipe the burr away. Coat the blade in light mineral oil to prevent rust.
What to Look for in Beginner Knifemaking Reference Guides
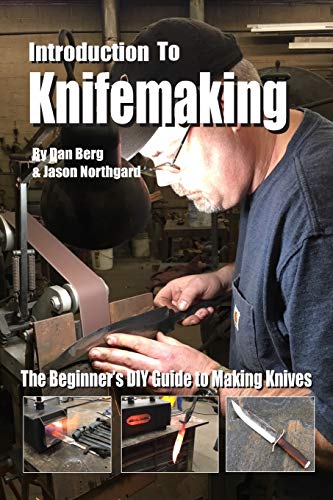
Building a functional knife from an old file is an achievable home project, but having a dependable knifemaking guide on your workbench prevents expensive mistakes. Working with heat, hot oil, and cutting tools involves safety factors and metalworking steps that are much easier to follow with visual illustrations. A good manual stays open beside your vise, letting you check pin spacing, edge geometry, and heat colors without fumbling with a phone.
When choosing a knifemaking guide, check for these practical qualities:
- Hand-tool focus: Look for books that explain stock removal using hacksaws, bench files, and simple charcoal setups rather than assuming you own expensive belt grinders.
- Bench-side diagrams: Verify the guide includes clear photo sequences or technical drawings showing blade balance, bevel slopes, and handle alignment.
- Clear heat-treating instructions: Ensure the text explains magnet checks, oil quench setups, and home oven tempering cycles in plain English without confusing formulas.
- Workshop safety: Choose guides that clearly cover eye protection, ventilation for hot oil, and safe handling of scrap metals.

- TAR Score9.2
TAR Score is a ranking system developed by TopAppliancesReviews.com. TAR score has no relationship or impact from any manufacturers or sales agent websites. Learn more
- BrandCREATESPACE
- TAR Score9.2
TAR Score is a ranking system developed by TopAppliancesReviews.com. TAR score has no relationship or impact from any manufacturers or sales agent websites. Learn more
- BrandIndependently Published

- TAR Score9.0
TAR Score is a ranking system developed by TopAppliancesReviews.com. TAR score has no relationship or impact from any manufacturers or sales agent websites. Learn more
- BrandIndependently Published

- TAR Score8.8
TAR Score is a ranking system developed by TopAppliancesReviews.com. TAR score has no relationship or impact from any manufacturers or sales agent websites. Learn more
- BrandKrause Publications

- TAR Score7.8
TAR Score is a ranking system developed by TopAppliancesReviews.com. TAR score has no relationship or impact from any manufacturers or sales agent websites. Learn more
- BrandN/A

- TAR Score7.8
TAR Score is a ranking system developed by TopAppliancesReviews.com. TAR score has no relationship or impact from any manufacturers or sales agent websites. Learn more
- BrandGun Digest Books

- TAR Score7.2
TAR Score is a ranking system developed by TopAppliancesReviews.com. TAR score has no relationship or impact from any manufacturers or sales agent websites. Learn more
- BrandMajosta

- TAR Score6.8
TAR Score is a ranking system developed by TopAppliancesReviews.com. TAR score has no relationship or impact from any manufacturers or sales agent websites. Learn more
- BrandMajosta
Last update on 2026-10-02 / Affiliate links / Images, Product Titles, and Product Highlights from Amazon Product Advertising API
FAQs
Can I make a knife from an old file without softening it first?
You can shape a knife from an unsoftened file, but it requires continuous grinding on an electric sander while dipping the metal in cold water every few seconds. If friction pushes the steel past 400 degrees Fahrenheit, it ruins the original temper and leaves the edge soft. Drilling pin holes through an unsoftened file is also nearly impossible with standard drill bits. Softening the steel first saves hours of effort and protects your shop tools.
What kind of oil works best for quenching a heated file blade?
Plain canola oil or standard vegetable oil works best for quenching high-carbon file steel. Warm the cooking oil to around 120 degrees Fahrenheit before quenching so it cools the red-hot steel rapidly without the violent shock that ice water causes. Never quench in water, which cools too fast and frequently cracks high-carbon steel. Avoid used motor oil because burning engine additives produce toxic smoke and fumes.
Why does the blade need to go into a kitchen oven after quenching?
Quenching freezes the red-hot steel into an extremely hard crystalline state, but it leaves the metal as brittle as raw glass. If you drop the freshly quenched blade or strike a piece of wood, it will shatter into pieces. Baking the blade at 400 degrees Fahrenheit in a home oven relaxes internal molecular stress. This balancing process retains keen edge hardness while giving the blade enough toughness to withstand hard cuts without snapping.


Top Rated Best Quality Range Hoods: 2026 Expert Picks

The 12 Best Small Solar Generators 2026

10 Best Quality Semi Automatic Washing Machine of 2026 For Leak-Free Laundry

11 Best Small Washer Machine of 2026 For Everyday Laundry

12 Best Vibration Pads For Washing Machine of 2026 To Stop Walking and Shaking

11 Best Selling Front Load Washing Machine of 2026 For Quiet Odor-Free Laundry

11 Best Washing Machine For King Size Bedding of 2026 To Prevent Cycle Errors

10 Best Small Front Loader Washing Machine of 2026 For Tight Closets






