
How to Make a Hot Knife to Cut Styrofoam at Home

Making a heated blade sounds intimidating, but crafting one at home is simple and safe when handled with care. The most reliable approach is to clamp a standard utility blade to a soldering iron using a small metal hose clamp. The iron warms the steel directly, letting the edge glide through foam like butter without tearing it into a messy storm of static beads.
The exact approach depends on the tools on hand and the foam type. Crumbly white bead foam melts fast with very little heat, but dense insulation board requires a sturdier blade and steady warmth. Working near an open window or outdoors is also necessary, since hot foam releases irritating fumes. Here is how to put the cutter together safely and make smooth, mess-free cuts.
Why a Soldering Iron Makes the Safest Improvised Hot Knife
Anyone who has attempted to slice packaging foam with a standard utility blade or kitchen knife knows the mess that follows. Cold steel catches on the material, crushing the foam bubbles and spraying static-charged white beads across the room. Those tiny beads stick to clothing, rugs, and walls, creating a frustrating cleanup chore. Unlike slicing food with fine cutlery, such as blades from German high-carbon steel knife sets, cutting rigid foam requires thermal heat rather than physical wedge force.
A hot knife works by melting rather than sawing. As the hot steel nears the plastic, it dissolves the thin cell walls instantly. The plastic collapses inward into a clean, sealed edge without crumbly flakes. To get that clean line, the blade must maintain a steady, moderate temperature while moving through the sheet.
The foam type changes how much heat you need:
- EPS (crumbly white bead foam): The lightweight foam found in cooler chests and electronics packaging. Because it is mostly trapped air, it melts quickly under gentle heat.
- XPS (dense pink or blue foam board): The solid board used for house insulation and craft modeling. It is much denser, pulling heat out of the blade faster and requiring steady thermal power.
Many crafters attempt to heat a craft blade over a candle flame, a kitchen burner, or with a heat gun. An open flame coats the blade in black soot, heats the metal unevenly, and poses an immediate fire hazard next to combustible plastics. Worse, thin steel cools within seconds of touching foam, forcing you to stop constantly to reheat the metal.
A 25-watt to 40-watt electric soldering iron solves this problem. The internal element maintains continuous heat without an open flame. By clamping a utility blade directly to the iron barrel, heat transfers into the steel through direct contact, giving you an uninterrupted cutting edge that glides through foam sheets.
Step-by-Step Assembly of Your DIY Heated Blade
Building an improvised hot knife takes only a few basic workshop items. You do not need electrical wiring skills because you are clamping a blade to an existing heating tool. Make sure your soldering iron is completely unplugged and cool before starting.
You will need a pencil-style soldering iron, a fresh utility blade made of high-carbon or tool steel (harder metal that stays rigid under heat), a small hose clamp (a small metal band tightened with a screw), a flathead screwdriver, and a metal iron stand.
- Prepare the iron barrel: Place the unplugged soldering iron on your table. If your iron has a pointed soldering tip held by a side screw, loosen the screw and slide the tip out. Removing the tip lets the blade sit flush against the barrel closer to the heating element. If the tip is permanent, mount the blade along the side of the barrel instead.
- Align the blade against the barrel: Lay the flat side of the utility blade flush against the metal barrel. Ensure the sharp cutting bevel faces outward and away from the handle, with the blade point extending past the front. Keep the blade straight so the cutting line feels natural in your hand.
- Position the hose clamp: Slide the hose clamp over the blade and barrel. Place the band across the solid upper spine of the blade, away from the sharp edge. Turn the screw mechanism toward the side so it does not dig into your fingers when holding the grip.
- Tighten the band securely: Turn the screw clockwise with your screwdriver until the clamp draws tight. Check that the blade remains straight as you tighten. Fasten it until the blade cannot wobble, twist, or shift when nudged with a scrap piece of wood.
- Place the tool in a metal stand: Rest the assembled tool in a sturdy metal cradle. Make sure the exposed blade hangs freely without touching your workbench, cords, or papers.
- Preheat and check the cut: Plug the iron into a wall outlet and let it heat for four to five minutes. Check the temperature by slicing a scrap piece of packaging foam. If the metal glides through without snagging, your hot knife is ready.
Workspace Safety, Fume Control, and Cutting Technique
Melting polystyrene plastic releases styrene vapor and irritating fumes. Breathing these fumes causes throat irritation, coughing, and headaches. Working in an enclosed room without active airflow will quickly overwhelm your workspace.
An improvised tool also presents burn risks because it lacks factory guards. The barrel and blade reach temperatures between 300 and 450 degrees Fahrenheit. If the tool rolls off a table or touches your skin, it causes severe burns instantly.
Follow this safety checklist every time you cut:
- Work near an open window with a fan blowing fumes away from your face toward the outdoors.
- Clear scrap paper, cardboard, and solvents at least three feet away from your cutting area.
- Place a ceramic tile or metal baking sheet underneath your cutting path to protect your tabletop.
- Always rest the tool in its metal stand when your hand leaves the handle.
- Keep a spray bottle of water or a fire extinguisher nearby in case hot plastic flares.
- Unplug the tool the moment you finish cutting.
Good cutting technique determines whether your foam edge ends up glassy or jagged. The golden rule is to let the heat cut, not physical pressure. Unlike slicing with sharp kitchen blades, such as knives from Japanese chef knife sets where you apply gentle slicing force, a hot foam knife needs almost zero push.
Rest the hot edge against your marked line and let the melting plastic draw the tool forward. Pushing hard forces the cold foam against the blade, cooling the metal and causing it to tear crumbly beads. Moving too slowly allows heat to radiate outward, melting wide gouges and leaving scorched brown crust. Move at an even pace that leaves a sealed, smooth path. For straight cuts, clamp a metal straightedge along your line. Avoid plastic or wooden rulers, as the heated blade will melt or scorch them.
When a Dedicated Electric Foam Knife Makes More Sense
An improvised soldering iron knife works well for quick home crafts or trimming small insulation panels. But clamped blades have clear limits. A utility blade provides less than two inches of cutting depth, preventing clean cuts through thick foam blocks. Also, because the blade relies on a mechanical clamp, repeated heating cycles can loosen the screw and cause wobble during extended use.
When your projects grow larger or require detailed carving, a purpose-built commercial foam cutter is a better option. Dedicated foam cutters eliminate clamped blade hazards and offer features designed specifically for shaping plastic.
Consider which cutter style fits your project needs:
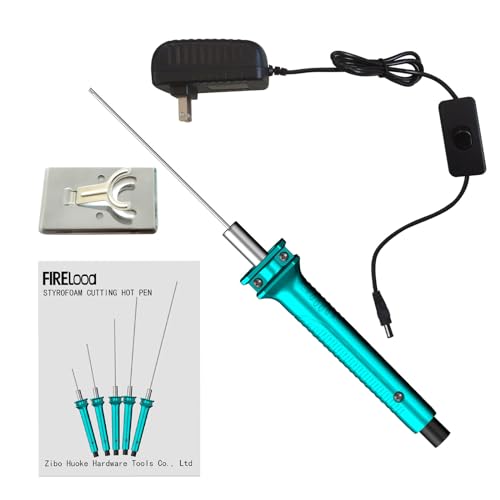
- Wand-style cutting pens: These feature a solid stainless steel heating rod attached to an insulated handle. The entire rod warms up evenly in ten to fifteen seconds, allowing you to plunge into foam and carve shapes like writing with a pen.
- Hot wire cutters: These use a thin strand of nichrome (special electric heating wire) strung across a metal bow frame. Hot wire tools produce the thinnest cut possible with zero drag, making them ideal for cutting large blocks or detailed architectural models.
- Heavy-duty hot knives: Built like power tools, these pistol-grip units accept long blades ranging from four to eight inches. They often include variable heat dials and spring-loaded safety triggers that cut power the moment you release the handle.
Before buying, verify that the tool includes overheat protection, an on-off switch with an indicator light, and enough wattage for your foam thickness. A dedicated tool heats faster, reaches deeper, and keeps your hands safer.

- TAR Score8.8
TAR Score is a ranking system developed by TopAppliancesReviews.com. TAR score has no relationship or impact from any manufacturers or sales agent websites. Learn more
- BrandGOCHANGE

- TAR Score8.8
TAR Score is a ranking system developed by TopAppliancesReviews.com. TAR score has no relationship or impact from any manufacturers or sales agent websites. Learn more
- BrandGOCHANGE

- TAR Score8.8
TAR Score is a ranking system developed by TopAppliancesReviews.com. TAR score has no relationship or impact from any manufacturers or sales agent websites. Learn more
- BrandCOOLTOP

- TAR Score8.8
TAR Score is a ranking system developed by TopAppliancesReviews.com. TAR score has no relationship or impact from any manufacturers or sales agent websites. Learn more
- BrandROMECH

- TAR Score8.6
TAR Score is a ranking system developed by TopAppliancesReviews.com. TAR score has no relationship or impact from any manufacturers or sales agent websites. Learn more
- BrandROMECH

- TAR Score8.4
TAR Score is a ranking system developed by TopAppliancesReviews.com. TAR score has no relationship or impact from any manufacturers or sales agent websites. Learn more
- BrandDOMINOX

- TAR Score8.4
TAR Score is a ranking system developed by TopAppliancesReviews.com. TAR score has no relationship or impact from any manufacturers or sales agent websites. Learn more
- BrandGOCHANGE
- TAR Score7.8
TAR Score is a ranking system developed by TopAppliancesReviews.com. TAR score has no relationship or impact from any manufacturers or sales agent websites. Learn more
- BrandFIRElood
- TAR Score7.8
TAR Score is a ranking system developed by TopAppliancesReviews.com. TAR score has no relationship or impact from any manufacturers or sales agent websites. Learn more
- BrandGOCHANGE

- TAR Score7.4
TAR Score is a ranking system developed by TopAppliancesReviews.com. TAR score has no relationship or impact from any manufacturers or sales agent websites. Learn more
- BrandV TOWER
Last update on 2026-10-02 / Affiliate links / Images, Product Titles, and Product Highlights from Amazon Product Advertising API
FAQs
Can I heat a regular kitchen knife over a stove burner to cut foam?
Heating a kitchen knife over a stove burner is dangerous and rarely produces clean cuts. An open burner heats the blade unevenly, which can scorch the foam, create an open flame hazard, and ruin the temper of your knife steel. In addition, the blade cools down within seconds of touching the foam, causing it to crush the material rather than melting it cleanly.
How can I tell if my DIY hot knife is running too hot?
Your knife is too hot if the foam produces heavy smoke, smells sharply acrid, or leaves blackened crust along the cut. A properly heated knife produces only faint wisps of vapor and leaves clean, smooth, melt-sealed seams without discoloration. If your tool overheats, unplug the soldering iron for thirty seconds to allow the metal to cool slightly before continuing.
Does melting Styrofoam ruin the utility knife blade?
The heat will not damage the structural steel of a utility blade, but melted plastic residue will bake onto the metal over time. This sticky coating creates friction and drags through future cuts. You can clean the blade by wiping it gently across a damp cloth while it is still warm, or simply swap in a fresh utility blade when your project is finished.


Top Rated Best Quality Range Hoods: 2026 Expert Picks

The 12 Best Small Solar Generators 2026

10 Best Quality Semi Automatic Washing Machine of 2026 For Leak-Free Laundry

11 Best Small Washer Machine of 2026 For Everyday Laundry

12 Best Vibration Pads For Washing Machine of 2026 To Stop Walking and Shaking

11 Best Selling Front Load Washing Machine of 2026 For Quiet Odor-Free Laundry

11 Best Washing Machine For King Size Bedding of 2026 To Prevent Cycle Errors

10 Best Small Front Loader Washing Machine of 2026 For Tight Closets






