
How to Make a Homemade Knife Without a Forge

Basic hand tools make tough, working knives. Anyone can shape a solid blade through stock removal, which simply means cutting away excess metal from a flat steel bar using a hacksaw and hand files. Once the blade shape is ready, heating the metal red-hot and dipping it in vegetable oil locks in hardness, while a short bake in a kitchen oven keeps the steel from snapping.
The exact process shifts with the gear and supplies on your workbench. Starting with a fresh bar of carbon steel saves hours of filing compared to recycling old rusty tools, while an inexpensive angle grinder speeds up cutting. Your heat source matters just as much, since a simple plumbing torch works for small blades, but an outdoor charcoal fire handles thicker stock. Here is how to shape, harden, and assemble a dependable knife right at home.
Choosing Steel and Garage Tools for Stock Removal
Stock removal means cutting and filing flat steel into shape without forging. You do not need a blacksmith forge, an anvil, or a heavy hammer. You start with a flat rectangular bar of steel, cut away excess metal, shape the edge bevels with hand files, and harden the finished blade in a simple garage setup.
Picking the correct metal determines whether your project succeeds. High-carbon or tool steel is harder metal that stays sharp longer but requires dry wiping and light oiling to prevent rust spots. For a first knife, annealed 1084 high-carbon steel flat bar is the easiest material to shape. Annealed means the mill cooled the metal slowly so it arrives soft, letting standard hand files and drill bits cut it easily. Stainless steel is rust-resistant, easy-to-clean metal, but it requires airtight foil pouches and digital kilns reaching over 1,900 degrees Fahrenheit. A garage propane torch cannot heat stainless steel evenly enough to harden it.
Scrap metal like old files or lawnmower blades can work, but old files are already fully hardened. If you try to cut or drill an old file without softening it first in a fire, your hacksaw teeth will strip and your drill bits will dull instantly. Starting with new annealed carbon steel prevents wasted time and ruined tools.
Assemble this basic garage setup before cutting steel:
- Annealed high-carbon steel bar: A 1.5-inch wide, 1/8-inch thick bar works well for an everyday utility knife.
- Heavy bench vise: Holds the steel steady while you saw and file.
- Hacksaw: Fitted with bi-metal blades (24 teeth per inch) for straight cuts.
- Hand files: A coarse 10-inch bastard file (a coarse, flat file that removes steel quickly) and a smooth mill file.
- Hand drill: Uses sharp high-speed steel bits for pin holes.
- Heat source: A propane or MAPP gas torch and two soft firebricks carved into a heating chamber.
- Quench tank: A metal container filled with one gallon of canola oil.
- Baking oven: A kitchen or toaster oven to soften brittle metal after hardening.
- Handle materials: Hardwood scales, brass pins, two-part epoxy glue, and C-clamps.
- Safety gear: Safety glasses, a dust mask, leather gloves, and a fire extinguisher.
Step-by-Step Instructions to Shape, Harden, and Assemble Your Knife
- Draw your blade pattern and transfer it to the steel bar. Sketch your design on stiff paper, outlining the cutting edge, handle grip, and full tang (meaning one solid piece of blade steel extending all the way through the handle). Cut out the paper shape, check how the grip feels in your palm, and glue the template to the steel with a glue stick. Trace the border with a marker, then peel off the paper. Reason: Establishing the outline on paper prevents accidental cutting mistakes and ensures the handle fits your natural grip.
- Cut relief slots and saw away waste steel. Clamp the steel bar in your bench vise. Use your hacksaw to cut straight relief slots from the outer edge toward your marker line, spacing cuts half an inch apart along curves. Slice off the steel tabs one by one. Avoid forcing a hacksaw around curves, because the blade will bind and snap. Reason: Removing metal in small rectangular chunks prevents blade binding and clears waste metal faster than filing.
- File the perimeter to match your outline. Clamp the cutout in the vise with the edge facing upward. Push your coarse bastard file across the perimeter with firm, flat strokes to level out rough saw marks. Lift the file slightly on the return stroke so you do not dull the teeth. File until the steel matches your marker line, then smooth it with a mill file. Reason: Smoothing the profile before heat treating guarantees crisp curves that are difficult to reshape once the metal turns hard.
- Drill pin and balance holes through the tang. Mark pin locations along the handle center using a center punch and hammer. Drill matching holes through the tang for your 1/8-inch or 1/4-inch brass pins. Drill several larger 3/8-inch holes through the handle center to lighten the knife and give the epoxy glue a mechanical bridge. Reason: Steel must be drilled while it remains annealed and soft, because hardened steel destroys drill bits instantly.
- File the primary blade bevels. Scribe a center line along the bottom edge of the blade to mark where the sharp apex will sit. Paint the blade sides with a marker to track file strokes. Clamp the blade to a wooden support board. Push your bastard file across the steel at an angle to cut the bevel (the angled slope leading to the cutting edge). Leave the edge thickness about the size of a dime (roughly 0.04 inches). Reason: Leaving the edge blunt before heat treatment stops thin steel from curling, burning, or cracking in the quenching oil.
- Heat the blade red-hot and quench it in oil. Warm your canola oil to about 120 degrees Fahrenheit by dipping a heated metal scrap into the bucket. Place the blade inside the firebrick chamber and run the torch flame evenly down both sides until the steel glows bright cherry red. Check the metal with a magnet; when the magnet stops sticking, it has reached its critical temperature near 1,500 degrees Fahrenheit. Hold that heat for 30 seconds, then plunge the blade straight down into the warm canola oil point-first. Reason: Quenching (dipping glowing steel into oil to lock in hardness) locks carbon atoms into a rigid structure that allows the blade to take a sharp edge.
- Temper the blade in a standard oven. Wipe the cooled oil off the blade and scrape the edge with a file; the file should slide off like glass without biting. Untempered steel is brittle, so place the blade in an oven preheated to 400 degrees Fahrenheit for two hours. Let it cool to room temperature, then bake it again at 400 degrees Fahrenheit for another two hours. The steel will turn a light golden straw color. Reason: Tempering (gently baking hard steel so it does not snap) relieves internal stresses, removing extreme brittleness while keeping the cutting edge tough.
- Sand away fire scale and polish the metal flats. Wrap 120-grit wet-and-dry sandpaper around a flat sanding block. Lubricate the metal with soapy water and sand from handle to tip to clear away dark furnace crust. Work through 220-grit and 400-grit paper until the bevels show an even satin finish. Leave the tang area sanded with rough 80-grit paper so glue has a textured surface to grab. Reason: Polishing the blade before attaching the handle prevents accidental scratches on the wooden scales later and ensures maximum epoxy bonding.
- Glue and pin the wooden handle scales. Cut two hardwood slabs slightly larger than your handle outline. Clamp one slab to the tang, drill through the tang holes into the wood, and repeat for the second slab. Cut brass rod pins slightly longer than the handle thickness. Clean the tang with rubbing alcohol. Spread two-part epoxy on the tang and wood faces, insert the pins, and clamp firmly with C-clamps. Wipe off squeezed-out epoxy near the front of the handle before it cures. Reason: Brass pins paired with waterproof epoxy lock the wooden slabs against the full tang, sealing out moisture that causes hidden rust.
- Shape the handle for comfort. Let the epoxy cure for 24 hours. Wrap the metal blade in cardboard and tape to protect your hands, then clamp the knife in your vise. Use a wood rasp and half-round file to grind the wooden scales and brass pins down flush with the steel. Round the corners into a smooth oval profile that fills your palm. Sand the wood up to 400 grit and rub in boiled linseed oil or paste wax to seal the grain. Reason: Contouring the handle eliminates flat spots and sharp edges that create painful blisters during extended cutting tasks.
Sharpening the Final Edge and Protecting the Metal from Rust
Because you left the cutting edge blunt before heat treating, you must now grind the final sharp apex. Secure a coarse sharpening stone (around 320 to 400 grit) on your workbench. For general utility or outdoor blades, hold the knife at a steady 20-degree utility edge per side. If you built a thin slicing blade for food prep, you might aim for a steep 15-degree slicing edge per side, similar to the delicate edges found on high-carbon Japanese chef knife sets.
Stroke the blade across the stone from heel to tip with even pressure until you feel a burr along the cutting edge. A burr is the microscopic wire edge or curved sliver of metal that forms on the opposite side during sharpening when the two bevel planes meet. Once you feel the burr, flip the knife over and repeat on the second side. Progress to a 1,000-grit whetstone, then finish by stropping the edge backward across leather with polishing compound to remove the fragile wire edge.
Caring for high-carbon steel requires steady habits. High-carbon steel develops dark stains or surface rust if left wet or stored in damp places. Always cut away from your body, and never soak your knife in a sink or run it through an automatic dishwasher. Hand-wash the blade, dry it completely immediately after use, and wipe on a drop of food-safe mineral oil. These simple steps match the care needed to maintain commercial cutlery like German high-carbon steel premium knife block sets so the steel stays bright and corrosion-free for years.
Choosing Beginner Knifemaking Kits and Project Guides
If cutting thick steel bars with a hacksaw or running a garage torch feels daunting, beginner knifemaking kits and project reference books offer a guided entry into the craft.
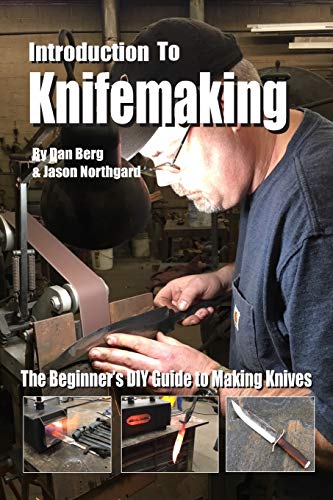
When selecting instructional books, look for guides with clear step-by-step color photos illustrating every stage of stock removal. A helpful guide should explain full tang construction, partial tang designs (where the blade metal narrows or stops inside the handle), file bevel techniques, and safe home heat treating without specialized tools.
If you lack metal-cutting tools and want to practice handle fitting first, consider a pre-shaped knife building kit. These kits provide pre-cut blades that arrive shaped and heat-treated from resilient stainless steel or high-carbon steel, eliminating the need for torches or oil. When checking a kit before buying, verify that the blade arrives fully hardened, confirm that it includes pre-cut wood scales like moisture-resistant pakkawood, and ensure that all required brass pins and hardware are in the package.

- TAR Score10.0
TAR Score is a ranking system developed by TopAppliancesReviews.com. TAR score has no relationship or impact from any manufacturers or sales agent websites. Learn more
- BrandN/A
- TAR Score9.2
TAR Score is a ranking system developed by TopAppliancesReviews.com. TAR score has no relationship or impact from any manufacturers or sales agent websites. Learn more
- BrandIndependently Published

- TAR Score9.2
TAR Score is a ranking system developed by TopAppliancesReviews.com. TAR score has no relationship or impact from any manufacturers or sales agent websites. Learn more
- BrandCREATESPACE

- TAR Score8.6
TAR Score is a ranking system developed by TopAppliancesReviews.com. TAR score has no relationship or impact from any manufacturers or sales agent websites. Learn more
- BrandN/A

- TAR Score7.8
TAR Score is a ranking system developed by TopAppliancesReviews.com. TAR score has no relationship or impact from any manufacturers or sales agent websites. Learn more
- BrandBlack Sierra Equipment

- TAR Score7.8
TAR Score is a ranking system developed by TopAppliancesReviews.com. TAR score has no relationship or impact from any manufacturers or sales agent websites. Learn more
- BrandN/A

- TAR Score7.6
TAR Score is a ranking system developed by TopAppliancesReviews.com. TAR score has no relationship or impact from any manufacturers or sales agent websites. Learn more
- BrandGun Digest Books

- TAR Score2.0
TAR Score is a ranking system developed by TopAppliancesReviews.com. TAR score has no relationship or impact from any manufacturers or sales agent websites. Learn more
- BrandN/A
Last update on 2026-10-02 / Affiliate links / Images, Product Titles, and Product Highlights from Amazon Product Advertising API
FAQs
Can you make a knife out of an old metal file without annealing it?
You can shape an old file into a blade without annealing it, but you must use an electric grinder rather than hand files because the steel is already hard. If the steel overheats and turns blue or purple from friction, the factory hardness is ruined and the edge will stay soft. Dunk the blade in cold water every few seconds while grinding to prevent heat buildup.
What type of oil is best for quenching carbon steel at home?
Plain canola oil or vegetable oil from the grocery store is the best choice for basic steels like 1084. Warm the oil to about 120 degrees Fahrenheit before quenching, because warm cooking oil cools the blade evenly. Avoid used motor oil, as it produces hazardous fumes, ignites easily, and contains toxic chemical additives.
Why did my knife blade warp or curve during the oil quench?
A blade warps when one side cools faster than the other or when bevels are filed unevenly. If one side of the cutting edge is thinner than the other, the thin section shrinks quicker in the oil and pulls the blade into a curve. Keep your edge thickness even, heat both sides symmetrically, and plunge the blade straight down into the oil.
How do you verify the blade is hard after the quench?
You can verify hardness by skating the corner of an old bastard file lightly across the blade bevel. If the heat treatment worked, the file will glide across the steel with a glassy sound without digging into the surface. If the file catches and scratches a groove, the blade did not reach critical temperature before the quench, and you must reheat and quench it again.


Top Rated Best Quality Range Hoods: 2026 Expert Picks

The 12 Best Small Solar Generators 2026

10 Best Quality Semi Automatic Washing Machine of 2026 For Leak-Free Laundry

11 Best Small Washer Machine of 2026 For Everyday Laundry

12 Best Vibration Pads For Washing Machine of 2026 To Stop Walking and Shaking

11 Best Selling Front Load Washing Machine of 2026 For Quiet Odor-Free Laundry

11 Best Washing Machine For King Size Bedding of 2026 To Prevent Cycle Errors

10 Best Small Front Loader Washing Machine of 2026 For Tight Closets






