
How to Make a Knife Handle with Basic Tools

Secure two hardwood slabs to the steel. Most knife handles come together by drilling matching pin holes through two flat wooden slabs and the blade tang (the back steel extension of the blade), then bonding them with epoxy glue and metal pins. Once the adhesive cures completely, a simple wood rasp and sandpaper round off the corners until the grip rests naturally in your palm. A tight bond keeps moisture out so the wood never loosens or shifts under pressure.
The exact build depends on your blade shape. A wide, flat steel tang takes two matching slabs, while a narrow stick tang slides inside a single carved block. Dense hardwoods like walnut or maple are easiest to work, though synthetic composites or antler also hold up well outdoors. Basic hand files and workshop clamps are plenty to finish the job safely. Here is how to build a durable, comfortable handle from start to finish.
Your Blade Tang Determines Your Handle Build Style
The steel shape at the back of your blade dictates how you construct the grip. In knife making, the tang is the back steel extension of the blade inside the grip. Before choosing wood, inspect this exposed metal to determine whether your knife uses flat slabs or a solid drilled block.
A full tang means one solid piece of blade steel extends all the way through the handle from tip to butt. Looking at the spine and belly, you see a continuous strip of steel. This design uses two flat pieces of wood called scales that sandwich the steel. Full tang construction offers maximum strength for heavy cutting, similar to the sturdy builds seen in German high carbon steel knife block sets. It is also the easiest style for a beginner because the steel serves as your layout template.
A partial tang means the blade metal narrows or stops inside the handle. This is often called a hidden tang because the narrow steel rod slips inside a solid wood block, hiding the metal completely. Traditional Japanese kitchen knives, such as those found in high carbon Japanese chef knife sets, often feature this hidden build.
Before taking any measurements, wrap the sharp cutting edge securely. Fold three layers of painter tape or heavy cardboard over the edge and tape it tight against the blade flats. An exposed edge will bite your fingers during tracing or clamping. Keep this tape on until final finishing.
Simple Woods Pins and Epoxy Create Durable Grips
Building a dependable handle does not require rare materials or expensive machinery. You need three basic elements: dense wood, mechanical pins, and a waterproof adhesive.
Dense domestic hardwoods are the best choice for beginners. Woods such as black walnut, hard maple, white oak, and cherry carve smoothly, resist splintering, and absorb minimal moisture. Avoid softwoods like pine, cedar, or balsa because they dent easily and split along the grain when drilled.
Pins are small metal rods holding the handle pieces to the blade. They pass through the wood scales and tang holes to lock everything together mechanically. Brass or copper rods measuring 1/8-inch or 3/16-inch work best. Brass cuts easily with a hacksaw, sands flush without tearing wood, and provides a clean contrast against dark timber.
Your glue choice is just as critical as the pins. Epoxy is strong two-part glue that cures hard when resin and hardener combine. Always choose a standard slow-curing two-part epoxy with a 24-hour cure time. Avoid 5-minute epoxies, which cure too fast to seat pins, remain rubbery, and weaken when exposed to moisture.
Gather these basic workshop tools before starting:
- A hand saw to cut wood blanks to rough size.
- A hand drill and bits matched to your pin diameter.
- Two or three C-clamps to hold pieces during drilling and curing.
- A half-round wood rasp and hand file to shape contours.
- Assorted sandpaper in 80, 120, 220, and 400 grit.
- Rubbing alcohol to clean steel surfaces before gluing.
- A dust mask and eye protection.
Drill Holes One Scale at a Time for Exact Alignment
Misaligned pin holes are the most common mistake in handle making. If a drill bit tilts even slightly, the metal pin will bind or crack the wood. Drilling each scale separately using the tang as a guide guarantees exact hole alignment.
- Cut two matching wood blocks roughly 3/8-inch thick and slightly larger than your knife tang. Trace the tang outline onto the smooth inside face of the first scale with a pencil.
- Shape and sand the front edge of both scales before drilling. This front edge faces the blade. Once glued to the steel, you cannot sand that front wood face without scratching the finished blade. Sand both front edges down to 400 grit now.
- Clamp the first wood scale tightly to the steel tang with the finished front edge aligned. Place a scrap piece of wood beneath the scale so the drill bit does not tear out the back wood fibers.
- Drill through the steel tang holes into the first scale. Keep your drill straight at a 90-degree angle, letting the bit cut without heavy downward force.
- Insert temporary pin cutoffs through the drilled holes to lock the first scale and tang together. Place the second scale underneath, clamp all three pieces tightly, and drill through the existing holes into the second scale.
- Perform a dry fit without glue. Push your metal pins through both scales and the tang. Check all edges. If you see light passing between the wood and steel, sand the inside faces flat on 120-grit sandpaper placed over a flat surface.
Epoxy and Pins Lock the Handle Without Squeeze Gaps
Gluing and pinning secures the wood to the steel and keeps moisture from seeping between the layers. Water trapped under a loose scale causes hidden rust that weakens the tang over time. A clean glue-up process prevents voids and creates a permanent bond.
- Scuff all mating surfaces. Rub the steel tang with coarse 80-grit sandpaper to give the epoxy mechanical grip. Scuff the inside faces of both wood scales as well, then wipe down the steel, wood, and pins with rubbing alcohol.
- Cut your metal pins to length using a hacksaw, making them roughly 1/8-inch longer than the handle thickness. File a slight bevel onto the pin tips so they slide into the holes without snagging fibers.
- Mix the two-part epoxy on scrap cardboard. Measure equal amounts of resin and hardener, then stir slowly for two full minutes using a craft stick to avoid whipping air bubbles into the glue.
- Spread a thin layer of epoxy across the inside faces of both wood scales, both sides of the tang, and inside the pin holes. Roll the pins in epoxy before sliding them into place.
- Slide the pins through the first scale, through the tang, and into the second scale, leaving a small stub of pin metal exposed on both sides.
- Apply clamps near the front and butt. Tighten until you see a uniform bead of glue squeeze out. Do not over-tighten, or you will starve the joint of adhesive.
- Clean the front edge immediately. Dip a cotton swab in rubbing alcohol and wipe away all squeezed-out glue from the front shoulders and blade face. Let the knife cure for 24 hours.
Hand Rasps and Files Shape a Safe Ergonomic Handle
Shaping transforms two flat wood slabs into a comfortable grip that feels natural in your hand. Hand rasps and files give you total control, ensuring you do not remove too much wood. A comfortable handle should fill the palm without sharp edges that cause blisters.
- Trim the exposed metal pins. Once the epoxy has cured for 24 hours, remove the clamps. Use a hacksaw to cut the protruding pin stubs close to the wood surface, then file them flat with a metal file.
- File the perimeter flush with the steel tang. Secure the knife in a vise with soft jaws. Use the flat side of a coarse rasp to bring the wood edges flush with the steel spine and belly until you feel one continuous surface.
- Bevel the four sharp corners. A rectangular handle feels awkward and twists under pressure. File a uniform 45-degree chamfer along the four sharp outer corners of the handle.
- Round the profile into a smooth oval. Use the curved side of your rasp to knock down the remaining ridges, blending the flat sides into the chamfers. Aim for an oval cross-section that is narrower at the finger grip and wider at the spine.
- Check the grip in your hand frequently. Put your tools down, wipe away the dust, and hold the knife in standard cutting grips. Close your eyes and squeeze firmly to feel any high spots or sharp ridges that need further filing.
Progressive Sanding and Oil Sealing Protect Against Moisture
Sanding smooths away rough rasp marks, highlights natural wood grain, and leaves the brass pins shining flush with the timber. Applying a penetrating oil finish seals the wood pores so water, sweat, and kitchen grease cannot soak inside and cause warping or cracking.
- Remove heavy tool marks with 120-grit sandpaper wrapped around a flat block of wood. Sand the handle lengthwise, always moving in the direction of the wood grain until all rasp marks vanish.
- Progress to 220-grit and 400-grit paper. Switch to 220-grit paper to erase coarse scratches, then finish with 400-grit sandpaper over both the wood and metal pins to polish the brass and give the hardwood a satin texture.
- Wipe away all fine sanding dust with a dry rag. Inspect the handle under direct light to confirm there are no lingering scratches.
- Apply a penetrating oil finish. Pour a small puddle of boiled linseed oil or tung oil onto a rag and massage it deeply into the wood fibers. If you are building a handle for a kitchen knife, use food-grade mineral oil or walnut oil instead.
- Allow the oil to soak into the wood for twenty minutes, then wipe off any excess liquid with a dry cloth. Apply a second light coat the following day for lasting weather protection.
- Conduct a final safety check. Peel the protective tape off the blade edge. Check the bond line between the steel tang and wood under bright light to verify there are no gaps. Hold the blade spine firmly and twist the handle. If you feel any movement or clicking, the epoxy failed to bond, and the knife is unsafe to use until remounted.
Printed Knifemaking Guides Prevent Costly Workshop Mistakes
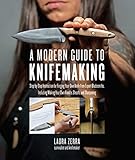
Crafting a knife handle with basic hand tools is straightforward when you follow a steady sequence, but having a printed knifemaking guidebook open on your workbench provides valuable visual support. Printed guides offer clear scale patterns, pin layout formulas, and cross-section drawings that help you plan your grip before cutting into a nice piece of hardwood.
Beginners often ruin handle blanks by cutting wood blocks too small, placing pins too close to the edge, or filing down the palm swell too aggressively. A quality guide gives you proven templates that you can trace directly onto your scales, removing the guesswork from your layout.
When selecting a knifemaking guide, verify that it matches your workshop setup. Look for books that emphasize hand tools like rasps, drills, and files rather than expensive belt grinders. Check that the guide covers your specific tang style, whether you need slab scales for an outdoor utility knife or a drilled block for a hidden tang. Confirm that the manual provides clear photographic steps showing grain direction, adhesive ratios, and clamp placement so you can craft handles with total confidence.

- TAR Score10.0
TAR Score is a ranking system developed by TopAppliancesReviews.com. TAR score has no relationship or impact from any manufacturers or sales agent websites. Learn more
- BrandN/A
- TAR Score9.4
TAR Score is a ranking system developed by TopAppliancesReviews.com. TAR score has no relationship or impact from any manufacturers or sales agent websites. Learn more
- BrandQuarry Books

- TAR Score9.0
TAR Score is a ranking system developed by TopAppliancesReviews.com. TAR score has no relationship or impact from any manufacturers or sales agent websites. Learn more
- BrandIndependently Published

- TAR Score8.2
TAR Score is a ranking system developed by TopAppliancesReviews.com. TAR score has no relationship or impact from any manufacturers or sales agent websites. Learn more
- BrandCedar Lane Press

- TAR Score8.0
TAR Score is a ranking system developed by TopAppliancesReviews.com. TAR score has no relationship or impact from any manufacturers or sales agent websites. Learn more
- BrandMajosta

- TAR Score7.8
TAR Score is a ranking system developed by TopAppliancesReviews.com. TAR score has no relationship or impact from any manufacturers or sales agent websites. Learn more
- BrandN/A

- TAR Score7.2
TAR Score is a ranking system developed by TopAppliancesReviews.com. TAR score has no relationship or impact from any manufacturers or sales agent websites. Learn more
- BrandMajosta

- TAR Score6.8
TAR Score is a ranking system developed by TopAppliancesReviews.com. TAR score has no relationship or impact from any manufacturers or sales agent websites. Learn more
- BrandMajosta
Last update on 2026-10-02 / Affiliate links / Images, Product Titles, and Product Highlights from Amazon Product Advertising API


Top Rated Best Quality Range Hoods: 2026 Expert Picks

The 12 Best Small Solar Generators 2026

10 Best Quality Semi Automatic Washing Machine of 2026 For Leak-Free Laundry

11 Best Small Washer Machine of 2026 For Everyday Laundry

12 Best Vibration Pads For Washing Machine of 2026 To Stop Walking and Shaking

11 Best Selling Front Load Washing Machine of 2026 For Quiet Odor-Free Laundry

11 Best Washing Machine For King Size Bedding of 2026 To Prevent Cycle Errors

10 Best Small Front Loader Washing Machine of 2026 For Tight Closets






